

P0197 on 2011-2019 Chevrolet Silverado Duramax: Engine Oil Temp Sensor Circuit Low Causes and Fixes
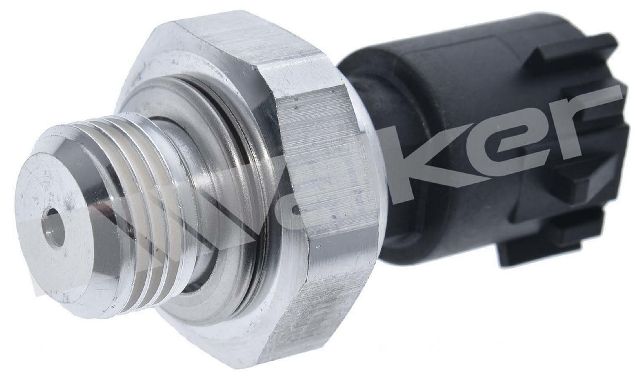
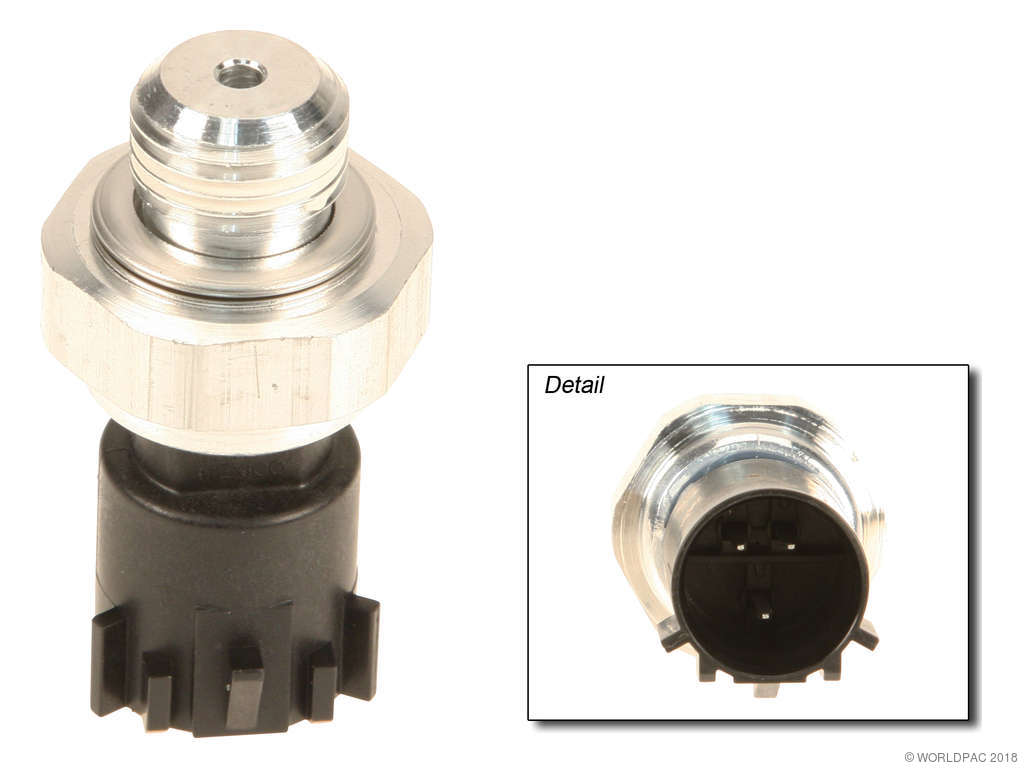
This code is most often caused by a failed Engine Oil Pressure Sensor, which includes the oil temperature sensor. On 2011-2016 LML engines, it can also be caused by a chafed wiring harness near the EGR valve. Expect to pay $40-$90 for a new sensor.
- P0197 is an electrical fault code for the oil temperature sensor circuit, which is integrated into the Engine Oil Pressure Sensor on these trucks.
- The most likely fix is replacing the Engine Oil Pressure Sensor, located on the driver's side of the engine block near the oil filter.
- For 2011-2016 LML models, you MUST inspect the wiring harness for chafing near the EGR valve before replacing any parts, as this is a very common cause.
- Driving with this code is risky as the engine's oil temperature safety monitoring is disabled.
What's Unique About the 2011-2019 Chevrolet Silverado
On LML and L5P Duramax engines, there is no separate, standalone Engine Oil Temperature (EOT) sensor. The temperature sensing thermistor is integrated into the Engine Oil Pressure (EOP) sensor assembly. Therefore, a P0197 code points to a fault in this combined sensor or its wiring. Additionally, 2011-2016 LML models are known for a specific wiring harness chafing issue near the EGR valve that can cause this and other electrical fault codes, as documented in GM Service Bulletin PIP5198A.
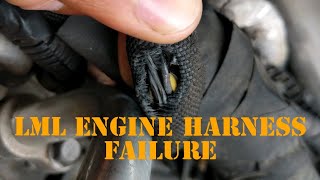
🎬 Watch: See how the LML wiring harness fails near the EGR.Generation note: This guide covers two Duramax generations: the LML (2011-2016) and the L5P (2017-2019). While the P0197 code's meaning is the same for both, a key difference is a well-documented wiring harness chafing issue specific to the LML models that is a common cause. The integrated oil pressure/temperature sensor part numbers are also different between the two generations.
Symptoms You May Notice
- Check Engine Light is on
- Engine oil temperature gauge reads low or at its minimum value (e.g., stuck on cold)
- In some cases, a brief rough idle on a cold start
- Fluctuating oil pressure gauge reading (if wiring chafe is the cause)
- Replacing the Engine Coolant Temperature (ECT) sensor. The ECT is a different sensor in a different location, and will not fix a P0197 code.
- Replacing the instrument panel cluster because the gauge is reading incorrectly. The gauge reading is a symptom of the bad sensor input, not the cause.
Most Likely Causes
- Failed Engine Oil Pressure/Temperature Sensor 🔴 High Probability The sensor is located low on the driver's side of the engine block, exposing it to heat, vibration, and potential contamination which can lead to internal failure of the thermistor.
How to confirm: With a scan tool, observe the live data for Engine Oil Temperature. If it shows a fixed, illogical low value (like -40°F), the sensor has likely failed. You can also test the sensor's resistance with a multimeter; it should change predictably as the sensor is heated or cooled. 🎬 Watch: How to test and replace an oil temperature sensor. A good sensor at room temperature (around 70°F) should read approximately 2-2.6 kilo-ohms.
Typical fix: Replace the Engine Oil Pressure sensor assembly. Apply RTV sealant to the threads before installation to prevent leaks.
Est. part cost: $40-$90 - Chafed or Damaged Wiring Harness (LML Engine) 🟡 Medium Probability On 2011-2016 LML engines, the engine wiring harness is known to rub against a sharp metal tab on the EGR valve gasket, eventually cutting through the insulation and causing wires to short to ground. This is documented in GM Service Bulletin PIP5198A. The bulletin notes that an improperly seated harness retainer on the driver's side rocker cover stud can cause this lack of clearance.
How to confirm: Visually inspect the wiring harness where it passes over and near the EGR valve at the back of the engine. Look for any signs of abrasion, cuts, or exposed wires. Wiggle the harness in this area while monitoring live sensor data to see if the reading changes. Other potential chafe points include near the A/C compressor and on a rear ground strap.
Typical fix: Repair the damaged wires using solder and heat shrink. Protect the harness by wrapping it in anti-abrasion tape or loom. Secure the harness away from the sharp edge of the EGR gasket to prevent recurrence. Ensure the harness retainer clip is fully seated on its stud.
Est. part cost: $5-$20 for repair materials - Damaged Sensor Connector or Pigtail ⚪ Low Probability The connector's location makes it susceptible to becoming brittle from heat cycles or damaged during oil filter changes. Oil contamination can also degrade the connector seals and pins.
How to confirm: Visually inspect the connector for cracks, broken locking tabs, or corroded/oil-soaked pins. Check for a loose connection at the sensor.
Typical fix: Replace the connector pigtail, which involves cutting the old connector off and splicing the new one in using weatherproof butt connectors or solder and heat shrink.
Est. part cost: $15-$30
Rare But Worth Checking
- Faulty Engine Control Module (ECM): This is very rare. The ECM should only be considered after the sensor, wiring, and connectors have been thoroughly tested and confirmed to be good.
Diagnosis Steps
- Connect an OBD-II scanner and confirm P0197 is the active code. Check for any other codes, especially P0522 or P0641.
- View the live data stream for the Engine Oil Temperature (EOT) parameter. A reading of -40°F or another fixed, extremely low value strongly suggests an electrical circuit fault.
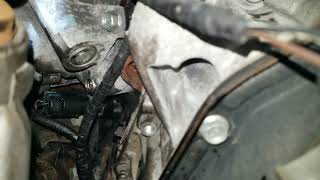
- Locate the Engine Oil Pressure/Temperature sensor. On LML/L5P engines, it is on the driver's side of the engine block, near the oil filter housing and front driveshaft. 🎬 See this walkthrough for replacing the sensor on an LML.
- Inspect the sensor's electrical connector for damage, corrosion, or oil contamination. Ensure it is securely plugged in.
- Trace the wiring harness from the sensor as far as possible. For LML models (2011-2016), pay extremely close attention to the area where the harness passes near the EGR valve at the rear of the engine. Inspect for any signs of chafing or cut wires, as detailed in TSB PIP5198A.
- If wiring appears intact, test the sensor. Disconnect the connector and measure the resistance across the appropriate pins on the sensor. The resistance should change when the sensor is gently heated (e.g., with a heat gun). A reading of ~2.0-2.6 kΩ is expected at room temp. If the resistance is infinite (open) or does not change, the sensor is bad.
- If the sensor tests good, the fault lies in the wiring or, rarely, the ECM. Check for 5-volt reference and ground at the connector with the key on. If either is missing, the wiring between the ECM and sensor is faulty.
- If all tests pass and the problem persists, the ECM may be at fault, but this is highly unlikely.
Parts You'll Likely Need
- Engine Oil Pressure Sensor (LML, 2011-2016)
(OEM #12673134)— This is the combined unit for LML engines that provides both oil pressure and oil temperature readings. The internal thermistor is the most common failure point for code P0197.
Trusted brands: ACDelco (GM Genuine), Bosch, Standard Motor Products
OEM price range: $60-$90
Aftermarket price range: $40-$70 - Engine Oil Pressure Sensor (L5P, 2017-2019)
(OEM #12727099 (replaces 12635397, 12677838))— This is the combined pressure/temperature sensor specific to the L5P engine. While similar in function to the LML part, it is not interchangeable.
Trusted brands: ACDelco (GM Genuine)
OEM price range: $35-$60
Aftermarket price range: $25-$50
Related Codes That Often Appear With This One
- P0198 — This is the opposite code, 'Engine Oil Temperature Sensor Circuit High'. If there is an intermittent short followed by an open circuit, both codes could potentially be stored.
- P0522 — This code is for 'Engine Oil Pressure Sensor/Switch Circuit Low'. Since the temperature and pressure sensors are integrated into one unit on these engines, a failure of the sensor or its wiring can trigger both codes simultaneously.
- P0641 — This code for 'Sensor Reference Voltage 'A' Circuit/Open' can appear with P0197 if the wiring chafe on an LML engine affects the shared 5-volt reference circuit, which also supplies the camshaft position sensor, fuel rail pressure sensor, and A/C pressure sensor.
Technical Service Bulletins (TSBs) & Recalls
- PIP5198A: Addresses engine harness chafing near the EGR valve on 2015 LML models, which is a known cause for various electrical circuit fault codes including P0197. It specifically points to the sharp tab on the EGR valve's metal gasket as the point of abrasion.
Platform-Specific Known Issues
- LML (2011-2016) Harness Chafing at EGR Valve: On 2011-2016 LML engines, a primary cause of P0197 is the engine wiring harness rubbing through on a sharp metal tab of the EGR valve gasket at the rear of the engine. This can cause a short circuit in the oil temperature sensor wire. This is documented in GM Preliminary Information bulletin PIP5198A, which advises inspecting this area carefully and ensuring the harness retainer is properly seated before replacing any parts.
Mechanic-Grade Diagnostic Values
- Engine Oil Temperature Sensor Resistance — expected: Approx. 2,500 Ohms at 68°F (20°C), decreasing as temperature increases. Should be between 275-375 Ohms at 194°F (90°C).. Failure: Infinite resistance (Open Loop), zero resistance (short), or failure to change smoothly with temperature indicates a bad sensor.
- EOT Sensor Signal Wire Voltage (Back-probed at connector, Key On Engine Off) — expected: Relatively high voltage when cold, typically 2.5V - 4.5V.. Failure: Voltage stuck below 0.5V, and often below 0.17V, indicates a short to ground or internal sensor failure, triggering P0197.
- Sensor Connector 5V Reference and Ground Check (Connector unplugged, Key On) — expected: One pin should show a steady 5-volt reference from the ECM. Another pin should show less than 5 Ohms of resistance to the battery negative terminal (ground).. Failure: Absence of 5V reference or a high resistance to ground points to a wiring issue between the ECM and the sensor, or a faulty ECM driver.
- Continuity Test on Signal Wire (Sensor unplugged, Key Off) — expected: Resistance between the signal wire pin at the connector and a known good chassis ground should be infinite (Open Loop / OL).. Failure: Any low resistance reading (e.g., under 1,000 Ohms) indicates the signal wire is shorted to ground somewhere in the harness.
Scan Tool Commands That Help
- GDS2 (GM Global Diagnostic System 2): Live Data Graphing - Engine Oil Temperature — When diagnosing an intermittent P0197, graphing the EOT sensor voltage over time while performing a 'wiggle test' on the harness (especially near the EGR valve on LMLs) can reveal sudden voltage drops that pinpoint a wiring issue.
Wiring & Ground Locations
- Engine Oil Pressure / Temp Sensor Connector (LML) — A 3-pin connector on the sensor, which is located on the driver's side of the engine block near the oil filter housing.. This is the primary connection point. Pin A: Low Reference (Ground from ECM). Pin B: 5-Volt Reference. Pin C: Oil Pressure Signal. The temperature signal is also derived from this sensor's internal thermistor, sharing the reference and ground. A fault in any of these circuits can cause issues.
- G103 — Located at the left rear of the engine compartment on the cowl, above the brake booster.. This is a major chassis and module ground. While not the primary sensor ground (which is a low reference from the ECM), a poor G103 connection can cause electrical noise and erratic behavior in various systems, including the ECM, potentially leading to incorrect sensor readings.
- G107 (LML) — Main engine ground strap, typically running from the rear of the driver's side cylinder head to the firewall/cab.. A loose or corroded main engine-to-body ground can cause the ECM and other modules to seek ground paths through sensor circuits, potentially causing voltage drops and setting codes like P0197.
- 5-Volt Reference 'A' Circuit — Internal to the ECM, this circuit provides the 5V reference to multiple sensors via separate wires in the engine harness.. The EOT/EOP sensor is on this circuit. A short to ground on any sensor or wire on this same circuit (e.g., Fuel Rail Pressure sensor, Camshaft Position sensor) can pull the entire circuit voltage down, causing a P0641 and potentially a P0197 as a collateral code.
Real Owner Repair Stories
- YouTube user 'Uncle Phil's Garage' (GMT900 Truck (Similar wiring architecture to Silverado)) — P0641 (5V Reference code), reduced engine power, multiple other sensor codes (cam, MAP, MAF).
❌ Tried (didn't work) Checked all grounds., Inspected the common harness chafe point over the intake manifold stud.
✅ What actually fixed it Found a section of the main wiring harness that had dropped down and was rubbing against the front driveshaft. The 5V reference wire (gray wire) was intermittently shorting to ground on the driveshaft, causing the cluster of codes. The fix was to repair the damaged wires and secure the harness away from the driveshaft.
OEM Part Supersession History
12635397, 12677838→12727099— Standard part evolution, potential improvements in durability or accuracy.
Heads up: These part numbers are for the L5P (2017-2019) engine and are not compatible with the LML (2011-2016) engine, which uses part number 12673134.
Model Year Variations Within This Range
- 2011-2016 (LML): The LML engine is uniquely susceptible to the harness chafing issue near the EGR valve gasket (TSB PIP5198A). This specific failure mode is not a common cause on 2017-2019 L5P engines, which have a different engine and harness layout.
Diagnostic Flowchart
Other Known Issues on This Vehicle
Issues unrelated to this code that are worth knowing about as an owner of this generation:
- LML: Catastrophic CP4.2 High-Pressure Fuel Pump Failure 🔴 High — A widely known and feared issue for the 2011-2016 LML. Failure can occur at any mileage, often without warning. When it fails, it sends metal debris throughout the entire fuel system, requiring an $8,000-$12,000+ repair.
- L5P: DEF Tank Heater Failure 🟠 Medium — Very common on 2017-2022 models, especially in colder climates. The heater element shorts out, triggering a "Service Emission System" warning and a speed-limiting countdown, potentially stranding the driver. (Ref: 21-NA-078, 22-NA-198, N192210260)
- LML: Cracked Pistons 🔴 High — Occurs more frequently on tuned or hard-worked trucks, but has been seen on stock engines. Often discovered when investigating head gasket failure. Can lead to complete engine failure.
- L5P: MAP Sensor Clogging 🟡 Low — A common issue where soot buildup clogs the Manifold Absolute Pressure (MAP) sensor, leading to incorrect air-fuel ratio, rough idle, and loss of power.
- LML: NOx Sensor Failures 🟠 Medium — Failures of the Nitrogen Oxide (NOx) sensors are common, leading to check engine lights and issues with the emissions aftertreatment system.
- L5P: #4 Fuel Injector Connector Failure 🟡 Low — The connector for the #4 fuel injector can degrade, causing an intermittent connection that triggers limp mode and rough running. The injector itself is usually fine.
- L5P: Engine Block Heater Fire Risk (2017-2019) 🔴 High — A recall was issued because the engine block heater cable can short-circuit, creating a fire risk. Owners were advised not to use the block heater until the recall was performed. (Ref: GM Recall N182186280)
Used vs. New Parts: Buying Guide for This Vehicle
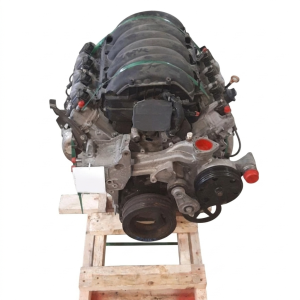
When a used part is the smart pick: For this repair, a used part is generally not recommended for the sensor itself due to its low cost and critical function. However, sourcing a used connector pigtail from a junkyard harness is a very practical and cost-effective option if only the connector is damaged.
Donor-vehicle mileage cap: roughly under 150000 miles for the part to have meaningful remaining life.
What to inspect on the donor part:
- For a pigtail: ensure the connector's locking tab is intact and clicks firmly.
- Check for at least 6 inches of clean, flexible wire with no signs of cracking or heat damage.
- Inspect the connector pins for any green/white corrosion or oil saturation.
OEM-only on this vehicle (don't cheap out):
- Engine Oil Pressure/Temperature Sensor
Aftermarket brands forum-validated for this vehicle:
- ACDelco (GM Genuine)
- Bosch
Brands owners have reported issues with on this vehicle:
- Unbranded, 'white-box' sensors from online marketplaces are frequently cited on forums as having high failure rates or inaccurate readings out of the box.
Real Owner Stories
Aggregated from forums and TSBs cited above. Mileages and costs reflect what owners reported in those sources.
2015 Chevrolet Silverado LML 6.6L
Symptoms: Check Engine Light on with code P0197 and a fluctuating oil pressure gauge reading.
What fixed it: Found the engine wiring harness had rubbed through on a sharp metal tab of the EGR valve gasket. Repaired the damaged wires with solder and heat shrink and secured the harness away from the sharp edge.
Source hint: GM Service Bulletin PIP5198A
2011-2016 Chevrolet Silverado LML 6.6L
Symptoms: The Check Engine Light was on and the oil temperature gauge was stuck on its lowest reading, even when the engine was fully warmed up.
What fixed it: Replaced the complete Engine Oil Pressure/Temperature Sensor assembly.
Source hint: duramaxforum.com
Related OBD-II Codes
Frequently Asked Questions
I have a 2015 Silverado LML with code P0197. Is there a known wiring issue I should check first?
My oil temperature gauge is stuck on cold. Is this related to the P0197 code on my Duramax?
Where is the engine oil temperature sensor located on my LML/L5P Duramax?
My mechanic found the wiring harness chafed near the EGR valve on my 2014 LML. What's the proper fix?
What reading should I see on a scan tool for the oil temperature if the P0197 circuit fault is active?
My truck is a 2018 L5P, not an LML. Does the EGR wiring chafe issue from TSB PIP5198A still apply?
Helpful Videos


Used OEM Parts in Stock


New Aftermarket Parts Available




The information in this article is provided for general reference and educational purposes only. Vehicle specifications, procedures, and part compatibility can vary by production date, trim level, and region. Always consult your vehicle's factory service manual and verify part numbers before purchasing or performing repairs. Safety-critical components such as airbags, seat belts, and braking systems should be installed by a qualified professional.
- Chevrolet Silverado:
- 🎬 Helpful Videos
- 🛍️ Shop This Part
- What's Unique About the 2011-2019 Chevrolet Silverado
- Symptoms You May Notice
- Most Likely Causes
- Rare But Worth Checking
- Diagnosis Steps
- Parts You'll Likely Need
- Related Codes That Often Appear With This One
- Technical Service Bulletins (TSBs) & Recalls
- Platform-Specific Known Issues
- Mechanic-Grade Diagnostic Values
- Scan Tool Commands That Help
- Wiring & Ground Locations
- Real Owner Repair Stories
- OEM Part Supersession History
- Model Year Variations Within This Range
- Diagnostic Flowchart
- Other Known Issues on This Vehicle
- Used vs. New Parts: Buying Guide for This Vehicle
- Real Owner Stories
- 2015 Chevrolet Silverado LML 6.6L
- 2011-2016 Chevrolet Silverado LML 6.6L
- Related OBD-II Codes
- Frequently Asked Questions
- 🎟️ Get 5% Off