

OBD-II Code P0641: Sensor Reference Voltage 'A' Circuit/Open
The Ultimate Guide to Diagnosing and Fixing P0641
- P0641 triggers when the Engine Control Module (ECM) detects voltage outside the normal 4.5V to 5.5V range on the 5-volt 'A' reference circuit.
- A single internally shorted sensor (like a MAP or TPS) causes 80% of P0641 codes, pulling down the shared 5-volt circuit.
- Isolate the exact failure by testing the 5V reference wire with a multimeter and unplugging sensors one by one until the voltage returns to a steady 5.0V.
- Never replace a $500+ ECM without first performing a 'wiggle test' on the wiring harness and verifying all chassis ground connections.
What Does P0641 Mean?

P0641 means the Engine Control Module (ECM) or Powertrain Control Module (PCM) detected a problem with a specific electrical circuit. The ECM sends a steady 5-volt signal to power critical engine sensors. This code indicates the voltage on the 'A' circuit is too high, too low, or missing completely.
Technical definition: The official SAE/OBD-II definition is "Sensor Reference Voltage 'A' Circuit/Open". The Powertrain Control Module (PCM) sets this code when the 5-volt reference circuit 'A' falls outside its normal specified range (typically below 4.5V or above 5.5V) or opens completely. Some PCMs trigger the code if voltage strays outside 3.99V to 6.00V for more than two seconds. The 'A' designates one of several reference circuits; modern vehicles utilize 'A', 'B', 'C', and 'D' circuits to power distinct sensor groups.
Can I Drive With P0641?
Yes, But With Caution. You can drive to a repair shop, but do not drive for extended periods. The vehicle enters a 'limp mode' with severely reduced power, stalls unexpectedly, or fails to start, creating unsafe traffic conditions. Continuing to drive with erratic sensor data forces a rich fuel condition, destroying the catalytic converter over time—a repair costing $800 to $2,500.
Common Causes

- Shorted or faulty sensor on the 'A' circuit (Very Common) — An internal short in a sensor connected to the 5-volt reference circuit is the most frequent cause. Sensors like the Throttle Position (TPS), Manifold Absolute Pressure (MAP), Fuel Rail Pressure (FRP), or Camshaft Position (CMP) Sensor fail, pulling the entire circuit's voltage down or causing an open.
- Damaged, frayed, or shorted wiring harness (Common) — Wires rub against engine parts, brackets, or the firewall, wearing away insulation and shorting the wire to ground. This is a well-documented issue on GM trucks where the harness rubs on a mounting stud near the intake manifold or steering column. 🎬 Watch: Diagnosing common GM truck wiring harness shorts
- Corroded or water-damaged connectors (Common) — Moisture from rain or engine washing penetrates electrical connectors, corroding pins and creating high resistance or a short. This resistance disrupts the 5-volt signal. (This includes specific issues like water intrusion in Pontiac G6 fuel pump connectors).
- Aftermarket accessories or modifications (Less Common) — Improperly installed aftermarket electronics—such as remote starters, alarms, or stereos—that tap into sensor wiring interfere with the 5-volt reference circuit and trigger P0641.
- Poor ground connection (Less Common) — A loose, corroded, or broken engine or chassis ground strap creates electrical system instability. The ECM requires a solid ground to output a stable 5-volt reference.
- Corrupted ECM/PCM Software (Rare) — The software within the Engine Control Module corrupts, falsely reporting a voltage issue. This requires a dealer to reflash or update the ECM's software.
- Faulty Engine Control Module (ECM/PCM) (Rare) — The internal voltage regulator inside the ECM fails. This is the absolute least likely cause and requires ruling out all sensors, wiring, grounds, and software first.
Symptoms

- Reduced engine power or 'limp mode' — The vehicle suffers poor acceleration and feels sluggish as the ECM protects the engine. A 'Reduced Power Mode' message displays on the dashboard.
- Engine stalling or hard starting — The engine stalls at idle or low speeds, or refuses to start because the ECM lacks 🎬 Watch: Fixing a vehicle that dies out from P0641 correct sensor data.
- Rough idle or engine misfires — Without correct sensor inputs, the ECM mismanages the fuel and air mixture, causing a shaky or sputtering engine.
- Erratic or harsh gear shifting — Loss of sensor data disrupts transmission shift points, causing jerky or unpredictable gear changes.
- Inoperative gauges or systems — A shorted 5V reference drops the oil pressure gauge to zero or disables the accelerator pedal entirely.
- Check Engine Light is on (also visible on scanner) — The Malfunction Indicator Lamp (MIL) illuminates immediately.
- Multiple other trouble codes present (scan-tool only — no driver-felt sign) — Because the 'A' circuit powers several sensors, additional codes for every sensor on that circuit store alongside P0641.
Diagnostic Flowchart
Tap your situation to follow the diagnostic path that matches what you're seeing on this code.
Common Fixes & Costs
- Replace a faulty sensor (e.g., MAP, TPS, Fuel Pressure)
— Parts: $50-$150, Labor: $100-$200, ~1.0 hr book time
(DIY)
: OEM GM: 25203477, 12623671 (Alt: AC Delco: 213-4683, Bosch: 0261230283, Standard Motor Products: AS483)
: OEM VAG: 03L906054A (Alt: Bosch: 0281006075, Standard Motor Products: FPS67)
: OEM Ford: FR3Z-9E926-A, BR3Z-9E926-B (Alt: Bosch: 0280750603, Walker Products: 225-1033) - Repair a damaged section of the wiring harness — Parts: $10-$50, Labor: $100-$400, ~2.5 hr book time (Intermediate)
- Clean or replace a corroded electrical connector — Parts: $5-$60, Labor: $50-$150, ~0.5 hr book time (DIY)
- Reflash/update ECM software — Parts: $0, Labor: $100-$200, ~1.0 hr book time (Professional)
- Replace the Engine Control Module (ECM)
— Parts: $500-$1,500, Labor: $100-$200, ~2.0 hr book time
(Professional)
: OEM GM: 12639900, 12639269, 12633055 (Alt: Remanufactured units from various suppliers (e.g., Flagship One, FS1))
: OEM VAG: Varies significantly by specific options, requires VIN lookup. (Alt: Remanufactured units from various suppliers.)
: OEM Ford: Varies significantly by specific options, requires VIN lookup. (Alt: Remanufactured units from various suppliers.)
DIY vs Professional
- Replace a faulty sensor — Beginner: Yes.
Tools: Basic hand tools (socket set, screwdrivers), flashlight. - Repair a damaged wiring harness — Beginner: No.
Tools: Multimeter, wire cutters/strippers, soldering iron, heat shrink tubing, automotive-grade wiring, wiring diagrams. - Clean or replace a corroded connector — Beginner: Yes.
Tools: Connector pick set, electrical contact cleaner, small wire brush, dielectric grease. - Reflash/update ECM software — Beginner: No.
Tools: Professional-grade scan tool with manufacturer-specific software subscription, stable power supply. - Replace the Engine Control Module (ECM) — Beginner: No.
Tools: Socket set, screwdrivers, OEM programming tools.
Used vs. New Parts: Buying Guide
When a used part is worth it: For common sensors (MAP, TPS) on older, high-mileage vehicles where the cost of a new OEM part is high relative to the vehicle's value. A used OEM sensor from a reputable salvage yard is often a better choice than a cheap, new aftermarket sensor.
Donor-vehicle mileage cap: roughly under 100000 miles for the part to have meaningful remaining life.
Donor quality checklist:
- Verify the donor vehicle part number matches exactly.
- Inspect the part for physical damage, corrosion, or brittle plastic.
- Prefer parts from vehicles scrapped for reasons unrelated to engine performance (e.g., collision damage).
Decision logic:
- If Part is a critical sensor (e.g., Crank/Cam) on a newer vehicle (< 8 years old) → Buy new OEM. The risk of failure and potential for being stranded outweighs the cost savings.
- If Vehicle is > 10 years old and budget is a primary concern → A used OEM sensor is an acceptable risk; it offers better compatibility than many aftermarket options.
- If New OEM parts are no longer available for your vehicle → A used OEM part is preferable to aftermarket. Consider buying a spare if the part is known to fail.
Warranty tradeoff: Used parts typically have a 30-90 day warranty, covering only the part itself, not labor. New aftermarket warranties range from 1 year to limited lifetime. New OEM parts carry a manufacturer's warranty (typically 1-2 years) and are guaranteed to be compatible.
Worst-case if a used part fails: $200-$500 if a used or cheap aftermarket sensor fails shortly after installation, requiring repeat diagnosis, labor, and another part.
What Happens If You Wait — Timeline
- 0-1 month: Code sets and Check Engine Light illuminates. Symptoms are intermittent, possibly a slightly rough idle or a momentary hesitation. (MPG impact: 0-5%% · Added cost: $0)
- 1-3 months: Symptoms become consistent. The vehicle enters 'limp mode' with reduced power, stalls at idle, or becomes hard to start. Fuel economy noticeably drops. (MPG impact: 5-15%% · Added cost: $50-$150 in wasted fuel)
- 3-6 months: Continued operation with a rich fuel mixture causes the catalytic converter to overheat and degrade, leading to a P0420 code. (MPG impact: 10-20%% · Added cost: $1200-$2800 for catalytic converter replacement.)
- 6+ months: A persistent electrical short overloads and destroys the internal voltage regulator within the Engine Control Module (ECM). (MPG impact: 15-25% (if vehicle still runs)% · Added cost: $800-$1,500 for a replacement ECM.)
Cost of Not Fixing It
- 0-1 month: Noticeable drop in fuel economy (5-15%), poor engine performance, and potential for stalling in traffic. (Added cost: $20-$60 per month in extra fuel costs)
- 1-6 months: Driving with incorrect fuel mixture from bad sensor data overheats and destroys the catalytic converter. (Added cost: $1200-$2800)
- 6+ months: A persistent short circuit overloads and destroys the internal voltage regulator of the Engine Control Module (ECM). (Added cost: $700-$1700)
Diagnosis Steps

- Read the Trouble Codes & Freeze Frame Data
Use an OBD-II scanner to confirm P0641. Note any accompanying codes (e.g., P0192, P0341), as they identify which sensors share the failing circuit. Analyze freeze-frame data to pinpoint engine conditions (RPM, speed, temp) when the fault triggered.
Tools: OBD-II Scanner (Beginner) - Perform a Thorough Visual Inspection
Inspect the engine's wiring harness for damage. Look for frayed, melted, or pinched wires rubbing against metal parts (especially near the ECM bracket on GM vehicles). Check electrical connectors for green/white corrosion or loose pins. Verify main engine and chassis grounds are tight.
Tools: Flashlight, Inspection Mirror (Beginner) - Verify 5V Reference at the Sensors
With the key on and engine off, use a digital multimeter to test the 5-volt reference wire at an easily accessible sensor on the 'A' circuit. A healthy circuit reads a steady 4.8 to 5.2 volts. A reading of 0V, below 4.5V, or above 5.5V confirms a hard failure.
Tools: Digital Multimeter (Intermediate) - Isolate the Faulty Component (The Unplug Method)
With the key on and engine off, monitor the 5V reference voltage with a multimeter or scanner live data. Unplug sensors on the 'A' circuit one at a time. If the voltage returns to a stable ~5V after unplugging a specific sensor, that sensor is internally shorted and requires replacement.
Tools: OBD-II Scanner (with live data) or Digital Multimeter (Intermediate) - [Pro Tip] The 'Wiggle Test'
If unplugging sensors fails to isolate the fault, the wiring harness is the culprit. With the key on, monitor the 5V reference PID on a scan tool. Gently wiggle sections of the wiring harness leading to the sensors. If voltage fluctuates, you found the short or open.
Tools: OBD-II Scanner (with live data) (Intermediate) - Check for Technical Service Bulletins (TSBs)
Search for Technical Service Bulletins (TSBs) for your specific vehicle. Manufacturers frequently release bulletins for known wiring chafe points, such as GM TSB #P11067B for harness chafing on the ECM bracket.
Tools: Internet access (Beginner) - Check for a Short to Ground
Disconnect the battery and main ECM connector. Set a multimeter to Ohms. Touch one probe to the 5-volt reference wire pin at the ECM connector and the other to chassis ground. A reading of infinite (OL) is good; any low resistance confirms a short to ground in the harness.
Tools: Digital Multimeter, Vehicle Wiring Diagram (Advanced) - [Advanced] Check Sensor-Specific Voltage/Pressure PIDs
Using a scan tool, observe live data PIDs for sensors on the 'A' circuit. A MAP sensor reads 1-2V at idle and 4.5-5V at Wide Open Throttle (WOT). Readings fixed at 0V, 5V, or fluctuating wildly indicate a circuit or sensor failure.
Tools: Advanced OBD-II Scanner (with live data) (Advanced) - [Advanced] Manually Test Sensor Output
Connect a vacuum pump to a MAP sensor. With key on, engine off, voltage reads ~4.5V. Apply vacuum; voltage drops smoothly to 1.1-1.3V at 20 inHg. Erratic or static voltage means the sensor is bad.
Tools: Digital Multimeter, Handheld Vacuum Pump (Advanced) - [Pro Tip] Scope the Circuit for Noise
For intermittent issues, graph the 5V reference circuit with an automotive oscilloscope. A healthy circuit shows a perfectly flat 5V line. Noise, hash, or sudden dropouts indicate a poor connection, failing sensor, or interference.
Tools: Automotive Oscilloscope (Advanced)
When This Code Triggers (Freeze-Frame Conditions)
- Engine Coolant Temp: 180-210°F (Fully warmed up)
- RPM: 1500-2500 (Cruise / steady throttle)
- Engine Load: 25-50% (Light to moderate load, not heavy acceleration)
- Vehicle Speed: 40-65 mph (Steady highway or arterial driving)
Related Codes
- P0651 — This is the code for the 'Sensor Reference Voltage 'B' Circuit'. The diagnostic process is identical, but applied to a different set of sensors identified via a wiring diagram.
- P0192 — This means 'Fuel Rail Pressure Sensor Circuit Low Input'. If you see P0192 along with P0641, the shared 5V reference circuit is the culprit. If P0192 appears alone, the problem is specific to the FRP sensor.
- P0341 — This is for 'Camshaft Position Sensor 'A' Circuit Range/Performance'. If P0341 is present with P0641, the 5V reference circuit is the primary suspect.
- P0106 — This means 'Manifold Absolute Pressure (MAP)/Barometric Pressure Sensor Range/Performance'. If P0106 appears with P0641, the fault lies within the shared 5V circuit.
- P0300-P0308 — Random or specific misfire codes trigger as a symptom of P0641. Inaccurate data from MAP or CMP sensors causes the ECM to command incorrect ignition timing or fuel delivery.
Climate & Environmental Factors
- High Humidity & Rain: High ambient moisture accelerates corrosion on electrical connectors, wiring, and ground points. Water seeps into connectors and wiring harnesses, causing shorts or high resistance that trigger P0641.
- Road Salt (Salt Belt Regions): Salty slush splashes into the engine bay and undercarriage, severely corroding electrical grounds and connectors. This corrosion increases electrical resistance and leads to intermittent voltage-related codes.
How to Talk to a Mechanic About This Code
Say this: "I have a P0641 code, indicating a fault on the 5-volt reference circuit. Please test the stability of the 'A' reference circuit and perform the 'unplug test' to isolate the fault before recommending part replacements."
This signals you understand the code and want a methodical electrical diagnosis, not just a 'parts cannon' approach. It directs the technician to the correct first steps and helps avoid paying for sensors you don't need.
Avoid saying:
- 'My check engine light is on, can you look at it?' (This is too vague and invites a broad, expensive diagnostic process)
- 'I think it's the MAP sensor, can you replace it?' (Don't guess the part; you might be wrong and pay for an unnecessary repair)
- 'Just fix whatever's wrong.' (This gives the shop a blank check to replace multiple parts without proper diagnosis)
Questions to ask before authorizing the repair:
- What was the voltage reading on the 5-volt 'A' circuit when you tested it?
- Did you isolate the fault to a specific sensor, the wiring, or the ECM?
- If it's a wiring issue, can you show me where the damage is?
- What is the warranty on the recommended parts and labor?
Where to Take It: Dealer vs Independent vs Chain
- Dealer:
Best for: Vehicles under warranty, Known manufacturer-specific issues (like GM harness chafing TSBs), Complex diagnostics requiring an ECM reflash or replacement
Downsides: Typically the highest labor rates, May recommend expensive module replacement when a wiring repair is possible (Typical cost: +50% vs. baseline) - Independent Shop:
Best fit for most scenarios. A good independent shop with strong electrical diagnostic skills is the most cost-effective choice for a P0641.
Best for: Out-of-warranty vehicles, Common sensor or wiring repairs
Downsides: Diagnostic skill for complex electrical faults varies greatly; look for a shop specializing in diagnostics or with ASE-certified technicians. (Typical cost: +0% vs. baseline) - Chain Shop:
AVOID for diagnosis. Acceptable only for replacing a specific sensor if you are certain it's the cause.
Best for: Simple, clear-cut part replacements if you have already diagnosed the specific sensor that failed.
Downsides: Technician skill varies dramatically; generally not recommended for the initial diagnosis of a complex electrical code like P0641. (Typical cost: -10% vs. baseline)
When to Walk Away From the Repair
If the estimated repair cost exceeds 40-50% of the car's private-party value, sell the car as-is instead of repairing it.
- Car worth $4000, fix is $2000: Walk away. A $2,000 repair on a $4,000 car is 50% of its value and rarely makes financial sense.
- Car worth $12000, fix is $400: Fix it. The repair cost is low compared to the vehicle's value.
- Car worth $3000, fix is $1700: Walk away. The repair cost is nearly 60% of the car's value. Put that money toward a replacement vehicle.
What Scan Tool You Need for This Code
Minimum: A scanner that can read and graph live sensor data, specifically the 5-volt reference circuit voltage.
A basic $20 code reader only shows the P0641 code. It cannot show the live voltage on the circuit, which is essential for diagnosing whether the problem is a sensor, wiring, or the ECM.
Budget: BlueDriver Pro (~$100) — Connects to your phone and displays live sensor data, allowing you to watch the 5V reference voltage as you perform diagnostic tests like unplugging sensors.
Mid-range: Foxwell NT510 Elite (~$200) — A handheld unit providing detailed live data streams and graphing capabilities. It accesses manufacturer-specific codes that accompany P0641, offering deeper insight than generic readers.
Professional: Autel MaxiCOM MK808 / MP900BT (~$500-900) — Offers full bidirectional control to actively test components, view comprehensive live data, and access OEM-level diagnostic functions, which is vital for complex wiring or intermittent electrical faults.
Rent vs buy: Most auto parts stores read codes for free, but their basic readers do not show live data. For a P0641 diagnosis, you need live data, so buying a tool like the BlueDriver is a better investment.
How to Clear the Code After You Fix It
- Reconnect battery if disconnected for repair
- Use an OBD-II scan tool to clear all diagnostic trouble codes
- Perform a complete drive cycle to allow readiness monitors to run
Drive cycle (~30 minutes): From a cold start, let the engine idle for 2-3 minutes. Drive for 15-20 minutes in mixed conditions, including stop-and-go city driving and at least 5 minutes of steady driving at highway speeds (55-60 mph). Allow the vehicle to cool down completely.
Readiness monitors affected: Comprehensive Component Monitor, Misfire Monitor, Fuel System Monitor, Catalyst Monitor
Before emissions retest: drive at least 100 miles to fully set monitors.
Watch out for:
- Simply disconnecting the battery clears the code but resets all readiness monitors to 'Not Ready', causing an automatic emissions test failure.
- The code returns immediately if the underlying electrical fault was not properly repaired.
Will This Fail Emissions / State Inspection?
Yes — this code typically fails an OBD-II emissions inspection.
- California: An illuminated Check Engine Light results in an automatic smog check failure. All required OBD readiness monitors must be set to 'Ready' before a retest.
- New York: The NYS DMV emissions inspection includes an OBD-II scan. An active P0641 code is an automatic failure.
- Texas: In counties requiring emissions testing, an illuminated Check Engine Light is an automatic failure. After repair, you can have at most one readiness monitor 'Not Ready' (for vehicles 2001 and newer) to pass.
Most Commonly Affected Vehicles
- Chevrolet/GMC Silverado/Sierra, Equinox, Tahoe, Suburban (2007-2020) — Highly prone to wiring harness chafing on a sharp-edged ECM bracket or a stud over the intake manifold. On the 2007 Tahoe, sensors on this circuit include MAP, fuel tank pressure, A/C pressure, APP sensor 2, oil pressure, CMP, and brake booster vacuum sensor.
- Volkswagen/Audi Jetta/Golf/Passat TDI, A4 (2008-2015) — The high-pressure fuel rail pressure sensor is a very common failure point that specifically triggers the P0641 code, often without other sensor codes present.
- Ford F-150, Focus, Freestyle (2005-2018) — A direct short to ground on the 5-volt reference circuit causes the entire PCM to shut down, resulting in a no-start condition where a scan tool cannot communicate with the computer.
- Honda Accord, Civic (2012-2023) — For 2012-2017 models, the PCM flags this code if voltage is outside 4.5V-5.2V for over 2 seconds. For 2017-2023 models, the code is often related to CVT transmission sensors.
- Dodge/Chrysler/Jeep Grand Caravan, Caliber, Grand Cherokee, Patriot (2005-2014) — These vehicles frequently log P0641 due to sensor failures or wiring issues within the large engine bay harnesses. Common culprits include the MAP, TPS, and oil pressure sensors.
- Hyundai Santa Fe, Genesis (2007-2012) — P0641 is triggered by faults in the Accelerator Position Sensor (APS), Throttle Position Sensor (TPS), A/C pressure sensor, or power steering sensor.
- BMW X5 (Diesel), 3-Series (2009-2013) — On diesel models, P0641 points to a group of sensors including the rail pressure sensor, boost pressure sensor, and EGR sensor all sharing the same 5V reference.
- Pontiac G6 (2007-2010) — Known issues with damaged wiring at the fuel pump connector pigtail causing a loss of the 5V reference signal, especially after a fuel pump replacement.
Manufacturer-Specific Notes
- General Motors (GM): GM utilizes multiple 5-volt reference circuits. Always check for wiring harness chafing on a bracket/stud over the intake manifold; this is a very common failure point with numerous Technical Service Bulletins (TSBs) issued.
- Ford: A direct short to ground on the 5-volt reference circuit causes the entire PCM to go to sleep. This results in a no-spark, no-fuel, and no-start condition where the scan tool cannot communicate with the computer until the shorted component is unplugged.
- Volkswagen (VW) / Audi: On TDI diesel models, the P0641 code is most commonly caused by a failing high-pressure fuel rail pressure sensor, even if no other sensor codes are present. Technicians replace this sensor as a primary diagnostic step after verifying wiring.
- Honda: On 2017+ models, the P0641 code is associated with sensors for the Continuously Variable Transmission (CVT), such as the drive pulley speed sensor. Diagnosis involves disconnecting CVT components alongside engine sensors.
Real Owner Stories
2011 Chevy Silverado, 187k miles - Intermittent Stalling & Reduced Power
Truck intermittently entered 'Reduced Power' mode, threw P0641, and stalled. Owner replaced the Camshaft Position Sensor without success.
Outcome: The oil pressure switch was leaking oil internally, shorting the connector. Replacing the $50 switch and cleaning the connector resolved the P0641 code.
Lesson: An internally leaking sensor shorts the 5V reference circuit. The 'unplug method' is critical for isolating the true cause without replacing unnecessary parts.
2010 VW Jetta TDI, 120k+ miles - Limp Mode, No Start
Vehicle was stuck in limp mode or cranked without starting, with a persistent P0641 code.
Outcome: Replacing the fuel rail pressure sensor (Bosch P/N: 0281006325) resolved the code. One owner fixed the issue after a dealership wasted $800 on diagnostics.
Lesson: On certain models like the VW TDI, P0641 has a very common 'pattern failure'. Searching forums for your specific vehicle saves significant diagnostic time.
2008 Pontiac G6 - P0641 after Fuel Pump Replacement
Check Engine Light and P0641 appeared shortly after a new fuel pump was installed by a third-party shop.
Outcome: The owner repaired the damaged pin and connector in under an hour, fixing the open circuit and clearing the P0641 code.
Lesson: If a code appears immediately after a repair, the first suspect is the work just performed. A damaged pin or unseated connector causes frustrating electrical faults.
2016 Chevy Silverado 5.3L - Multiple Codes, Intermittent No-Start
Truck randomly failed to start, throwing P0641 and codes for multiple other sensors. When it ran, the oil pressure gauge sat at zero.
Outcome: A broken power wire for the fuel tank pressure sensor shorted against the cab, bringing down the 5V reference circuit. Repairing the wire fixed the issue.
Lesson: For intermittent electrical issues, the 'wiggle test' is key. Trace the entire harness for the affected circuit, looking for spots rubbing against the frame or body.
How to Prevent This Code From Triggering
- Inspect and Secure Wiring Harnesses (Every oil change) — Regularly check for wiring harnesses rubbing against sharp metal edges or hot engine components. Use zip ties or loom clamps to secure loose sections and prevent insulation wear.
- Apply Dielectric Grease to Connectors (Whenever a connector is disconnected) — Apply dielectric grease to the rubber seal of electrical connectors to prevent moisture intrusion and corrosion, which create high resistance or shorts.
- Clean and Check Main Ground Connections (Every 30,000 miles or annually) — The ECM requires a stable ground to provide a stable 5V reference. Clean away corrosion or paint from main battery-to-chassis and engine-to-chassis ground straps.
- Be Careful When Cleaning the Engine Bay (During engine cleaning) — Avoid spraying high-pressure water directly at the ECM, fuse box, or electrical connectors. Water forces past weather seals and causes immediate shorts.
Frequently Asked Questions
What are the most common mistakes when diagnosing P0641?
The most common mistake is replacing the sensor mentioned in accompanying codes without confirming the 5-volt reference is stable. Technicians often replace multiple sensors unnecessarily when the true fault is a wiring short. Never replace the ECM before exhaustively testing all wiring and sensors.
Can I fix P0641 myself?
Replacing a bad sensor is a straightforward DIY repair requiring basic tools. However, diagnosing the root cause requires a multimeter and a methodical approach. Leave wiring shorts, software issues, or ECM replacements to professionals.
Will clearing the code make it go away?
Clearing the code with a scanner turns off the light temporarily, but it returns immediately if the electrical fault persists. Clearing a code never fixes the underlying problem.
Why are there so many other codes with P0641?
The 5-volt reference circuit powers multiple sensors simultaneously. A single fault on that circuit causes all connected sensors to send bad data, triggering multiple codes. Fixing the P0641 root cause resolves the accompanying codes.
Can a bad battery cause P0641?
A bad battery does not directly cause P0641 because the ECM regulates the 5-volt reference internally. However, a failing alternator causing severe voltage spikes damages the ECM's internal regulator, leading to this code.
What does the 'A' in 'Circuit A' mean?
The 'A' designates one of several reference circuits in the vehicle. Modern cars utilize circuits 'A', 'B', 'C', and 'D', each powering a distinct group of sensors. This letter helps technicians identify the specific circuit on a wiring diagram.
Can a blown fuse cause P0641?
A blown fuse supplying power to the ECM or the 5-volt reference circuit causes this code. Check related fuses immediately during your visual inspection.
Key Takeaways
- P0641 triggers when the Engine Control Module (ECM) detects voltage outside the normal 4.5V to 5.5V range on the 5-volt 'A' reference circuit.
- A single internally shorted sensor (like a MAP or TPS) causes 80% of P0641 codes, pulling down the shared 5-volt circuit.
- Isolate the exact failure by testing the 5V reference wire with a multimeter and unplugging sensors one by one until the voltage returns to a steady 5.0V.
- Never replace a $500+ ECM without first performing a 'wiggle test' on the wiring harness and verifying all chassis ground connections.
Helpful Videos
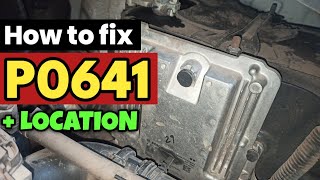
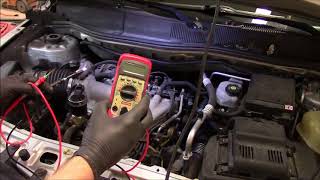



The information in this article is provided for general reference and educational purposes only. Vehicle specifications, procedures, and part compatibility can vary by production date, trim level, and region. Always consult your vehicle's factory service manual and verify part numbers before purchasing or performing repairs. Safety-critical components such as airbags, seat belts, and braking systems should be installed by a qualified professional.
- 🎬 Helpful Videos
- What Does P0641 Mean?
- Can I Drive With P0641?
- Common Causes
- Symptoms
- Diagnostic Flowchart
- Common Fixes & Costs
- DIY vs Professional
- Used vs. New Parts: Buying Guide
- What Happens If You Wait — Timeline
- Cost of Not Fixing It
- Diagnosis Steps
- When This Code Triggers (Freeze-Frame Conditions)
- Related Codes
- Climate & Environmental Factors
- How to Talk to a Mechanic About This Code
- Where to Take It: Dealer vs Independent vs Chain
- When to Walk Away From the Repair
- What Scan Tool You Need for This Code
- How to Clear the Code After You Fix It
- Will This Fail Emissions / State Inspection?
- Most Commonly Affected Vehicles
- Manufacturer-Specific Notes
- Real Owner Stories
- 2011 Chevy Silverado, 187k miles - Intermittent Stalling & Reduced Power
- 2010 VW Jetta TDI, 120k+ miles - Limp Mode, No Start
- 2008 Pontiac G6 - P0641 after Fuel Pump Replacement
- 2016 Chevy Silverado 5.3L - Multiple Codes, Intermittent No-Start
- How to Prevent This Code From Triggering
- Frequently Asked Questions
- What are the most common mistakes when diagnosing P0641?
- Can I fix P0641 myself?
- Will clearing the code make it go away?
- Why are there so many other codes with P0641?
- Can a bad battery cause P0641?
- What does the 'A' in 'Circuit A' mean?
- Can a blown fuse cause P0641?
- Key Takeaways
- 🎟️ Get 5% Off