

P0335 on 2014-2019 GMC Sierra 4.3L: Crank Sensor Causes and Fixes
P0335 on a 2014-2019 GMC Sierra with the 4.3L V6 almost always means the crankshaft position sensor has failed. This typically causes a no-start or stalling condition. The fix involves replacing the sensor, which is located behind the starter, and performing a mandatory 'relearn' procedure with a scan tool. Before replacing the sensor, it is critical to inspect the engine wiring harness for chafing, a known issue detailed in several GM TSBs.
- P0335 on this truck means the engine is not getting a signal from the crankshaft sensor, which will likely cause a no-start or dangerous stalling condition.
- The most probable cause is a failed crankshaft position sensor. However, always inspect the wiring harness for chafing damage before replacing parts, as this is a known issue.
- The sensor is located on the lower passenger side of the engine and requires removing the starter motor to access it.
- After replacing the sensor, you MUST perform a 'Crankshaft Position Variation Relearn' with a capable scan tool for the engine to run correctly.
What's Unique About the 2014-2019 GMC Sierra
On the 2014-2019 Sierra with the 4.3L LV3 engine, the P0335 code is a common issue, often pointing directly to a failed sensor. Unlike some other platforms where wiring is the primary suspect, on these trucks, the sensor itself is the most frequent point of failure. However, GM has issued several Technical Service Bulletins (TSBs) related to engine harness chafing that can cause this code, so inspecting the wiring is still a critical diagnostic step. A key requirement for this specific platform is the mandatory 'Crankshaft Position Variation Relearn' procedure after sensor replacement, without which the truck may run poorly, exhibit misfires, or set other codes like P0315.
Generation note: The 2014-2019 year range covers the third generation of the GMC Sierra (K2XX platform), which was produced from 2014 to 2018, and the start of the fourth generation (T1XX platform) in 2019. This guide primarily applies to the third-generation models with the 4.3L LV3 V6. The 2019 'Sierra 1500 Limited' is a continuation of the third generation, while the all-new 2019 model is the fourth generation. The causes and fixes are generally consistent for the LV3 engine across these years, but always verify part numbers for your specific model year.
Symptoms You May Notice
- Engine cranks but will not start.
- Extended cranking time before the engine starts.
- Engine stalls unexpectedly while driving or at idle.
- Rough or unstable idle.
- Noticeable loss of engine power and poor acceleration.
- Check Engine Light is illuminated.
- Tachometer reads 0 RPM while cranking the engine.
- Engine bucks or stumbles while driving.
- Replacing the camshaft position sensor instead of the crankshaft position sensor. While they work together, P0335 specifically points to the crankshaft sensor circuit.
- Replacing the starter motor. While the starter must be removed to access the sensor, it is almost never the cause of the P0335 code itself.
- Replacing the fuel pump. A no-start condition can be caused by a lack of fuel, but a scan tool showing 0 RPM during cranking points directly to the CKP sensor circuit, not the fuel system.
Most Likely Causes
- Failed Crankshaft Position Sensor 🔴 High Probability The sensor is a common failure point on this platform due to heat cycles and age. Its location behind the starter exposes it to significant heat.
How to confirm: Use a scan tool to monitor engine RPM while cranking. If the reading is 0, the sensor is not sending a signal. The sensor can also be tested for resistance, but replacement is often the most practical diagnostic step if wiring is confirmed to be good.
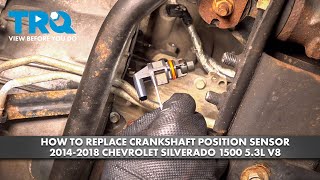
Typical fix: Replace the crankshaft position sensor. This requires removing the starter motor for access. 🎬 Watch: Step-by-step guide to replacing the sensor and removing the starter. A 'Crankshaft Position Variation Relearn' procedure must be performed with a capable scan tool after replacement.
Est. part cost: $25-$75 - Wiring Harness Damage (Chafing) 🟡 Medium Probability GM has issued TSBs (21-NA-149, PIT5307) noting that the engine harness is routed tightly and can rub through. Specific chafe points for the LV3 engine include the engine vacuum pump pulley, the front corner of the left-hand cylinder head, the drive belt idler pulley bracket, the oil dipstick bracket, the ECM bracket, and the shock tower. TSB Bulletin #PIP5553A notes that a wiring jumper harness can also become chafed at a specific bolt, leading to a stall or a no-start condition.
How to confirm: Visually inspect the entire length of the crankshaft sensor wiring harness, paying close attention to the specific areas noted in TSBs. Perform a 'wiggle test' on the harness while monitoring the sensor signal to see if it cuts out. A tug test on wires at the connector may reveal a broken wire inside the insulation. 🎬 See how to diagnose persistent codes when a new sensor doesn't work.
Typical fix: Repair the damaged section of wire using approved splicing techniques and waterproof heat shrink. Re-route or secure the harness with zip ties and protective conduit (like Tesa tape or a Kevlar sleeve as recommended by GM) to prevent future contact.
Est. part cost: $10-$35 - Damaged or Corroded Connector ⚪ Low Probability The connector's location low on the engine exposes it to moisture, oil, and road debris. The plastic locking tab can also become brittle from heat and break during service, leading to a poor connection. NHTSA ODI #10440614 describes a case where a P0335 code was cleared simply by unplugging and reseating the crankshaft position sensor, suggesting a loose or poor connection.
How to confirm: Unplug the sensor and inspect the connector terminals for corrosion (green or white powder), moisture, or pushed-out pins. Ensure the connector clicks securely into place and the lock is engaged.
Typical fix: Clean the connector terminals with an electrical contact cleaner. If the connector is physically damaged or the terminals are too corroded, replace the connector pigtail.
Est. part cost: $10-$35
Rare But Worth Checking
- Damaged Reluctor Wheel: The reluctor wheel is a toothed ring on the crankshaft that the sensor reads. While very rare, damage to its teeth (from debris or internal engine issues) can cause a P0335 code. This is typically a last-resort diagnosis after the sensor and wiring have been ruled out and usually involves significant labor to inspect.
- Faulty Engine Control Module (ECM): An internal failure of the ECM is extremely rare but possible. The ECM should only be considered after all other possibilities (sensor, wiring, reluctor wheel) have been exhaustively tested and ruled out. TSB 21-NA-149 explicitly states that the ECM has been unnecessarily replaced for these concerns.
- Incorrect Air Gap / Shimming: On older GM 4.3L Vortec engines, it was sometimes necessary to install shims to achieve the correct air gap between the sensor and reluctor wheel, especially after a timing cover replacement. While the new ACDelco sensors for the LV3 do not typically come with shims and it is not a common procedure for this engine, a severe issue like crankshaft end play could theoretically cause an air gap problem.
Diagnosis Steps
- Connect a capable scan tool and confirm P0335 is the active code. Check for any other related codes.
- Using the scan tool's live data feature, monitor 'Engine RPM' while cranking the engine. If the RPM reads 0, it confirms the ECM is not receiving a signal from the CKP sensor.
- If no RPM signal is present, perform a thorough visual inspection. Safely raise the vehicle and locate the CKP sensor on the lower passenger side of the engine block, just above and behind the starter motor.
- Inspect the wiring harness and connector leading to the sensor. Look for any signs of chafing, melting, corrosion, or loose connections. Pay special attention to the chafe points identified in TSB 21-NA-149 and PIT5307: near the ECM bracket, shock tower, vacuum pump pulley, front of the passenger-side cylinder head, and idler pulley bracket. Also check for a pinched jumper harness near the X15 connector as noted in TSB Bulletin #PIP5724.
- If the wiring and connector appear to be in good condition, the most likely cause is a failed sensor.
- To replace the sensor, disconnect the battery. Remove the starter motor. Remove the single bolt holding the CKP sensor and remove the sensor.
- Install the new sensor, ensuring it is fully seated and the o-ring is properly in place. Reinstall the starter motor and reconnect the battery.
- Perform the 'Crankshaft Position Variation Relearn' procedure using a GM Tech-2, MDI, or a high-level professional scan tool with this function. 🎬 Watch: How to perform the mandatory crankshaft position variation relearn procedure. This step is mandatory for proper engine operation and to prevent codes like P0315.
- Clear the codes and perform a test drive to ensure the repair was successful.
Parts You'll Likely Need
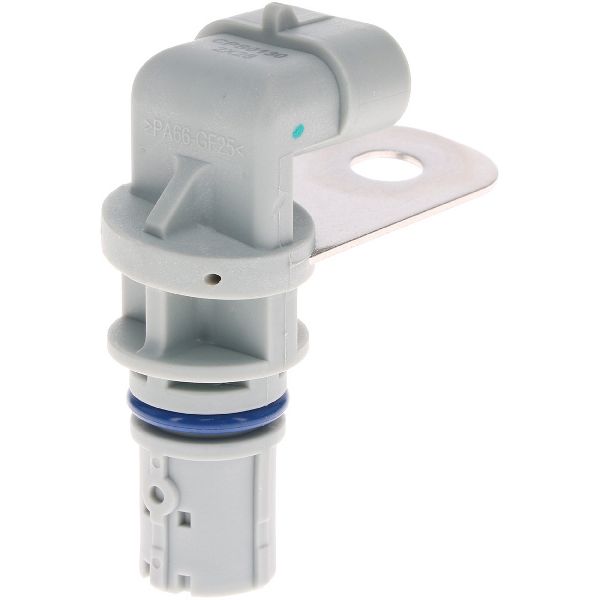
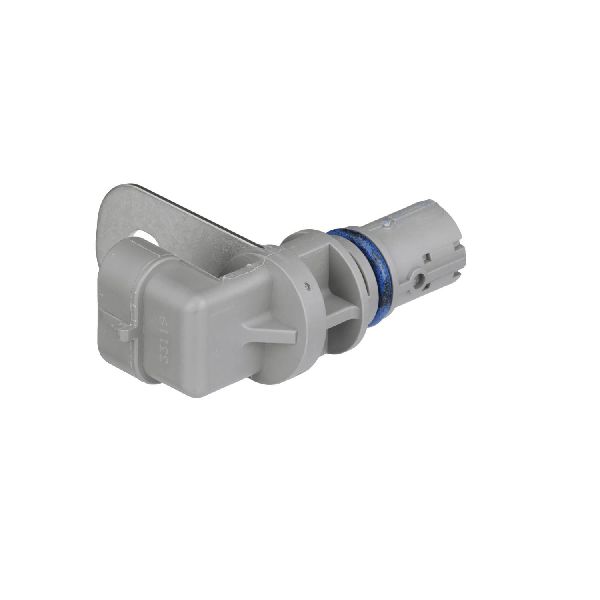
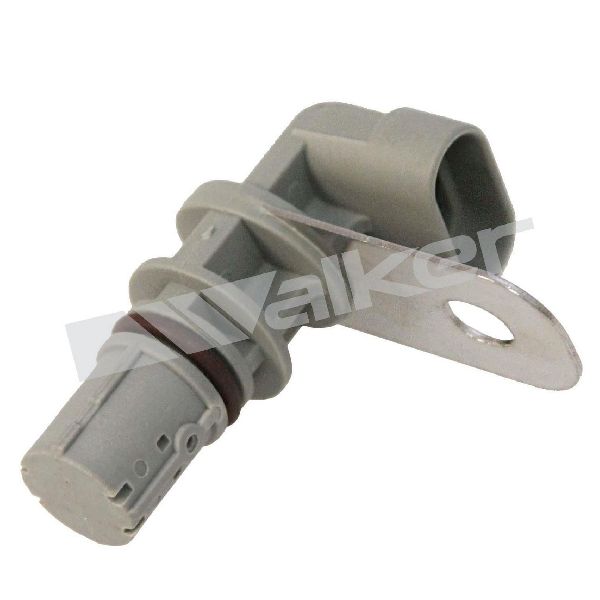
- Engine Crankshaft Position Sensor
(OEM #12716223)— This is the most common failure part for a P0335 code on this engine. The original part number 12679196 has been superseded by 12716223.
Trusted brands: ACDelco (Genuine GM), Delphi
OEM price range: $40-$75
Aftermarket price range: $25-$50 - Crankshaft Position Sensor Connector Pigtail
(OEM #PT2649)— The original connector can become brittle from heat and the locking tab may break upon removal. It's also replaced if the wiring is corroded or damaged near the sensor.
Trusted brands: ACDelco, Dorman
OEM price range: $20-$40
Aftermarket price range: $10-$25
Related Codes That Often Appear With This One
- P0336 — This code for 'Crankshaft Position Sensor 'A' Circuit Range/Performance' often appears with P0335, indicating an intermittent or poor-quality signal rather than a complete loss. Both codes point to the same set of potential failures.
- P0315 — This GM-specific code for 'Crankshaft Position Variation Not Learned' will appear if the sensor is replaced but the mandatory relearn procedure is not performed or fails.
- P0340 — This code for the Camshaft Position Sensor circuit can appear if a wiring harness that contains wires for both sensors is damaged. TSB PIP5724 notes a specific jumper harness that can be pinched, causing both codes.
- P0300 — A general 'Random/Multiple Cylinder Misfire' code can be triggered if the crankshaft position variation is not learned correctly, as the ECM's misfire detection relies on accurate crank speed data.
Technical Service Bulletins (TSBs) & Recalls
- 21-NA-149: Supersedes 21-NA-233. Details multiple potential engine harness chafe points on the LV3 engine, including the front corner of the left cylinder head, drive belt idler pulley bracket, and oil dipstick bracket.
- PIT5307: Specifically calls out the engine harness rubbing on the engine vacuum pump pulley as a cause for P0335 and other codes.
- PIP5724: Notes that P0335 and P0340 (Camshaft Sensor) can appear together if a specific jumper harness gets pinched near the front engine cover or the X15 connector.
- 21-NA-233: An earlier TSB, now superseded by 21-NA-149, that also warned of harness chafing against the ECM/TCM bracket or shock tower.
- TSB Bulletin #PIP5553: Communicates that the vehicle may exhibit an SES lamp with DTC P0335 due to a wiring jumper harness chafed at the bolt.
- TSB Bulletin #PIE0416A: An informational bulletin regarding field data for vehicles with DTCs P0335, P0340, or P0365 set.
Platform-Specific Known Issues
- TSB 21-NA-149 / 21-NA-233: Details multiple locations of potential engine wiring harness chafing that can cause a P0335, among other codes. Technicians are advised to inspect the harness near the ECM bracket, shock tower, vacuum pump pulley, and cylinder heads.
Mechanic-Grade Diagnostic Values
- CKP Sensor 5V Reference Voltage — expected: 5.0 Volts DC with key on, engine off. Failure: 0V indicates an open/short in the reference circuit or a faulty ECM. Voltage significantly lower than 5V could indicate a wiring issue or a sensor pulling the voltage down.
- CKP Sensor Ground Circuit Voltage Drop — expected: Less than 100mV. Failure: A reading higher than 100mV indicates high resistance in the ground circuit (Low Reference), which can cause an erratic signal.
- CKP Sensor Signal (Digital Square Wave) — expected: A square wave alternating between approximately 0V and 5V when the engine is cranking or running. This is best observed with an oscilloscope.. Failure: No signal, a flat line at 0V or 5V, or a distorted/noisy waveform indicates a failed sensor, wiring issue, or damaged reluctor wheel.
- CKP Sensor Resistance (Not Recommended for LV3) — expected: N/A. Failure: The LV3 uses a 3-wire Hall effect sensor which cannot be accurately tested with a resistance measurement. Older 2-wire variable reluctance sensors could be tested this way, but it is not applicable here.
Scan Tool Commands That Help
- GDS2 / Tech 2 / High-Level Aftermarket: Crankshaft Position Variation Learn — This function is mandatory after replacing the crankshaft position sensor, the ECM, or performing major engine work. It allows the ECM to learn the minor variations in the crankshaft reluctor wheel to ensure accurate misfire detection and timing. Failure to perform this will often set a P0315 code and may cause a P0300 (random misfire).
Wiring & Ground Locations
- CKP Sensor Connector (X125) — On the lower passenger side of the engine block, above and behind the starter motor.. This is the primary connection point for the sensor. It is susceptible to contamination from oil and road debris, and the wiring near it can be damaged during starter replacement or from contact with hot engine components.
- Engine Block Ground (G103) — Typically located on the front or side of the engine block, often near the alternator or starter.. This is a primary ground for the engine block itself. While not the direct sensor ground (which is a low reference from the ECM), a poor block ground can introduce electrical noise and cause issues with multiple sensors, including the CKP.
- ECM Low Reference Circuit — This is a dedicated ground path provided by the Engine Control Module (ECM) through the wiring harness, not a chassis ground.. The CKP sensor uses this low reference circuit as its ground. A break or high resistance anywhere in this wire between the sensor and the ECM will cause a P0335. It's critical not to mistake this for a chassis ground when testing.
Real Owner Repair Stories
- Forum user on gm-trucks.com (2015 GMC Sierra 4.3L V6) — Intermittent no-start and stalling. P0335 code was present.
❌ Tried (didn't work) Replaced the crankshaft position sensor twice with aftermarket parts.
✅ What actually fixed it The wiring harness had chafed on the corner of the engine block near the starter. The insulation was worn through, causing the signal wire to short to ground intermittently. Repairing the wires and protecting the harness with a conduit solved the problem permanently. - NHTSA ODI #10440614 — An owner reported a P0335 code causing the vehicle to stall. The issue was resolved when the crankshaft position sensor was unplugged and reseated, which caused the warning lights to disappear.
OEM Part Supersession History
12679196→12716223— Likely an internal revision for improved durability or signal stability. This is a common practice by manufacturers to address known failure patterns.
Heads up: The new part number (12716223) is a direct replacement for the old one and should be used for all repairs.
Model Year Variations Within This Range
- 2019: In 2019, GM sold both the old K2XX platform truck as the 'Sierra 1500 Limited' and the all-new T1XX platform truck. The 4.3L LV3 engine was a carryover engine for the new T1XX platform's base model. For the purposes of diagnosing P0335, the engine, sensor, and its location are effectively identical between a 2018 K2XX and a 2019 T1XX with the 4.3L V6.
- 2018+: The 4.3L LV1 engine, used in Express and Savana vans starting in 2018, is nearly identical to the LV3 but lacks Active Fuel Management (AFM). While not a Sierra, parts like the CKP sensor are often shared, but part numbers should always be verified by VIN.
Diagnostic Flowchart
Other Known Issues on This Vehicle
Issues unrelated to this code that are worth knowing about as an owner of this generation:
- Torque Converter Shudder (6L80/8L90 Transmissions) 🟠 Medium — Very common, often appearing between 30,000-80,000 miles. Causes a vibration or shudder at light throttle, especially around 35-50 mph. (Ref: Multiple TSBs issued, with the primary fix being a transmission fluid flush and replacement with an updated Mobil 1 Synthetic LV ATF HP fluid. In some cases, torque converter replacement is required.)
- Intake Valve Carbon Buildup 🟠 Medium — Inherent to all direct-injection (DI) engines. Symptoms like rough idle or misfires may appear after 80,000-100,000 miles. (Ref: No specific TSB, but it's a widely documented characteristic. The fix is physical cleaning (walnut blasting). Preventative measures include installing an oil catch can.)
- Active Fuel Management (AFM) Lifter Failure 🔴 High — While more common on the 5.3L and 6.2L V8s, the 4.3L V6 LV3 still uses AFM and is susceptible to lifter failure, which can cause ticking noises, misfires, and lead to catastrophic engine damage if ignored. (Ref: No recall for the V6, but the issue is well-known. Many owners install an AFM Disabler device to prevent the system from activating.)
- Brake Vacuum Pump Failure / Hard Pedal 🔴 High — Common issue where the vacuum pump fails or its filter clogs, resulting in a hard brake pedal with reduced stopping power. Onset can be sudden. (Ref: Subject of GM recall N192268490. The fix involves reprogramming the EBCM and, if necessary, replacing the vacuum pump.)
- Premature Starter Motor Failure 🟡 Low — Many owners report starter failure well below 100,000 miles, characterized by a single click and no-crank condition. Sometimes caused by corroded ground connections rather than the starter itself.
Used vs. New Parts: Buying Guide for This Vehicle
When a used part is the smart pick: For this specific repair, using a used part is not recommended for the sensor itself. However, if the connector pigtail is damaged, a used pigtail with a length of wire from a junkyard harness can be a cost-effective and reliable repair if spliced correctly with weatherproof connections.
Donor-vehicle mileage cap: roughly under 50000 miles for the part to have meaningful remaining life.
What to inspect on the donor part:
- For a pigtail, inspect for any signs of brittleness in the plastic.
- Ensure the locking tab is intact and functional.
- Check for any corrosion on the pins or cut wires that appear discolored (indicating previous moisture intrusion).
OEM-only on this vehicle (don't cheap out):
- Engine Control Module (ECM)
Aftermarket brands forum-validated for this vehicle:
- Delphi
- NTK
Brands owners have reported issues with on this vehicle:
- Unnamed or 'white-box' brands from online marketplaces often have a high failure rate and may produce a noisy signal, leading to persistent or intermittent issues.
Real Owner Stories
Aggregated from forums and TSBs cited above. Mileages and costs reflect what owners reported in those sources.
2014-2019 GMC Sierra 4.3L LV3 V6
Symptoms: The engine would crank but would not start, and the tachometer remained at 0 RPM during the cranking attempt.
What fixed it: Replacement of the crankshaft position sensor located behind the starter motor, followed by a 'Crankshaft Position Variation Relearn' procedure.
Source hint: Article Context - Symptoms and Diagnosis Steps
2014-2019 GMC Sierra 4.3L LV3 V6
Symptoms: P0335 and P0340 codes appeared together after engine work.
What fixed it: Repairing a jumper harness that had been pinched near the front engine cover.
Source hint: TSB PIP5724
2014-2019 GMC Sierra 4.3L LV3 V6
Symptoms: Engine stalling unexpectedly and throwing P0335 due to wiring issues near the vacuum pump.
What fixed it: Inspecting the harness for contact with the vacuum pump pulley and repairing the damaged wires.
Source hint: TSB PIT5307
GMC Sierra / Yukon Platform
Symptoms: The vehicle experienced a stall while driving, and a scan revealed DTC P0335 for crankshaft position sensor failure.
What fixed it: According to NHTSA ODI #10440614, the crankshaft position sensor was simply unplugged and reseated, which caused the warning lights to go away.
Related OBD-II Codes
Frequently Asked Questions
I replaced the sensor on my 4.3L LV3 but the P0335 code is still there. Did I miss a step?
Does TSB 21-NA-149 apply to my GMC Sierra with the 4.3L V6?
Where is the crankshaft position sensor located on the 2014-2019 Sierra 4.3L?
My truck is throwing P0335 and my tachometer stays at 0 while cranking. Is this common?
Could the engine vacuum pump be related to my P0335 code?
Are there specific areas I should check for wiring damage on my 2015 Sierra 4.3L?
Helpful Videos
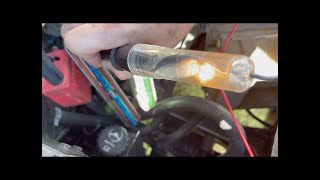
Used OEM Parts in Stock


New Aftermarket Parts Available


The information in this article is provided for general reference and educational purposes only. Vehicle specifications, procedures, and part compatibility can vary by production date, trim level, and region. Always consult your vehicle's factory service manual and verify part numbers before purchasing or performing repairs. Safety-critical components such as airbags, seat belts, and braking systems should be installed by a qualified professional.
- GMC Sierra:
- 🎬 Helpful Videos
- 🛍️ Shop This Part
- What's Unique About the 2014-2019 GMC Sierra
- Symptoms You May Notice
- Most Likely Causes
- Rare But Worth Checking
- Diagnosis Steps
- Parts You'll Likely Need
- Related Codes That Often Appear With This One
- Technical Service Bulletins (TSBs) & Recalls
- Platform-Specific Known Issues
- Mechanic-Grade Diagnostic Values
- Scan Tool Commands That Help
- Wiring & Ground Locations
- Real Owner Repair Stories
- OEM Part Supersession History
- Model Year Variations Within This Range
- Diagnostic Flowchart
- Other Known Issues on This Vehicle
- Used vs. New Parts: Buying Guide for This Vehicle
- Real Owner Stories
- 2014-2019 GMC Sierra 4.3L LV3 V6
- 2014-2019 GMC Sierra 4.3L LV3 V6
- 2014-2019 GMC Sierra 4.3L LV3 V6
- GMC Sierra / Yukon Platform
- Related OBD-II Codes
- Frequently Asked Questions
- 🎟️ Get 5% Off