

U0101 on 2006-2010 Ford Explorer: Lost Communication with TCM Causes and Fixes
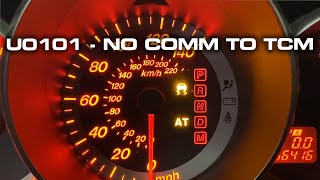
On a 2006-2010 Ford Explorer, code U0101 means the Transmission Control Module (TCM) has stopped communicating. For the 4.6L V8 engine, the most common cause is failing ignition coils creating electrical interference. For all engines, check for corroded wiring connectors at the transmission (bulkhead connector), bad grounds, and blown fuses before suspecting a failed internal TCM/lead frame.
- U0101 on a 2006-2010 Explorer indicates a communication failure with the TCM, not a mechanical transmission problem.
- For the 4.6L V8 engine, the number one suspect should be failing ignition coils causing electrical interference.
- For all engines, thoroughly inspect the battery, grounds, and the main transmission wiring connector for corrosion or damage before assuming the TCM has failed.
- The TCM is located inside the transmission oil pan and its replacement is a labor-intensive job.
- Do not drive the vehicle with this code, as it can result in unpredictable shifting and leave you stranded.
What's Unique About the 2006-2010 Ford Explorer

The 2006-2010 Explorer used two main automatic transmissions: the 5R55S with the 4.0L V6 and the 6R60 with the 4.6L 3V V8. On models with the 4.6L V8, a surprisingly common cause for U0101 is electrical interference from failing ignition coils, particularly cheap aftermarket ones. The transmission wiring harness is routed very close to the passenger-side ignition coils, and as they fail, they can create enough radio frequency interference (RFI) to corrupt the communication signal between the PCM and TCM, triggering the code. On all models, the TCM is located inside the transmission as part of the mechatronic/solenoid body assembly (often called a 'lead frame'), making it more susceptible to heat and vibration and more labor-intensive to access. Failure of this internal lead frame is also a well-documented issue, particularly on the 6R60 transmission.
Symptoms You May Notice

- Harsh or erratic shifting, sometimes banging into gear.
- Transmission stuck in one gear (limp-home mode), often 3rd or 5th.
- Illuminated 'Wrench' light on the dashboard.
- Traction control or ABS warning light may turn on.
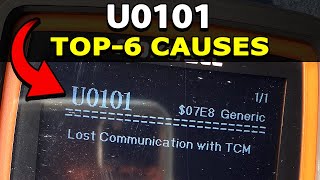
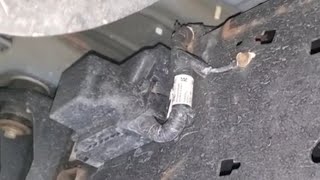
- Check Engine Light is on. 🎬 Watch: A breakdown of the top 6 causes for U0101.
- Gear selector indicator (PRNDL) on the dash may disappear or show dashes.
- Vehicle may not start or crank.
- Speedometer reads zero while driving.
- Replacing the entire transmission. This code is almost always an electrical or network issue, not a mechanical failure of the transmission itself.
- Replacing the PCM. While possible for the PCM to fail, it is far less common than a TCM, wiring, or interference issue.
Most Likely Causes


- Failing Ignition Coils (4.6L V8 Only) 🔴 High Probability The transmission wiring harness runs close to the passenger-side ignition coils. Failing coils, especially low-quality aftermarket ones, emit strong electrical interference (RFI) that disrupts the CAN bus communication signal in the adjacent harness.
How to confirm: Check for codes U0101 and U1900 together. Inspect the passenger-side ignition coils for cracks or non-OEM brands. A mechanic can use an oscilloscope to see the interference on the CAN bus lines 🎬 See how to avoid common mistakes when diagnosing CAN network failures. when the engine is running. A misfire may or may not be present.
Typical fix: Replace all four ignition coils on the passenger-side bank, and it is wise to replace all eight. It is highly recommended to use high-quality OEM (Motorcraft) or equivalent brands and also replace the spark plugs to prevent recurrence.
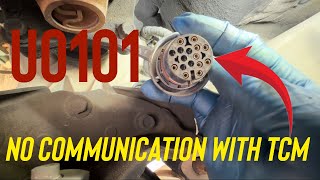
Est. part cost: $150-$300 - Corroded or Damaged Transmission Wiring/Connector 🟡 Medium Probability The main transmission electrical connector (the bulkhead connector) is on the passenger side of the transmission case and is exposed to road salt, moisture, and debris, leading to corrosion on the pins. The harness can also chafe against the engine or frame, causing broken wires.
How to confirm: Perform a visual inspection of the main electrical connector at the transmission case for green or white corrosion, bent pins, or fluid intrusion from a leaking connector sleeve. Trace the harness from the transmission to the engine bay, looking for chafed or broken sections. A continuity test of the CAN bus wires (often a twisted pair of wires) between the PCM and TCM connectors can confirm a broken wire.
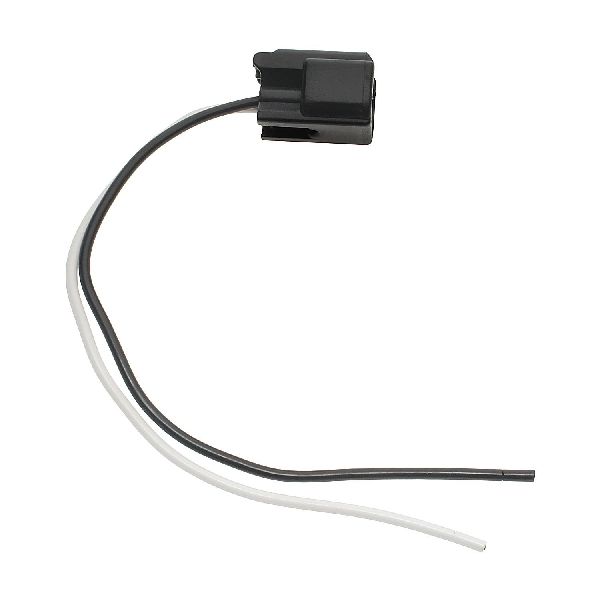
Typical fix: Clean the connector pins thoroughly with electrical contact cleaner. If corrosion is severe or pins are broken, the connector pigtail must be cut out and a new one spliced in. Damaged sections of the harness must be repaired. The internal connector sleeve/seal should also be replaced.
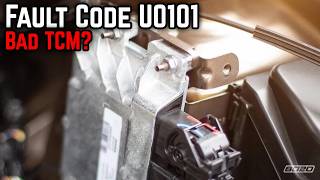
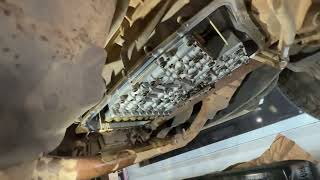
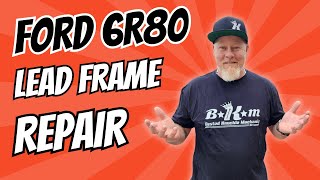
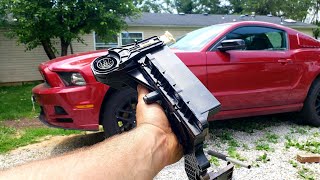
Est. part cost: $20-$70 for a connector pigtail kit. - Failed Transmission Control Module (TCM/Lead Frame) 🟡 Medium Probability The TCM is integrated into the 'molded lead frame' assembly inside the transmission oil pan, attached to the valve body. 🎬 Watch this detailed walkthrough on replacing the TCM lead frame. Constant heat cycles and vibration can cause internal electronic components, solder joints, or the integrated speed sensors to fail over time.
How to confirm: This is typically diagnosed by exclusion. If all wiring, fuses, and power/ground sources for the TCM have been tested and are confirmed to be good, the module itself is the likely point of failure. A professional scan tool will be unable to communicate with the TCM. This failure is common enough that Ford issued Customer Satisfaction Program 19N01 for similar vehicles with the 6R80 transmission (a close relative of the 6R60).
Typical fix: The transmission oil pan must be removed to access and replace the TCM/lead frame assembly. The replacement module may need to be programmed to the vehicle's VIN.
Est. part cost: $300-$700 - Low Battery Voltage or Poor Grounds ⚪ Low Probability Control modules require a stable voltage to communicate properly. A weak battery, failing alternator, or corroded main ground straps (especially the body-to-frame ground) can cause intermittent voltage drops that trigger communication codes.
How to confirm: Test the battery voltage with the engine off (should be >12.4V). Test the alternator output with the engine running (should be 13.7-14.7V). Inspect and clean the main battery terminals and body/engine ground connections, especially the one on the frame rail near the transmission.
Typical fix: Replace the failing battery, replace the alternator, or clean/tighten all ground connections.
Est. part cost: $100-$400
Rare But Worth Checking
- Blown Fuse: Always a quick and easy check. A blown fuse for the TCM or PCM will instantly cause a communication loss. Check the fuse boxes in the engine bay (Smart Junction Box) and passenger compartment.
- Failed PCM: While the Powertrain Control Module can fail and cause this code, it is far less common than the other listed causes. This should be considered only after all other possibilities are exhausted.
Diagnosis Steps
- Scan for all codes in all modules. Note if U0101 is present with other U-codes like U1900 or transmission-specific codes like P0720/P0722. Confirm if your scanner can or cannot communicate with the TCM.
- Check the battery and charging system. Ensure voltage is stable and above 12.4V with the engine off and 13.7-14.7V when running.
- Inspect all relevant fuses in the engine bay and interior fuse panels related to the TCM, PCM, or transmission.
- If you have the 4.6L V8, inspect the passenger-side ignition coils. Look for cracks, carbon tracking, or non-Motorcraft brands. This is a highly probable cause.
- Locate the main transmission harness connector (bulkhead connector) on the passenger side of the transmission. Disconnect it and inspect thoroughly for corrosion, moisture, or damaged pins.
- Inspect vehicle ground points, especially the main body-to-frame ground strap which can become corroded.
- If a wiring diagram is available, check for 12V power and a clean ground at the TCM connector. Then, test the CAN bus resistance. With the battery disconnected, measure resistance between Pin 6 and Pin 14 at the OBD-II port. A healthy network should read approximately 60 Ohms. A reading of 120 Ohms suggests a break in the circuit, and near 0 Ohms indicates a short.
- If steps 1-7 do not reveal the cause, the issue is most likely an internal failure of the TCM/lead frame assembly, which is located inside the transmission pan.
Parts You'll Likely Need
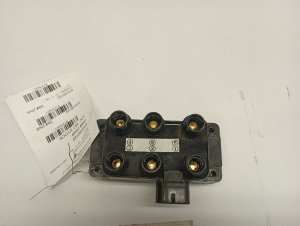
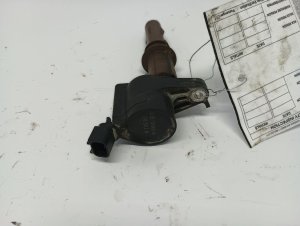
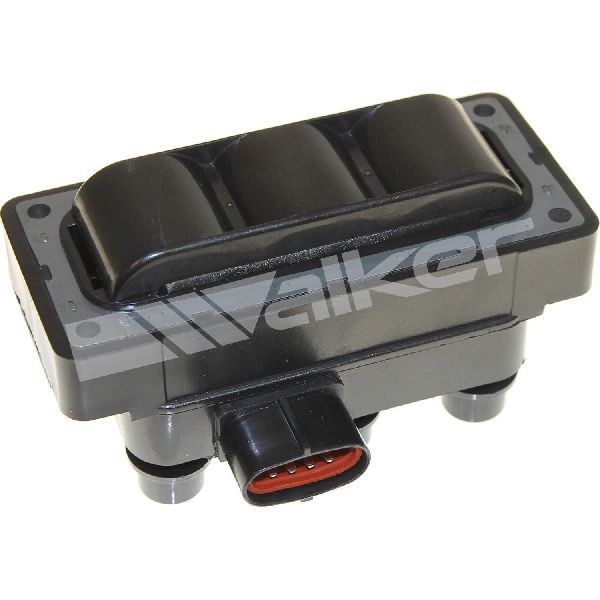
- Ignition Coil
(OEM #DG511 (Motorcraft))— Specific to the 4.6L V8 engine, failing coils are a primary cause of electrical interference that triggers U0101.
Trusted brands: Motorcraft, Denso
Related Codes That Often Appear With This One
- U1900 — Stands for 'CAN Communication Bus Fault - Receive Error'. This code often appears with U0101, especially when electrical interference from failing ignition coils is the root cause, as the interference corrupts the data on the network.
- P0720 / P0722 — These codes relate to the Output Speed Sensor (OSS) circuit. On these transmissions, the OSS is integrated into the TCM/lead frame assembly. Seeing these codes alongside U0101 is a strong indicator that the lead frame itself has failed. Ford's Customer Satisfaction Program 19N01 specifically mentions these codes in relation to lead frame failure.
- P0700-series codes — If communication is intermittent, the TCM may be able to store its own codes (like for faulty solenoids) before it goes completely offline. A cluster of solenoid codes (e.g., P0750, P0755, P0760) along with U0101 often points to a wiring harness or connector problem affecting the entire solenoid pack.
Technical Service Bulletins (TSBs) & Recalls
- TSB 13-6-8: While not for the Explorer directly, this TSB for F-150s and Mustangs with the related 6R80 transmission describes identical symptoms (stuck in gear, no speedo, wrench light) caused by a faulty molded lead frame. The diagnostic principles and repair are highly relevant.
Platform-Specific Known Issues
- Ignition Coil RFI: The routing of the transmission harness near the passenger side V8 ignition coils makes this platform uniquely susceptible to communication codes caused by radio frequency interference from failing coils.
- Internal TCM/Lead Frame: Unlike many vehicles with an externally mounted TCM, the Explorer's is inside the transmission pan, making it both harder to access and more prone to failure from heat and vibration.
Mechanic-Grade Diagnostic Values
- CAN Bus Network Resistance — expected: Approximately 60 Ω. Failure: A reading of 120 Ω indicates an open circuit or a missing termination resistor. A reading near 0 Ω indicates a short between the CAN High and CAN Low wires.
- CAN Bus Voltage (Key On, Engine Off) — expected: CAN High (Pin 6) should be ~2.6V-3.0V. CAN Low (Pin 14) should be ~2.0V-2.4V.. Failure: Voltages that are stuck high, low, or at 0V indicate a short or open on the network. CAN High voltage should always be greater than CAN Low.
- TCM Power Supply Pin Voltage — expected: 12.0V - 12.6V with ignition on.. Failure: Significantly lower voltage or no voltage indicates a problem with the power supply wire or a blown fuse.
- TCM Ground Pin Resistance — expected: Less than 0.5 Ω.. Failure: High resistance indicates a poor ground connection, which can cause modules to drop offline.
Scan Tool Commands That Help
- Ford IDS (Integrated Diagnostic System): Network Test — This function performs a 'ping' of all modules expected to be on the network. It provides a clear green/red status for each module, instantly confirming if the TCM is not responding. This is a primary step before proceeding to manual wiring checks.
Wiring & Ground Locations

- Transmission Bulkhead Connector — On the passenger side of the transmission case, where the main vehicle harness connects to the transmission's internal harness.. This is the primary interface for all power, ground, and communication signals to the internal TCM. It is highly exposed to road spray, salt, and debris, making it a common point of failure due to corrosion or moisture intrusion.
- G104 — On the RH (passenger) side of the engine compartment, typically near the rear of the engine on the body.. This is a primary engine and PCM-related ground point. A poor connection here can cause unstable voltage for multiple control modules, leading to communication codes like U0101.
- G302 — Inside the vehicle, often on the left front body structure or kick panel area.. This serves as a major ground point for interior and body-related modules. While less likely to be the primary cause, a fault here can contribute to network instability.
- PCM Connector C175T — This is one of the main connectors at the Powertrain Control Module (PCM), located in the engine bay.. The CAN bus wires from the TCM route through this connector to communicate with the PCM. A pin-fit issue or corrosion here can interrupt the signal. A wiring diagram is needed to identify the specific CAN pins within this large connector.
Real Owner Repair Stories
- Ford Truck Enthusiasts Forum (2007 Ford Expedition (Similar platform and powertrain)) — Harsh shifting, wrench light, traction control light, codes U0101, U1900, U0073. Vehicle would go into limp mode under hard acceleration.
❌ Tried (didn't work) Initial diagnostics were inconclusive.
✅ What actually fixed it The owner traced the TCM cable from the transmission up into the engine bay. He found broken wires within the harness near a connector on the top right fender area. After repairing the broken wires, all error codes disappeared and the vehicle was fixed. - YouTube Channel 'FordTechMakuloco' (2006-2010 Ford Explorer with 4.6L V8) — Wrench light on the cluster, harsh shifting, code U0101 stored in the PCM.
❌ Tried (didn't work) Replacing the MAF sensor.
✅ What actually fixed it The problem was caused by cheap, aftermarket ignition coils on the passenger side bank creating RFI. The fix was to replace all four passenger-side coils with new, high-quality Motorcraft parts. This eliminated the electrical interference and restored communication with the TCM. - NHTSA ODI #11396431 — An owner reported that the wrench light would come on while driving and the vehicle would enter limp mode with codes U0101 and U1900.
❌ Tried (didn't work) Replacing the TCM and the ignition coils on the left bank did not resolve the problem.
OEM Part Supersession History
Varies by year→AL3Z-7G276-D (for 6R80, a close relative)— The original molded lead frames for the 6R-series transmissions were prone to failures of the integrated speed sensors and internal connections due to heat and vibration.
Heads up: When replacing the lead frame, it is critical to verify the part number with the vehicle's VIN. Ford has issued several updates, and using the wrong revision can lead to failure. The part is often listed as a 'Connector' in Ford's parts catalog, which can be confusing.
Model Year Variations Within This Range
- 2006-2010: The 4.0L V6 engine was paired with the 5R55S 5-speed automatic, while the 4.6L V8 was paired with the 6R60 6-speed automatic. While both have internal TCMs, the lead frame/solenoid body designs are completely different. The 5R55S has a reputation for solenoid pack failures and band issues, while the 6R60 is more known for the molded lead frame failures.
Diagnostic Flowchart
Other Known Issues on This Vehicle
Issues unrelated to this code that are worth knowing about as an owner of this generation:
- 4.0L SOHC V6 Timing Chain Cassette Failure 🔴 High — Very common, especially after 80,000-150,000 miles. Often presents as a 'rattle' on startup or at idle.
- Cracked Rear Liftgate Applique Panel 🟠 Medium — Extremely common. The plastic panel below the rear window cracks, allowing water to enter the liftgate and potentially damage the latch mechanism.
- 4.6L 3V V8 Spark Plug Breakage 🟠 Medium — The original two-piece spark plugs are known to break apart in the cylinder head during removal, requiring a special extraction tool. This is a maintenance issue rather than a failure.
- 5R55S/W Transmission Solenoid Body Failure 🟠 Medium — Common on V6 models, leading to harsh shifting, delayed engagement, or gear slippage. Often requires replacement of the solenoid pack.
Used vs. New Parts: Buying Guide for This Vehicle
When a used part is the smart pick: A used wiring harness or connector pigtail from a junkyard can be a cost-effective solution, provided it is from a low-mileage, non-corroded donor vehicle and is thoroughly inspected for damage before installation.
Donor-vehicle mileage cap: roughly under 80000 miles for the part to have meaningful remaining life.
What to inspect on the donor part:
- Check for the absence of green or white corrosion on connector pins.
- Ensure the plastic locking tabs on connectors are intact and not brittle.
- Inspect the wiring for any signs of previous repairs, chafing, or heat damage.
- For harnesses, confirm they are from the exact same engine/transmission combination.
OEM-only on this vehicle (don't cheap out):
- Transmission Control Module / Molded Lead Frame: Due to the high labor cost of replacement and the high failure rate of the original part, installing a used one is a major gamble. A new OEM part with the latest revisions is strongly recommended.
- Ignition Coils: The RFI issue is specifically linked to low-quality aftermarket coils. To prevent recurrence, only genuine Motorcraft (DG511) or top-tier OEM-equivalent brands should be used.
Aftermarket brands forum-validated for this vehicle:
- For ignition coils, if not using Motorcraft, brands like Denso are generally considered reliable.
Brands owners have reported issues with on this vehicle:
- Cheap, unbranded ignition coils sold on marketplaces like eBay or Amazon are a frequent cause of the RFI issue that triggers U0101 on the 4.6L V8. Be wary of counterfeit Motorcraft parts, which often have subtle differences in plastic finish and markings.
Real Owner Stories
Aggregated from forums and TSBs cited above. Mileages and costs reflect what owners reported in those sources.
2006 Ford Explorer 4.6L V8
Symptoms: The vehicle experienced communication issues and the technician found U0101. The cause was traced back to electrical interference from the ignition system.
What fixed it: Replacing the passenger-side ignition coils to eliminate RFI (Radio Frequency Interference) on the CAN bus lines.
Source hint: https://www.m-tekk.com/post/2006-ford-explorer (A technician's blog post detailing a U0101 fix caused by ignition coil RFI).
2006-2010 Ford Explorer
Symptoms: Transmission stuck in gear, no speedometer reading, and the wrench light illuminated on the dashboard.
What fixed it: Replacement of the molded lead frame (TCM assembly) inside the transmission.
Source hint: TSB 13-6-8
2010 Ford Explorer
Symptoms: An owner reported that the wrench light would come on while driving and the vehicle would enter limp mode with codes U0101 and U1900. (NHTSA ODI #11396431)
What fixed it: The owner attempted to replace the TCM and the ignition coils on the left bank, but the problem did not go away.
Related OBD-II Codes
Frequently Asked Questions
Why is my 4.6L V8 Explorer throwing U0101 even though the transmission seems fine?
Does Ford have a program to cover the TCM/Lead Frame failure on my Explorer?
My PRNDL display disappeared and the wrench light is on. Is this related to U0101?
Can a bad ground cause a 'Lost Communication with TCM' code on a 2006-2010 Explorer?
Where is the TCM located on the 2006-2010 Ford Explorer?
Should I use aftermarket ignition coils if I have the V8 engine?
Helpful Videos
Used OEM Parts in Stock

New Aftermarket Parts Available


The information in this article is provided for general reference and educational purposes only. Vehicle specifications, procedures, and part compatibility can vary by production date, trim level, and region. Always consult your vehicle's factory service manual and verify part numbers before purchasing or performing repairs. Safety-critical components such as airbags, seat belts, and braking systems should be installed by a qualified professional.
- Ford Explorer:
- 🎬 Helpful Videos
- 🛍️ Shop This Part
- What's Unique About the 2006-2010 Ford Explorer
- Symptoms You May Notice
- Most Likely Causes
- Rare But Worth Checking
- Diagnosis Steps
- Parts You'll Likely Need
- Related Codes That Often Appear With This One
- Technical Service Bulletins (TSBs) & Recalls
- Platform-Specific Known Issues
- Mechanic-Grade Diagnostic Values
- Scan Tool Commands That Help
- Wiring & Ground Locations
- Real Owner Repair Stories
- OEM Part Supersession History
- Model Year Variations Within This Range
- Diagnostic Flowchart
- Other Known Issues on This Vehicle
- Used vs. New Parts: Buying Guide for This Vehicle
- Real Owner Stories
- 2006 Ford Explorer 4.6L V8
- 2006-2010 Ford Explorer
- 2010 Ford Explorer
- Related OBD-II Codes
- Frequently Asked Questions
- 🎟️ Get 5% Off