

P0461 on 2019-2022 Chevrolet Silverado: Fuel Gauge Problems and Fixes
This code means your Silverado's fuel level sensor is failing. The most common fix is to replace the fuel level sensor, which is part of the fuel pump module inside the gas tank. This is a labor-intensive job that requires dropping the tank.
- P0461 on your Silverado points to a problem with the fuel level sensor circuit.
- The most common symptom is an erratic or non-working fuel gauge.
- The most likely cause is a failed fuel level sensor, which is part of the fuel pump module in the tank.
- Repair is labor-intensive, requiring the fuel tank to be dropped, so replacing the entire fuel pump module is recommended.
- While driving is possible, you risk running out of fuel unexpectedly.
What's Unique About the 2019-2022 Chevrolet Silverado
On the 2019-2022 Silverado (fourth-generation T1 platform), the fuel level sensor is integrated with the fuel pump module inside the tank. While there are no widespread recalls for this specific issue, owner forums suggest paying close attention to the wiring and ground connections at the top of the tank, as poor grounds can cause erratic readings. Due to the significant labor involved in dropping the fuel tank for access, most technicians and experienced DIYers recommend replacing the entire fuel pump module, not just the sensor, to prevent future failures of the pump itself.
Symptoms You May Notice
- Check Engine Light is on
- Fuel gauge behaves erratically, fluctuating wildly or dropping to empty suddenly
- Fuel gauge is stuck on Full or Empty
- Inaccurate 'Distance to Empty' reading on the driver information center
- Low Fuel warning light may stay on or flash even with a full tank
- Replacing the instrument cluster without first testing the fuel level sensor and its circuit.
- Replacing the fuel pump when only the sending unit has failed (though replacing the whole module is often wise).
Most Likely Causes
- Faulty Fuel Level Sensor / Sending Unit 🔴 High Probability The sensor's resistive strip can wear out or become contaminated from sulfur in the fuel over time, creating dead spots that result in erratic voltage signals. This is a common failure point for this type of sensor across many vehicles.
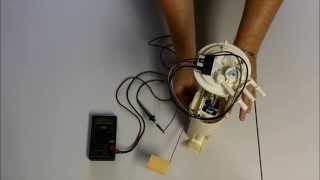
How to confirm: After accessing the sensor, a multimeter can be used to check for a smooth change in resistance as the float arm is moved through its range. A healthy sensor should read approximately 250 Ohms when empty and 40 Ohms when full. Any sudden jumps or dropouts indicate a bad sensor.
Typical fix: Replace the fuel level sensor. Since the sensor is typically part of the complete fuel pump module, the entire module is often replaced to save on future labor.
Est. part cost: $60-$100 for sensor only, $250-$500 for complete fuel pump module - Damaged or Corroded Wiring/Connectors 🟡 Medium Probability The wiring connector on top of the fuel tank is exposed to the elements under the truck, making it susceptible to moisture intrusion, corrosion, or physical damage from road debris. This can introduce unwanted resistance or open the circuit.
How to confirm: Visually inspect the wiring harness and connector pins on top of the fuel tank for any signs of corrosion (green or white powder), broken wires, or loose pins. Test for continuity and proper voltage from the ECM to the connector.
Typical fix: Clean the connector pins or repair/replace the damaged section of the wiring harness. A new connector pigtail may be needed if corrosion is severe.
Est. part cost: $20-$50 - Poor Ground Connection ⚪ Low Probability The fuel tank and sending unit rely on a solid ground to the vehicle's chassis. A corroded or loose ground strap can cause a floating voltage reference, leading to incorrect sensor readings. This is a known issue on some GM trucks.
How to confirm: Locate the chassis ground strap for the fuel tank and inspect it for corrosion or looseness. Test the resistance between the sending unit's ground pin and a clean chassis ground; it should be near zero ohms.
Typical fix: Clean the contact points of the ground strap and the chassis with a wire brush and re-secure the connection. Replace the strap if it is badly corroded.
Est. part cost: $10-$30
Rare But Worth Checking
- Stuck Fuel Float Arm: The float arm itself can get hung up on wiring inside the tank or be damaged by an impact to the bottom of the fuel tank, causing it to be stuck in one position. NHTSA ODI #10311787 notes a similar mechanical interference where a fuel vapor line hung up the fuel level sender, causing the gauge to read inaccurately.
- Faulty Instrument Cluster or ECM: This is very rare. Before suspecting the cluster or computer, all other possibilities with the sensor and wiring should be exhaustively ruled out. A dealer scan tool can perform a 'gauge sweep' to test the instrument cluster independently. In some cases, a PCM software update may be required. Manufacturer Bulletin #N192285430 confirms that a gauge unexpectedly reading empty or a false low fuel message can be caused by an error in the ECM calibration, requiring a reprogram.
Diagnosis Steps
- Confirm the P0461 code is present using an OBD-II scanner.
- Use the scanner's live data function to observe the 'Fuel Level Sensor' voltage. Note if it is stuck, or if it changes erratically when the vehicle is in motion (e.g., sloshing fuel).
- Visually inspect the fuel tank for any major dents or damage that could impede the float's movement.
- Locate the fuel pump module connector on top of the tank. Inspect the wiring and connector for any visible damage, corrosion, or looseness.
- If the wiring looks good, and access allows, test the sensor's resistance with a multimeter. You will need a wiring diagram for the correct pins. The resistance should change smoothly from approximately 250Ω (empty) to 40Ω (full).
- Check the fuel tank's chassis ground strap for integrity and clean connections.
- If the sensor and wiring test good, the issue may be with the instrument cluster or ECM, which typically requires professional diagnosis. As noted in Bulletin #PIT5212B, technicians should ensure their scan tool is updated to the latest version before continuing with the diagnosis of P0461.
Parts You'll Likely Need
- Fuel Level Sensor
(OEM #84715868)— This is the sensor that fails and causes the P0461 code. It is the most direct fix if the wiring is intact. Note: Part number may vary based on bed length (long bed is 84715870).
Trusted brands: ACDelco, GM Genuine Parts
OEM price range: $60-$95
Aftermarket price range: $40-$70 - Fuel Pump Module Assembly
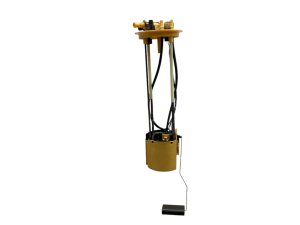
(OEM #ACDelco 85522713 (Crew Cab, Gas), ACDelco 85522714 (Standard Cab), ACDelco 85623235 (Diesel))— Since the fuel tank must be dropped for the repair, it is preventative maintenance to replace the entire module, which includes the fuel pump, sensor, and housing. This avoids having to do the same labor-intensive job again if the pump fails later.
Trusted brands: ACDelco, Delphi, Bosch
OEM price range: $350-$500
Aftermarket price range: $200-$350 - Fuel Pump Control Module
(OEM #ACDelco 13565642, GM 23382215)— This module relays power to the fuel pump and can sometimes be a source of electrical issues in the fuel system, though it is a less common cause for P0461 specifically. A failure here was noted as a problem on some 2019 models.
Trusted brands: ACDelco, GM Genuine Parts
OEM price range: $75-$120
Aftermarket price range: $50-$90
Technical Service Bulletins (TSBs) & Recalls
- Bulletin #PIP5695: Preliminary information for technicians to check for open field actions or ECM updates for fuel gauge concerns and DTC P0461.
- Bulletin #PIC5703A: Describes scenarios where the fuel gauge is inoperative and stuck on empty with a full tank; clearing the P0461 code may temporarily restore gauge function.
- TSB 15-06-01-002L: Addresses engine misfires and ticking noises, which can be related to lifter failure, a major known issue for this platform.
- TSB PIP5776G: Provides specific guidelines for replacing collapsed lifters on 2021 models with 5.3L and 6.2L engines, a critical platform issue.
- TSB 18-NA-355: Pertains to the 8-speed transmission shudder, recommending a fluid flush with Mobil 1 Blue Label ATF.
Platform-Specific Known Issues
- Intermittent Fault Resolution: Some owners have reported that the P0461 code and associated gauge malfunction can resolve on its own after several engine start cycles. One owner on DuramaxDiesels.com noted that after clearing the code, the gauge began working normally again after about five starts. This suggests the fault can be intermittent, possibly related to connector fretting or temporary sensor glitches.
- Fuel Filling Issues: In some cases, a P0461 code can be accompanied by difficulty filling the fuel tank, where the pump nozzle clicks off prematurely. This can happen if the system believes the tank is full due to the faulty sensor reading, potentially causing an overflow into the evaporative emissions (charcoal) canister.
Mechanic-Grade Diagnostic Values
- Fuel Level Sensor Resistance — expected: Approximately 40 Ohms (Full) to 250 Ohms (Empty).. Failure: Readings are erratic, show open circuit (OL), or have sudden jumps/dead spots when moving the float arm.
- Fuel Level Sensor Circuit Voltage — expected: Typically 0.5V (Empty) to 4.5V (Full).. Failure: Voltage is stuck at 0V or 5V, or does not change smoothly with fuel level.
- Sensor Ground Wire Voltage Drop — expected: Near 0.0V (less than 100mV).. Failure: A reading significantly higher than 0V (e.g., approaching 5V) indicates a bad ground connection.
Scan Tool Commands That Help
- GDS2 (or equivalent professional scanner): Instrument Cluster Functional Test / Gauge Sweep — Use this to command all instrument panel gauges to sweep through their full range of motion. If the fuel gauge moves correctly during this test, it confirms the gauge itself is functional and the problem lies within the sensor, wiring, or ECM.
- GDS2 (or equivalent professional scanner): Fuel Level Sensor Relearn / Fuel Tank System Adaptation — After replacing the fuel pump module or sensor, some vehicles may require this function to calibrate the new sensor's resistance range to the vehicle's computers. However, many modern GM vehicles will auto-relearn after a few drive cycles with significant fuel level changes.
Wiring & Ground Locations
- Fuel Pump Ground — On the driver's side frame rail, near the wheel well. There are typically two grounds in this area; the top one is often for the fuel pump circuit.. This is the primary ground for the fuel pump module, including the sending unit. Corrosion or looseness at this point can cause a floating ground, leading to erratic voltage readings and triggering P0461.
- G110 / G114 — G110 (Body Harness) and G114 (Engine Harness) are key ground points on the 2019-2020 models, typically located on the engine block or nearby chassis points.. GM issued an Engineering Information bulletin (PIE0548) to gather data on loose connections at these specific grounds, which can cause various electrical issues. While not directly for the fuel pump, a poor engine or body ground can affect the reference voltage for multiple sensors.
- Fuel Pump Module Connector — On top of the fuel tank, accessible by dropping the tank or lifting the truck bed.. The signal (purple wire) and ground (black with white stripe on some GMs) for the fuel level sensor pass through this connector. It is the primary point to test voltage and resistance directly at the sending unit.
Real Owner Repair Stories
- DuramaxDiesels.com forum user 'Coop' (2020 Silverado Duramax Crew Cab SB) — Fuel gauge dropped to empty and would not read correctly.
❌ Tried (didn't work) Clearing the P0461 code initially did not fix the gauge.
✅ What actually fixed it The fuel gauge began working normally on its own after approximately five engine starts after the code was cleared, indicating an intermittent, self-correcting fault.
OEM Part Supersession History
84505349, 84505355, 84715866→84715868— Standard part consolidation and potential minor revisions for improved reliability or manufacturing.
Heads up: This part is for standard bed trucks ('without 8 ft box'). A different part number is used for long bed models.
Model Year Variations Within This Range
- 2022 (Refresh): The 2022 model year introduced a significant interior refresh with a new, fully digital instrument cluster on LT trims and above. While the underlying P0461 code logic in the ECM is the same, diagnosing issues between the cluster and ECM may differ due to the new digital architecture. A gauge sweep test remains a valid diagnostic step.
Diagnostic Flowchart
Other Known Issues on This Vehicle
Issues unrelated to this code that are worth knowing about as an owner of this generation:
- V8 Engine Lifter Failure (AFM/DFM) 🔴 High — Widespread on 5.3L (L84) and 6.2L (L87) V8s, particularly 2021 models. Can occur at low mileage (under 50k miles), leading to misfires, ticking noises, and potential catastrophic engine damage. (Ref: TSB PIP5776G, 15-06-01-002L)
- 8-Speed Automatic Transmission Shudder/Hard Shift 🟠 Medium — Common on 2019+ models with the 8-speed transmission. Owners report shuddering at highway speeds (like driving over rumble strips) and harsh 1-2 shifts. Often linked to torque converter issues or contaminated fluid. (Ref: TSB 18-NA-355 (recommends fluid flush))
- Infotainment System Glitches (Black Screen, Freezing) 🟡 Low — Frequently reported across 2019-2022 models. Symptoms include the screen going black, freezing, random reboots, and unresponsive touch controls. Often a software issue that can sometimes be fixed with a reset or dealer update.
- Rear Sliding Window Leaks 🟡 Low — Owners of 2019-2022 Crew Cab models have reported water leaking through the frame of the power sliding rear window, especially after rain or car washes, potentially leading to water stains on the headliner.
Used vs. New Parts: Buying Guide for This Vehicle
When a used part is the smart pick: A used part is generally not recommended for this repair. The fuel level sensor is a wear item, and the fuel pump has a finite lifespan. The labor to access the module is significant, so installing a used part with unknown history carries a high risk of premature failure, forcing you to do the job twice.
Donor-vehicle mileage cap: roughly under 20000 miles for the part to have meaningful remaining life.
What to inspect on the donor part:
- Verify the part is from a low-mileage, late-model wreck.
- Inspect the electrical connector for any signs of corrosion, melting, or damaged pins.
- Ensure the float arm is not bent and moves freely without binding.
- Check that the plastic housing of the module is not cracked or damaged.
OEM-only on this vehicle (don't cheap out):
- Fuel Pump Module Assembly
Aftermarket brands forum-validated for this vehicle:
- ACDelco (OEM)
- Delphi
- Bosch
Brands owners have reported issues with on this vehicle:
- Unbranded, 'white-box' parts from online marketplaces are a significant gamble due to inconsistent quality control. Given the labor involved, saving a small amount on the part is not worth the risk of early failure.
Real Owner Stories
Aggregated from forums and TSBs cited above. Mileages and costs reflect what owners reported in those sources.
2020 Silverado Duramax
Symptoms: The fuel gauge dropped to empty and the Check Engine Light came on with code P0461.
What fixed it: The issue resolved itself. After the owner cleared the code, the fuel gauge began working normally again after approximately five engine starts, suggesting an intermittent fault.
Source hint: DuramaxDiesels.com: A thread titled 'fuel gauge to empty 2020 Silverado Duramax...'
Related OBD-II Codes
Frequently Asked Questions
My fuel gauge is acting up on my 2020 Silverado, but the Check Engine Light isn't on. Could it still be a P0461 issue?
Is it better to replace just the fuel level sensor or the whole fuel pump module for a P0461 code?
My truck has been difficult to fill with fuel lately, with the pump clicking off early. Is this related to my P0461 code?
I've inspected the wiring on top of the fuel tank and it looks clean. What's the next diagnostic step?
Can a bad ground connection really cause the fuel gauge to be so erratic on my Silverado?
Does this P0461 problem also affect the GMC Sierra or other GM SUVs?
Helpful Videos

Used OEM Parts in Stock




New Aftermarket Parts Available


The information in this article is provided for general reference and educational purposes only. Vehicle specifications, procedures, and part compatibility can vary by production date, trim level, and region. Always consult your vehicle's factory service manual and verify part numbers before purchasing or performing repairs. Safety-critical components such as airbags, seat belts, and braking systems should be installed by a qualified professional.
- Chevrolet Silverado:
- 🎬 Helpful Videos
- 🛍️ Shop This Part
- What's Unique About the 2019-2022 Chevrolet Silverado
- Symptoms You May Notice
- Most Likely Causes
- Rare But Worth Checking
- Diagnosis Steps
- Parts You'll Likely Need
- Technical Service Bulletins (TSBs) & Recalls
- Platform-Specific Known Issues
- Mechanic-Grade Diagnostic Values
- Scan Tool Commands That Help
- Wiring & Ground Locations
- Real Owner Repair Stories
- OEM Part Supersession History
- Model Year Variations Within This Range
- Diagnostic Flowchart
- Other Known Issues on This Vehicle
- Used vs. New Parts: Buying Guide for This Vehicle
- Real Owner Stories
- 2020 Silverado Duramax
- Related OBD-II Codes
- Frequently Asked Questions
- 🎟️ Get 5% Off