

P0335 on 2009-2016 Audi A4 2.0T: Crankshaft Sensor Failure Causes and Fixes
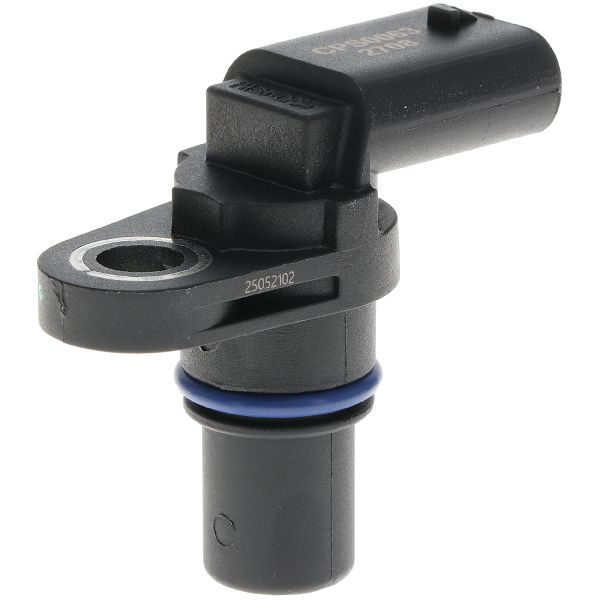
For a 2009-2016 Audi A4 with a P0335 code, the most likely cause is a failed crankshaft position sensor, also known as the engine speed sensor (G28). The failure is often heat-related, causing no-start conditions when the engine is warm. Expect to pay $80-$120 for an OEM Bosch sensor and face a difficult, tight-access replacement requiring long extensions and a swivel joint.
- P0335 on your A4 almost always means the crankshaft position sensor (G28) has failed.
- The primary symptoms are the engine cranking but not starting, or stalling unexpectedly while driving.
- The correct replacement part is OEM number 06H906433D; Bosch is a trusted OEM brand.
- Replacement is a difficult DIY job due to the sensor's very tight location. Be prepared with long extensions, a T30 Torx bit, and a universal/swivel joint.
- Do not continue to drive the vehicle, as it can stall at any time, creating a serious safety hazard.
What's Unique About the 2009-2016 Audi A4

On the 2.0T EA888 engine in the B8 generation A4, this is a very common failure part. The sensor, which Audi calls the Engine Speed Sensor (G28), is notoriously difficult to access. It is located low on the driver's side of the engine block, near the transmission bell housing and tucked behind the oil filter housing. While the failure itself is a straightforward sensor burnout, the replacement job is challenging due to the tight quarters. Access is typically achieved from above using a combination of long extensions (around 24 inches) and a swivel/wobble socket for the single retaining bolt. Some technicians prefer access from below, which requires removing the belly pan and potentially the oil filter for a clearer path.
Generation note: This guide covers the entire Audi A4 B8 generation (2009-2016), which includes the pre-facelift (B8) and facelift (B8.5) models. The 2.0T EA888 engine (Gen 2) and the location of the crankshaft position sensor are consistent across this entire year range, so the causes and fixes are the same. The issue is also shared with other platform mates using the same engine.
Symptoms You May Notice
- Engine cranks but will not start
- Intermittent stalling, especially after the engine has warmed up (heat-soak failure)
- Engine shuts off while driving
- Tachometer needle drops to zero while the engine is still physically turning during a stall event
- Rough or unstable idle
- Hesitation or stumbling during acceleration
- Illuminated Check Engine Light (CEL/MIL)
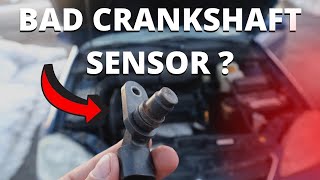
- Illuminated Electronic Power Control (EPC) light 🎬 See a visual breakdown of common bad crankshaft sensor symptoms.
- Replacing the camshaft position sensors. While related to timing, a cam sensor fault will typically set a different code (like P0340-P0344).
- Replacing spark plugs or ignition coils. While symptoms like misfiring can overlap, a complete loss of the crank signal (0 RPM on scanner) is unique to the P0335 code.
- Assuming a timing chain issue. While P0016 (crank/cam correlation) can appear with P0335, P0335 alone is almost never caused by a timing chain. If P0016 is also present, timing chain health should be investigated, but the crank sensor circuit should be fixed first.
Most Likely Causes

- Failed Crankshaft Position Sensor (G28) 🔴 High Probability The sensor is located in a high-heat area of the engine bay, low on the block near the exhaust and transmission. Years of intense heat cycles cause the internal electronics or magnet to degrade and eventually fail, often presenting as a 'no-start when hot' condition.
How to confirm: Using a scan tool, check for an RPM signal in the live data screen while cranking the engine. If the RPM reads '0' while the engine is turning over, the sensor or its circuit is faulty. You can also test the old sensor's resistance with a multimeter; an open circuit (infinite resistance) or a value far outside the manufacturer's specification confirms failure. A definitive test involves using an oscilloscope to check for a proper square wave signal from the sensor.
Typical fix: Replace the crankshaft position sensor.
Est. part cost: $30-$120 - Wiring Harness or Connector Damage 🟡 Medium Probability The wiring harness runs low in the engine bay and can be susceptible to heat damage from the exhaust manifold or catalytic converter, causing insulation to become brittle and crack. Oil leaks from higher up (e.g., valve cover gasket) can also saturate the wiring, leading to degradation. The connector itself can also become corroded or have pins back out.
How to confirm: Visually inspect the entire length of the sensor's wiring harness from the sensor to the main engine harness. Check for brittle or cracked insulation, chafing, melting, or oil saturation. Unplug the connector and inspect for green/white corrosion or bent/loose pins. Perform a continuity test on the wires from the sensor connector to the ECM plug if no visual damage is found.
Typical fix: Repair the damaged section of wire using solder and heat shrink, or replace the connector pigtail. Clean any corrosion from the connector terminals with an electrical contact cleaner.
Est. part cost: $10-$40
Rare But Worth Checking
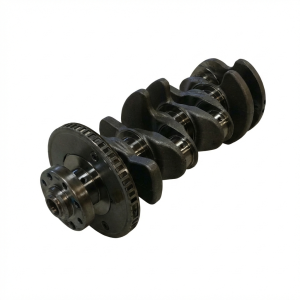
- Damaged Reluctor Ring: The sensor reads teeth on a reluctor ring (or a sensor wheel) attached to the crankshaft. While very rare, this ring can be damaged, have a tooth break off, or shear its keyway, which would cause an erratic or nonexistent signal. An Audi TSB for a different engine (2.5L TFSI) notes that a damaged sensor wheel can cause similar codes (P0321), suggesting it's a plausible, though unlikely, failure mode.
- Failing Engine Control Module (ECM): In extremely rare cases, the fault can be internal to the ECM itself, such as a failed driver circuit for the sensor. This should be the absolute last consideration after all other possibilities, including wiring continuity back to the ECM connector, have been exhaustively tested by a professional.
Diagnosis Steps

- Connect an OBD-II scanner (like VCDS or OBDeleven for VAG-specific data) and confirm P0335 is the primary code. Note any other codes, especially P0322 or P0016.
- Access the scanner's live data stream and monitor 'Engine RPM' while cranking the engine. A solid '0' RPM reading during cranking is a strong indicator of a faulty crank sensor circuit.
- Safely raise and support the vehicle on jack stands to access the sensor from below, or prepare for access from above.
- Locate the sensor on the driver's side of the engine block, near the transmission bell housing, just above the oil pan and behind the oil filter.
- Thoroughly inspect the sensor's electrical connector and wiring harness for any signs of damage, melting, oil contamination, or loose connections.
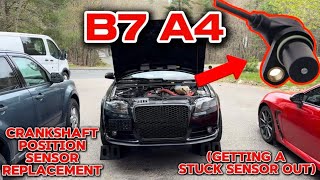
- If wiring appears intact, the next step is to replace the crankshaft position sensor. It is held in by a single T30 Torx bolt. 🎬 Watch this walkthrough for replacing the sensor on a B8 A4.
- Pro Tip: Use a very long extension (24"+), a universal swivel joint, and a magnetic socket or tape to secure the bolt during removal and installation to prevent dropping it.
- If a new sensor does not resolve the issue, perform circuit integrity tests on the wiring harness using a multimeter to check for 5V reference, ground, and signal continuity back to the ECM.
- After the repair, clear the fault codes. Some vehicles may require a 'crankshaft position sensor relearn procedure,' which can be done with an advanced scan tool, though it is not always necessary for this platform. 🎬 Learn how to perform a crankshaft position sensor relearn procedure.
- Perform a test drive, allowing the engine to reach full operating temperature to confirm the fix, especially if the symptom was heat-related.
Parts You'll Likely Need

- Crankshaft Position Sensor (Engine Speed Sensor G28)
(OEM #06H906433D)— This sensor is the most common failure point for the P0335 code due to wear and tear from heat cycles. The part number 06H906433D supersedes previous versions like 06H906433C.
Trusted brands: Bosch (OEM), Continental/VDO, Delphi, NTK
OEM price range: $75-$110
Aftermarket price range: $25-$80 - Crankshaft Sensor Retaining Bolt
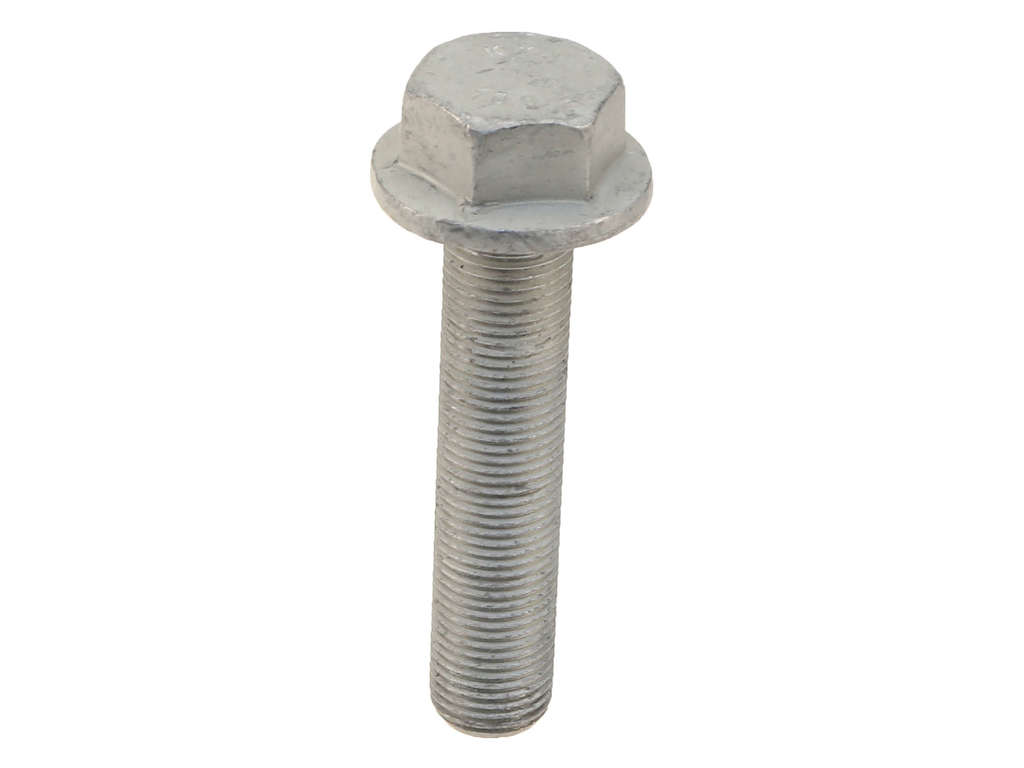
(OEM #N10751201 or N10029205)— This small T30 Torx bolt is notoriously easy to drop and lose in the engine bay during replacement. It is highly recommended to have a new one on hand. Part numbers may vary slightly by specific application.
Trusted brands: Genuine Audi/VW
OEM price range: $1-$5
Aftermarket price range: $1-$3
Related Codes That Often Appear With This One
- P0322 — This is a VAG-specific code for 'Ignition/Distributor Engine Speed Input Circuit - No Signal,' which is functionally identical to P0335 and points to the same G28 sensor failure.
- P0016 — This code indicates a 'Crankshaft/Camshaft Position Correlation' error. While it can appear with P0335, it more often points to a stretched timing chain. However, an intermittent or failed crank sensor signal makes it impossible for the ECM to verify correlation, potentially triggering P0016 as a secondary fault.
Technical Service Bulletins (TSBs) & Recalls
- While no TSB directly addresses P0335 on the 2.0T EA888, Audi TSB 2072326/1 for the 2.5L TFSI engine discusses similar codes (P0321) caused by a damaged sensor wheel, confirming the diagnostic possibility of reluctor ring issues.
Platform-Specific Known Issues
- The location of the sensor makes replacement extremely difficult for DIYers. It is deep in the engine bay, and access requires working 'blind' from above with long extensions and a swivel socket, or from below after removing the undertray and possibly the oil filter.
- The single retaining bolt (T30 Torx) can be difficult to remove without the correct tools and is very easily dropped into the subframe or engine bay abyss. A magnetic tool is highly recommended.
- The sensor itself can become brittle from heat and break apart during removal, leaving the lower portion stuck in the engine block. This requires careful extraction with picks or other tools.
Mechanic-Grade Diagnostic Values
- Crankshaft Position Sensor (G28) Supply Voltage — expected: Approximately 5.0 V at the sensor connector with key on, engine off.. Failure: No voltage or significantly lower voltage points to a wiring issue or a problem with the ECM's 5V reference circuit.
- Crankshaft Position Sensor (G28) Resistance — expected: Consult a vehicle-specific repair manual. A general test involves checking resistance between terminals 2 and 3 of the sensor's harness connector.. Failure: A resistance value outside the specified range (e.g., an open or short circuit) indicates a failed sensor.
- VCDS Live Data - Engine Speed — expected: While cranking, should show ~200-300 RPM. At idle, should be stable around 700-850 RPM.. Failure: A reading of '0' RPM while the engine is physically cranking is a definitive sign of no signal from the G28 sensor or its circuit.
Scan Tool Commands That Help
- VCDS (VAG-COM): Engine -> Measuring Blocks (Function 08) — Use this to monitor live data from the G28 sensor. Check groups 001 through 005 for 'Engine Speed (RPM)'. A value of 0 while cranking confirms a lack of signal.
- Advanced Scan Tool (VCDS, ODIS, etc.): Crankshaft Position Sensor Relearn/Adaptation — This is generally NOT required on the EA888 Gen 2 engine after sensor replacement. However, if the engine runs rough or sets correlation codes (like P0016) after a new sensor is installed, a relearn procedure may be attempted. This typically involves letting the engine idle to operating temperature, followed by specific drive cycles or a guided function in the scan tool.
Wiring & Ground Locations
- G12 (or similar) — Located on the left rear of the engine compartment, often on the firewall.. This is a primary ground point for multiple engine components, including the ECM. A loose or corroded ground here can cause a host of intermittent electrical issues, including sensor signal problems.
- G18 — Located on the left rear of the engine, often near the ignition coils on the 2.0T engine.. This ground is specifically for the ignition coils. While not directly tied to the crank sensor, a bad ground here can cause symptoms (misfires, rough running) that could be confused with a P0335 fault.
- G28 Sensor Connector — On the sensor itself, low on the driver's side of the engine block near the bell housing.. The 3-pin connector provides power, ground, and signal. Pin 1 typically receives ~5V reference, Pin 2 is the signal wire to the ECM, and Pin 3 is the ground. Testing voltage and continuity at these pins is a key diagnostic step.
Real Owner Repair Stories
- Forum User Report (2013 Audi A4 2.0T) — Car would crank but not start, threw P0335 and EPC light. Tachometer showed 0 RPM during cranking.
❌ Tried (didn't work) Replaced the crankshaft position sensor (G28) with a new OEM Bosch part. The problem persisted immediately after replacement.
✅ What actually fixed it The wiring harness leading to the crankshaft position sensor was found to be damaged. An oil leak from the valve cover above had saturated the harness over time, causing the insulation to degrade and the wires to short against each other near the connector. Repairing the damaged section of the wiring harness and cleaning the oil residue resolved the P0335 code.
OEM Part Supersession History
06H906433B, 06H906433C→06H906433D— Revisions to improve sensor accuracy, durability, and resistance to heat-related failures.
Heads up: While all listed part numbers should be physically compatible, it is strongly recommended to use the latest revision (06H906433D) to benefit from the engineering improvements. Some aftermarket versions may not have the correct internal components, leading to weak signals or premature failure.
Model Year Variations Within This Range
- 2009-2016: The B8 platform (2009-2012) and B8.5 facelift (2013-2016) both primarily used the EA888 Gen 2 engine in North America. While there were minor revisions to engine components and software over the years, the crankshaft position sensor (G28), its location, and the common failure mode remain consistent across the entire generation for the 2.0T engine.
Diagnostic Flowchart
Real Owner Stories
Aggregated from forums and TSBs cited above. Mileages and costs reflect what owners reported in those sources.
2010 Audi A4 Avant 2.0T — 112000 miles
Symptoms: Sputtering at stoplights, refusing to restart after warming up, stalling at red lights, and a solid check engine light.
What fixed it: Replaced the crankshaft position sensor.
Source hint: 2010 Audi A4 Crankshaft Position Sensor: Real-World Fixes - AliExpress
2012 Audi A4 2.0T
Symptoms: Car would start fine when cold, but after driving for 20 minutes it would take 3-5 attempts to restart; engine would crank but not fire. Ran rough for 10-15 seconds after starting. Check engine light came on with code P0335.
What fixed it: Replaced the sensor with part number 03C906433A.
Source hint: AliExpress Article
Related OBD-II Codes
Frequently Asked Questions
Is there a specific TSB for the P0335 code on my 2009-2016 Audi A4 2.0T?
Why does my A4 only stall or refuse to start when the engine is warmed up?
How difficult is it to replace the crankshaft position sensor on the B8 A4 myself?
What tools are required to remove the G28 sensor on this engine?
My tachometer needle drops to zero while the engine is stalling. Is this related to P0335?
Do I need to perform a relearn procedure after replacing the sensor on my A4?
Helpful Videos


Used OEM Parts in Stock
New Aftermarket Parts Available

The information in this article is provided for general reference and educational purposes only. Vehicle specifications, procedures, and part compatibility can vary by production date, trim level, and region. Always consult your vehicle's factory service manual and verify part numbers before purchasing or performing repairs. Safety-critical components such as airbags, seat belts, and braking systems should be installed by a qualified professional.
- Audi A4:
- 🎬 Helpful Videos
- 🛍️ Shop This Part
- What's Unique About the 2009-2016 Audi A4
- Symptoms You May Notice
- Most Likely Causes
- Rare But Worth Checking
- Diagnosis Steps
- Parts You'll Likely Need
- Related Codes That Often Appear With This One
- Technical Service Bulletins (TSBs) & Recalls
- Platform-Specific Known Issues
- Mechanic-Grade Diagnostic Values
- Scan Tool Commands That Help
- Wiring & Ground Locations
- Real Owner Repair Stories
- OEM Part Supersession History
- Model Year Variations Within This Range
- Diagnostic Flowchart
- Real Owner Stories
- 2010 Audi A4 Avant 2.0T — 112000 miles
- 2012 Audi A4 2.0T
- Related OBD-II Codes
- Frequently Asked Questions
- 🎟️ Get 5% Off