

U0077 on 2015-2019 Chevrolet Silverado 3500HD: Causes and Fixes for Communication Bus Failure
Code U0077 on a 2015-2019 Silverado 3500HD indicates a loss of communication on the Chassis Expansion CAN Bus. The most common cause, cited in GM TSB #PIT5288H, is a pinched wiring harness behind the driver's side of the dashboard. Other frequent causes include a poor ground at location G218 or high resistance in the communication enable circuit under the driver's sill plate (TSB #PIT5457D). Inspecting and repairing these specific wiring locations is the most likely fix before suspecting a faile
- U0077 on a 2015-2019 Silverado 3500HD is a serious network communication error.
- Before suspecting any expensive modules, thoroughly inspect the wiring harness behind the driver's side of the dashboard for pinching, as per GM TSB #PIT5288H.
- Driving with this code is unsafe due to the potential for unpredictable system failures (ABS, Stabilitrak, Power Steering).
- Diagnosis is complex and best left to a professional with experience in automotive network diagnostics.
What's Unique About the 2015-2019 Chevrolet Silverado 3500HD
The K2XX platform, which includes the 2015-2019 Silverado 3500HD, is known for specific vulnerabilities that trigger code U0077. General Motors issued Technical Service Bulletin #PIT5288H identifying that the main dash wiring harness can get pinched between a metal mounting bracket and the truck's body on the left side of the instrument panel. Another common issue is a poor ground connection at a specific point, G218, located behind the driver's side kick panel, where insulation can get trapped under the ground nut during assembly. These specific, documented issues make wiring faults a much higher probability on these trucks compared to other vehicles where a module failure might be more common.
Symptoms You May Notice
- Multiple warning lights on the instrument cluster, such as "Service Stabilitrak", "Service Power Steering", or ABS light.
- Loss of function in systems like power windows (especially rear), radio/touchscreen, or steering wheel controls.
- Instrument cluster display (DIC) going blank or behaving erratically.
- Radio and audio system inoperative.
- A no-start or dead battery condition due to modules not shutting down.
- "No Fob Detect" message on DIC.
- Engine performance issues, such as surging or sluggish acceleration, sometimes accompanied by 5-volt reference codes (P0106, P0697, P2138).
- Replacing the Body Control Module (BCM) or Electronic Brake Control Module (EBCM) without first thoroughly inspecting the dash wiring harness for the known pinched-wire issue (TSB #PIT5288H) and the G218 ground point.
Most Likely Causes
- Pinched or Damaged Dash Wiring Harness 🔴 High Probability As documented in GM TSB #PIT5288H, the dash harness is highly susceptible to being pinched between the left instrument panel (I/P) mounting bracket and the body. This can happen during factory assembly or subsequent service. The damage can be difficult to see without moving the harness.
How to confirm: Visually inspect the wiring harness located behind the driver's side dash fuse panel cover. This requires looking up from underneath the dash. Check for signs of pinching, chafing, or damage where the harness passes the metal I/P mounting bracket, which is near the parking brake pedal assembly. Confirm the harness can move freely away from the bracket.
Typical fix: Loosen the I/P mounting bracket bolts, free the harness, and carefully open the loom to inspect individual wires. Repair any damaged wires by soldering and using heat-shrink tubing. Reroute the harness to prevent future damage and secure it away from the pinch point.
Est. part cost: $5-$20 for wiring repair supplies. - Poor Ground Connection at G218 🔴 High Probability GM TSB #PIT5405C and numerous owner reports identify a poor ground at location G218 as a cause for a multitude of electrical issues, including communication codes. During assembly, the dash insulator mat can get trapped between the ground eyelet and the body stud, preventing a solid connection.
How to confirm: G218 is located on the driver's side, behind the kick panel/trim near the A-pillar. After removing the trim, locate the ground stud with one or more wires attached. Check if the nut is loose or if insulation material is caught underneath the wire terminal.
Typical fix: Remove the 10mm nut, pull the wire terminal(s) off the stud, and trim away any interfering insulation mat. Clean the contact surfaces of the terminal and the body, then reinstall the terminal directly against the metal body and securely tighten the nut.
Est. part cost: $0-$10 for basic tools and cleaning supplies. - Failed Control Module ⚪ Low Probability Any module on the Chassis Expansion bus (e.g., EBCM, PSCM, BCM, Airbag Module) can fail internally. A failed module can either stop communicating or, more disruptively, flood the network with corrupt data, bringing the entire bus down.
How to confirm: This requires a high-end scan tool to see which modules are not communicating. A technician can then unplug modules on the affected bus one by one. If communication is restored to the other modules after unplugging a specific one, that module is the source of the fault.
Typical fix: Replace the failed module. The new module will require programming to the vehicle's VIN using dealership or equivalent software (GM SPS).
Est. part cost: $400-$900 depending on the module.
Rare But Worth Checking
- High Resistance in Communication Enable Circuit (Circuit 5986): GM TSB #PIT5457D points to high resistance or an open in the 'Communication Enable' circuit (Circuit 5986) as a cause for communication DTCs, including U0077. The fault is often found in the wiring harness running under the driver's or passenger's sill plate, or where the harness passes near the spare tire crossmember on short wheelbase utilities.
- Faulty Aftermarket Electronics: Improperly installed remote starters, alarms, aftermarket lighting, or audio equipment can tap into CAN bus wires incorrectly, causing interference or shorts that set communication codes.
- Faulty OnStar/Telematics Module: A failing OnStar (Telematics) module can disrupt network communication, causing various electrical issues and codes, including U0077. This is mentioned in owner complaints and forum discussions as a potential cause after more common issues are ruled out.
Diagnosis Steps
- Scan all vehicle modules with a professional-grade scan tool capable of reading manufacturer-specific codes and viewing network status.
- Record all present DTCs. Note which modules are not communicating on the Chassis Expansion Bus.
- Perform a visual and physical inspection. Based on TSB #PIT5288H, the first check should be the wiring harness at the left I/P mounting bracket for pinching. The second check should be the G218 ground behind the driver's kick panel for trapped insulation.
- If no wiring damage is found, check the condition of the battery and verify all major power and ground connections are clean and tight. Low system voltage can cause widespread communication faults.
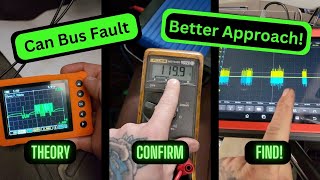
- Perform a CAN bus resistance test at the DLC. With the battery disconnected, measure resistance between Pin 12 (Chassis CAN Low) and Pin 13 (Chassis CAN High). A healthy network should read approximately 60 ohms. A reading of 120 ohms indicates an open circuit or that one of the two terminating resistors is not being seen. A reading near 0 ohms indicates a short between the two CAN lines.
- The two 120-ohm terminating resistors for this bus are located in the Electronic Brake Control Module (EBCM) and the Inflatable Restraint Sensing and Diagnostic Module (Airbag Module/SDM).
- If resistance is abnormal, unplug modules on the bus one by one to isolate the faulty component or section of wiring. For example, unplugging the EBCM and re-testing should result in a reading of 120 ohms if the rest of the circuit and the SDM's resistor are intact.
- If resistance is correct but communication is still down, use an oscilloscope on pins 12 and 13 to visually inspect the data signal for corruption, shorts to power, or shorts to ground while wiggling harnesses.
Parts You'll Likely Need
- Wiring Repair Supplies — To fix the most common causes: a pinched/chafed wire in the dash harness or repairing a wire under a sill plate.
Trusted brands: Tesa (for harness tape), 3M
OEM price range: $10-$30
Aftermarket price range: $5-$20 - Electronic Brake Control Module (EBCM)
(OEM #84524801 (example, verify by VIN))— This is one of the key modules on the chassis CAN bus that contains a terminating resistor. It should only be replaced after confirming it is the faulty component through diagnostic steps.
Trusted brands: ACDelco
OEM price range: $450-$700
Aftermarket price range: $300-$550 - Auxiliary Chassis Control Module
(OEM #85698746 (supersedes multiple previous numbers, verify by VIN))— Another potential module on the bus that could fail. This part number is listed for 2015-2019 Silverado 2500/3500 models.
Related Codes That Often Appear With This One
- U0121 — Lost Communication With Electronic Brake Control Module (EBCM)
- U0126 — Lost Communication With Steering Angle Sensor Module
- U0131 — Lost Communication With Power Steering Control Module (PSCM)
- U0151 — Lost Communication With Restraints Control Module
- U0415 — Invalid Data Received From Electronic Brake Control Module
- C0544 — Steering Wheel Angle Sensor related code
- B144C — Chassis related communication code
- U0028 / U0029 — Vehicle Communication Bus A/B performance codes often set alongside other bus faults.
Technical Service Bulletins (TSBs) & Recalls
- Bulletin #PIT5288H: Addresses a potential pinched wire harness in the left instrument panel causing various communication DTCs, including U0077, and a wide range of electrical symptoms like no-start, blank screens, and loss of various functions.
- Bulletin #PIT5457D: Details how high resistance in the Communication Enable Circuit (5986), often under the driver's sill plate, can cause loss of communication with chassis modules and set codes like U0077.
- Bulletin #PIT5405C: Points to a poor ground at G218 as a cause for numerous electrical issues, including various communication DTCs and symptoms like a blank instrument panel or stalling.
Platform-Specific Known Issues
- Pinched Dash Harness (TSB PIT5288H): A well-documented issue where the main dash harness gets crushed by the left instrument panel mounting bracket, causing shorts or opens in the CAN bus wires. This is the first place to look.
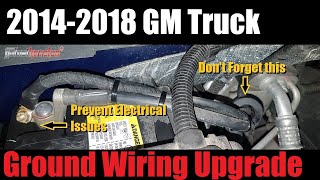
- G218 Ground Fault (TSB PIT5405C): A common factory flaw where sound-deadening insulation gets trapped under the main BCM ground lug (G218) behind the driver's kick panel, causing intermittent and widespread electrical faults.
Mechanic-Grade Diagnostic Values
- Chassis Expansion CAN Bus Resistance — expected: Approximately 60 Ω. Failure: 120 Ω indicates an open circuit or a missing terminating resistor. ~0 Ω indicates a short between the CAN High and Low wires.
- CAN Bus Voltage (Signal Integrity Check) — expected: With key on, CAN High should be ~2.5-3.5V and CAN Low should be ~1.5-2.5V. The signals should mirror each other as seen on an oscilloscope.. Failure: A flat line, or voltage shorted to ground (0V) or power (~5V or 12V) indicates a wiring fault.
- Module Ground Resistance — expected: < 5 mΩ. Failure: High resistance indicates a poor ground connection, which can cause communication errors.
Scan Tool Commands That Help
- GDS2 (Global Diagnostic System 2): Vehicle DTC Information — To perform an initial scan of all modules on the vehicle to see which ones are reporting codes and which are not communicating.
- GDS2 (Global Diagnostic System 2): Module Diagnostics / Bidirectional Controls — To test the functionality of a specific module (like the BCM) by commanding outputs (e.g., turning on lights, operating windows) to verify if the module itself is working, even if it has network issues.
- ACDelco TDS / SPS (Service Programming System): Module Programming/Setup — This is required after replacing a major control module like the EBCM or BCM. The new module must be programmed with the vehicle's VIN and specific configuration files to function correctly.
Wiring & Ground Locations
- Chassis Expansion Bus @ DLC — Pins 12 (CAN Low) and 13 (CAN High) on the vehicle's Data Link Connector (DLC) under the driver's side dashboard.. This is the primary access point for testing the electrical integrity (resistance, voltage, signal) of the entire Chassis Expansion network.
- Terminating Resistor 1 — Internal to the Electronic Brake Control Module (EBCM), located on the frame rail under the driver's side of the vehicle.. The EBCM contains one of the two 120-ohm resistors that terminate the bus. A failure of this module or the wiring to it can cause the entire network to fail.
- Terminating Resistor 2 — Internal to the Inflatable Restraint Sensing and Diagnostic Module (SDM / Airbag Module), typically located under the center console or front seats.. The SDM contains the second 120-ohm terminating resistor. A failure here can also take down the network.
- G218 — Behind the driver's side kick panel, near the A-pillar.. This is a major body ground point. Factory insulation often gets trapped under the ground lug, causing high resistance and a host of electrical and communication problems.
- G312 — At the bottom of the passenger side 'B' pillar.. This ground serves components in the passenger doors. A fault here can cause loss of communication to door modules, potentially contributing to network noise or faults.
Real Owner Repair Stories
- GMSquareBody.com Forum User (2018 Silverado Crew Cab) — Power windows and door locks on the passenger side were not working.
✅ What actually fixed it The user located and cleaned ground terminal G312 at the bottom of the passenger side 'B' pillar, which restored function. - Reddit user comment (Chevrolet Truck (model unspecified)) — U0077 code present.
✅ What actually fixed it A common fix pointed out by another user was to inspect the wiring harness located above the spare tire for chafing or damage. This aligns with GM TSB #PIT5457D.
OEM Part Supersession History
23154721, 23237319, 84074934, 84074964, 84256796, 84609554→85698746— Part consolidation and revision by the manufacturer.
Heads up: The newest part number (85698746) is the correct service replacement for the older numbers on 2015-2019 Silverado 2500/3500 models.
Model Year Variations Within This Range
- 2016-2019: Models from 2016 onward received updated infotainment systems with Apple CarPlay and Android Auto capability. While not directly tied to U0077, a failing Human Machine Interface (HMI) module could potentially disrupt network traffic.
- 2017-2019: The 6.6L L5P Duramax diesel engine was introduced, replacing the previous LML engine. This involved significant powertrain changes, but the underlying K2XX chassis electrical architecture and common U0077 causes (pinched harness, G218 ground) remained consistent.
Diagnostic Flowchart
Other Known Issues on This Vehicle
Issues unrelated to this code that are worth knowing about as an owner of this generation:
- A/C Condenser/Compressor Failure 🔴 High — Very common. Condensers are prone to cracking and leaking refrigerant. Compressors can also fail prematurely. Often occurs between 50,000 and 100,000 miles.
- Transmission Torque Converter Failure (6L80) or Shudder (8L90) 🔴 High — The 6L80 transmission is known for torque converter failures, often before 120,000 miles. The 8L90 transmission is known for a pronounced shudder, which has been addressed by fluid flushes (TSB 18-NA-355) and sometimes requires torque converter replacement. (Ref: 18-NA-355 (for 8-speed shudder))
- Brake Vacuum Pump Failure 🔴 High — Affects many 2014-2018 models, leading to a hard brake pedal and increased stopping distance. Caused by sludge buildup in the pump. (Ref: Recall N192268490 / NHTSA 19V645)
- Leaking Oil/Transmission Cooler Lines 🟠 Medium — The crimped connections on the flexible cooler lines are a common leak point. Often noticed as drips under the front of the vehicle.
- Cracked Radiator 🟠 Medium — Primarily affects 2014-2016 models. Excessive thermal cycles can cause the radiator end tanks to crack and leak coolant. (Ref: PI1513F)
- Roof-Rail Airbag Inflator Rupture 🔴 High — A safety recall was issued for 2015-2016 models because the side curtain airbag inflator could rupture during deployment, sending metal fragments into the cabin. (Ref: Recall 16V381 / NHTSA 21V504000)
Used vs. New Parts: Buying Guide for This Vehicle
When a used part is the smart pick: Used parts are generally not recommended for this repair, with the exception of structural components if needed. For wiring faults, new wire and connectors are inexpensive and reliable. For control modules, the complexity and cost of reprogramming make used parts risky.
Donor-vehicle mileage cap: roughly under 80000 miles for the part to have meaningful remaining life.
What to inspect on the donor part:
- For a used control module (EBCM, BCM), verify the exact part number matches.
- Ensure the donor vehicle was not in a flood or fire.
- Obtain the VIN of the donor vehicle if possible, as it may be needed for programming inquiries.
- Ask for a warranty or return period, as there is a risk the used module cannot be successfully reprogrammed.
OEM-only on this vehicle (don't cheap out):
- Electronic Brake Control Module (EBCM)
- Body Control Module (BCM)
- Inflatable Restraint Sensing and Diagnostic Module (SDM)
Aftermarket brands forum-validated for this vehicle:
- For wiring repairs: 3M, Tesa (harness tape).
- For control modules, ACDelco (OEM) is the only reliable choice.
Brands owners have reported issues with on this vehicle:
- Unknown/unbranded control modules from online marketplaces. These often cannot be programmed or fail quickly. The risk of programming failure is high, and labor for programming is often non-refundable.
Real Owner Stories
Aggregated from forums and TSBs cited above. Mileages and costs reflect what owners reported in those sources.
2014 Silverado
Symptoms: A long list of communication codes including U0077, U0073, and U0140. Issues with the battery and potential failure of the main fuse/distribution box on top of the battery.
What fixed it: Checking the battery, battery cables, and the main fuse/distribution box on top of the battery.
Source hint: gm-trucks.com: 'Communication issues'
2015-2019 Silverado (K2XX Platform)
Symptoms: Intermittent Stabilitrak messages and brake system warnings.
What fixed it: Performing the G218 ground fix by pulling sound-deadening insulation out from under the ground nut behind the driver's kick panel.
Source hint: gm-trucks.com: 'Ground 218 and Service Stabiltrac and Brake message only issue'
Related OBD-II Codes
Frequently Asked Questions
My 2015-2019 Silverado 3500HD is showing 'Service Stabilitrak' and the radio is dead; does TSB #PIT5288H apply?
I'm seeing a 'No Fob Detect' message and my DIC is blank. Could this be a ground issue?
What should the CAN bus resistance be on my Silverado's Chassis Expansion bus?
Can a problem under the driver's door sill plate cause code U0077?
Is it true that the battery can cause U0077 communication codes on these trucks?
Helpful Videos
We Have This Part in Stock



The information in this article is provided for general reference and educational purposes only. Vehicle specifications, procedures, and part compatibility can vary by production date, trim level, and region. Always consult your vehicle's factory service manual and verify part numbers before purchasing or performing repairs. Safety-critical components such as airbags, seat belts, and braking systems should be installed by a qualified professional.
- Chevrolet Silverado 3500HD:
- 🎬 Helpful Videos
- 🛍️ Shop This Part
- What's Unique About the 2015-2019 Chevrolet Silverado 3500HD
- Symptoms You May Notice
- Most Likely Causes
- Rare But Worth Checking
- Diagnosis Steps
- Parts You'll Likely Need
- Related Codes That Often Appear With This One
- Technical Service Bulletins (TSBs) & Recalls
- Platform-Specific Known Issues
- Mechanic-Grade Diagnostic Values
- Scan Tool Commands That Help
- Wiring & Ground Locations
- Real Owner Repair Stories
- OEM Part Supersession History
- Model Year Variations Within This Range
- Diagnostic Flowchart
- Other Known Issues on This Vehicle
- Used vs. New Parts: Buying Guide for This Vehicle
- Real Owner Stories
- 2014 Silverado
- 2015-2019 Silverado (K2XX Platform)
- Related OBD-II Codes
- Frequently Asked Questions
- 🎟️ Get 5% Off