

P1315 Toyota Highlander 2001-2007: Igniter Circuit Malfunction No. 4 Causes and Fixes
On a 2001-2007 Highlander, code P1315 almost always means the ignition coil for cylinder #4 has failed. Cylinder #4 is the middle cylinder on the front bank (closest to the radiator), making this a very easy and common DIY repair. Expect to pay $40-$70 for a quality aftermarket coil and around $90-$120 for an OEM part.
- P1315 on a Highlander V6 means a fault in the ignition coil circuit for cylinder #4.
- Cylinder #4 is the middle cylinder on the front bank, making it very easy to access.
- The most reliable way to diagnose this is to swap the #4 coil with another coil (like #2 or #6) and see if the code follows the coil.
- The fix is almost always a new ignition coil, which is a simple, beginner-friendly DIY job that takes less than 15 minutes.
- Always inspect the spark plug when replacing a coil; a bad plug can destroy a new coil.
What's Unique About the 2001-2007 Toyota Highlander
What makes this code particularly straightforward on the first-generation Highlander V6 is the engine's transverse (sideways) mounting. This layout places cylinder #4 on the front bank of cylinders (Bank 2), right behind the radiator and easily accessible. Unlike the rear cylinders (Bank 1) which are tucked against the firewall, diagnosing and replacing the coil for cylinder #4 requires minimal disassembly and is one of the easiest ignition repairs you can perform on this engine.
Symptoms You May Notice
- Engine misfiring, which may feel like shaking or stumbling, especially during acceleration
- Rough or unstable idle
- Solid or flashing Check Engine Light
- Noticeable loss of engine power
- Reduced fuel economy
- Engine may stall intermittently
- Replacing all six ignition coils when only one has failed. The code P1315 specifically identifies cylinder #4, so shotgunning parts is unnecessary.
- Replacing the fuel injector for cylinder #4. While a bad injector can cause a misfire (P0304), it will not cause the P1315 igniter circuit code.
Most Likely Causes
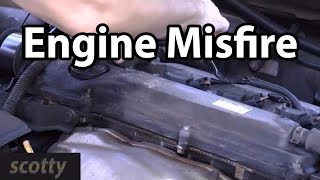
- Faulty Ignition Coil on Cylinder #4 🔴 High Probability Ignition coils are wear-and-tear components that operate in a high-heat, high-vibration environment. Over time, the internal windings or the integrated igniter (which sends the IGF signal) can fail. 🎬 Watch this walkthrough on fixing the P1315 code and resetting the light. This is a very common issue on the MZ-series engines.
How to confirm: Swap the ignition coil from cylinder #4 with the coil from cylinder #2 or #6 (the other front cylinders). Clear the codes and run the engine. If the code changes to P1305 (Cylinder 2) or P1325 (Cylinder 6), the coil is definitively bad.
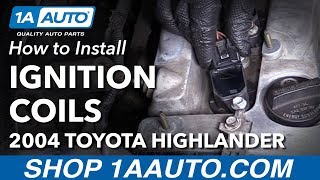
Typical fix: Replace the faulty ignition coil with a new one. Since cylinder #4 is easily accessible, this involves removing one 10mm bolt and an electrical connector. 🎬 Watch: Step-by-step guide to replacing ignition coils on your Highlander.
Est. part cost: $40-$120 - Worn or Fouled Spark Plug in Cylinder #4 🟡 Medium Probability A spark plug with an excessive gap or heavy carbon/oil fouling requires more voltage to create a spark. This extra strain can overheat and damage the ignition coil, leading to its failure. It's also possible for a plug to be faulty right out of the box or fail prematurely.
How to confirm: When the ignition coil is removed, take the extra step to remove the spark plug from cylinder #4. Inspect it for a cracked porcelain insulator, heavy deposits, or a visibly worn electrode. The recommended plugs are typically dual-ground-electrode platinum or iridium types.
Typical fix: Replace the spark plug. It is highly recommended to replace the spark plug when replacing the coil to ensure the new coil is not damaged by a bad plug. For best results, replace all six spark plugs if they are near the end of their service life (typically 60,000-120,000 miles depending on type).
Est. part cost: $5-$15 per plug - Damaged Wiring or Connector ⚪ Low Probability The plastic locking tab on the electrical connector can become extremely brittle with age and break, leading to a poor or intermittent connection. Wires can also chafe or corrode, though this is less common. A ClubLexus user traced a no-start condition with multiple P13xx codes to a bad ground connection for the coils.
How to confirm: If swapping the coil does not move the trouble code, the issue is likely in the harness. Visually inspect the connector for a broken locking tab, pushed-out pins, or corrosion. Wiggle the connector with the engine running to see if it induces a misfire. Check the wiring leading to the connector for any signs of cracking, melting, or physical damage.
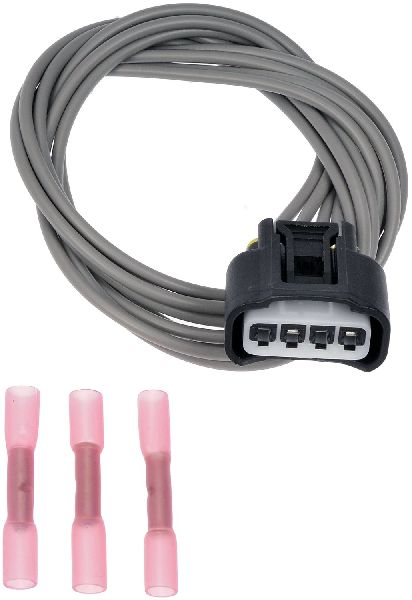
Typical fix: If the connector housing is broken, it can be replaced without cutting wires by de-pinning the old connector and inserting the wires into a new housing. If the wires or terminals are damaged, replace the connector pigtail. The OEM pigtail part number is often 90980-11246 or a compatible replacement like 90980-11885.
Est. part cost: $10-$30 for a new pigtail connector or housing
Rare But Worth Checking
- Faulty Engine Control Module (ECM): This is extremely rare. The ECM should only be considered a potential cause after all other possibilities (coil, plug, wiring, and grounds) have been exhaustively ruled out.
- Crankshaft or Camshaft Position Sensor Issues: While less common for an isolated P1315, a failing crankshaft position sensor can cause erratic misfire detection across multiple cylinders, sometimes triggering various P13xx codes. This would typically be accompanied by other symptoms like stalling or difficulty starting.
Diagnosis Steps
- Identify Cylinder #4: Open the hood and locate the front bank of cylinders between the engine and the radiator. The cylinders on this bank are, from driver's side to passenger's side, #6, #4, and #2. Cylinder #4 is the middle one.
- Perform the 'Coil Swap' Test: Using a 10mm socket, unbolt and unplug the ignition coil from cylinder #4. Do the same for an adjacent coil, like cylinder #6 (to the driver's left). Swap their positions, ensuring they are securely bolted down and plugged in. Be gentle with the connectors as the locking tabs are often brittle.
- Clear Codes and Test Drive: Use an OBD-II scanner to clear the trouble codes. Start the engine and drive for a few minutes, including some light acceleration, to see which code returns.
- Analyze Results: If the code changes to P1325 (Cylinder 6), the ignition coil you moved is faulty and needs replacement. If the code P1315 returns, the problem is not the coil itself but likely the wiring to cylinder #4 or the spark plug.
- Inspect Spark Plug and Connector: If the code did not move with the coil, remove the coil from cylinder #4 again and inspect the electrical connector for damage. Then, remove the spark plug (requires a spark plug socket and extension) and check its condition. A heavily worn or fouled plug can cause this code and should be replaced.
- Check for Power and Ground: If the plug is good and the connector looks fine, use a multimeter to verify the circuit. With the key ON, engine OFF, probe the terminals in the connector. You should find ~12V on one wire (power from EFI relay) and a good ground on another (typically a white wire with a black stripe). The other two wires are the IGT (trigger) and IGF (confirmation) signals from the ECM.
Parts You'll Likely Need
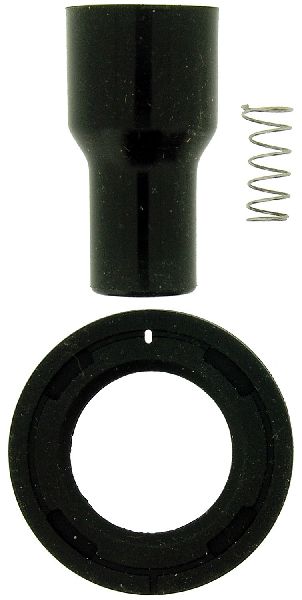
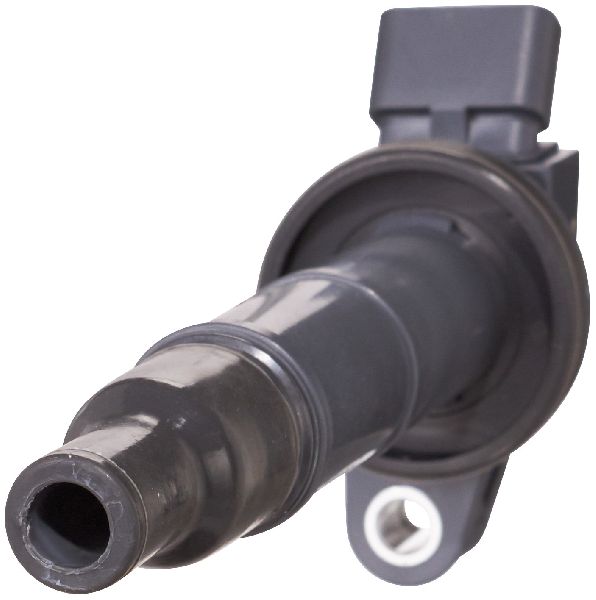
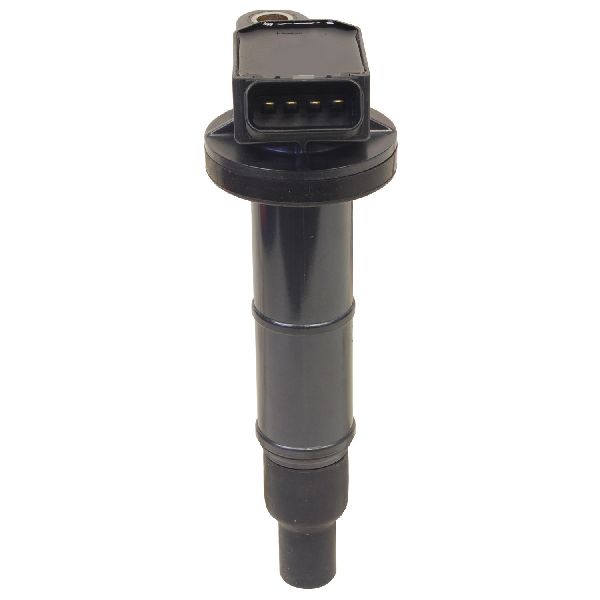
- Ignition Coil (Coil-on-Plug)
(OEM #90919-02234 (for 1MZ-FE 3.0L) or 90919-02246 (for 3MZ-FE 3.3L))— This is the most common failure point for code P1315. The part contains both the coil and the igniter that sends the confirmation signal to the ECM.
Trusted brands: Denso (OEM supplier), NGK, Bosch
OEM price range: $90-$120
Aftermarket price range: $40-$70 - Ignition Coil Connector Pigtail
(OEM #90980-11246 or 90980-11885)— Needed if the original connector's locking tab is broken or if the terminals/wires are corroded or damaged, causing a poor connection.
Trusted brands: Dorman, Standard Motor Products, OEM Toyota
OEM price range: $20-$30
Aftermarket price range: $10-$20
Related Codes That Often Appear With This One
- P0304 — P0304 means 'Cylinder 4 Misfire Detected'. Since a failed ignition circuit (P1315) will prevent the cylinder from firing properly, it will almost always be accompanied by the corresponding misfire code.
Technical Service Bulletins (TSBs) & Recalls
- TSB EG014-04 (Supersedes EG004-02): While not for P1315 specifically, this TSB addresses diagnosing misfires on 1MZ-FE engines. It details a procedure for using a diagnostic tester to confirm which cylinder is misfiring and emphasizes holding engine speed and throttle angle constant to duplicate the condition, which is a useful diagnostic tip.
Platform-Specific Known Issues
- The plastic locking tabs on the ignition coil connectors become very brittle over time due to engine heat cycles. It is extremely common for them to break when unplugging the coil, which can lead to a loose connection and repeat codes if not addressed. Securing the connector with a zip tie can be a temporary field repair, but replacing the connector housing or pigtail is the correct long-term fix.
Mechanic-Grade Diagnostic Values
- Ignition Coil Primary Resistance (1MZ-FE) — expected: 0.70 - 0.94 ohms. Failure: A reading outside this range indicates a faulty coil.
- Ignition Coil Secondary Resistance (1MZ-FE) — expected: 10,800 - 14,900 ohms. Failure: A reading outside this range indicates a faulty coil.
- IGT Signal Voltage at ECM (1MZ-FE) — expected: 0.1 - 4.5 volts while cranking. Failure: Voltage outside this pulsing range suggests a wiring or ECM issue.
- Crankshaft Position Sensor Resistance (1MZ-FE, cold) — expected: 1630 - 2740 ohms. Failure: A reading outside this range indicates a faulty sensor.
- Camshaft Position Sensor Resistance (1MZ-FE, cold) — expected: 835 - 1400 ohms. Failure: A reading outside this range indicates a faulty sensor.
- Ignition Coil Power Supply — expected: Battery Voltage (~12V) with key ON. Failure: No voltage indicates a problem with the EFI relay or wiring.
Hidden / Shadow Codes Worth Checking
- Mode $06 Misfire Data: While not a hidden code, advanced scan tools can access Mode $06 data to view raw misfire counts per cylinder before they are high enough to trigger a P030x code. This can help confirm that cylinder #4 is the only one experiencing issues. (see via Use a scan tool capable of displaying Mode $06 test results.)
Scan Tool Commands That Help
- Toyota Techstream: Active Test — Techstream software allows for 'Active Tests' which can command specific components to operate. While there may not be a direct 'fire coil' command, observing live data for the IGF signal while wiggling wires or commanding other related actuators can help isolate intermittent wiring faults that are difficult to find with a multimeter alone.
Wiring & Ground Locations
- EB — On the left (driver's side) radiator support in the engine compartment.. This is a primary engine bay ground point. While the ignition coils have their own ground wire in the harness (typically white with a black stripe), that circuit ultimately terminates at a major chassis or engine ground. A loose or corroded 'EB' ground could cause intermittent issues across multiple systems, including ignition.
- EC — On the right-hand side of the intake surge tank.. Another key ground point located directly on the engine's intake assembly, close to the ignition coils. Verifying this ground is clean and tight is a crucial step when diagnosing any electrical fault on the engine.
- Ignition Coil Connector Pinout — The 4-pin connector on any of the ignition coils.. Pin 1 is +B (12V Power), Pin 2 is IGF (Ignition Confirmation), Pin 3 is IGT (Ignition Trigger), and Pin 4 is Ground. Knowing this pinout is essential for testing power, ground, and the trigger/confirmation signals between the coil and the ECM.
Real Owner Repair Stories
- YouTube channel 'Driven By Satch' (Toyota Avensis with P1315 (demonstrates the same diagnostic principle)) — Check Engine Light on, rough running.
❌ Tried (didn't work) The video directly diagnoses the code without showing prior failed attempts.
✅ What actually fixed it The fault code P1315 was read, identifying an igniter circuit fault for cylinder #4. The ignition coil on cylinder #4 was replaced, and the code was cleared, resolving the issue.
OEM Part Supersession History
90080-19016→90919-02234— Standard part evolution and supplier changes.
Heads up: These parts are generally interchangeable for the 1MZ-FE engine.90080-19025→90919-02246— Standard part evolution for the 3MZ-FE engine.
Heads up: Part 90919-02246 is for the 3.3L 3MZ-FE and should not be used on the 3.0L 1MZ-FE, and vice-versa.
Model Year Variations Within This Range
- 2001-2003: These years used the 3.0L 1MZ-FE V6 engine. This engine uses ignition coil part number 90919-02234. It is a non-interference engine, meaning a broken timing belt is less likely to cause catastrophic valve/piston damage.
- 2004-2007: These years used the larger 3.3L 3MZ-FE V6 engine. This engine features a larger bore, VVT-i, and an electronic throttle body (ETCS-i). It uses ignition coil part number 90919-02246. The 3MZ-FE is an interference engine, making timely timing belt changes more critical.
Diagnostic Flowchart
Used vs. New Parts: Buying Guide for This Vehicle
When a used part is the smart pick: For this repair, buying a used ignition coil is generally not recommended. They are high-wear electronic components exposed to extreme heat and vibration. A used coil from a junkyard has an unknown history and may fail shortly after installation, forcing you to do the job again. The only exception might be a very low-mileage donor vehicle where the part is nearly new.
Donor-vehicle mileage cap: roughly under 30000 miles for the part to have meaningful remaining life.
What to inspect on the donor part:
- Check for cracks in the plastic housing.
- Ensure the electrical connector pins are not corroded or bent.
- Inspect the rubber boot for tears, swelling, or signs of oil contamination.
- Ask for the donor vehicle's mileage if possible.
OEM-only on this vehicle (don't cheap out):
- Engine Control Module (ECM)
Aftermarket brands forum-validated for this vehicle:
- Denso (OEM supplier)
- NGK
- Bosch
Brands owners have reported issues with on this vehicle:
- Unnamed, no-brand 'white box' parts from online marketplaces should be avoided. While very cheap, they have a high failure rate, often within a few months, and can lead to repeat repairs.
Real Owner Stories
Aggregated from forums and TSBs cited above. Mileages and costs reflect what owners reported in those sources.
1999 Lexus RX300 (1MZ-FE)
Symptoms: Check Engine Light on with diagnostic code P1315.
What fixed it: Following the coil swap diagnostic procedure confirmed a bad #4 ignition coil, which was then replaced.
Source hint: ClubLexus - '1999 RX300, 1315 Diagnostic Code'
2001-2007 Toyota Highlander V6
Symptoms: A repeat P1315 code appeared after a previous repair, caused by a loose connection.
What fixed it: The plastic locking tab on the coil connector had broken. Securing the connector with a zip tie or replacing the connector pigtail resolved the loose connection and the code.
Source hint: Vehicle-Specific Issues section of this article
Lexus RX300 (platform mate)
Symptoms: A no-start condition accompanied by multiple P13xx codes.
What fixed it: The issue was traced to a bad ground connection for the ignition coils. Repairing the ground fixed the problem.
Source hint: Common Causes section (Damaged Wiring or Connector)
Related OBD-II Codes
Frequently Asked Questions
Where is cylinder #4 on my 2001-2007 Highlander's V6 engine?
The plastic clip on my ignition coil connector broke when I unplugged it. Is this a common problem?
I swapped the coil from cylinder #4 with cylinder #6, and now I have code P1325. What does that mean?
Should I replace the spark plug at the same time as the ignition coil for cylinder #4?
Is this P1315 ignition coil issue also found on other Toyota models like the Sienna or Lexus RX300?
What's the best way to test the ignition coil if I suspect it's the cause of P1315?
Helpful Videos


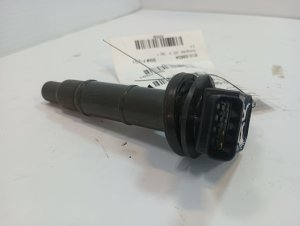
Used OEM Parts in Stock



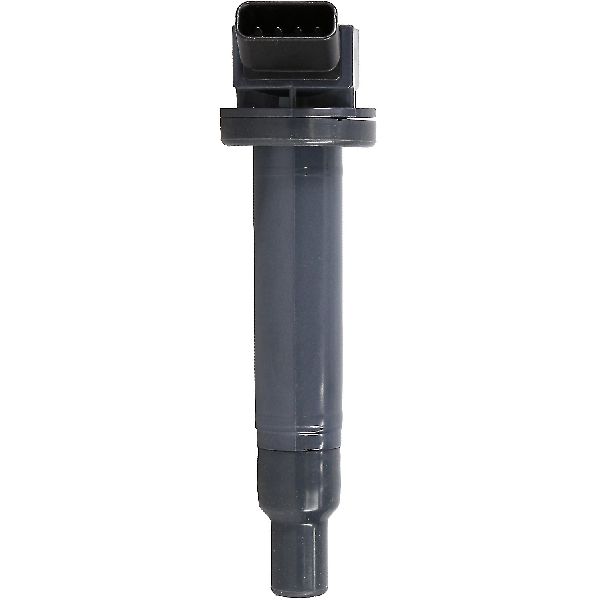
New Aftermarket Parts Available


The information in this article is provided for general reference and educational purposes only. Vehicle specifications, procedures, and part compatibility can vary by production date, trim level, and region. Always consult your vehicle's factory service manual and verify part numbers before purchasing or performing repairs. Safety-critical components such as airbags, seat belts, and braking systems should be installed by a qualified professional.
- Toyota Highlander:
- 🎬 Helpful Videos
- 🛍️ Shop This Part
- What's Unique About the 2001-2007 Toyota Highlander
- Symptoms You May Notice
- Most Likely Causes
- Rare But Worth Checking
- Diagnosis Steps
- Parts You'll Likely Need
- Related Codes That Often Appear With This One
- Technical Service Bulletins (TSBs) & Recalls
- Platform-Specific Known Issues
- Mechanic-Grade Diagnostic Values
- Hidden / Shadow Codes Worth Checking
- Scan Tool Commands That Help
- Wiring & Ground Locations
- Real Owner Repair Stories
- OEM Part Supersession History
- Model Year Variations Within This Range
- Diagnostic Flowchart
- Used vs. New Parts: Buying Guide for This Vehicle
- Real Owner Stories
- 1999 Lexus RX300 (1MZ-FE)
- 2001-2007 Toyota Highlander V6
- Lexus RX300 (platform mate)
- Related OBD-II Codes
- Frequently Asked Questions
- 🎟️ Get 5% Off