

P0455 on 2002-2007 Mitsubishi Lancer: EVAP Large Leak Causes and Fixes
For a 2002-2007 Mitsubishi Lancer, a P0455 code is most often caused by a loose or faulty gas cap. If a new gas cap doesn't fix it, the next most likely culprits are a failed EVAP purge solenoid in the engine bay or a cracked vacuum hose. A smoke test is the most reliable way to find a leak that isn't obvious. A new gas cap costs about $15-$35.
- Always start with the simplest fix: check that your gas cap is tight. If the seal looks old or cracked, replace it.
- A P0455 code will not stop you from driving the car, but it will cause an automatic failure on an emissions test.
- If a new gas cap doesn't solve the problem, the leak is likely a cracked hose or a faulty purge solenoid in the engine bay.
- For leaks that are not obvious, a smoke test performed by a professional is the fastest way to find the exact source of the problem.
- Always verify part numbers with your vehicle's VIN before ordering to ensure correct fitment.
What's Unique About the 2002-2007 Mitsubishi Lancer
On this generation of Mitsubishi Lancer, the EVAP system components are relatively straightforward and common across many vehicles from this era. There are no particularly unique or complex systems to be aware of. The most frequent owner complaints follow a predictable pattern: the issue starts with the gas cap, and if that doesn't resolve it, progresses to checking the purge valve and vacuum lines, often requiring a smoke test to locate the non-obvious leak. In rust-belt states, a rusted-out fuel filler neck is a very common cause of a persistent P0455 after the gas cap has been replaced.
Symptoms You May Notice
- Check Engine Light is on
- A faint to strong smell of gasoline, especially around the rear of the car or after refueling.
- Difficulty refueling, such as the gas pump nozzle clicking off repeatedly before the tank is full.
- Replacing the oxygen (O2) sensors. O2 sensors are not related to the EVAP system.
- Replacing the catalytic converter. This is an exhaust component and is unrelated to fuel vapor leaks.
Most Likely Causes
- Loose, Incorrect, or Faulty Gas Cap 🔴 High Probability The gas cap seal is a simple rubber O-ring that can dry out, crack, or get dirty over time, preventing a proper seal. This is the most common failure point for any EVAP system and the first thing to check.
How to confirm: First, ensure the cap is tightened until it clicks at least once. Inspect the rubber seal on the cap for any cracks, stiffness, or debris. If the seal is damaged or you have an aftermarket locking cap, replace it with an OEM-spec cap. Many owners report fixing the code simply by tightening the cap correctly.
Typical fix: Replace the gas cap.
Est. part cost: $15-$35 - Failed EVAP Purge Solenoid Valve 🟡 Medium Probability This solenoid is an electromechanical valve that opens and closes frequently. Over time, it can get stuck open or closed. If stuck open, it creates a constant vacuum leak that the system interprets as a large leak.
How to confirm: The purge solenoid is located in the engine bay, near the intake manifold. It's a normally-closed valve. Disconnect it and try to blow through it. If air passes, it's stuck open and needs replacement. You can also test it with a hand vacuum pump to see if it holds vacuum when unpowered.
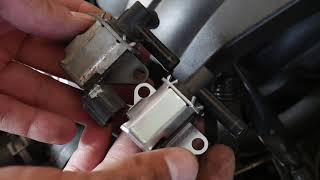
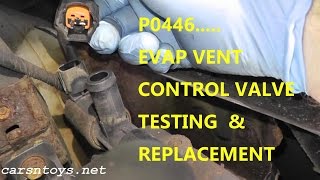
Typical fix: Replace the purge solenoid valve. This often requires a T25 Torx bit. 🎬 See this walkthrough for replacing the purge valve.
Est. part cost: $35-$140 - Cracked or Disconnected EVAP Hoses 🟡 Medium Probability The rubber and plastic vacuum lines in the engine bay and running to the back of the car become brittle with age and exposure to heat cycles. A crack or a disconnected fitting is a common source of a large leak. A hose that is frequently mentioned is the one connecting to the back of the intake manifold.
How to confirm: Visually inspect all accessible EVAP hoses for obvious cracks, breaks, or loose connections. A smoke test is the most effective way to find a leak that isn't visually apparent. This involves injecting pressurized smoke into the EVAP system and looking for where it escapes.
Typical fix: Replace the cracked hose section or reconnect the loose fitting.
Est. part cost: $5-$50 - Rusted or Damaged Fuel Filler Neck 🟡 Medium Probability In areas with road salt, the metal pipe leading to the gas tank can rust through, creating a leak where the gas cap seals or along the pipe itself. This is a well-documented issue on Lancers of this era and will cause a persistent P0455 code that a new gas cap won't fix.
How to confirm: Visually inspect the entire fuel filler neck, from behind the fuel door down to the tank. Look for significant rust, flaking metal, or visible holes. A smoke test will show smoke billowing from the rusted section. Some owners notice gasoline leaking from this area during refueling.
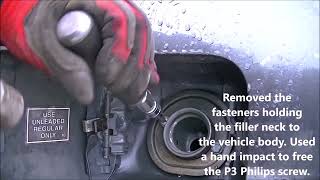
Typical fix: Replace the fuel filler neck. 🎬 Watch: How to replace a rusted fuel filler neck.
Est. part cost: $60-$150 - Failed EVAP Canister Vent Solenoid/Valve ⚪ Low Probability Located near the charcoal canister at the rear of the vehicle, this valve is normally open and closes to seal the system for testing. It can get stuck open due to dirt, debris (like spider webs), or internal failure, preventing the system from sealing.
How to confirm: This valve can be tested with a scan tool that can command it closed. A smoke test will show smoke exiting a stuck-open vent valve. It can also be removed and tested for operation by applying voltage.
Typical fix: Replace the canister vent solenoid.
Est. part cost: $40-$120 - Cracked Charcoal Canister ⚪ Low Probability The plastic housing of the canister, located underneath the rear of the car, can be damaged by road debris or become brittle and crack with age. This was reported by an owner after being rear-ended.
How to confirm: Visually inspect the canister for any cracks or physical damage. A smoke test will clearly show smoke billowing from a crack in the canister body.
Typical fix: Replace the charcoal canister.
Est. part cost: $120-$300
Rare But Worth Checking
- Faulty Fuel Tank Pressure Sensor: While uncommon, the sensor that measures system pressure can fail and give the computer false readings, making it think there is a leak when there isn't one. One owner on an EvolutionM forum suspected this when their sensor voltage was out of the typical 2-3v range. This is usually diagnosed after all other possibilities have been ruled out.
Diagnosis Steps
- Read the Code: Confirm P0455 is the only code present. If other EVAP codes are present (like P0441, P0442, P0449), they can help pinpoint the faulty component.
- Check the Gas Cap: Remove the gas cap, inspect the seal for cracks or damage, and clean any dirt from the seal and filler neck. Reinstall it and ensure it clicks shut. Clear the code and drive for a few days (it may take over 100 miles for the EVAP monitor to run).
- Visual Inspection (Engine Bay): Thoroughly inspect all visible EVAP hoses in the engine bay, especially the lines connected to the purge solenoid and intake manifold. Look for any obvious cracks, disconnections, or brittle sections.
- Test the Purge Solenoid: Locate the purge solenoid in the engine bay. Disconnect the electrical connector and hoses. Attempt to blow through it. If air passes, the valve is stuck open and must be replaced.
- Visual Inspection (Under Vehicle): Safely raise the rear of the vehicle. Inspect the fuel filler neck for severe rust or holes. Check the hoses running to and from the charcoal canister and vent solenoid for cracks or damage. Inspect the charcoal canister itself for any visible cracks.
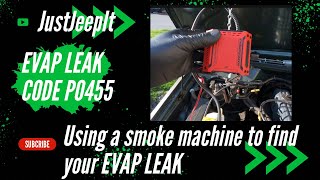
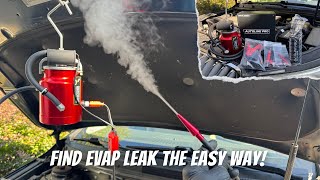
- Perform a Smoke Test: If no obvious faults are found, the most reliable next step is a smoke test. A mechanic will connect a smoke machine to an EVAP service port. The machine fills the system with low-pressure smoke, which will escape from any leaks, making them easy to see. 🎬 Watch: How to find leaks using a smoke machine. This is the definitive way to find cracked hoses, a rusted filler neck, or a cracked canister.
- Test Vent Valve and Canister: During the smoke test, pay close attention to the vent valve (near the canister) and the canister itself. If the vent valve is commanded closed but smoke escapes, the valve is faulty. If smoke comes from the body of the canister, it is cracked.
- Final Checks: If no leaks are found, the issue could be a faulty fuel tank pressure sensor, though this is rare.
Parts You'll Likely Need
- Fuel Cap
(OEM #1711A015)— This is the most frequent cause. The seal fails over time, preventing the system from holding pressure. Always start with this simple fix.
Trusted brands: Genuine Mitsubishi, Stant, Gates, Duralast
OEM price range: $30-$45
Aftermarket price range: $10-$25 - Vapor Canister Purge Solenoid
(OEM #MR507781)— This valve gets stuck open, causing a permanent leak. It's a common failure item after the gas cap. Part number MR988075 is a widely cross-referenced and compatible replacement.
Trusted brands: Genuine Mitsubishi, Dorman, Standard Motor Products (SMP), SKP
OEM price range: $70-$140
Aftermarket price range: $35-$85 - Fuel Filler Neck
(OEM #MN120533 (Verify with VIN))— A very common failure in rust-prone regions. The metal pipe rusts through, creating a large, un-sealable leak. Aftermarket steel replacements are available.
Trusted brands: Genuine Mitsubishi, Spectra Premium, Dorman, Lil-Packaging
OEM price range: $100-$180
Aftermarket price range: $60-$150
Related Codes That Often Appear With This One
- P0442 — P0442 indicates a small EVAP leak. If a small leak worsens over time, it can eventually trigger the P0455 for a large leak.
- P0456 — Similar to P0442, this code indicates a very small leak. It could appear before a component fails completely and causes a large P0455 leak.
- P0441 — This code indicates 'Incorrect Purge Flow'. It can sometimes appear alongside P0455 if the purge valve is malfunctioning or a line is blocked.
Platform-Specific Known Issues
- Rusted Fuel Filler Neck: Owners in the 'rust belt' frequently report that the fuel filler neck rusts completely through, causing a P0455 code that cannot be fixed by a new gas cap. Visual inspection and smoke testing are key to confirming this. Several YouTube videos document this specific repair on 2002-2003 Lancers.
Mechanic-Grade Diagnostic Values
- EVAP Canister Purge Valve Solenoid Resistance — expected: 30 to 38 ohms. Failure: A reading significantly outside this range indicates a faulty solenoid coil.
- EVAP Canister Vent Solenoid Resistance — expected: 48 to 65 ohms. Failure: A reading outside this range suggests the vent solenoid coil is bad.
- Fuel Tank Pressure (FTP) Sensor Voltage — expected: 1.0 - 4.0 volts (during monitor execution). Failure: Voltage stuck low (e.g., 0.3V) or high (5V) can indicate a sensor or wiring fault. The ECM will not run the EVAP monitor if the voltage is outside this range.
Scan Tool Commands That Help
- Mitsubishi M.U.T.-III: Special Function -> Evap Leak Monitor — This is a guided diagnostic test initiated by the scan tool. The ECM automatically raises engine RPM and runs the EVAP system self-test, reporting back a pass or fail status. It's used to confirm a leak exists after a repair or during initial diagnosis.
- Mitsubishi M.U.T.-III: Actuator Test -> Item 15: Evaporative Emission Ventilation Solenoid — This command allows a technician to manually energize (close) the normally-open vent solenoid. It's used in conjunction with a smoke test or hand vacuum pump to confirm the valve is capable of sealing the system on command.
Wiring & Ground Locations
- G4 — At the left rear of the engine compartment, on the shock tower.. This is a primary ground point in the engine bay. A corroded or loose G4 ground could potentially affect the operation of engine-bay-mounted EVAP components like the purge solenoid.
- Powertrain Control Module (PCM/ECM) — Behind the glove box.. The ECM controls and monitors all EVAP solenoids and sensors. Knowing its location is critical for checking harness continuity from the components (e.g., FTP sensor, purge solenoid) back to the computer.
- EVAP Canister Vent Solenoid — Below the left rear of the vehicle, near the charcoal canister.. Knowing the physical location is necessary for visual inspection, testing, and replacement.
- Fuel Tank Differential Pressure Sensor — On the top right side of the fuel tank.. This sensor's location requires accessing the top of the fuel tank, which is important for diagnosis if the sensor is suspected to be faulty.
Real Owner Repair Stories
- Reddit user in r/MechanicAdvice (2002 Mitsubishi Lancer, 115k miles) — P0455 code returned after about 100 miles of driving.
❌ Tried (didn't work) Replacing the gas cap
✅ What actually fixed it The user was advised by another commenter that their similar issue, after trying other parts, was ultimately a faulty Fuel Tank Pressure Sensor. The fix was replacing the sensor, which was accessible through a port under the rear seats. - EvolutionM Forum user (Mitsubishi Lancer (year not specified)) — Persistent P0455 code.
❌ Tried (didn't work) Tightening the original gas cap, Replacing the gas cap with a new one
✅ What actually fixed it The user did not post a final fix, but multiple members strongly advised that the next step must be a smoke test to find the leak, as guessing and replacing parts like the purge valve would be inefficient. This reinforces that after the gas cap, a smoke test is the standard professional procedure.
"I Checked Everything" — The Actual Cause
- In some cases across various makes, a P0455 can be set even if a smoke test shows no leaks. This can happen if the Fuel Tank Pressure (FTP) sensor itself is faulty, sending incorrect data to the ECM. The ECM interprets the faulty signal as a pressure loss (a leak) when the system is actually sealed.
OEM Part Supersession History
MR507781→MR507781 remains the primary part number.— This part has a wide range of vehicle fitment from 2002 through 2018 across different Mitsubishi models like the Lancer and Mirage, so it has remained a consistent part.
Model Year Variations Within This Range
- 2002-2003 vs 2004-2007: The fuel system design changed. Early models (2002-2003) used a return-style fuel system, while later models (like the Ralliart starting in 2004) used a returnless system. While the fuel tanks are physically similar, the fuel pump housing differs to accommodate the return line on the 02-03 models. This doesn't directly change the P0455 diagnosis for common parts like the purge valve or gas cap, but it is a key difference in the overall fuel and vapor handling architecture.
Diagnostic Flowchart
Real Owner Stories
Aggregated from forums and TSBs cited above. Mileages and costs reflect what owners reported in those sources.
Mitsubishi Lancer Evo
Symptoms: The vehicle threw a P0455 code and the owner experienced difficulty refueling shortly after being rear-ended in a collision.
What fixed it: Diagnosed and replaced a damaged (cracked) evaporative emission charcoal canister caused by the physical impact.
Source hint: EvolutionM forum thread titled 'Help.. Evo threw P0455 Code'
2002-2003 Mitsubishi Lancer
Symptoms: Persistent P0455 code that could not be resolved by installing a new gas cap.
What fixed it: Replaced the metal fuel filler neck, which had rusted completely through due to road salt exposure.
Source hint: Vehicle-specific issues section citing owner reports and YouTube repair videos
Related OBD-II Codes
Frequently Asked Questions
I replaced the gas cap on my 2002 Lancer but the P0455 code came back after 100 miles. What should I check next?
Where is the charcoal canister located on the 2002-2007 Lancer?
My Lancer Evo was recently rear-ended, and now I have a P0455 code and trouble refueling. Are they related?
How do I remove and test the EVAP purge solenoid on my Lancer?
Why does the gas pump keep clicking off repeatedly when I try to put gas in my Lancer?
Helpful Videos

We Have This Part in Stock

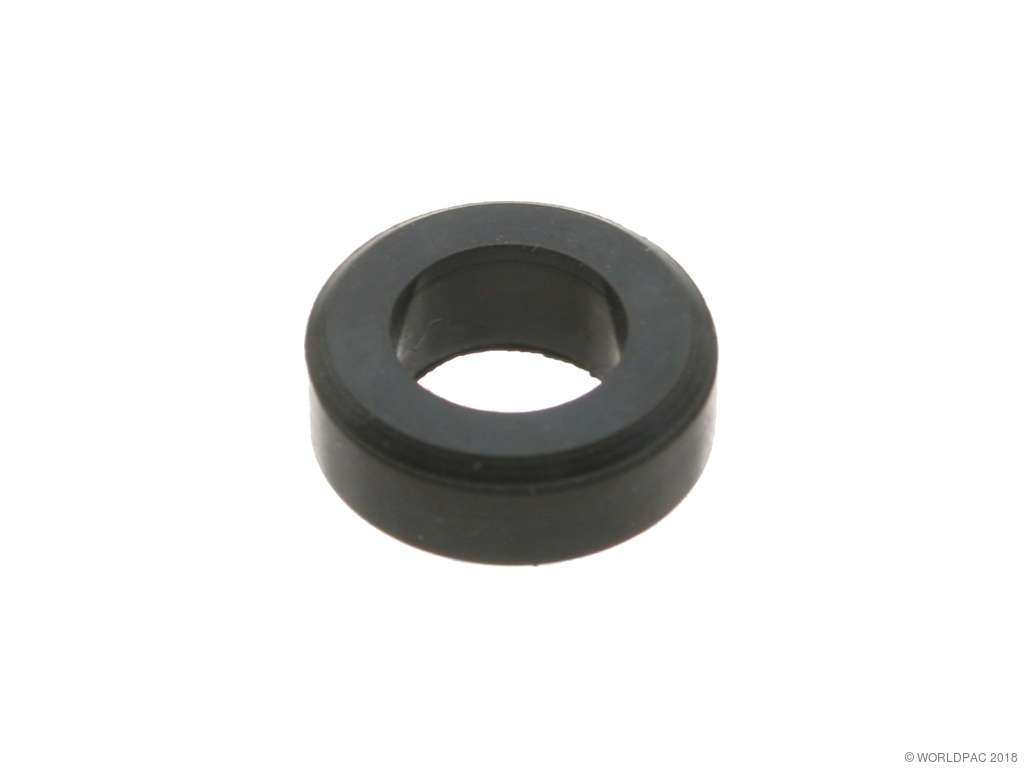

The information in this article is provided for general reference and educational purposes only. Vehicle specifications, procedures, and part compatibility can vary by production date, trim level, and region. Always consult your vehicle's factory service manual and verify part numbers before purchasing or performing repairs. Safety-critical components such as airbags, seat belts, and braking systems should be installed by a qualified professional.
- Mitsubishi Lancer:
- 🎬 Helpful Videos
- 🛍️ Shop This Part
- What's Unique About the 2002-2007 Mitsubishi Lancer
- Symptoms You May Notice
- Most Likely Causes
- Rare But Worth Checking
- Diagnosis Steps
- Parts You'll Likely Need
- Related Codes That Often Appear With This One
- Platform-Specific Known Issues
- Mechanic-Grade Diagnostic Values
- Scan Tool Commands That Help
- Wiring & Ground Locations
- Real Owner Repair Stories
- "I Checked Everything" — The Actual Cause
- OEM Part Supersession History
- Model Year Variations Within This Range
- Diagnostic Flowchart
- Real Owner Stories
- Mitsubishi Lancer Evo
- 2002-2003 Mitsubishi Lancer
- Related OBD-II Codes
- Frequently Asked Questions
- 🎟️ Get 5% Off