

P0325 on 2011-2017 Ford F-150 3.5L EcoBoost: Knock Sensor Circuit Fixes
P0325 on a 3.5L EcoBoost F-150 most often indicates a wiring problem near the knock sensor, not a failed sensor. A Ford TSB points to wire chafing as a common cause. Inspect the harness for damage before spending money on parts. If the sensor is bad, it's a labor-intensive job requiring intake manifold removal.
- P0325 on your F-150 points to an electrical circuit problem with the passenger-side knock sensor.
- Before buying any parts, thoroughly inspect the wiring harness for damage, as this is a known issue on the 3.5L EcoBoost engine.
- Replacing the knock sensor is a difficult, labor-intensive job that requires removing the intake manifold.
- If you must replace one sensor, it is wise to replace both at the same time to save on future labor costs.
- Ignoring this code can lead to poor engine performance, bad fuel economy, and potential long-term engine damage.
What's Unique About the 2011-2017 Ford F-150

The 1st generation 3.5L EcoBoost engine family has a documented issue with wire chafing that can trigger knock sensor codes like P0325. Ford issued Technical Service Bulletin (TSB) 18-2367 for the 3.5L EcoBoost in the Explorer, which points to a wire chafe condition near knock sensor connector C109. While this TSB is not for the F-150 directly, it applies to the same engine family and highlights a known weak point in the wiring harness. This makes a wiring inspection the most critical first step in diagnosis before attempting the difficult replacement of the sensor itself, which is located under the intake manifold.
Generation note: This range covers the 12th generation (2011-2014) and the 13th generation (2015-2017) F-150. The 1st generation 3.5L EcoBoost engine was used until the 2016 model year. The redesigned 2nd generation 3.5L EcoBoost was introduced for the 2017 F-150 model year. While the knock sensors are located under the intake manifold in both generations, the intake design and surrounding components are different, especially with the Gen 2's addition of port injection. Always verify part numbers for your specific model year.
Symptoms You May Notice
- Check Engine Light is on
- Reduced engine power and acceleration
- Decreased fuel economy
- Audible engine pinging or knocking (less common, as the PCM will try to prevent it)
- Engine hesitation, especially under load
- Replacing the knock sensor without first inspecting the wiring harness. Given the known issues with wire chafing and rodent damage on this engine, the wiring is a more likely culprit than the sensor itself. Since the replacement is so labor-intensive, skipping the wiring check can lead to a very expensive and unnecessary repair.
Most Likely Causes

- Damaged Wiring or Connector 🔴 High Probability As noted in TSB 18-2367 for the same engine family, the wiring harness for the knock sensors is susceptible to chafing, especially near connector C109. The engine valley where the sensors and harness reside is a common place for rodents to build nests, leading to chewed wires. The shielded nature of the wiring means improper repairs can fail to resolve the code.
How to confirm: Visually inspect the entire length of the knock sensor wiring harness that is accessible. Check for chafed, melted, or broken wires and examine the connector for corrosion or bent pins. The TSB specifically points to the area near connector C109. If rodent damage is suspected, removal of the intake manifold may be required for a full inspection of the sub-harness in the engine valley.
Typical fix: Repair the damaged section of the wire using a splice kit (Ford P/N 3U2Z-14A088-AB is specified in the TSB) or replace the connector pigtail. Protect the repaired area with convoluted tubing or high-quality electrical tape like Coroplast. If damage is extensive or located in the shielded portion under the intake, the entire knock sensor sub-harness should be replaced.
Est. part cost: $10-$40 - Failed Knock Sensor 🟡 Medium Probability The sensor is located in the valley of the engine, under the intake manifold, where it is exposed to extreme heat cycles which can cause it to fail over time. It is essentially a microphone tuned to specific frequencies, and this harsh environment can degrade its internal components.
How to confirm: After confirming the wiring is intact, the sensor itself can be tested. A qualitative test involves using a multimeter on a low AC voltage or millivolt scale and tapping the engine block near the sensor; a small voltage reading should be generated. Using a scan tool like FORScan, monitor the knock sensor PIDs (KNOCK_1, KNOCK_2); at idle, values should be low (e.g., 20-60 counts) and rise with engine load. A sensor that produces no signal or has erratic readings is likely faulty.
Typical fix: Replace the knock sensor. Since accessing the sensor requires removing the intake manifold, it is highly recommended to replace both knock sensors (Bank 1 and Bank 2) and the wiring harness that connects them at the same time. The bolts should be torqued to specification, which is 20 Nm (15 lb-ft). Over or under-torquing can affect sensor performance.
Est. part cost: $40-$100 per sensor
Rare But Worth Checking
- Powertrain Control Module (PCM) Fault: This is extremely rare. The PCM should only be considered as the cause after all other possibilities, including wiring and the sensor itself, have been exhaustively tested and ruled out. A dealership-level diagnostic tool would be needed to confirm a PCM driver fault.
- Excessive Engine Noise: The knock sensor is a microphone. In rare cases, other mechanical problems (like a failing accessory drive component) can create vibrations that are misinterpreted by the PCM as knock, or that cause the sensor's readings to be out of the expected range, triggering a circuit code. This is uncommon but possible if you hear other noises.
Diagnosis Steps

- Read all diagnostic trouble codes (DTCs) with an OBD-II scanner. Note if other knock sensor codes (P0330, P0327, P0332) are present, as this strongly suggests a harness issue.
- Identify Bank 1. On the 3.5L EcoBoost, Bank 1 is the passenger side of the engine.
- Perform a thorough visual inspection of the knock sensor wiring harness and its connector. Trace the wiring from the firewall as far as you can towards the intake manifold, looking for any signs of chafing, melting, corrosion, or rodent damage. Pay close attention to areas where the harness may rub against other components, specifically near connector C109 as indicated by TSB 18-2367.
- Check for the 5-volt reference signal at the sensor connector with the key on, engine off. Check the main PCM ground, located on the chassis in front of the washer fluid reservoir, for tightness and corrosion.
- Using a scan tool like FORScan, monitor the PIDs for KNOCK_1 and KNOCK_2. At idle, expect to see values between 20-60 counts. If the value for Bank 1 is zero or erratic, it points to a circuit or sensor issue.
- If the wiring and circuit test good, test the knock sensor itself. A qualitative test is to tap the engine block near the sensor while monitoring for a small AC voltage signal with a multimeter.
- If the sensor tests bad, it must be replaced. This requires draining some coolant, and removing the upper and lower intake manifolds and fuel rails. It is strongly recommended to replace both sensors and the sub-harness while the intake is off. Torque the new sensor bolt to 20 Nm (15 lb-ft).
- If both the circuit and sensor test good, the problem may be intermittent or, in very rare cases, a faulty PCM. Check for any other sources of engine noise that could be confusing the sensor.
Parts You'll Likely Need

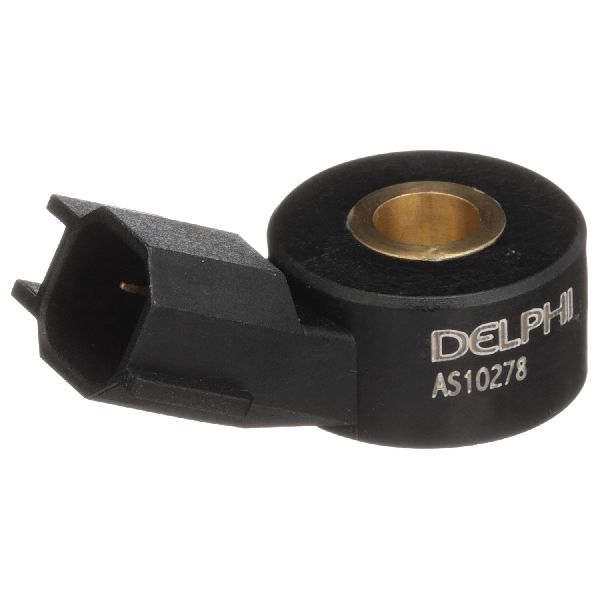
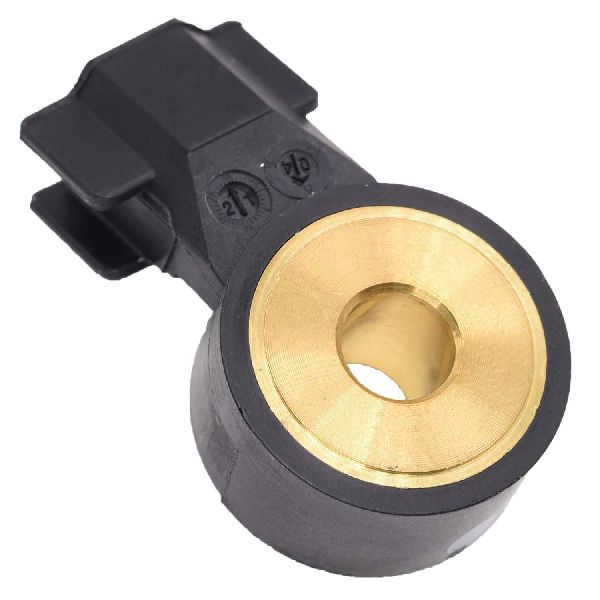
- Ignition Knock Sensor
(OEM #7T4Z-12A699-A)— If the sensor itself has failed, it will need to be replaced. It is recommended to replace both sensors if removing the intake manifold. This part number supersedes previous versions like 7T4Z-12A699-AB.
Trusted brands: Motorcraft, NGK, Delphi, Standard Motor Products
OEM price range: $60-$100
Aftermarket price range: $25-$60 - Intake Manifold Gasket Set
(OEM #BL3Z-9439-A (Upper), BL3Z-9L437-A (Lower))— These are one-time-use gaskets and must be replaced anytime the intake manifold is removed to access the knock sensors.
Trusted brands: Motorcraft, Fel-Pro, Mahle
OEM price range: $40-$70
Aftermarket price range: $20-$40 - Wiring Pigtail or Splice Kit
(OEM #3U2Z-14A088-AB)— If the wiring is damaged at the connector, a new pigtail or a wire splice kit (as listed in TSB 18-2367) is needed for the repair.
Trusted brands: Motorcraft
OEM price range: $20-$40
Aftermarket price range: $10-$20
Related Codes That Often Appear With This One
- P0330 — This is the code for the Bank 2 knock sensor. Since the wiring for both sensors is routed together in the same harness, a single point of damage can often affect both circuits, causing both codes to appear.
- P0327 — This code indicates 'Knock Sensor 1 Circuit Low Input'. It is often seen with P0325 as it also points to a circuit problem, such as a short to ground, and is mentioned in the same TSB.
- P0332 — This code indicates 'Knock Sensor 2 Circuit Low Input'. Like P0327, it points to a circuit fault and can appear alongside P0325 and P0330 if there is a wiring harness issue.
Technical Service Bulletins (TSBs) & Recalls
- TSB 18-2367: Although for the 2016-2017 Explorer, it applies to the 3.5L EcoBoost engine and identifies a wire chafe condition near knock sensor connector C109 as a cause for P0325 and related codes.
Platform-Specific Known Issues
- A key issue for the 3.5L EcoBoost engine is a known wiring harness chafing problem. As stated in TSB 18-2367 for the same engine in the Explorer, an illuminated MIL with DTCs P0325, P0327, P0330, and/or P0332 may be caused by a wire chafe condition near the knock sensor connector C109. This makes wiring inspection a critical first step before considering sensor replacement. Owners on forums frequently report that rodent damage to the soy-based wiring insulation is another common cause for this specific code, as the engine valley provides an attractive nesting spot.
Mechanic-Grade Diagnostic Values
- Knock Sensor Bolt Torque — expected: 20 Nm (15 lb-ft). Failure: Incorrect torque can lead to improper vibration sensing, causing false signals or a lack of signal.
- FORScan Knock Sensor PID Count (at idle) — expected: 20-60 counts. Failure: A value of 0 or erratic, high numbers on one bank at idle can indicate a sensor or circuit fault.
- Knock Sensor Connector Voltage (Key On, Engine Off) — expected: 5 Volts (reference voltage). Failure: Significantly lower or no voltage indicates a wiring or PCM issue.
- Intake Manifold Bolt Torque (Gen 1) — expected: First pass to 80 in-lbs, second pass an additional 90 degrees.. Failure: Improper torque can cause vacuum leaks.
Hidden / Shadow Codes Worth Checking
- PID: KNOCK_1 / KNOCK_2: These are not trouble codes but live data Parameter IDs (PIDs) that show the raw 'noise' count from each knock sensor. They provide more insight than a simple trouble code. (see via Advanced scan tools like FORScan can monitor these PIDs.)
Scan Tool Commands That Help
- FORScan: Reset All Adaptations / Clear DTCs — After completing a repair, use this function to clear the P0325 code. It's important to cycle the ignition off for at least 15-30 seconds after clearing for the reset to be properly registered by all modules.
Wiring & Ground Locations

- Main PCM Ground — On the chassis frame, located just in front of the windshield washer fluid reservoir on the passenger side.. An intermittent or corroded main PCM ground can cause a wide range of erratic sensor readings and codes, including P0325, as it can prevent the PCM from getting a stable reference.
- C109 — The main connector for the knock sensor sub-harness, located near the back of the engine by the firewall.. TSB 18-2367 specifically identifies this area as a potential chafe point for the knock sensor wiring. The connectors here are also noted by forum users as being difficult to access.
- PCM Connector C175E (Bank 2 Pins) — At the Powertrain Control Module (PCM).. For advanced circuit testing, Pin 18 is Knock Sensor 2 (+) and Pin 31 is Knock Sensor 2 (-). This allows for continuity checks from the PCM to the sensor harness.
Real Owner Repair Stories
- f150forum.com user (2017 Ford F-150 3.5L EcoBoost) — Check Engine Light with knock sensor code.
❌ Tried (didn't work) Initial diagnosis pointed to a bad sensor or chewed wires.
✅ What actually fixed it The owner confirmed the cause was rodent-chewed wires. A dealer quoted $1200 for the repair. A second quote to simply repair the wires (not replace the harness) was $700. The owner ultimately retrieved the truck and repaired the chewed wires near the cam position sensor themselves in about an hour. - CARspec auto shop blog (Lexus GX470 (Illustrates a common, transferable issue)) — Check Engine Light with P0325 and P0330.
❌ Tried (didn't work) Simple wire repair is not recommended.
✅ What actually fixed it Technicians removed the intake manifold and found a mouse nest in the engine valley. The rodent had chewed through the knock sensor harness. The shop noted that because the knock sensor wiring is shielded to prevent interference, it cannot be reliably repaired. The entire knock sensor sub-harness was replaced to ensure a permanent fix.
OEM Part Supersession History
7T4Z-12A699-AB→7T4Z-12A699-A— Part revision by manufacturer.
Heads up: The parts are interchangeable, with the 'A' revision being the current replacement for 'AB'.
Model Year Variations Within This Range
- 2011-2016: These model years use the 1st Generation 3.5L EcoBoost. Within this, 2011-2012 models used smaller turbos and a Hitachi fuel system, while 2013-2016 models used larger turbos and a Bosch fuel system. The knock sensor location and replacement procedure are largely the same.
- 2017: The 2017 model year F-150 introduced the 2nd Generation 3.5L EcoBoost. This was a significant redesign featuring both port and direct injection, new cam phasers, and different turbochargers. While the knock sensors are still under the intake manifold, the manifold itself and surrounding components are different, which will alter the disassembly procedure compared to earlier years.
Diagnostic Flowchart
Other Known Issues on This Vehicle
Issues unrelated to this code that are worth knowing about as an owner of this generation:
- Timing Chain Stretch & Cam Phaser Rattle 🔴 High — Commonly occurs between 70,000 and 100,000 miles, especially on 2011-2015 models. Presents as a brief rattle on cold startup. (Ref: Multiple TSBs issued, including TSB 15-0131, TSB 21-2119, and TSB 23-2143.)
- Intercooler Condensation (Shudder/Misfire) 🟠 Medium — Primarily affects 2011-2012 models, especially in humid climates. Causes stumbling or misfires under hard acceleration after highway cruising. (Ref: TSB 13-8-1 and TSB 12-6-4 were issued to address this with a redesigned air deflector and PCM reprogram.)
- Carbon Buildup on Intake Valves 🟠 Medium — A long-term consequence of all Gen 1 direct-injection-only engines. Can cause gradual power loss and misfires over 100,000 miles.
- Spark Plug and Ignition Coil Failure 🟡 Low — The factory-recommended 100,000-mile spark plug interval is considered too long by many owners. Worn plugs can cause misfires and damage ignition coils. Most experts recommend a 40,000-60,000 mile interval.
- Coolant Leaks 🟠 Medium — Leaks can occur from turbocharger coolant lines or the water pump, which is internally driven by the timing chain. A water pump failure can lead to coolant mixing with engine oil, causing catastrophic damage.
Used vs. New Parts: Buying Guide for This Vehicle
When a used part is the smart pick: A used wiring sub-harness from a documented low-mileage vehicle that shows no signs of rodent damage or brittle insulation can be a cost-effective alternative to a new OEM harness.
Donor-vehicle mileage cap: roughly under 60000 miles for the part to have meaningful remaining life.
What to inspect on the donor part:
- Check for any signs of rodent nesting material or chewed conduit.
- Flex the harness to ensure the plastic insulation isn't brittle or cracking.
- Inspect all connector housings for cracks and ensure locking tabs are intact.
- Verify the part came from a vehicle of the same engine generation (Gen 1 vs. Gen 2).
OEM-only on this vehicle (don't cheap out):
- Knock Sensors: Given the extreme labor cost to access them, using OEM (Motorcraft) or high-quality OE-supplier (NGK, Delphi) sensors is strongly recommended to avoid repeat repairs due to premature failure of a cheap aftermarket part.
Aftermarket brands forum-validated for this vehicle:
- NGK (for sensors)
- Delphi (for sensors)
- Fel-Pro (for intake gaskets)
- Mahle (for intake gaskets)
Brands owners have reported issues with on this vehicle:
- Unbranded, no-name sensors from online marketplaces. Forum users and professional technicians often report these parts failing quickly or being dead-on-arrival.
Real Owner Stories
Aggregated from forums and TSBs cited above. Mileages and costs reflect what owners reported in those sources.
2017 Ford F-150 3.5L EcoBoost
Symptoms: Check engine light on for knock sensor issues.
What fixed it: The owner was quoted for a full knock sensor replacement involving intake manifold removal.
Cost: $1200-$1200
Source hint: f150forum.com - 'Knock sensor replacement' (2021)
2015 Ford F-150 3.5L EcoBoost
Symptoms: DTC P0327 (related knock sensor code) and general harness layout concerns.
What fixed it: Discussion of sensor location under the intake manifold and harness layout for repair.
Source hint: f150forum.com - '2015 3.5L EcoBoost - P0327 Knock Sensor Help' (2022)
2015 Ford F-150 3.5L EcoBoost
Symptoms: Faulty knock sensor requiring replacement.
What fixed it: Removal of the lower intake manifold to access and replace the sensors.
Source hint: ecoboostperformanceforum.com - '2015 F150 Ecoboost 3.5L knock sensor' (2016)
Related OBD-II Codes
Frequently Asked Questions
Does TSB 18-2367 apply to my 2011-2017 Ford F-150 3.5L EcoBoost?
What is the specific torque specification for the knock sensor bolt on the 3.5L EcoBoost?
Why is the labor cost so high to fix a P0325 on my F-150?
Is there a specific repair kit for the knock sensor wiring harness issues?
Where is the main PCM ground located on the 2011-2017 F-150?
Which side of the engine is Bank 1 for the P0325 code?
Helpful Videos
Used OEM Parts in Stock


New Aftermarket Parts Available



The information in this article is provided for general reference and educational purposes only. Vehicle specifications, procedures, and part compatibility can vary by production date, trim level, and region. Always consult your vehicle's factory service manual and verify part numbers before purchasing or performing repairs. Safety-critical components such as airbags, seat belts, and braking systems should be installed by a qualified professional.
- Ford F-150:
- 🎬 Helpful Videos
- 🛍️ Shop This Part
- What's Unique About the 2011-2017 Ford F-150
- Symptoms You May Notice
- Most Likely Causes
- Rare But Worth Checking
- Diagnosis Steps
- Parts You'll Likely Need
- Related Codes That Often Appear With This One
- Technical Service Bulletins (TSBs) & Recalls
- Platform-Specific Known Issues
- Mechanic-Grade Diagnostic Values
- Hidden / Shadow Codes Worth Checking
- Scan Tool Commands That Help
- Wiring & Ground Locations
- Real Owner Repair Stories
- OEM Part Supersession History
- Model Year Variations Within This Range
- Diagnostic Flowchart
- Other Known Issues on This Vehicle
- Used vs. New Parts: Buying Guide for This Vehicle
- Real Owner Stories
- 2017 Ford F-150 3.5L EcoBoost
- 2015 Ford F-150 3.5L EcoBoost
- 2015 Ford F-150 3.5L EcoBoost
- Related OBD-II Codes
- Frequently Asked Questions
- 🎟️ Get 5% Off