

P0135 on 2006-2010 Mercury Mountaineer 4.0L V6: O2 Sensor Heater Causes and Fixes
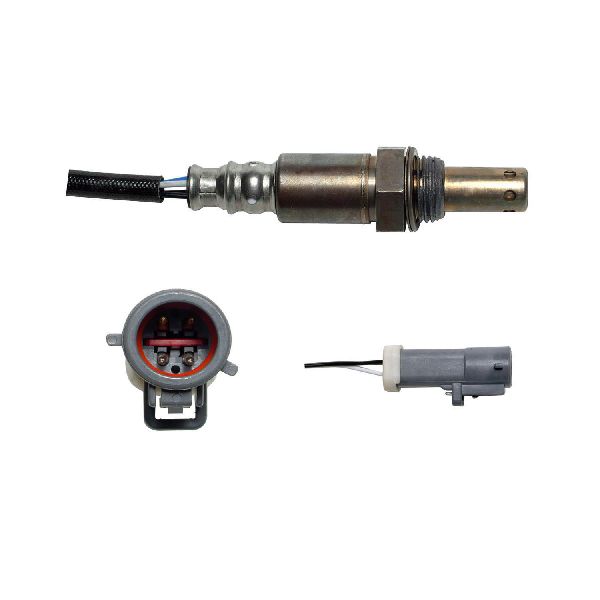
This code almost always means the upstream oxygen sensor on the passenger side has failed. The internal heater element burns out, requiring replacement of the sensor. Before replacing, check Fuse #42 in the under-hood fuse box. Expect to pay $30-$70 for an aftermarket sensor or $60-$95 for an OEM Motorcraft part. Replacement is difficult due to tight access, requiring removal of the passenger-side front wheel.
- P0135 points to the passenger-side, pre-catalytic converter oxygen sensor's heater.
- The most likely fix is to replace the oxygen sensor itself, but always check the fuse first.
- Before replacing the sensor, check Fuse #42 in the under-hood fuse box, as it powers the heater circuit and is a common, simple fix.
- Replacement is considered difficult for a DIYer due to very tight access; removing the passenger wheel and fender liner is the recommended method.
- If you have multiple O2 heater codes at once (P0135, P0141, P0155, P0161), especially with EGR (P0403) or EVAP (P0443) codes, the problem is likely a shared power wire, a blown fuse, or a faulty PCM, not individual sensors.
What's Unique About the 2006-2010 Mercury Mountaineer

The Mercury Mountaineer from this era shares its platform and powertrain directly with the Ford Explorer. For this P0135 code, the primary issue is typically a failed sensor, but this platform is also known for wiring harness problems. In some cases, wires can become frayed or damaged within the protective loom, leading to this code. Additionally, while less common, instances of multiple O2 heater codes appearing at once (P0135, P0141, P0155, P0161), sometimes accompanied by other circuit codes like P0403 (EGR) and P0443 (EVAP), have been traced back to a faulty Powertrain Control Module (PCM) on these vehicles.
Symptoms You May Notice
- Check Engine Light is on
- Decreased fuel economy
- Rough idle or slight engine hesitation, particularly when cold
- Failing an emissions test
- Engine remains in 'open-loop' status for an extended period after starting
- Black smoke or water from exhaust on cold starts in extreme cases
- Replacing the oxygen sensor without first checking the fuse and wiring. If a short in the harness caused the original sensor to fail and blew the fuse, a new sensor will not fix the problem.
- Replacing all four oxygen sensors when multiple heater codes are present, when the actual fault is a single shared fuse or a PCM driver issue.
Most Likely Causes

- Failed Bank 1, Sensor 1 Oxygen Sensor 🔴 High Probability The internal heater element within the oxygen sensor is a simple resistor that has a finite lifespan and is a common failure point after many heat cycles, causing an open circuit.
How to confirm: Disconnect the sensor and measure the resistance between the two heater circuit pins (typically the two wires of the same color). The resistance should be low, generally between 3 and 25 ohms when cold. An open circuit (infinite resistance) confirms the heater has failed.
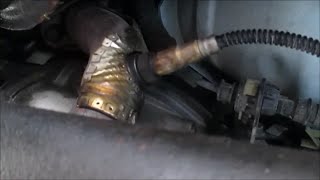
Typical fix: Replace the upstream oxygen sensor on the passenger side. Access is notoriously difficult and requires removing the passenger-side front wheel and inner fender liner. An O2 sensor socket is highly recommended. 🎬 Watch this video to see the Bank 1 Sensor 1 replacement.
Est. part cost: $30 - $95 - Damaged Wiring or Connector 🟡 Medium Probability The wiring harness is routed in a tight engine bay where it can be exposed to heat, oil, and potential chafing, leading to shorts or open circuits. Wires have been found melted to the exhaust or frayed behind the intake manifold.
How to confirm: Visually inspect the wiring harness leading to the Bank 1 Sensor 1 O2 sensor. Check for melted plastic, chafed insulation, or corrosion inside the connector pins. With the key on, engine off, check for 12V power at the harness-side connector on the power wire.
Typical fix: Repair the damaged section of the wiring harness or clean/replace the connector.
Est. part cost: $5 - $50 - Blown Fuse ⚪ Low Probability
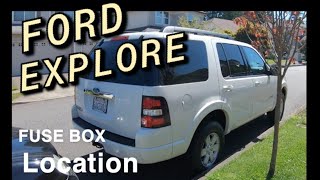
How to confirm: Locate and check fuse #42 (typically a 15A or 20A fuse) in the under-hood Power Distribution Box. 🎬 See this guide to locate your fuse box quickly. If this fuse is blown, it will cut power to all O2 sensor heaters, often resulting in multiple codes (P0135, P0141, P0155, P0161).
Typical fix: Replace the blown fuse. If the fuse blows again immediately, it indicates a short circuit in the wiring or one of the sensors that must be diagnosed.
Est. part cost: $1 - $5
Rare But Worth Checking
- Faulty Powertrain Control Module (PCM): This is rare, but should be considered if the sensor, wiring, and fuse all test good. It is a strong possibility if multiple, seemingly unrelated circuit codes are present at the same time (e.g., P0135, P0141, P0155, P0161 for O2 heaters, plus P0403 for EGR and P0443 for EVAP Purge Valve). The internal driver circuit in the PCM for these components can fail.
Diagnosis Steps

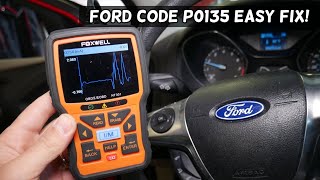
- Read the trouble codes with an OBD-II scanner to confirm P0135 is present. Note if any other codes, especially other heater circuit codes (P0141, P0155, P0161), are also stored.
- Locate the Power Distribution Box in the engine compartment and inspect Fuse #42 (15A or 20A). If it's blown, replace it and see if codes return. If they do, a short circuit exists.
- If the fuse is good, visually inspect the Bank 1 (passenger side) upstream O2 sensor wiring and connector for any signs of melting, chafing, or corrosion.
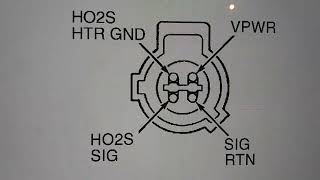
- If the fuse and wiring are good, disconnect the O2 sensor. Measure the resistance between the two heater pins on the sensor side. A reading of 3-25 ohms is expected; infinite resistance means the sensor is bad.
- With the sensor still disconnected and the ignition key in the 'On' position (engine off), carefully test the harness-side connector for battery voltage (~12V) at the heater power pin.
- If there is no voltage and the fuse is good, the problem is in the power supply wiring. If voltage is present and the sensor resistance is good, the problem may lie in the control wire to the PCM or the PCM itself.
- If replacing the sensor, access is very tight. It is recommended to remove the passenger-side front wheel and the inner fender liner to get better access to the sensor and its connector. An O2 sensor socket is required.
Parts You'll Likely Need

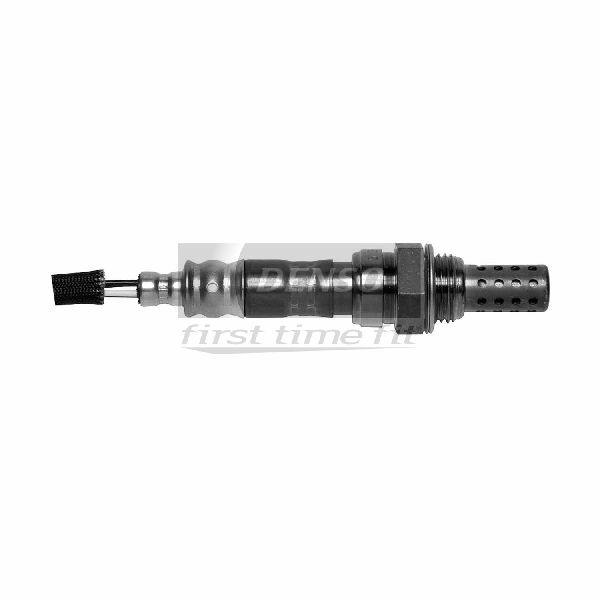
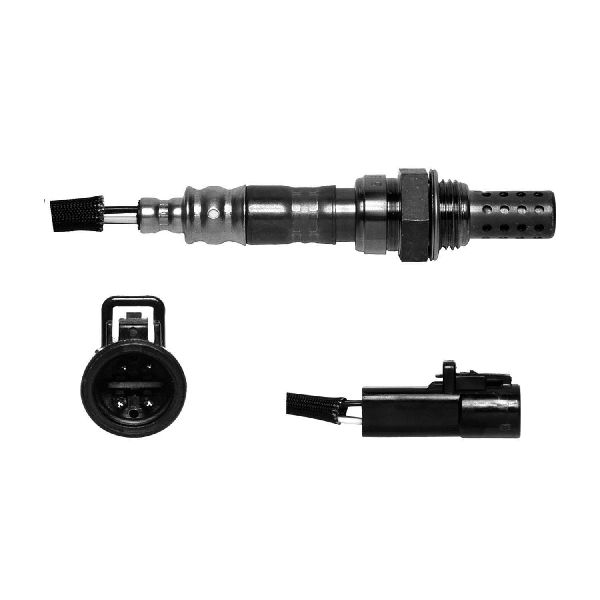
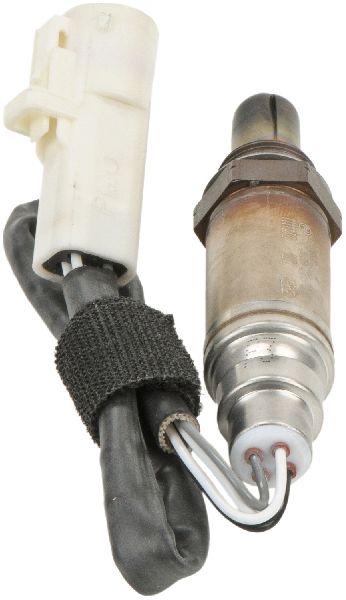
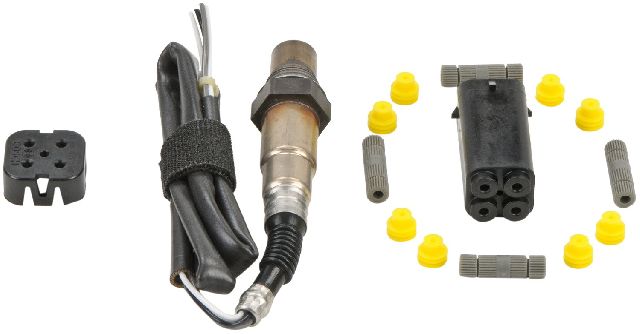
- Upstream Oxygen Sensor (Bank 1, Sensor 1)
(OEM #BE5Z9G444A (current), 5L8Z9G444A (original), Motorcraft DY-992, DY-1092)— This is the most common failure point for code P0135. The internal heater element fails from age and use.
Trusted brands: Motorcraft, Bosch, Denso, NTK
OEM price range: $60-$95
Aftermarket price range: $30-$70
Related Codes That Often Appear With This One
- P0141 — Heater circuit fault for Bank 1, Sensor 2. If seen with P0135, it could indicate a shared wiring or fuse issue for Bank 1.
- P0155 — Heater circuit fault for Bank 2, Sensor 1. If seen with P0135, it could point to a common power supply fuse or a PCM issue.
- P0161 — Heater circuit fault for Bank 2, Sensor 2. Seeing all four heater codes (P0135, P0141, P0155, P0161) together strongly suggests a problem with the shared power feed (Fuse #42), its wiring, or the PCM itself.
- P0403, P0443 — EGR Control Circuit and EVAP Purge Control Valve Circuit faults. When these appear alongside all four O2 heater codes, it is a very strong indicator of a failed PCM, as these components can share a common driver or power control logic within the module.
Platform-Specific Known Issues
- Simultaneous Multi-Circuit Code Failure (PCM): A known, though uncommon, failure mode on this platform is the simultaneous appearance of all four O2 heater codes (P0135, P0141, P0155, P0161) along with EGR (P0403) and EVAP (P0443) codes. This is not a failure of all six components, but rather a failure of the PCM which controls them. Diagnosis involves confirming good power and ground to the components before condemning the PCM.
Documented NHTSA Reports
While the Mountaineer shares its platform with the Explorer, other vehicles from the same manufacturer have documented similar circuit failures. NHTSA ODI #10730483 describes a situation where a vehicle exhibited a massive cluster of codes simultaneously, including P0135, P0141, P0155, P0161, P0403, and P0443, highlighting how these circuits are often interconnected in the manufacturer's electrical architecture.
Mechanic-Grade Diagnostic Values
- O2 Sensor Heater Element Resistance — expected: 3 to 25 Ohms at ambient temperature.. Failure: Infinite resistance (Open Loop) indicates a burned-out heater element.
- Heater Circuit Power Supply Voltage (KOEO) — expected: 10 to 12 Volts DC at the power supply pin on the harness-side connector.. Failure: 0 Volts indicates a blown fuse or a break in the power wire from the fuse box.
- Heater Circuit Ground Signal (KOEO) — expected: 10 to 12 Volts DC when testing between the battery positive terminal and the ground control pin on the harness-side connector. This indicates the PCM is providing a path to ground.. Failure: 0 Volts suggests a break in the ground wire to the PCM or an internal PCM fault. 🎬 Watch: Diagnosing multiple O2 heater codes and PCM issues.
Scan Tool Commands That Help
- Ford IDS (Integrated Diagnostic System): O2 Heater Monitor (OSM) Test — This is a self-test the PCM runs. A technician can use IDS to monitor the status of this test (Mode $06, Test ID $81) to see if the heater circuit is passing or failing the PCM's internal checks, which can help confirm an intermittent fault.
Wiring & Ground Locations

- G105 / G106 — G105 is on the left side of the engine compartment; G106 is on the right side of the engine compartment.. These are primary engine grounds. A poor connection at these points can cause a variety of electrical issues, including erratic sensor behavior. While not a direct cause of a heater circuit *fault*, a bad ground can cause other related codes and should be checked for corrosion and tightness.
- HO2S 11 Connector — On the passenger side (Bank 1), in the exhaust manifold before the catalytic converter. The harness connector is typically clipped to the frame or engine block nearby.. This is the main connector for the sensor in question. All electrical tests (resistance on the sensor side, voltage on the harness side) are performed here. It is a common point for corrosion or wire damage.
- Heater Power Wire — The power wire for the O2 heaters is often a Light Blue/Orange wire on this platform.. This is the wire that should have ~12V with the key on. Knowing the color helps to quickly identify the correct pin for voltage testing at the connector.
- Powertrain Control Module (PCM) — Located at the right side engine bulkhead (firewall).. The PCM provides the ground signal for the heater circuit and monitors its performance. All control wires for the O2 sensor ultimately lead back to this module.
Real Owner Repair Stories
- Ranger-Forums user (1997 Ford Ranger 4.0L (similar wiring and fuse layout)) — Rough idle, misfire, and multiple O2 heater codes: P0135, P0155, and P0141.
❌ Tried (didn't work) Replacing plugs, wires, filters, coolant temp sensor, thermostat, EGR valve, and DPFE sensor.
✅ What actually fixed it The root cause was a single blown 15A fuse (Fuse #3 in that model's fuse box) that supplied power to all three O2 sensor heaters. The user noted the power for the heaters comes from the same red wire from the PCM relay.
OEM Part Supersession History
5L8Z-9G444-A→BE5Z-9G444-A (Motorcraft DY-992)— Part number consolidation and potential minor design updates over the years.
Heads up: 5L8Z-9G444-A was also used for other applications and has been superseded by multiple part numbers depending on the vehicle (e.g., 5L8Z-9G444-G, YL8Z-9G444-CA). It is critical to verify the correct part for the specific vehicle application (upstream vs. downstream, bank 1 vs. bank 2) as wire length and connectors can differ.Motorcraft DY-1092→N/A— N/A
Heads up: DY-1092 is often listed as a downstream sensor for this vehicle platform. Using a downstream sensor in the upstream position (or vice-versa) can cause performance issues or persistent codes due to different calibration and wire lengths, even if the connector fits.
Model Year Variations Within This Range
- 2006-2010: The core 4.0L SOHC V6 engine and its emissions components remained largely unchanged throughout this generation of Explorer/Mountaineer. The VIN code for this engine is 'E'. No significant variations affecting the diagnosis or repair of P0135 are noted between these model years.
Diagnostic Flowchart
Used vs. New Parts: Buying Guide for This Vehicle
When a used part is the smart pick: For this specific repair, sourcing a used PCM from a junkyard can be a cost-effective choice if the rare PCM failure is confirmed. It is a viable alternative to a costly new or remanufactured unit, provided the part numbers match exactly.
Donor-vehicle mileage cap: roughly under 150000 miles for the part to have meaningful remaining life.
What to inspect on the donor part:
- For a PCM: Ensure the part number on the donor PCM is an exact match to the original.
- Check for any signs of water intrusion or corrosion on the case and connector pins.
- Verify the donor vehicle was not involved in a fire or flood.
OEM-only on this vehicle (don't cheap out):
- Powertrain Control Module (PCM) - While a used OEM unit is acceptable, avoid generic aftermarket 'rebuilt' PCMs from unknown vendors, as they can have programming and quality control issues. A Ford/Motorcraft remanufactured unit or a properly matched used unit is preferred.
Aftermarket brands forum-validated for this vehicle:
- NTK
- Denso
- Bosch
Brands owners have reported issues with on this vehicle:
- No-name, unbranded 'white box' sensors from online marketplaces. These often have incorrect heater resistance or slow response times, leading to the code returning shortly after replacement.
Real Owner Stories
Aggregated from forums and TSBs cited above. Mileages and costs reflect what owners reported in those sources.
2006 Mercury Mountaineer 4.0L V6 — 180000 miles
Symptoms: Check engine light was on with codes P0135, P0141, P0155, P0161, P0403, and P0443. The engine idled very rough (around 500rpm) and would often die when coming to a stop after warming up.
What fixed it: The user did not report a final solution, but this specific combination of O2 heater, EGR, and EVAP circuit codes is commonly caused by a failed Powertrain Control Module (PCM) that requires repair.
Source hint: Reddit r/MechanicAdvice
2010 Mercury Mountaineer
Symptoms: The vehicle was stalling out at stops and displayed a whole slew of codes: P0135, P0141, P0155, P0161, P0403, and P0443, after a previous EGR code was fixed.
What fixed it: A final fix was not reported, but the symptoms match a known pattern of PCM failure on this platform where multiple O2 heater, EGR, and EVAP circuit codes appear simultaneously.
Source hint: Reddit r/MechanicAdvice
2007 Ford Sport Trac 4.0L
Symptoms: Owner reported codes P0135, P0141, P0155, P0161, P0403, and P0443 all at once.
What fixed it: After replacing all related parts with no success, mechanics suspected the root cause was a wiring or PCM issue, which is a classic symptom pattern for this platform.
Source hint: Ford SportTrac Forum (https://www.sporttrac.org/threads/07-4-0l-odb-codes-and-part-replacement.6340/)
2005 Ford Ranger 4.0L
Symptoms: Experienced multiple O2, EVAP, and EGR codes simultaneously, accompanied by a rough idle.
What fixed it: After extensive parts replacement, the root cause was discovered to be a single blown fuse that powered all the affected components.
Source hint: Ranger-Forums (https://www.ranger-forums.com/4-0l-sohc-v6-tech-33/rough-idle-o2-codes-egr-evap-codes-163484/)
Related OBD-II Codes
Frequently Asked Questions
Where is the Bank 1, Sensor 1 oxygen sensor located on the 4.0L V6, and is it hard to replace?
My Mountaineer has P0135 along with P0141, P0155, P0161, P0403 (EGR), and P0443 (EVAP). Do I need to replace all those sensors?
I have code P0135. What is the first fuse I should check on my Mountaineer?
Can I use diagnostic information from a Ford Explorer for my Mountaineer's P0135 code?
What is the correct resistance for the Bank 1 Sensor 1 oxygen sensor heater?
If I replace the blown fuse #42 and it blows again, what's the next step?
Helpful Videos
We Have This Part in Stock


The information in this article is provided for general reference and educational purposes only. Vehicle specifications, procedures, and part compatibility can vary by production date, trim level, and region. Always consult your vehicle's factory service manual and verify part numbers before purchasing or performing repairs. Safety-critical components such as airbags, seat belts, and braking systems should be installed by a qualified professional.
- Mercury Mountaineer:
- 🎬 Helpful Videos
- 🛍️ Shop This Part
- What's Unique About the 2006-2010 Mercury Mountaineer
- Symptoms You May Notice
- Most Likely Causes
- Rare But Worth Checking
- Diagnosis Steps
- Parts You'll Likely Need
- Related Codes That Often Appear With This One
- Platform-Specific Known Issues
- Documented NHTSA Reports
- Mechanic-Grade Diagnostic Values
- Scan Tool Commands That Help
- Wiring & Ground Locations
- Real Owner Repair Stories
- OEM Part Supersession History
- Model Year Variations Within This Range
- Diagnostic Flowchart
- Used vs. New Parts: Buying Guide for This Vehicle
- Real Owner Stories
- 2006 Mercury Mountaineer 4.0L V6 — 180000 miles
- 2010 Mercury Mountaineer
- 2007 Ford Sport Trac 4.0L
- 2005 Ford Ranger 4.0L
- Related OBD-II Codes
- Frequently Asked Questions
- 🎟️ Get 5% Off