

P0132 on 1999-2004 Jeep Grand Cherokee (WJ) 4.0L: O2 Sensor High Voltage Causes and Fixes
On a 1999-2004 Jeep Grand Cherokee with the 4.0L engine, code P0132 is almost always caused by a failed upstream oxygen sensor or its wiring melting on the exhaust manifold. The most reliable fix is replacing the Bank 1, Sensor 1 O2 sensor with an NTK or Denso part, which costs around $40-$80. Before replacing, a thorough inspection of the wiring harness for heat damage is critical, as this is a well-documented failure point.
- P0132 on your 4.0L Grand Cherokee points directly to the upstream O2 sensor (Bank 1, Sensor 1) or its wiring.
- Before replacing any parts, you MUST carefully inspect the O2 sensor's wiring harness for signs of melting or chafing where it runs near the engine's manifolds.
- If you replace the sensor, use an NTK or Denso brand part for the best results. Other brands are known to cause issues on this specific engine.
- Do not replace the downstream sensor or the catalytic converter for this code, as they are not the cause.
- Ignoring this code will lead to poor fuel economy and can eventually damage your catalytic converter, a much more expensive repair.
What's Unique About the 1999-2004 Jeep Grand Cherokee (WJ)
The Jeep 4.0L I6 engine is known for subjecting its wiring harnesses to significant heat. The wiring for the upstream oxygen sensor is notoriously prone to melting or chafing where it passes over the intake and exhaust manifolds. This often leads to a short circuit between the signal wire and the heater power wire within the same harness, which triggers the P0132 code. Owners and mechanics widely report that this engine is sensitive to the brand of O2 sensor used, with NTK and Denso being the preferred brands for a reliable fix, while Bosch sensors are often reported to cause issues or fail prematurely.
Symptoms You May Notice
- Check Engine Light is on
- Decreased fuel economy
- Rough or fluctuating idle
- Engine hesitation or misfiring
- Black smoke from the exhaust in rare, extremely rich conditions
- Failing an emissions test
- Engine may 'clear its throat' or ping under acceleration.
- Replacing the downstream (Bank 1, Sensor 2) oxygen sensor. P0132 is specific to the upstream sensor.
- Replacing the catalytic converter. This code indicates a problem with the air/fuel mixture reading *before* the converter.
- Using a Bosch brand oxygen sensor. Many Jeep 4.0L owners report that these sensors may not fix the code or can fail prematurely; NTK or Denso are the recommended brands.
Most Likely Causes
- Failed Upstream Oxygen Sensor (Bank 1, Sensor 1) 🔴 High Probability The sensor is located in a high-heat area and is a normal wear-and-tear item. Internal shorts between the signal and heater circuits are common, causing the voltage to stick high.
How to confirm: With a scan tool, observe the live data for the B1S1 O2 sensor. If the voltage is stuck above 0.9V (often at 4.99V) and not fluctuating, the sensor is likely bad. Unplugging the sensor should cause the voltage to drop to a PCM-supplied bias voltage of around 0.45V; if it does, the wiring is likely okay and the sensor is bad.
Typical fix: Replace the upstream oxygen sensor. It is located on the exhaust pipe, accessible from underneath the vehicle. An O2 sensor socket is recommended for removal. Use of an NTK or Denso sensor is strongly advised.
Est. part cost: $40-$80 - Damaged O2 Sensor Wiring or Connector 🔴 High Probability The wiring harness for the upstream O2 sensor is frequently routed too close to the hot intake and exhaust manifolds. The protective loom degrades, allowing wires to melt and short together. This is a very common issue on the 4.0L engine across multiple platforms (WJ, XJ, TJ).
How to confirm: Visually inspect the entire wiring harness from the O2 sensor connector to the main engine harness. Remove the plastic split loom for a better view. Pay close attention to where it crosses the manifolds. Look for melted insulation, chafing, or pinholes in the wires. A user on CherokeeForum.com found their issue was resolved after separating wires that had melted together right where the harness curves over the manifold. If the code remains even with the sensor unplugged, a short in the harness is confirmed.
Typical fix: Repair the damaged section of the wiring harness. This may involve separating melted wires, repairing them with solder and heat shrink, and re-wrapping the harness in high-temperature protective loom. Reroute the harness to provide more clearance from heat sources.
Est. part cost: $5-$25 - High Fuel Pressure ⚪ Low Probability A failed fuel pressure regulator can cause excessive fuel pressure, leading to a genuinely rich condition that the O2 sensor correctly reports as high voltage.
How to confirm: On the 4.0L engine, the regulator is on the fuel rail. A definitive sign of failure is the presence of raw fuel inside its vacuum line. Alternatively, connect a fuel pressure gauge to the schrader valve on the fuel rail; pressure at idle should be approximately 49 PSI +/- 5 PSI.
Typical fix: Replace the fuel pressure regulator on the fuel rail.
Est. part cost: $30-$60 - Leaking Fuel Injector(s) ⚪ Low Probability While not a unique vulnerability, a leaking injector can create a rich condition. TSB 18-031-03, which addresses fuel vapor issues in the #3 injector due to heat, confirms that injectors are in a high-heat stress area.
How to confirm: This is more difficult to confirm without professional tools. If a new O2 sensor and wiring check don't resolve the code, and fuel pressure is normal, leaking injectors should be considered. This often appears with a P0172 (System Too Rich) code.
Typical fix: Identify and replace the leaking fuel injector(s).
Est. part cost: $40-$70 per injector
Rare But Worth Checking
- Powertrain Control Module (PCM) Fault: This is very rare. The internal circuit in the PCM that reads the O2 sensor signal can fail. This should only be considered after all other possibilities, including wiring, sensors, and fuel system issues, have been exhaustively ruled out.
- Exhaust Leak Before the O2 Sensor: An exhaust leak from a cracked manifold or a bad gasket before the upstream O2 sensor can sometimes allow outside air into the exhaust stream, confusing the sensor and potentially causing erratic voltage readings, although this more commonly causes a low voltage or lean code.
Diagnosis Steps
- Read the code with an OBD-II scanner to confirm P0132 is present.
- Check for other codes. If P0172 (System Rich) is present, investigate fuel system issues first. If P0135 (Heater Circuit) is present, suspect a blown fuse or a wiring short.
- CRITICAL STEP: Visually inspect the upstream O2 sensor wiring harness. Carefully trace it from the sensor to the engine block. Remove the split loom where it crosses over the intake manifold and look for melted wires stuck together. This is the most common cause.
- Using a scan tool with live data, monitor the voltage for 'O2S B1S1'. A healthy sensor's voltage will fluctuate rapidly between approximately 0.1 and 0.9 volts. If it is stuck high (e.g., above 1.0V, often at 4.99V), it confirms the fault condition.
- If the wiring appears intact, test the sensor itself. Unplug the sensor while monitoring live data. The voltage should drop to a default bias value from the PCM (around 0.45V). If it does, the wiring to the PCM is likely good, and the sensor is the culprit.
- If a wiring short is suspected, check for voltage on the signal wire at the sensor connector with the key on, engine off. There should not be battery voltage present. The presence of 5V or 12V indicates a short-to-power in the harness.
- If the sensor and wiring are good, check the fuel system. Test the fuel pressure at the fuel rail to ensure it's within the 49 +/- 5 PSI spec. Check the vacuum line on the fuel pressure regulator for the presence of raw fuel.
- If all other tests pass, the upstream O2 sensor is the most probable failed component.
Parts You'll Likely Need
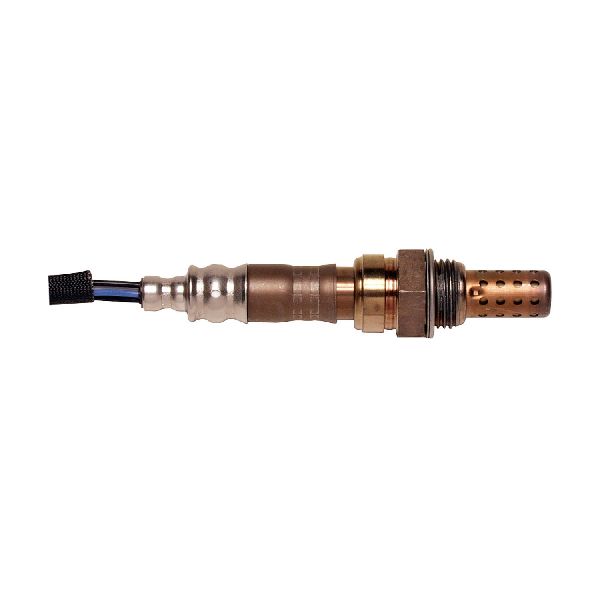
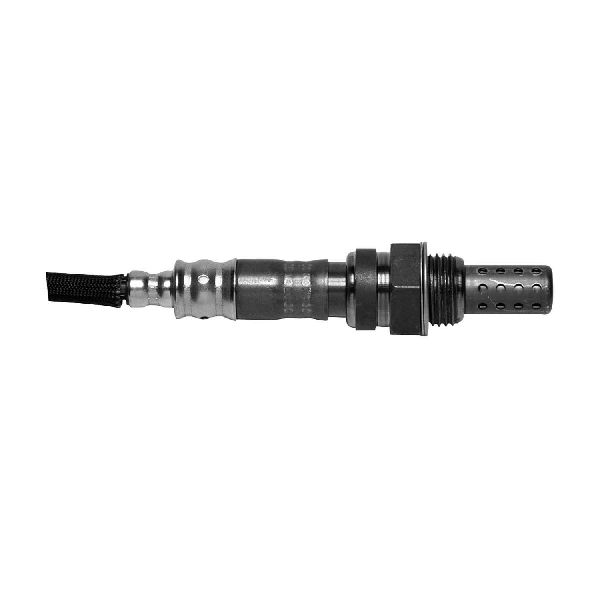
- Upstream Oxygen Sensor (Bank 1, Sensor 1)
(OEM #NTK 23506 (for 2000-2004 Federal/49-State Emissions), NTK 23151 (for 1999 models))— This is the most common component to fail and cause a P0132 code, either through internal failure or due to wiring damage.
Trusted brands: NTK, Denso
OEM price range: $60-$100
Aftermarket price range: $40-$80 - High-Temperature Wire Loom/Tape — Needed to repair and protect the wiring harness after finding and fixing melted wires near the exhaust manifold.
Trusted brands: DEI, Thermo-Tec
OEM price range: $15-$25
Aftermarket price range: $10-$20
Related Codes That Often Appear With This One
- P0135 — Stands for "O2 Sensor Heater Circuit Malfunction (Bank 1, Sensor 1)". A wiring short that causes P0132 can often damage the heater circuit wires at the same time, or blow the shared fuse, causing both codes to appear.
- P0172 — Stands for "System Too Rich (Bank 1)". This code can appear if a legitimate engine problem, like a leaking fuel injector or bad fuel pressure regulator, is causing a rich condition that the O2 sensor is correctly detecting.
- P1128 — Stands for "Closed Loop Fueling Not Achieved". This code can be set when the PCM cannot rely on the O2 sensor's signal because it is stuck high, preventing the system from entering its normal, efficient operating mode.
Technical Service Bulletins (TSBs) & Recalls
- TSB 18-031-03: While not directly for P0132, this TSB addresses a rough idle and cylinder 3 misfire (P0303) on 1999-2004 WJ 4.0L models caused by heat soak of the #3 fuel injector. The fix involves adding an insulator sleeve (p/n 56028371AA). This TSB is relevant because it officially acknowledges the extreme under-hood heat issues around the manifold that are the root cause of the melted O2 sensor wiring harnesses that trigger P0132.
Platform-Specific Known Issues
- Some 1999-2004 models with the 4.0L engine were equipped with California Emissions, which use four O2 sensors (two upstream, two downstream) instead of the standard two. P0132 still refers to the upstream sensor for the front three cylinders (Bank 1). It's important to verify which system you have before ordering
Mechanic-Grade Diagnostic Values
- Upstream O2 Sensor Heater Element Resistance — expected: 4-8 Ohms at room temperature.. Failure: A reading of infinity (Open Loop) or near 0 Ohms (short circuit) indicates a failed heater element.
- PCM Code Trigger Condition — expected: The PCM sets P0132 when the O2 sensor voltage is above 1.5 volts for more than 4 minutes with the engine warm (coolant > 180°F).. Failure: This is the specific logic the PCM uses to trigger the Check Engine Light.
- O2 Sensor Heater Power at Connector — expected: Battery voltage (~12V) with key on, engine off.. Failure: 0 volts indicates a blown fuse, bad relay, or open in the power wire from the Power Distribution Center (PDC).
Scan Tool Commands That Help
- DRB III: O2 Sensor Test — The dealer-level DRB III scan tool for this era has a specific test function that can monitor sensor response and heater operation, which can help differentiate between a lazy sensor and a completely failed one. However, observing live data on any modern scanner is usually sufficient.
Wiring & Ground Locations
- G104 (4.0L) — Located on the right rear of the engine block, near the transmission dipstick tube.. This is a primary engine ground. While not directly for the O2 sensor signal, a poor engine ground can cause floating voltages and erratic sensor readings across the board, potentially mimicking a sensor or circuit fault.
- Firewall to Engine Ground Strap — A flat, braided metal strap connecting a stud on the firewall (often above/near the PCM) to a valve cover bolt or coil-on-plug stud on the passenger side.. This is a critical ground path for the cylinder head and ignition system. A corroded or broken strap can cause the PCM to seek ground through other paths, leading to electrical noise and incorrect sensor readings, including the O2 sensor.
- O2 Sensor Signal Wire (Upstream) — The specific pin at the PCM varies by year. For example, on a 2001 WJ, the upstream O2 signal is on Pin 25 (Dark Green/Dark Blue wire) of the C1 (Black) PCM connector.. When diagnosing a persistent P0132 with the sensor unplugged, you can check for a short-to-voltage at this pin directly at the PCM to definitively rule out a harness issue.
Real Owner Repair Stories
- CherokeeForum.com user (Jeep Cherokee (XJ platform, but identical 4.0L engine and common issue)) — P0132 code, Check Engine Light.
❌ Tried (didn't work) Initial diagnosis pointed to a bad sensor.
✅ What actually fixed it The user inspected the wiring harness where it crosses the intake manifold, removing the split loom. They found wires with pinholes melted into the insulation, causing them to short together. Separating the wires and repairing the loom resolved the code without needing to replace the sensor.
OEM Part Supersession History
NTK 23151, NTK 23506→New, unlisted part numbers.— According to a forum post citing a call with NGK technical support in early 2023, both the 23151 (for '99 models) and 23506 (for '00-'04 Federal models) were discontinued due to sensor failures and were being redesigned.
Heads up: The original part numbers are no longer produced. Buyers should verify the current recommended NTK part number for their specific year and emissions type (Federal vs. California) when purchasing. Using old stock of the discontinued parts may lead to premature failure.
Model Year Variations Within This Range
- 2000-2004 (primarily California Emissions models): Starting in 2000, the 4.0L engine was redesigned with a new cylinder head (casting #0331) and a two-piece exhaust manifold that incorporated two mini catalytic converters (pre-cats) to meet stricter emissions. These 'California Emissions' models have four O2 sensors: two upstream (one for cylinders 1-3, one for 4-6) and two downstream. Federal emissions models typically retained the older style single manifold and two-sensor setup. P0132 on a California model refers to the Bank 1 (front three cylinders) upstream sensor. It is crucial to identify which system the vehicle has, as the parts are not interchangeable.
- 1999: The 1999 model year was a transition year. While it was the first year of the WJ and featured a redesigned 4.0L engine, it generally used the simpler Federal-style exhaust and emissions system with two O2 sensors. The recommended NTK upstream O2 sensor (23151) is different from the later Federal models (23506).
Diagnostic Flowchart
Other Known Issues on This Vehicle
Issues unrelated to this code that are worth knowing about as an owner of this generation:
- Cracked 0331 Cylinder Head 🔴 High — Common on 1999-2001 models with the '0331' casting number. A crack typically forms between cylinders 3 and 4, leading to unexplained coolant loss, overheating, and potential engine failure.
- Failing HVAC Blend/Recirculation Doors 🟠 Medium — Extremely common across all WJ model years. The plastic actuator doors or shafts inside the dashboard break, resulting in an inability to control temperature or direct airflow. Repair is labor-intensive, often requiring dashboard removal.
- Oil Filter Adapter Housing Leak 🟡 Low — A very common oil leak source. The O-rings that seal the oil filter adapter to the engine block degrade over time, causing a significant oil leak down the side of the engine.
- Fuel Injector Heat Soak (Cylinder 3) 🟡 Low — Affects 1999-2004 models, causing a rough idle for 20-30 seconds after a hot restart. Heat from the exhaust manifold causes fuel in the #3 injector to vaporize. (Ref: TSB 18-031-03)
- Window Regulator Failure 🟡 Low — Common for the windows to stop working or fall into the door due to a failed plastic regulator clip or cable.
Used vs. New Parts: Buying Guide for This Vehicle
When a used part is the smart pick: For this specific code, sourcing used parts is generally not recommended for the primary failure components. However, if a wiring connector or a section of the engine harness is damaged beyond simple repair, a used connector pigtail or harness from a junkyard can be a cost-effective solution.
Donor-vehicle mileage cap: roughly under 150000 miles for the part to have meaningful remaining life.
What to inspect on the donor part:
- For a wiring harness/pigtail: Inspect for any signs of melting, brittleness, or previous repairs.
- Ensure the locking tabs on connectors are intact and not broken.
- Check the donor vehicle's build date and options to ensure it matches your emissions system (Federal vs. California).
OEM-only on this vehicle (don't cheap out):
- While not OEM-only, it is critical to use specific brands for the Oxygen Sensor.
Aftermarket brands forum-validated for this vehicle:
- NTK for Oxygen Sensors
- Denso for Oxygen Sensors
Brands owners have reported issues with on this vehicle:
- Bosch for Oxygen Sensors (many forum users report premature failure or incompatibility issues on the 4.0L engine)
Real Owner Stories
Aggregated from forums and TSBs cited above. Mileages and costs reflect what owners reported in those sources.
2004 Jeep Cherokee 4.0L
Symptoms: Check Engine Light (CEL) with code P0132 and rough idle.
What fixed it: Found one spot where all the wires were stuck together right where the harness curves over the manifold. Pulled them all apart and separated them.
Source hint: CherokeeForum.com thread from 2014
1997-2001 Jeep Cherokee (XJ) 4.0L
Symptoms: P0108, P0132, and a rough idle.
What fixed it: Sourcing a local wiring harness after finding the harness was melted to itself across most of the intake manifold, affecting the injectors, throttle body sensors, and O2 sensors.
Source hint: NAXJA Forums (North American XJ Association) thread from 2016
Related OBD-II Codes
Frequently Asked Questions
Does TSB 18-031-03 apply to my 1999-2004 Jeep Grand Cherokee (WJ) 4.0L if I have code P0132?
Which brand of replacement oxygen sensor should I use for my 4.0L WJ?
How can I tell if my 4.0L Grand Cherokee has the California Emissions system?
Where is the most common failure point for the O2 sensor wiring on the 4.0L engine?
Can a bad fuel pressure regulator cause a P0132 code on my Jeep?
What should the O2 sensor voltage look like on a scan tool for a healthy WJ?
Helpful Videos
We Have This Part in Stock

The information in this article is provided for general reference and educational purposes only. Vehicle specifications, procedures, and part compatibility can vary by production date, trim level, and region. Always consult your vehicle's factory service manual and verify part numbers before purchasing or performing repairs. Safety-critical components such as airbags, seat belts, and braking systems should be installed by a qualified professional.
- Jeep Grand Cherokee (WJ):
- 🎬 Helpful Videos
- 🛍️ Shop This Part
- What's Unique About the 1999-2004 Jeep Grand Cherokee (WJ)
- Symptoms You May Notice
- Most Likely Causes
- Rare But Worth Checking
- Diagnosis Steps
- Parts You'll Likely Need
- Related Codes That Often Appear With This One
- Technical Service Bulletins (TSBs) & Recalls
- Platform-Specific Known Issues
- Mechanic-Grade Diagnostic Values
- Scan Tool Commands That Help
- Wiring & Ground Locations
- Real Owner Repair Stories
- OEM Part Supersession History
- Model Year Variations Within This Range
- Diagnostic Flowchart
- Other Known Issues on This Vehicle
- Used vs. New Parts: Buying Guide for This Vehicle
- Real Owner Stories
- 2004 Jeep Cherokee 4.0L
- 1997-2001 Jeep Cherokee (XJ) 4.0L
- Related OBD-II Codes
- Frequently Asked Questions
- 🎟️ Get 5% Off