

OBD-II Code P0135: O2 Sensor Heater Circuit Malfunction (Bank 1, Sensor 1)
The Ultimate Guide to Diagnosing and Fixing P0135
- P0135 indicates an electrical failure in the Bank 1, Sensor 1 oxygen sensor heater circuit, preventing the sensor from reaching its 600°F operating temperature.
- Always test the 7.5A to 15A O2 heater fuse and verify 12V power at the harness before spending $50 to $250 on a new sensor.
- Replacing the upstream oxygen sensor fixes P0135 in 80% of cases, requiring only a specialized 7/8-inch O2 sensor socket and penetrating oil.
- Driving with an active P0135 code reduces fuel economy by 10-15% and destroys the catalytic converter within 6 to 9 months, turning a $150 repair into a $1,500 replacement.
What Does P0135 Mean?

The Engine Control Module (ECM) detected an electrical problem with the heater circuit inside the upstream oxygen sensor on Bank 1. This sensor must reach 600°F (316°C) to accurately measure exhaust oxygen. The internal heater warms it up quickly after a cold start. Code P0135 means this heater is drawing incorrect current, taking too long to warm up, or has an open or shorted circuit.
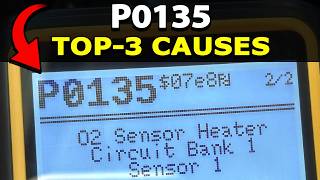
Technical definition: P0135 is defined as "Oxygen O2 Sensor Heater Circuit Malfunction (Bank 1, Sensor 1)." The Powertrain Control Module (PCM) detected the current in the Bank 1 upstream oxygen sensor heater circuit is outside the specified range, open, or shorted. The PCM runs a self-test on this circuit at startup; missing electrical feedback triggers the code and illuminates the Check Engine Light.
Can I Drive With P0135?
Yes, But With Caution. You can drive with a P0135 code, but you must address it promptly. Continuing to drive reduces fuel economy by 10-15%, increases emissions, and causes engine hesitation. Ignoring the code for several hundred miles destroys the catalytic converter, turning a minor fix into a $1,500+ repair.
Common Causes

- Failed heater element inside the oxygen sensor (Very Common) — The internal heater element, similar to a light bulb filament, burns out from age and thermal cycling, typically between 60,000 and 100,000 miles.
- Blown fuse or faulty relay (Common) — The O2 sensor heater circuit relies on a dedicated fuse. A short circuit in the wiring or the sensor itself blows this fuse, instantly cutting power to the heater.
- Damaged wiring or connectors (Common) — The wiring harness is exposed to extreme exhaust heat, moisture, and road debris. Melted wires or oil-contaminated connectors cause high resistance or short circuits.
- Poor ground connection (Less Common) — The heater circuit requires a solid chassis ground. A loose or corroded ground stud creates high resistance, preventing the heater from drawing enough current.
- Faulty Engine Control Module (ECM) (Very Rare) — The ECM driver circuit that supplies power or ground to the heater fails in extremely rare cases. Rule out the sensor, wiring, and fuses completely before replacing the ECM.
Symptoms
- Check Engine Light is on — The light illuminates and remains on as long as the heater circuit fault is active.
- Decreased fuel economy — The engine stays in 'open-loop' mode longer, running a rich fuel mixture that decreases gas mileage by 10-15%.
- Rough idle or hesitation — The engine idles erratically or hesitates on acceleration for the first few minutes after a cold start until exhaust gases naturally heat the sensor.
- Fuel smell from exhaust — The excessively rich fuel mixture produces a strong, noticeable gasoline smell from the tailpipe.
- Failed emissions test (scan-tool only — no driver-felt sign) — The malfunctioning heater increases hydrocarbon and carbon monoxide emissions during cold starts, guaranteeing a smog check failure.
Diagnostic Flowchart

Tap your situation to follow the diagnostic path that matches what you're seeing on this code.
Common Fixes & Costs

- Replace Bank 1, Sensor 1 Oxygen Sensor
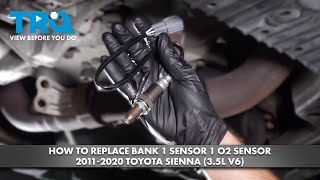
— Parts: $50-$250, Labor: $100-$200, ~0.8 hr book time 🎬 Watch: Step-by-step guide to removing and replacing the sensor.
(DIY)
Toyota Tacoma (2005-2012, V6): OEM {'brand': 'Toyota/Denso', 'part_number': '89467-04060', 'price': '$120-$180'} (Alt: {"brand": "Denso", "part_number": "234-9051", "price": "$100-$150"})
Honda Accord (2003-2007, 2.4L): OEM {'brand': 'Honda/Denso', 'part_number': '36531-RAA-A01', 'price': '$150-$220'} (Alt: {"brand": "Denso", "part_number": "234-9040", "price": "$110-$160"})
Ford F-150 (2004-2008, 5.4L): OEM {'brand': 'Motorcraft', 'part_number': 'DY1092', 'price': '$50-$80'} (Alt: {"brand": "Bosch", "part_number": "15719", "price": "$40-$60"}) - Replace Blown Fuse — Parts: $1-$5, Labor: $0-$50, ~0.1 hr book time (DIY)
- Repair Damaged Wiring or Connector — Parts: $10-$50, Labor: $100-$250, ~1.5 hr book time (Intermediate)
- Clean Corroded Ground Connection — Parts: $0-$10, Labor: $50-$100, ~0.5 hr book time (DIY)
- Replace Engine Control Module (ECM) — Parts: $600-$1500, Labor: $150-$300, ~2.0 hr book time (Professional)
Used vs. New Parts: Buying Guide
When a used part is worth it: Buying a used oxygen sensor is never recommended. They are wear items with a finite lifespan. The labor cost to install it outweighs any savings.
Donor-vehicle mileage cap: roughly under 20000 miles for the part to have meaningful remaining life.
Donor quality checklist:
- Ensure the part number is an exact OEM match.
- Avoid parts with any signs of corrosion or oil contamination.
Decision logic:
- If The cost of a new OEM sensor is less than $150 → Always buy new. The risk of premature failure with a used part is not worth the savings.
- If The part is an O2 sensor → Favor new OEM (Denso, NTK, Bosch) or direct-fit aftermarket parts for reliability.
Warranty tradeoff: Used parts have a 30-day max warranty. New OEM parts carry a 12-month/12,000-mile warranty.
Worst-case if a used part fails: $150-$400 if a used sensor fails, requiring repeat labor and a new sensor.
What Happens If You Wait — Timeline
- 0-2 weeks: Check Engine Light is on. The PCM defaults to a rich fuel map until the sensor heats up naturally. (MPG impact: 0-5%% · Added cost: $0)
- 2 weeks - 3 months: A noticeable drop in fuel economy occurs. May experience slight rough idle on cold starts. (MPG impact: 5-10%% · Added cost: $25-$75 in wasted fuel.)
- 3-9 months: The engine consistently runs rich. Unburned fuel overheats the catalytic converter and fouls spark plugs. (MPG impact: 10-15%% · Added cost: $100-$300 in wasted fuel and spark plugs.)
- 9+ months: Sustained extreme heat destroys the catalytic converter's internal substrate. (MPG impact: 15-25%% · Added cost: $800-$2,500+ for catalytic converter replacement.)
Cost of Not Fixing It
- 0-1 month: Reduced fuel economy by 10-15% and a guaranteed failed emissions test. (Added cost: $20-$50 per month in wasted fuel.)
- 1-6 months: The rich fuel mixture causes carbon buildup on spark plugs and begins degrading the catalytic converter. (Added cost: $100-$300 for spark plug replacement and fuel system cleaning.)
- 6+ months: Sustained exposure to raw fuel destroys the catalytic converter substrate. (Added cost: $800-$2,500 for catalytic converter replacement.)
Diagnosis Steps
- Confirm Code and Review Freeze Frame Data
Use an OBD-II scanner to confirm P0135 is active. Note the Freeze Frame data to see engine conditions when the code set. Clear the codes and see if P0135 returns immediately on the next cold start.
Tools: OBD-II Scanner (Beginner) - Check the Heater Circuit Fuse
Locate the fuse for the O2 sensor heater (often labeled 'O2 HTR' or 'A/F HTR') in the fuse box. If blown, replace it with the exact same amperage. If it blows again immediately, you have a short circuit.
Tools: Owner's Manual, Fuse Puller (Beginner) - Visually Inspect Wiring and Connector
Locate Bank 1, Sensor 1 (upstream, before the catalytic converter). Inspect the wiring harness for melted insulation or fraying. Unplug the connector and check the pins for green corrosion or oil contamination.
Tools: Flashlight, Safety Glasses (Beginner) - Test for Power and Ground at the Harness
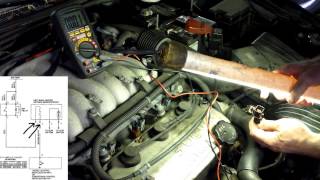
With the sensor unplugged, turn the ignition to 'ON' (engine off). Set a multimeter to DC Volts and probe the harness power pin; it must read ~12V. Switch to Ohms and check the ground pin for continuity to the chassis (less than 1 Ohm). Missing power or ground means the fault is in the vehicle wiring, not the sensor.
Tools: Multimeter, Vehicle Service Manual (Intermediate) - Test Heater Element Resistance
With the sensor unplugged and cold, set a multimeter to Ohms (Ω). Probe the two heater circuit pins on the sensor itself (usually the two same-colored wires). A good heater reads between 2 and 20 Ohms. A reading of 'OL' (Open Loop) means the internal heater is broken and the sensor must be replaced.
Tools: Multimeter, Vehicle Service Manual (Intermediate) - Replace the Oxygen Sensor
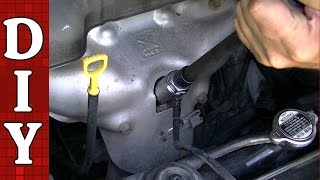
If the fuse, power, and ground are good, but the sensor fails the resistance test, replace the sensor. Use penetrating oil on the threads and a specialized O2 sensor socket to avoid damaging the new wires.
Tools: O2 Sensor Socket, Ratchet, Penetrating Oil (Intermediate)
When This Code Triggers (Freeze-Frame Conditions)
- Engine Coolant Temp: < 122°F (50°C) (During a cold start. The heater's job is to get the sensor hot before the engine warms up.)
- RPM: Idle (600-800 RPM) (The test runs within the first 2-3 minutes after starting the engine, frequently while idling.)
- Time After Start: 20-180 seconds (The PCM expects the heater to bring the sensor to operating temperature within a specific, short timeframe.)
Related Codes
- P0141 — Identical heater circuit malfunction code for Bank 1, Sensor 2 (downstream). If present with P0135, suspect a shared blown fuse or bad ground.
- P0155 — Heater circuit malfunction for Bank 2, Sensor 1. If a V6/V8 engine shows both P0135 and P0155, the problem is a shared power supply component.
- P0134 — O2 Sensor Circuit No Activity Detected. A dead heater (P0135) prevents the sensor from warming up and sending a signal. Fixing P0135 clears P0134.
- P0030 — Generic heater control circuit code for Bank 1, Sensor 1. Frequently appears alongside P0135 and shares the exact same diagnostic procedure.
Climate & Environmental Factors
- Cold Climates: In sub-zero weather, the heater works harder and longer to reach operating temperature. This increased demand causes weak heater elements to fail the PCM's startup test.
- High Humidity & Road Salt: In the 'Rust Belt,' moisture and salt penetrate electrical connectors, causing corrosion and short circuits. Salt also seizes the sensor threads in the exhaust pipe.
How to Talk to a Mechanic About This Code
Say this: "I have a P0135 code for the Bank 1 Sensor 1 O2 sensor heater circuit. Please start by checking the fuse, and verifying power and ground at the sensor connector before recommending a new sensor."
This directs the technician to perform a proper electrical diagnosis first, preventing them from immediately replacing a potentially good sensor.
Avoid saying:
- 'My check engine light is on, can you look at it?'
- 'Just fix whatever's wrong.'
- 'I think I need a new oxygen sensor.'
Questions to ask before authorizing the repair:
- Did the O2 heater fuse and relay check out okay?
- Did you confirm there is battery voltage and a good ground at the sensor's harness connector?
- Can you provide me with the old part?
Where to Take It: Dealer vs Independent vs Chain
- Dealer:
Best for: Vehicles still under the powertrain or federal emissions warranty (8 years/80,000 miles)., Complex electrical issues requiring PCM software updates.
Downsides: Significantly higher labor rates and diagnostic fees. (Typical cost: +50% vs. baseline) - Independent Shop:
Best fit for most drivers. A reputable independent shop easily diagnoses and repairs a P0135 fault at a lower cost than a dealership.
Best for: Out-of-warranty vehicles where cost is a major factor., Common codes like P0135 that don't require brand-specific tools.
Downsides: Quality varies; vet the shop through reviews and ASE certifications. (Typical cost: +0% vs. baseline) - Chain Shop:
Use with caution. Acceptable for a straightforward sensor replacement if you have already diagnosed the issue yourself.
Best for: Simple, routine maintenance.
Downsides: Technician skill with electrical diagnostics is inconsistent. (Typical cost: -10% vs. baseline)
When to Walk Away From the Repair
If the estimated repair cost exceeds 40-50% of the car's private-party value, pause and reconsider the repair.
- Car worth $4000, fix is $350: Fix it. This is a routine repair and the cost is well below the threshold.
- Car worth $2500, fix is $1500: Walk away. This implies a failed catalytic converter. The repair cost is over 50% of the car's value.
What Scan Tool You Need for This Code
Minimum: A code reader that displays live data for the O2 sensor and reads freeze-frame data.
A sub-$20 reader only shows the code. It won't display live sensor voltage or freeze-frame data, which are essential for confirming the diagnosis before buying parts.
Budget: BlueDriver Pro (~$100) — Connects via Bluetooth to read codes, show freeze-frame data, and graph live O2 sensor voltage.
Mid-range: Foxwell NT510 Elite (~$200) — Offers bidirectional control to command the heater circuit on/off, providing a definitive diagnosis.
Professional: Autel MaxiCOM MK808S (~$450) — Provides extensive bidirectional controls, all-system scanning, and detailed live data graphing to pinpoint ECM faults.
Rent vs buy: If this is a one-time fix, borrow a basic OBD-II scanner for free from an auto parts store. Buy a scanner only if you diagnose vehicles regularly.
How to Clear the Code After You Fix It
- Reconnect the sensor and battery terminal.
- Use an OBD-II scan tool to erase the P0135 fault code.
- Perform a complete OBD-II drive cycle to run the readiness monitors.
Drive cycle (~20 minutes): From a cold start, idle for 3 minutes with electrical loads on. Accelerate to 55 mph and hold for 5 minutes. Decelerate without braking to 20 mph. Accelerate again to 55 mph and hold for 5 minutes.
Readiness monitors affected: O2 Sensor Heater Monitor, O2 Sensor Monitor, Catalyst Monitor
Before emissions retest: drive at least 50 miles to fully set monitors.
Watch out for:
- Disconnecting the battery clears the code but resets all monitors to 'incomplete', guaranteeing an emissions failure.
- The code returns immediately if the underlying electrical fault was not fixed.
Will This Fail Emissions / State Inspection?
Yes — this code typically fails an OBD-II emissions inspection.
- California: An active P0135 code is an automatic failure. A full drive cycle must be completed to set readiness monitors to 'Ready' before a re-test.
- New York: A P0135 code causes an immediate test failure. The O2 Sensor Heater monitor must show 'Ready' to pass.
Most Commonly Affected Vehicles
- Toyota Camry, Tacoma, Sequoia (2001-2012) — Extremely common due to heater element failure in the original Denso A/F sensor. Replacement with an OEM Denso part is mandatory to avoid compatibility issues.
- Honda Civic, Accord, CR-V (1996-2010) — Straightforward sensor failure from age. Check the 'O2 HTR' fuse in the under-hood fuse box before replacing the sensor.
- Ford F-150, Explorer, Focus (2000-2010) — Wiring damage is common on trucks due to harness routing chafing against the frame.
- Chevrolet / GMC Silverado, Suburban, Tahoe (2000-2011) — If both P0135 and P0155 (Bank 2) are present, the issue is a shared blown fuse labeled 'O2A' or 'O2B'.
- Dodge / Ram Ram 1500/2500/3500 (2010-2012) — Corrosion in the sensor's wiring connector is a known defect. TSB #25-004-12 recommends installing a pigtail repair kit before replacing the sensor.
- Hyundai / Kia Elantra, Optima, Sorento (2007-2016) — Typically resolved by replacing the upstream O2 sensor due to internal heater element failure.
- Nissan Altima, Sentra, Frontier (1998-2012) — Aged O2 sensors are the primary cause, followed closely by wiring harness connector corrosion.
- Subaru Impreza, Forester, Outback (2002-2014) — Replacing the front Air/Fuel (A/F) Ratio sensor resolves the code. Ensure exact part matching for specific resistance values.
- Volkswagen Jetta, Golf, Passat (2005-2015) — A known issue on TDI diesel models where the lambda sensor heater circuit fails prematurely.
Manufacturer-Specific Notes
- Chrysler/Dodge/Jeep: Highly sensitive to aftermarket sensors. Using a non-OEM (Mopar/NTK) sensor causes P0135 to persist due to slight differences in heater resistance.
- Toyota/Lexus: The upstream sensor is an Air/Fuel (A/F) Ratio Sensor. Installing a standard O2 sensor instead of the required A/F sensor guarantees the code returns.
- General Motors (GM): GM issued Technical Service Bulletins (TSBs) addressing P0135 with a PCM software update that adjusts heater circuit monitoring parameters.
Real Owner Stories
2003 Honda Civic with a persistent P0135
Owner replaced the O2 sensor, but the P0135 code immediately returned.
What they tried:
- Replacing the O2 sensor.
- Inspecting the wiring harness.
Outcome: The problem was a blown 10-amp fuse in the under-dash fuse box. Replacing the fuse resolved the code.
Lesson: Always check the simple fixes first. A 5-minute fuse check saves the cost of an unnecessary O2 sensor.
2004 Honda Civic with P0135 after buying from a private seller
Check Engine Light came on with codes P0141 and P0135.
What they tried:
- Replaced the downstream O2 sensor, clearing P0141.
- Replaced the upstream A/F sensor, but P0135 remained.
- Tested the new sensor's resistance and checked the fuse.
Outcome: The owner found a previous, poor wiring repair wrapped in electrical tape, leaving exposed copper. The fault was in the vehicle's wiring.
Lesson: If a new sensor doesn't fix the code, visually inspect the harness between the sensor and the engine.
How to Prevent This Code From Triggering
- Use 'Top Tier' certified gasoline (Every fill-up) — Top Tier gas contains detergents that prevent carbon deposits, reducing contaminants that foul the O2 sensor.
- Replace upstream O2 sensors proactively (Once every 100,000 miles) — O2 sensors are wear items. Replacing them restores fuel economy and prevents a slow sensor from damaging the catalytic converter.
- Address engine oil and coolant leaks promptly (As needed) — Oil or antifreeze burned in the exhaust permanently poisons the O2 sensor.
Frequently Asked Questions
What does 'Bank 1, Sensor 1' actually mean?
Bank 1 is the side of the engine containing cylinder #1. Sensor 1 is the 'upstream' sensor, located in the exhaust manifold before the catalytic converter.
What is the biggest mistake when fixing P0135?
The most costly mistake is replacing the oxygen sensor without checking the fuse first. Always verify 12V power and ground at the connector before buying parts.
I replaced the O2 sensor and the P0135 code came back. What now?
This means the sensor was not the root cause. You likely have a blown heater fuse, a broken wire in the harness, or a poor ground connection. Re-verify 12V power and ground at the sensor connector.
Can I clean an oxygen sensor to fix a P0135 code?
No. P0135 is an electrical fault with the internal, sealed heater circuit. No amount of exterior cleaning repairs a burned-out heater element.
How much does it cost to fix a P0135 code?
Costs range from $5 for a blown fuse to $450 for a professional sensor replacement. A DIY sensor replacement typically costs $50 to $150 for the part. Dealership repairs on complex vehicles push the upper end of this range.
Is replacing an O2 sensor hard to do yourself?
It is a manageable DIY task requiring basic hand tools and a specialized 7/8-inch O2 sensor socket. The biggest hurdle is removing a rust-seized sensor from the exhaust manifold. Applying penetrating oil generously beforehand prevents thread damage.
Can a vacuum leak cause a P0135 code?
No. P0135 is strictly an electrical circuit code. A vacuum leak affects the air-fuel mixture and triggers lean codes like P0171, not heater circuit codes.
Key Takeaways
- P0135 indicates an electrical failure in the Bank 1, Sensor 1 oxygen sensor heater circuit, preventing the sensor from reaching its 600°F operating temperature.
- Always test the 7.5A to 15A O2 heater fuse and verify 12V power at the harness before spending $50 to $250 on a new sensor.
- Replacing the upstream oxygen sensor fixes P0135 in 80% of cases, requiring only a specialized 7/8-inch O2 sensor socket and penetrating oil.
- Driving with an active P0135 code reduces fuel economy by 10-15% and destroys the catalytic converter within 6 to 9 months, turning a $150 repair into a $1,500 replacement.
Helpful Videos




The information in this article is provided for general reference and educational purposes only. Vehicle specifications, procedures, and part compatibility can vary by production date, trim level, and region. Always consult your vehicle's factory service manual and verify part numbers before purchasing or performing repairs. Safety-critical components such as airbags, seat belts, and braking systems should be installed by a qualified professional.
- 🎬 Helpful Videos
- What Does P0135 Mean?
- Can I Drive With P0135?
- Common Causes
- Symptoms
- Diagnostic Flowchart
- Common Fixes & Costs
- Used vs. New Parts: Buying Guide
- What Happens If You Wait — Timeline
- Cost of Not Fixing It
- Diagnosis Steps
- When This Code Triggers (Freeze-Frame Conditions)
- Related Codes
- Climate & Environmental Factors
- How to Talk to a Mechanic About This Code
- Where to Take It: Dealer vs Independent vs Chain
- When to Walk Away From the Repair
- What Scan Tool You Need for This Code
- How to Clear the Code After You Fix It
- Will This Fail Emissions / State Inspection?
- Most Commonly Affected Vehicles
- Manufacturer-Specific Notes
- Real Owner Stories
- 2003 Honda Civic with a persistent P0135
- 2004 Honda Civic with P0135 after buying from a private seller
- How to Prevent This Code From Triggering
- Frequently Asked Questions
- What does 'Bank 1, Sensor 1' actually mean?
- What is the biggest mistake when fixing P0135?
- I replaced the O2 sensor and the P0135 code came back. What now?
- Can I clean an oxygen sensor to fix a P0135 code?
- How much does it cost to fix a P0135 code?
- Is replacing an O2 sensor hard to do yourself?
- Can a vacuum leak cause a P0135 code?
- Key Takeaways
- 🎟️ Get 5% Off