

P0106 on 2001-2011 Honda Civic: MAP Sensor Causes and Fixes
For a 2001-2011 Honda Civic, code P0106 is most often caused by a faulty Manifold Absolute Pressure (MAP) sensor. Before replacing the sensor, inspect for cracked vacuum hoses and clean the throttle body port, as these are common and cheaper fixes. Replacing the sensor is a common, affordable DIY fix, with quality parts costing between $20 and $70 for aftermarket and $70-$100 for OEM.
- P0106 on a 2001-2011 Civic almost always points to a problem with the Manifold Absolute Pressure (MAP) sensor system.
- Before buying a new sensor, always inspect for cracked vacuum hoses and clean the MAP sensor port on the throttle body, as these are very common, cheaper fixes.
- If you replace the sensor, use a quality OEM (Denso) or reputable aftermarket brand, as cheap sensors are known to cause persistent issues.
- The screws holding the sensor can be difficult to remove; be prepared with vice grips in case they strip.
What's Unique About the 2001-2011 Honda Civic
On 7th and 8th generation Honda Civics, the MAP sensor itself is a very frequent failure point leading to code P0106. While vacuum leaks or wiring issues can be the cause, many owners report that replacing the original MAP sensor resolves the issue. The sensor is also known to have its port on the throttle body become clogged with carbon, which can be cleaned before replacing the part. There was a Technical Service Bulletin for the Honda S2000 of a similar era (TSB 04-073) for MAP sensor connection issues, suggesting a general sensitivity in Honda's MAP systems from that time. Some owners have noted that issues can arise after a dead battery, requiring the car to relearn its idle, which can sometimes be confused with a MAP sensor fault.
Generation note: This guide covers the 7th generation (2001-2005) and 8th generation (2006-2011) Honda Civic. The primary cause (faulty MAP sensor) is common to both. The sensor location is on the throttle body for both generations, but the specific part numbers differ. The 7th gen uses the D17 engine series, while the 8th gen primarily uses the R18 engine.
Symptoms You May Notice
- Check Engine Light is on
- Rough or unstable idle, sometimes surging between 1k-2.5k RPM.
- Engine stalling, especially when coming to a stop
- Hesitation or a 'bogging' feeling when accelerating.
- Noticeably decreased fuel economy.
- Black smoke from the exhaust, indicating a rich fuel mixture.
- Difficulty starting the engine, or extended cranking time.
- In some cases, backfiring.
- Replacing the MAP sensor without first checking for vacuum leaks, which can produce identical symptoms.
- Replacing the throttle position sensor (TPS) without checking MAP sensor data first.
- Replacing the oxygen (O2) sensors, as poor fuel economy and black smoke can also be symptoms of a bad O2 sensor.
Most Likely Causes
- Faulty MAP Sensor 🔴 High Probability The MAP sensor is a known high-failure item on this generation of Honda Civics due to age, heat cycles, and internal contamination.
How to confirm: With a scan tool, observe live MAP sensor data (voltage or pressure). The reading should change smoothly as you press and release the throttle. If it's stuck, erratic, or doesn't change, the sensor is likely bad. With the Key On, Engine Off, the MAP reading should be very close to the Barometric Pressure (BARO) reading.
Typical fix: Replace the MAP sensor. It is typically held on by one or two screws on top of the throttle body. It is highly recommended to use an OEM (Denso) or high-quality aftermarket brand (NGK/NTK, Delphi) as cheap, unbranded sensors are known to fail quickly.
Est. part cost: $20-$100 - Vacuum Leak 🟡 Medium Probability Rubber vacuum hoses and intake gaskets become brittle and crack over time, causing unmetered air to enter the engine. This is a very common issue that mimics a bad MAP sensor.
How to confirm: Visually inspect all vacuum hoses connected to the intake manifold for cracks or disconnections. Pay close attention to the small hose running to the sensor itself. A smoke test is the most effective way to find small, hard-to-see leaks.
Typical fix: Replace the cracked hose or faulty gasket that is causing the leak.
Est. part cost: $5-$50 - Clogged MAP Sensor Port or Dirty Throttle Body 🟡 Medium Probability
How to confirm: Remove the MAP sensor and inspect the small port on the throttle body where it mounts. Check if it is blocked with carbon buildup. Also, inspect the throttle body bore for heavy carbon deposits that could restrict airflow and alter pressure readings.
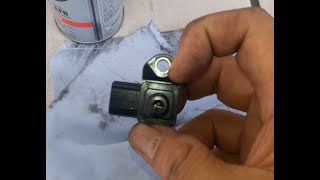
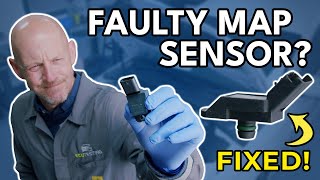
Typical fix: Clean the MAP sensor port carefully with a small pick or brush. Clean the throttle body with a dedicated throttle body cleaner and a soft cloth or brush. Do not spray cleaner directly into the MAP sensor itself; use a dedicated electronics or MAF sensor cleaner 🎬 See this DIY guide for cleaning and replacing your sensor. if cleaning the sensor tip.
Est. part cost: $5-$15 - Damaged Wiring or Connector ⚪ Low Probability
How to confirm: Inspect the MAP sensor's electrical connector and wiring for signs of corrosion, damage, or loose pins. Use a multimeter to check for a 5-volt reference signal (often a Yellow/Red wire), a good ground (often a Green/White wire), and a fluctuating signal voltage with the engine running.
Typical fix: Repair the damaged wire or replace the connector pigtail.
Est. part cost: $10-$30
Rare But Worth Checking
- Faulty Powertrain Control Module (PCM): This is very rare. The PCM should only be considered after all other possibilities (sensor, wiring, vacuum leaks) have been thoroughly ruled out.
- Clogged Catalytic Converter: A severely clogged catalytic converter can create backpressure that affects intake manifold pressure, potentially triggering a P0106 code. This is usually accompanied by other codes and more severe performance loss.
- Engine Mechanical Issues: A skipped timing belt or low engine compression can cause low or erratic engine vacuum, leading the ECU to believe the MAP sensor is faulty. This was noted as a possibility on a 2005 Civic after a sensor replacement didn't fix the issue.
- MAP Sensor Icing: In extremely cold weather, ice can form on the MAP sensor during long drives, causing temporary erratic readings. A GM TSB (20-NA-043) describes this exact issue, and while not a Honda TSB, the physics are universal. The issue typically resolves itself after the engine warms up.
Diagnosis Steps
- Read the code with an OBD-II scanner and check for any other stored codes. Note any codes like P0107, P0108, or P1129.
- Use the scanner's live data function to monitor the MAP sensor reading (usually in kPa or Volts) with the Key On, Engine Off (KOEO). It should be close to the Barometric Pressure (BARO) reading.
- Start the engine and observe the MAP reading at idle. It should be stable and low (high vacuum). Briefly snap the throttle; the reading should change instantly and smoothly toward the BARO reading and then drop back down.
- Visually inspect all vacuum lines connected to the intake manifold for obvious cracks, breaks, or loose connections. A cracked hose is a very common cause.
- Remove the MAP sensor (usually located on top of the throttle body, held by one or two Phillips screws 🎬 Watch: How to find and replace the MAP sensor. which may be corroded and strip easily). Inspect its port for carbon buildup or obstructions. Clean if necessary.
- Inspect the sensor's electrical connector for corrosion or damage. Ensure it fits snugly.
- If the sensor and port are clean, perform a smoke test on the intake system to check for hidden vacuum leaks. This is the most definitive way to rule out leaks.
- If no vacuum leaks are found, test the sensor's wiring. Check for a 5V reference wire, a ground wire, and a signal wire that changes voltage with vacuum applied.
- If wiring is good and no vacuum leaks are present, the MAP sensor itself is the most likely culprit and should be replaced with a quality part.
Parts You'll Likely Need
- Manifold Absolute Pressure (MAP) Sensor
(OEM #37830-RNA-A01 (2006-2011) / 37830-PGK-A01 (2001-2005))— This is the most common part to fail and cause a P0106 code on this vehicle.
Trusted brands: Denso (OEM), NGK/NTK, Delphi, Standard Motor Products (SMP)
OEM price range: $70-$100
Aftermarket price range: $20-$70
Related Codes That Often Appear With This One
- P0107 — P0107 indicates 'MAP Circuit Low Voltage,' which can occur if the sensor fails or has a wiring issue, directly related to the P0106 performance fault.
- P0108 — P0108 indicates 'MAP Circuit High Voltage,' the opposite of P0107, but also points to a sensor or circuit failure that would trigger a P0106 performance code.
- P1129 — A Honda-specific code for 'MAP Sensor Signal Higher Than Expected.' This often appears on 7th gen Civics and points directly to the same set of faults as P0106, such as a bad sensor or a significant vacuum leak.
- P0171/P0172 — Incorrect MAP readings can cause the ECU to create a lean (P0171) or rich (P0172) fuel mixture as it tries to compensate, triggering these fuel trim codes.
Technical Service Bulletins (TSBs) & Recalls
- While no direct TSB for P0106 on this Civic was found, Honda TSB 04-073 for the S2000 addressed MAP sensor connection issues causing hesitation, indicating a potential pattern for Honda vehicles of that era.
- GM TSB 20-NA-043 describes MAP sensor icing in cold weather, a phenomenon that could theoretically affect any vehicle, causing a temporary P0106 code.
Platform-Specific Known Issues
- Stripped MAP Sensor Screws: On older Civics, the Phillips head screws holding the MAP sensor to the throttle body are notorious for corroding and stripping easily. Owners on forums recommend using vice grips to break them loose. One user even suggests carefully breaking the plastic housing of the old sensor to gain access to the screw heads with pliers. Always replace with new screws.
- Intermittent Issues After Battery Change: Some owners have reported the P0106 code appearing after the vehicle's battery has died or been replaced. This can sometimes be related to the ECU needing to relearn idle parameters. If the car idles poorly or stalls after a battery replacement, performing the idle relearn procedure should be the first step before diagnosing the MAP sensor.
Mechanic-Grade Diagnostic Values
- MAP Sensor Signal Voltage (Key On, Engine Off) — expected: ~2.9V to 4.9V depending on model and atmospheric pressure. Should correspond to barometric pressure.. Failure: A reading of 0V, or a reading significantly outside the expected range that doesn't match BARO, indicates a sensor or wiring fault. A reading over 5V is a definitive failure.
- MAP Sensor Signal Voltage (Engine at Hot Idle) — expected: ~1.0V to 1.5V.. Failure: Voltage that is high (e.g., >2.0V) or erratic at a stable idle suggests a vacuum leak or a faulty sensor.
- MAP Sensor Signal Voltage (Hard Acceleration / Low Vacuum) — expected: Should rise to ~4.5V.. Failure: Voltage does not increase smoothly with throttle application or is stuck low.
- MAP Sensor 5V Reference Wire — expected: Approximately 5.0V (±0.5V) with key on.. Failure: No voltage or low voltage points to a problem with the ECU or the wiring between the ECU and the sensor.
- MAP Sensor Ground Wire — expected: Should have continuity to a known good ground (less than 5 ohms resistance).. Failure: High resistance or an open circuit indicates a bad ground, which can cause erratic sensor readings.
Scan Tool Commands That Help
- Manual Procedure (No special tool required): Idle Relearn Procedure — This procedure is critical after disconnecting the vehicle's battery, cleaning the throttle body, or replacing the ECU. Failure to perform it can cause a rough, unstable idle and stalling that mimics a P0106 fault. The ECU's learned idle trim is lost and must be recalibrated. The general procedure is to warm the engine to operating temperature (until the cooling fan cycles), then let it idle without any electrical loads (A/C, lights, radio off) for at least 10 minutes.
Wiring & Ground Locations
- MAP Sensor Connector (Typical) — On the MAP sensor, which is mounted to the throttle body or intake manifold.. Knowing the pinout is essential for testing the sensor and circuit. Wire colors can vary by year and model. One common configuration is: 5V Reference (Yellow/Red), Ground (Green/White), Signal (Green/Blue or Red/Green). Some sensor plugs have the pins labeled V, O, G for Voltage, Signal, and Ground.
Real Owner Repair Stories
- Honda-Tech forum user 'California98Civ' (1998 Honda Civic DX) — Car broke down, threw P0108 (MAP Sensor High Voltage), sudden fuel enrichment, sputtering and stalling.
❌ Tried (didn't work) Cleaning the sensor was attempted before testing.
✅ What actually fixed it The user tested the sensor with a multimeter and a hand vacuum pump. With 0 inches of vacuum, the sensor outputted 6 volts, far exceeding its 5V design and confirming a definitive electrical failure within the sensor. The user was confident in replacing the sensor as the fix based on this test.
OEM Part Supersession History
37830-RNA-A01→N/A— This is the standard part for the 8th Gen (2006-2011) Civic. The Denso OEM cross-reference is 079800-7590.37830-PGK-A01→N/A— This is the standard part for the 7th Gen (2001-2005) Civic. The Denso OEM cross-reference is 079800-5410.
Model Year Variations Within This Range
- 2001-2005: These 7th generation Civics use the D17 engine family and require MAP sensor part number 37830-PGK-A01.
- 2006-2011: These 8th generation Civics primarily use the R18 engine family and require MAP sensor part number 37830-RNA-A01.
Diagnostic Flowchart
Real Owner Stories
Aggregated from forums and TSBs cited above. Mileages and costs reflect what owners reported in those sources.
1996 Honda Civic
Symptoms: Surging idle from 1k to 2.5k RPM with the code present.
What fixed it: Troubleshooting the wiring by checking for a 5V reference and ground at the MAP connector.
Source hint: Honda-Tech forum thread titled 'How do I fix P0106?'
Honda Civic EG
Symptoms: Unable to remove the MAP sensor due to the common problem of stripped Phillips head screws.
What fixed it: Carefully breaking the old sensor's plastic body to access the stripped screws with vice grips.
Source hint: Civic EG Forum thread titled 'DIY replace map sensor-hassle free way'
Honda Civic
Symptoms: The P0106 code started immediately after the vehicle had a dead battery.
What fixed it: Cleaning the throttle body and performing the idle relearn procedure instead of assuming the new sensor was bad.
Source hint: Reddit r/MechanicAdvice thread titled 'Car keeps kicking out P0106 code - even after replacing the MAP sensor'
2005 Honda Civic
Symptoms: Received a P1129 code (MAP Sensor Higher Than Expected), replaced the sensor, but the problem returned.
What fixed it: Diagnosing mechanical engine problems, such as a skipped timing belt, which causes low vacuum and triggers the code.
Source hint: Honda-Tech forum thread titled '2005 Civic- P1129 MAP Sensor (Higher Than Expected)'
Related OBD-II Codes
Frequently Asked Questions
Why did my 2001-2011 Civic get a P0106 code right after I changed the battery?
The screws holding the MAP sensor on my Civic's throttle body are stripped. How do I get them out?
What brand of MAP sensor should I buy for my Civic to fix P0106?
Does Honda TSB 04-073 apply to my 2001-2011 Civic?
I replaced the MAP sensor on my 2005 Civic but the code came back. What else could it be?
Can cold weather cause a P0106 code on my Civic?
Helpful Videos
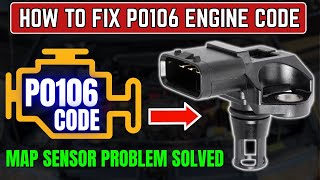

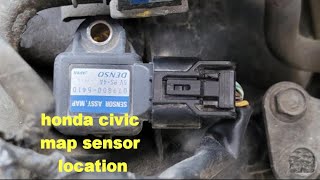
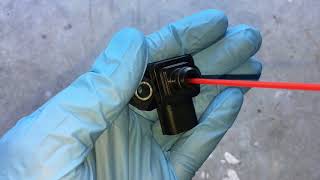
We Have This Part in Stock


The information in this article is provided for general reference and educational purposes only. Vehicle specifications, procedures, and part compatibility can vary by production date, trim level, and region. Always consult your vehicle's factory service manual and verify part numbers before purchasing or performing repairs. Safety-critical components such as airbags, seat belts, and braking systems should be installed by a qualified professional.
- Honda Civic:
- 🎬 Helpful Videos
- 🛍️ Shop This Part
- What's Unique About the 2001-2011 Honda Civic
- Symptoms You May Notice
- Most Likely Causes
- Rare But Worth Checking
- Diagnosis Steps
- Parts You'll Likely Need
- Related Codes That Often Appear With This One
- Technical Service Bulletins (TSBs) & Recalls
- Platform-Specific Known Issues
- Mechanic-Grade Diagnostic Values
- Scan Tool Commands That Help
- Wiring & Ground Locations
- Real Owner Repair Stories
- OEM Part Supersession History
- Model Year Variations Within This Range
- Diagnostic Flowchart
- Real Owner Stories
- 1996 Honda Civic
- Honda Civic EG
- Honda Civic
- 2005 Honda Civic
- Related OBD-II Codes
- Frequently Asked Questions
- 🎟️ Get 5% Off