

P0031 on 2008-2015 Scion xB: Air/Fuel Sensor Heater Circuit Causes and Fixes
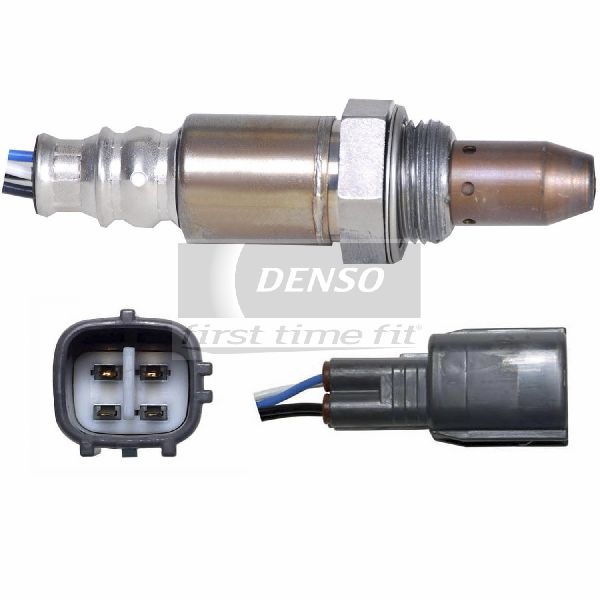
On a 2008-2015 Scion xB, code P0031 is almost always caused by a failed heater element inside the upstream Air/Fuel Ratio sensor. Replacing this sensor, which costs about $60-$120 for a quality aftermarket part (Denso is OEM), is the most common fix. Before replacing, check the 'EFI MAIN' or 'A/F HEATER' fuse in the engine bay.
- P0031 on your Scion xB points to the heater in the upstream Air/Fuel Ratio sensor, located on the exhaust manifold.
- The most likely cause is a failed sensor. Before buying one, check the 'EFI MAIN' or 'A/F HEATER' fuse in the engine bay fuse box.
- When ordering a new sensor, be sure to get the correct Denso part for your vehicle's year: 234-9041 for 2008-2010 and 234-9049 for 2011-2015. Using the correct OEM part is critical.
- Don't be alarmed if the VSC and TRAC OFF lights are also on; this is a normal response on this vehicle and will clear with the Check Engine Light.
What's Unique About the 2008-2015 Scion xB
The 2008-2015 Scion xB uses the reliable Toyota 2AZ-FE engine, which has only one exhaust bank, making 'Bank 1' the only one. The key component here is a wideband Air/Fuel Ratio sensor, not a conventional oxygen sensor, which is more precise but also more expensive. A common quirk on this platform, and its Toyota platform-mates, is that a powertrain fault like P0031 will often trigger the 'VSC' and 'TRAC OFF' lights on the dashboard in addition to the Check Engine Light. This is a standard safety feature to indicate the vehicle stability systems may have reduced effectiveness and the lights will clear once the engine code is resolved.
🎬 See how to reset VSC and TRAC OFF dashboard lightsSymptoms You May Notice
- Check Engine Light is on
- VSC and TRAC OFF lights may also be illuminated
- Reduced fuel economy
- Rough idle, especially when the engine is cold
- Failing an emissions test
- Slight hesitation or loss of power
- Replacing the downstream (Bank 1, Sensor 2) oxygen sensor. This code specifically points to the upstream sensor's heater circuit.
- Using a cheap, non-OEM sensor. Owners on forums report that Toyota/Scion vehicles are often picky and may not work correctly with off-brand A/F sensors, leading to the code returning.
Most Likely Causes
- Failed Upstream Air/Fuel Ratio Sensor 🔴 High Probability The internal heater element of the sensor has a finite lifespan and is the most common point of failure for this code. It is a standard wear-and-tear item that eventually burns out.
How to confirm: After checking the fuse and wiring, test the resistance of the heater circuit at the sensor's connector using a multimeter. The two wires of the same color (typically black) are for the heater. An open circuit (infinite resistance or 'OL') confirms the heater has failed. A good heater should have a low resistance, typically between 1.8 and 3.4 ohms when at room temperature (20°C / 68°F).
Typical fix: Replace the Bank 1, Sensor 1 (upstream) Air/Fuel Ratio sensor. It is highly recommended to use the OEM Denso part, as these vehicles can be sensitive to aftermarket sensors.
Est. part cost: $60-$150 - Blown A/F Heater Fuse 🟡 Medium Probability A short circuit in the sensor or its wiring can cause the corresponding fuse to blow as a protective measure.
How to confirm: Locate the fuse box in the engine bay on the driver's side. Check the fuse labeled 'A/F HEATER' or 'EFI MAIN'. Visually inspect if the fuse is blown or test for continuity with a multimeter.
Typical fix: Replace the blown fuse. If it blows again immediately, a short circuit exists in the wiring or the sensor that must be repaired.
Est. part cost: $1-$5 - Damaged Wiring or Connector ⚪ Low Probability The sensor wiring is located near the hot exhaust manifold and can become brittle, melt, or get damaged over time, leading to an open or short circuit.
How to confirm: Visually inspect the wiring harness and connector leading to the upstream A/F sensor for any signs of melting, chafing, corrosion, or loose pins. Check for 12V power at the harness connector (typically a black wire) with the ignition on.
Typical fix: Repair the damaged section of the wiring harness or replace the connector pigtail.
Est. part cost: $15-$40
Rare But Worth Checking
- Faulty Engine Control Module (ECM): This is extremely rare. The ECM contains the driver circuit that controls the sensor's heater. Before condemning the ECM, all other possibilities (sensor, fuse, wiring) must be exhaustively ruled out.
Diagnosis Steps
- Read the trouble codes with an OBD-II scanner to confirm P0031 is the primary code.
- Locate the A/F Heater fuse (may be labeled 'EFI MAIN') in the engine bay fuse box. Visually inspect it and replace if blown.
- If the fuse is good, locate the upstream Air/Fuel Ratio sensor. It is in the exhaust manifold, on the driver's side of the engine, pointing toward the battery.
- Inspect the sensor's wiring harness and connector for any visible damage, such as melting, fraying, or corrosion.
- Disconnect the sensor. Using a multimeter set to Ohms, measure the resistance between the two heater pins on the sensor side of the connector (pins +B and HT, often same-colored wires). 🎬 Watch: How to test and replace an Air Fuel sensor A reading of 'OL' or infinite resistance indicates a failed heater element. A good sensor should read between 1.8 and 3.4 ohms at 68°F (20°C).
- If resistance is within spec, check for power at the harness-side connector. With the ignition on, you should have ~12V between the power wire (often black) and chassis ground.
- If power and ground are present at the harness and the sensor's heater has correct resistance, the issue could be a rare intermittent connection problem or a fault with the ECM driver circuit.
Parts You'll Likely Need
- Upstream Air/Fuel Ratio Sensor (2008-2010)
(OEM #Denso 234-9041)— This is the direct-fit replacement for the upstream sensor on 2008-2010 models, confirmed by multiple auto parts retailers. Denso is the Original Equipment Manufacturer. This part number is often superseded by 234-9049.
Trusted brands: Denso
OEM price range: $120-$180
Aftermarket price range: $80-$130 - Upstream Air/Fuel Ratio Sensor (2011-2015)
(OEM #Denso 234-9049)— This is the direct-fit replacement for the upstream sensor on 2011-2015 models, cross-referencing to Toyota part 89467-28090. Denso is the Original Equipment Manufacturer.
Trusted brands: Denso, NGK
OEM price range: $100-$160
Aftermarket price range: $60-$120
Platform-Specific Known Issues
- Easy Sensor Access but Specific Tool Recommended: The Bank 1 Sensor 1 is conveniently located on the front exhaust manifold, on the driver's side of the engine bay, making it very easy to access. However, owners on forums strongly recommend using a 22mm stubby wrench for removal and installation, as a regular length wrench can be difficult to maneuver in the available space. An O2 sensor socket set can also be used.
Mechanic-Grade Diagnostic Values
- A/F Sensor Heater Resistance — expected: 1.8 to 3.4 Ω at 20°C (68°F). Failure: A reading of OL (Open Loop/infinite resistance) or a value outside the specified range.
- A/F Sensor Heater Circuit Current (ECM Monitored) — expected: Greater than 0.8 Amps when the heater is commanded on.. Failure: The ECM will set code P0031 if the current is less than 0.8 Amps.
- Voltage at A/F Sensor Harness Connector — expected: Approximately 12V (battery voltage) at the power supply pin (+B, often a black wire) with the ignition ON.. Failure: No voltage or significantly low voltage indicates a problem with the EFI MAIN relay, fuse, or wiring.
Scan Tool Commands That Help
- Toyota Techstream: Freeze Frame Data Analysis — To review the exact engine operating conditions (engine temp, speed, load, etc.) at the moment the P0031 fault was first recorded. This can help distinguish a cold-start failure from an intermittent wiring issue.
- Toyota Techstream: DTC Check / Clear — After a repair, use this function to clear the code, then idle the engine for at least one minute to confirm the DTC does not immediately return, which would indicate a persistent hard fault.
Wiring & Ground Locations
- EA, EB, EC — Engine compartment. These are the designators for the main ground points in the engine bay.. The A/F sensor heater circuit requires a solid ground to complete its circuit. A corroded or loose ground connection at one of these points could cause low current flow and trigger P0031.
- A/F Sensor Connector Pins — At the sensor connector on the exhaust manifold.. For accurate testing, you must know the pin functions. On the 4-wire connector, pins 1 (+B) and 2 (HT) are for the heater circuit. Resistance should be measured across these two pins on the sensor side.
- EFI MAIN Relay — In the engine room relay/fuse block.. This relay supplies the 12V power to the A/F sensor heater circuit. A faulty relay will prevent the heater from receiving power, causing P0031.
Real Owner Repair Stories
- CamryForums user 'ML32413' (2003 Toyota Camry 2.4L 2AZ-FE) — Check Engine Light with code P0031. Light comes on in ~15 seconds from a cold start, but takes 15-20 miles to return if reset when the engine is warm.
❌ Tried (didn't work) Replacing the upstream A/F sensor with the correct Denso part (234-9041).
✅ What actually fixed it The user did not post a final resolution, but their experience strongly suggests the problem was not the sensor itself, but rather an issue in the wiring, EFI relay, or ECM, which is a critical diagnostic path if a new OEM sensor doesn't solve the code.
OEM Part Supersession History
Denso 234-9041→Denso 234-9049— The 234-9041 part for 2008-2010 models has been discontinued by Denso and is noted by retailers to be replaced by 234-9049.
Heads up: While 234-9049 is the replacement, it's always best practice to confirm fitment with the supplier for the specific vehicle VIN. The original Toyota part number for the 2011-2015 sensor is 89467-28090.
Model Year Variations Within This Range
- 2008-2010 vs 2011-2015: The OEM part number for the upstream Air/Fuel ratio sensor is different. 2008-2010 models used Denso 234-9041, which has since been superseded by Denso 234-9049, the part specified for 2011-2015 models. This may reflect a minor change in calibration or connector keying.
Diagnostic Flowchart
Used vs. New Parts: Buying Guide for This Vehicle
When a used part is the smart pick: For this specific repair, a used part is almost never a smart choice. The A/F sensor is a wear-and-tear component with a finite lifespan. A used sensor from a junkyard carries a high risk of being faulty or failing shortly after installation.
Donor-vehicle mileage cap: roughly under 30000 miles for the part to have meaningful remaining life.
What to inspect on the donor part:
- If forced to consider a used part, source it from a very low-mileage vehicle that was wrecked due to collision, not engine failure.
- Inspect the sensor tip for heavy carbon deposits or white contamination, which indicates a poor-running donor engine.
- Ensure the wiring and connector are completely intact with no signs of melting or brittleness.
OEM-only on this vehicle (don't cheap out):
- Air/Fuel Ratio Sensor
Aftermarket brands forum-validated for this vehicle:
- Denso (is the OEM and highly recommended)
- NTK (also a reputable OEM supplier, considered a safe alternative if Denso is unavailable)
Brands owners have reported issues with on this vehicle:
- Generic, unbranded 'eBay or Amazon' sensors are strongly discouraged by forum veterans.
- Bosch sensors have been reported by some Toyota owners to have compatibility issues, even if listed as a fit.
Real Owner Stories
Aggregated from forums and TSBs cited above. Mileages and costs reflect what owners reported in those sources.
2008-2015 Scion xB 2.4L (2AZ-FE)
Symptoms: An owner shared their experience and advice for replacing the upstream oxygen sensor.
What fixed it: The owner advised that the sensor is on the driver's side of the exhaust manifold. They strongly recommended using a 22mm stubby wrench for the job and insisted on using the OEM Denso sensor to avoid compatibility problems.
Source hint: Reddit (r/ScionxB) - Thread 'Anyone know where to find the upstream oxygen sensor on a 2nd Gen XB?'
2005-2010 Scion tC 2.4L (2AZ-FE)
Symptoms: The owner had a P0031 code and attempted to diagnose it by swapping parts.
What fixed it: This was a cautionary tale. The owner swapped their sensor with a friend's known-good sensor. The code remained on their car, and when the friend's sensor was reinstalled in the original car, it also triggered a code, suggesting the test may have damaged the good sensor due to system sensitivity.
Source hint: ScionLife.com - Thread 'quick code question, need help badly!!!! P0031'
2002-2011 Toyota Camry 2.4L (2AZ-FE)
Symptoms: An owner was frustrated with a persistent P0031 code and performed advanced electrical checks.
What fixed it: The owner shared their diagnostic steps rather than a final fix. They confirmed the issue was not the sensor by checking for specific voltages at the harness connector with the ignition on: 12V on the black wire, 3.3V between the orange and brown wires, and 3.0V between the white and brown wires.
Source hint: CamryForums - Thread 'Frustrated with P0031 code!'
Related OBD-II Codes
Frequently Asked Questions
Where exactly is the Air/Fuel Ratio sensor for code P0031 located on my 2008-2015 Scion xB?
What is the best tool to use for removing the upstream A/F sensor on this vehicle?
Can I use a cheaper aftermarket sensor, or do I need to buy the OEM Denso part?
My Check Engine Light is on for P0031, but my VSC and TRAC OFF lights are on too. Is this related?
How can I test my A/F sensor to confirm it's bad before buying a new one?
I checked the 'A/F HEATER' fuse and it was blown. I replaced it, and it blew again immediately. What's next?
Is this P0031 problem also common on other Toyota or Scion models?
Helpful Videos

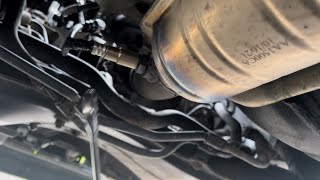
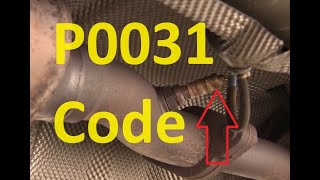
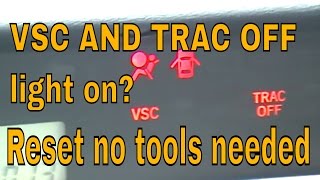
We Have This Part in Stock


The information in this article is provided for general reference and educational purposes only. Vehicle specifications, procedures, and part compatibility can vary by production date, trim level, and region. Always consult your vehicle's factory service manual and verify part numbers before purchasing or performing repairs. Safety-critical components such as airbags, seat belts, and braking systems should be installed by a qualified professional.
- Scion xB:
- 🎬 Helpful Videos
- 🛍️ Shop This Part
- What's Unique About the 2008-2015 Scion xB
- Symptoms You May Notice
- Most Likely Causes
- Rare But Worth Checking
- Diagnosis Steps
- Parts You'll Likely Need
- Platform-Specific Known Issues
- Mechanic-Grade Diagnostic Values
- Scan Tool Commands That Help
- Wiring & Ground Locations
- Real Owner Repair Stories
- OEM Part Supersession History
- Model Year Variations Within This Range
- Diagnostic Flowchart
- Used vs. New Parts: Buying Guide for This Vehicle
- Real Owner Stories
- 2008-2015 Scion xB 2.4L (2AZ-FE)
- 2005-2010 Scion tC 2.4L (2AZ-FE)
- 2002-2011 Toyota Camry 2.4L (2AZ-FE)
- Related OBD-II Codes
- Frequently Asked Questions
- 🎟️ Get 5% Off