

OBD-II Code P0037: Oxygen Sensor Heater Control Circuit Low (Bank 1, Sensor 2)
The Ultimate Guide to Diagnosing and Fixing P0037 — Causes, Pro-Level Diagnostics, and Real-World Costs
- A burned-out internal heater inside the Bank 1, Sensor 2 oxygen sensor causes over 80% of P0037 codes.
- Inspect the 10-15A O2 heater fuse and the sensor's wiring harness for melted insulation before spending $50 to $150 on a replacement sensor.
- Driving more than 200 miles with an active P0037 code forces the engine to run rich, risking a $1,000 to $4,000 catalytic converter replacement.
- Expect to pay a shop $125 to $300 for a professional sensor replacement, or DIY the job for $50 to $150 using an OEM-quality Denso or NTK part.
What Does P0037 Mean?

The Engine Control Module (ECM) detected a problem with the heater inside the oxygen sensor located after the catalytic converter (Bank 1, Sensor 2). This sensor must reach approximately 600°F to monitor catalytic converter efficiency. Code P0037 means the ECM detected voltage or current in the heater circuit below the expected range, indicating the sensor is not warming up.
Technical definition: The SAE/OBD-II definition is "HO2S Heater Control Circuit Low (Bank 1, Sensor 2)". The Powertrain Control Module (PCM) uses a pulse-width modulated (PWM) signal to control the heater. When it detects the current draw is too low (e.g., under 0.25 A) or sees a short to ground, it sets P0037. Some vehicles enter a fail-safe mode, disabling the heater circuit entirely until the ignition cycles.
Can I Drive With P0037?
Yes, But With Caution. Yes, you can drive with a P0037 code, but address it promptly. Continued driving over several hundred miles forces the engine to run rich, saturating the catalytic converter with unburned fuel. This turns a $100 sensor fix into a $1,000 to $4,000 catalytic converter replacement. Your vehicle will also fail emissions tests and experience a 5-10% drop in fuel economy until resolved.
Common Causes

- Faulty Heated Oxygen Sensor (HO2S) (Very Common) — The internal heater element within the oxygen sensor burns out from constant thermal cycling. This breaks the delicate filament, creating an open circuit or high resistance that the ECM flags as a low voltage/current fault. 🎬 Watch: How to test oxygen sensor heater circuits with a multimeter
- Damaged Wiring, Connectors, or Ground (Common) — Positioned under the vehicle, the sensor's wiring is vulnerable to road debris, exhaust heat, and moisture. Frayed wires, melted insulation shorting to the exhaust, corroded connector pins, or a loose ground strap cause low voltage conditions.
- Blown Fuse or Failed Relay (Less Common) — The O2 sensor heater circuit is protected by a fuse (often labeled 'O2 HTR' or 'A/F HEATER') and sometimes powered by a relay. A short circuit blows the fuse or burns out the relay, cutting power and triggering the code.
- Defective or Incompatible Aftermarket Sensor (Less Common) — Cheap, universal, or incorrect aftermarket oxygen sensors cause P0037 to persist. Toyota and Honda systems are highly sensitive to the sensor's specific resistance and heating characteristics.
- Faulty Engine Control Module (ECM) (Very Rare) — The driver circuit within the ECM that controls the ground or power to the sensor heater fails. Consider this only after exhaustively ruling out the sensor, wiring, fuse, and relay.
Symptoms

- Check Engine Light is On — The Malfunction Indicator Lamp (MIL) illuminates as long as the fault is detected. This is often the only noticeable symptom.
- Failed Emissions Test — P0037 is an emissions-related fault, causing an automatic failure of any state-mandated smog or emissions inspection.
- Decreased Fuel Economy — The emissions system fault forces the ECM into a less efficient open-loop mode, dropping gas mileage by 5-10%.
- Rough Idle, Hesitation, or Black Smoke — The ECM reacts to the fault by commanding a richer fuel mixture, causing a rough idle, hesitation on acceleration, or brief puffs of black smoke during cold starts. 🎬 Watch: A complete repair guide for the P0037 code
Diagnostic Flowchart
Tap your situation to follow the diagnostic path that matches what you're seeing on this code.
Common Fixes & Costs
- Replace Heated Oxygen Sensor (Bank 1, Sensor 2) — Parts: $50-$150, Labor: $75-$150, ~1.0 hr book time (DIY)
- Replace Blown Fuse or Relay — Parts: $1-$20, Labor: $0-$50, ~0.2 hr book time (DIY)
- Repair Damaged Wiring or Connector — Parts: $10-$50, Labor: $150-$400, ~2.0 hr book time (Intermediate)
- Replace Engine Control Module (ECM) — Parts: $600-$1200, Labor: $150-$300, ~2.0 hr book time (Professional)
DIY vs Professional
- Replace Heated Oxygen Sensor — Beginner: Yes
Tools: Jack and jack stands, penetrating oil, O2 sensor socket (22mm or 7/8"), breaker bar, torque wrench, anti-seize compound. - Replace Blown Fuse / Relay — Beginner: Yes
Tools: Fuse puller, owner's manual. - Repair Damaged Wiring or Connector — Beginner: No
Tools: Multimeter, wire strippers, wire cutters, soldering iron or butt connectors, heat shrink tubing, wiring diagrams. - Replace Engine Control Module (ECM) — Beginner: No
Tools: Professional diagnostic and programming tools.
Used vs. New Parts: Buying Guide
When a used part is worth it: Never for an oxygen sensor. O2 sensors are wear items with finite lifespans. A used sensor fails quickly, forcing you to pay labor twice. The low cost of new aftermarket sensors makes buying used impractical.
Donor-vehicle mileage cap: roughly under 10000 miles for the part to have meaningful remaining life.
Donor quality checklist:
- Avoid used sensors entirely.
- If forced to use one for temporary diagnosis, pull from the lowest-mileage vehicle possible.
- Ensure the part number matches exactly.
Decision logic:
- If The part is an oxygen sensor. → Buy a new OEM or high-quality aftermarket (Denso, NTK, Bosch) part. Do not buy used.
- If Vehicle is a Toyota, Honda, or Subaru. → Strongly prefer an OEM, Denso, or NTK sensor to avoid incompatibility issues.
- If The budget is extremely tight. → A new, budget-friendly aftermarket sensor ($20-$50) is better than a used one of unknown history.
Warranty tradeoff: Used parts offer no warranty or 30-day max. Aftermarket new offers 1-year to limited lifetime. OEM new offers 1-year/12,000-mile warranties.
Worst-case if a used part fails: $150-$400 if a used or cheap aftermarket part fails quickly, requiring repeat labor and a new part.
What Happens If You Wait — Timeline
- 0-1 month: Code P0037 is stored and the Check Engine Light illuminates. The vehicle automatically fails emissions tests. No other symptoms are noticeable. (MPG impact: 0-5%% · Added cost: $0-$25 in wasted fuel)
- 1-3 months: Fuel economy decreases. The system defaults to a richer fuel mixture, causing slight hesitation or rough idle on cold starts. (MPG impact: 5-10%% · Added cost: $25-$75 in wasted fuel)
- 3-6 months: The consistently rich engine overheats the catalytic converter. The internal substrate saturates with unburned fuel, reducing efficiency and beginning irreversible damage. (MPG impact: 7-15%% · Added cost: Risk of $1,200-$3,500 for catalytic converter replacement becomes significant.)
- 6+ months: The catalytic converter substrate melts or clogs from sustained overheating. The vehicle exhibits significant performance loss, rough idle, and a 'rotten egg' exhaust smell. (MPG impact: 15-25%% · Added cost: $1,500-$4,000 for a new catalytic converter plus the original sensor repair.)
Cost of Not Fixing It
- 0-1 month: Guaranteed failure of an emissions test and a drop in fuel economy of 5-10%. (Added cost: $10-$30 per month in wasted fuel.)
- 1-6 months: The engine runs rich to compensate for the sensor fault, dumping unburned fuel into the exhaust. This overheats the catalytic converter, leading to premature failure. (Added cost: Risk of a $1,200-$3,500 catalytic converter replacement.)
- 6+ months: Continued overheating destroys the precious metal substrate inside the catalytic converter. The vehicle suffers poor performance and releases excessive pollution. (Added cost: $1,200-$3,500 for a new catalytic converter, plus the original sensor repair.)
Diagnosis Steps
- Scan for Codes and Review Freeze Frame Data
Confirm P0037 is active using an OBD-II scanner. Note other codes (e.g., P0137, P0141) for clues. Review freeze frame data to see engine conditions when the code set. Clear codes and see if P0037 returns immediately on key-on.
Tools: OBD-II Scanner (Beginner) - Inspect the Fuse and Relay
Locate the O2 sensor heater fuse (typically 10-15A) using the owner's manual. Visually inspect it for a blown filament. If a relay is present, swap it with an identical non-critical relay (like the horn) to test it.
Tools: Owner's Manual, Fuse Puller (Beginner) - Visually Inspect Sensor and Wiring Harness
Raise and secure the vehicle. Locate Bank 1, Sensor 2 (post-catalytic converter). Meticulously inspect the wiring harness for melting, chafing against the frame, or physical damage. Check the connector for corrosion or pushed-out pins.
Tools: Jack and Jack Stands, Flashlight (Beginner) - Test the Sensor's Heater Element Resistance
Disconnect the sensor. Switch your multimeter to Ohms (Ω). On the sensor side of the connector, measure resistance between the two heater circuit pins (often two wires of the same color). A good sensor reads 2-30 Ohms at room temperature. 'OL' (Over Limit) means the internal heater is broken and the sensor requires replacement.
Tools: Multimeter, Service Manual for Specs (Intermediate) - Test for Power at the Sensor Connector
Turn the ignition to 'Key On, Engine Off' (KOEO). Using a multimeter set to DC Volts, probe the power supply wire on the harness-side connector. You should see battery voltage (~12V). If there is no voltage, the problem is upstream in the power supply wire, fuse, or relay.
Tools: Multimeter (Intermediate) - Check the Ground Circuit for Integrity
If power and sensor resistance test good, check the ground circuit. Check for continuity to ground on the ground wire in the harness connector. A direct short to ground with the key off indicates a shorted wire. No continuity to the ECM indicates a broken wire.
Tools: Multimeter, Vehicle-Specific Wiring Diagram (Advanced) - [PRO TIP] Monitor Live Data PIDs
Monitor live data PIDs like 'O2 Heater B1S2' or 'HTR12_CMD' using an advanced scan tool. The status changes from 'Off' to 'On' as the engine runs. Monitor the sensor's signal voltage ('O2S12 V'). If the heater fails, this voltage responds slowly from a cold start and stays at a fixed low value (under 0.1V).
Tools: Advanced OBD-II Scanner (Advanced) - [PRO TIP] Heater Circuit Current Draw Test
Measure heater circuit current using a DC clamp-on ammeter around the heater power wire, or insert a multimeter (10A DC setting) in series, using a bidirectional scan tool to activate it. A healthy heater draws 0.5-2.0 amps. A reading near zero confirms an open circuit. Readings below 0.25A trigger the code.
Tools: Clamp-on Ammeter or Multimeter (10A capable), Bidirectional Scan Tool (Advanced) - [PRO TIP] Scope the ECM Driver Signal
Scope the ground control wire of the heater circuit. With the engine running, look for a square wave pattern as the ECM pulses the ground. A flat line near zero volts indicates a short to ground. A flat line near battery voltage indicates an open control wire or the ECM is not commanding the heater on.
Tools: Automotive Oscilloscope, Wiring Diagram (Professional)
When This Code Triggers (Freeze-Frame Conditions)
- Engine Coolant Temp: 180-210°F (82-99°C) (The engine must be fully warmed up for the heater circuit diagnostic to run.)
- RPM: 1500-2500 RPM (The code sets during steady-state cruise, not at idle or during heavy acceleration.)
- Engine Load: 30-60% (A stable, moderate engine load is required for the PCM to test the circuit.)
- Vehicle Speed: 35-55 mph (56-88 km/h) (Steady city or highway driving provides the stable operating environment needed for the test.)
Related Codes
- P0038 — The direct opposite of P0037, indicating heater circuit voltage is too high (short to power). Both point to the Bank 1, Sensor 2 heater circuit.
- P0141 — A general performance/malfunction code for the Bank 1, Sensor 2 heater circuit. P0037 is more specific, identifying low voltage/current. Conditions setting P0037 often set P0141.
- P0036 — A generic control circuit range/performance code for the B1S2 heater. It indicates a problem but doesn't specify high or low voltage.
- P0137 — Indicates low voltage in the sensor's signal circuit. If the heater fails (P0037), the sensor doesn't get hot enough to produce a proper signal, triggering P0137. Seeing both strongly points to a failed sensor.
Climate & Environmental Factors
- Cold Climates / Road Salt: Vehicles in the 'Salt Belt' are prone to P0037. Salt and moisture accelerate corrosion of the wiring harness and connector pins, causing poor connections or short circuits.
- Extreme Heat Cycles: Frequent short trips prevent the exhaust from reaching full temperature. This rapid heating and cooling accelerates thermal stress on the sensor's internal heater element, causing premature failure.
- High Humidity: Moisture enters non-sealed connectors or compromised wire insulation, promoting corrosion and increasing electrical faults in the heater circuit.
How to Talk to a Mechanic About This Code
Say this: "I have a P0037 code. Can you test the Bank 1 Sensor 2 heater circuit for power, ground, and resistance before recommending a part replacement? I want to confirm if it's the sensor or a wiring issue."
This signals you understand common failure points. It directs the mechanic to perform necessary electrical tests rather than immediately replacing the sensor, saving money if the issue is a fuse or wire.
Avoid saying:
- 'My check engine light is on, can you just fix it?' (Vague, leads to unnecessary diagnostics).
- 'I think I need a new oxygen sensor.' (Invites part replacement without proper diagnosis).
- 'Just do whatever you think is best.' (Gives the shop a blank check).
Questions to ask before authorizing the repair:
- Did you find 12 volts at the sensor's harness connector?
- What was the resistance reading on the old sensor's heater circuit?
- Is the fuse for the O2 heater circuit intact?
- What is the warranty on the replacement part and your labor?
Where to Take It: Dealer vs Independent vs Chain
- Dealer:
Best for: Vehicles under powertrain or emissions warranty., Complex electrical issues or manufacturer-specific quirks., If a Technical Service Bulletin (TSB) or recall exists for P0037.
Downsides: Highest labor rates (1.5-2x more than independent shops)., May recommend replacing parts an independent shop might repair. (Typical cost: +50% vs. baseline) - Independent Shop:
Best fit for most situations. P0037 is common, and a reputable independent mechanic diagnoses and repairs it cost-effectively by testing the circuit.
Best for: Most out-of-warranty vehicles., Standard diagnosis and replacement of the oxygen sensor or wiring repair., Cost-conscious owners.
Downsides: Quality varies; look for ASE certification., May lack access to the latest manufacturer-specific software updates. (Typical cost: +0% vs. baseline) - Chain Shop:
Acceptable for a simple sensor swap. Avoid chain shops for complex wiring diagnostics unless they provide clear multimeter test results.
Best for: Simple part replacements when you are certain the sensor is the problem.
Downsides: Technician skill is inconsistent., High pressure to upsell additional services or parts without thorough diagnosis. (Typical cost: -10% vs. baseline)
When to Walk Away From the Repair
If the total estimated repair cost exceeds 50% of your car's private-party value, consider selling or trading it in.
- Car worth $4000, fix is $2000: Borderline. This repair equals 50% of the car's value. Get a second opinion.
- Car worth $12000, fix is $1800: Fix it. The repair cost is well below the threshold.
- Car worth $2500, fix is $1500: Walk away. The repair cost is 60% of the car's value.
What Scan Tool You Need for This Code
Minimum: A basic OBD-II code reader that reads and clears engine codes. Viewing live data for O2 sensor voltage is highly beneficial.
A sub-$20 reader only provides the code, leading to guesswork. A scanner with live data shows if the sensor responds, differentiating a dead sensor from a wiring problem before buying parts.
Budget: BlueDriver Pro or Foxwell NT301 (~$100) — Reads/clears codes, shows freeze-frame data, and displays live O2 sensor voltage graphing, crucial for diagnosing P0037.
Mid-range: Autel MaxiCOM MK808S or Innova 5610 (~$350) — Offers bidirectional control to command the O2 sensor heater circuit on and off to test function directly. Provides in-depth live data.
Professional: Autel MaxiSys Series (e.g., MS906) or Launch X431 Series (~$600-1200) — Provides OEM-level diagnostics, advanced bidirectional controls, ECU coding capabilities, and detailed topology mapping to trace wiring faults.
Rent vs buy: Auto parts stores read codes for free. AutoZone's Loan-A-Tool program allows borrowing a capable scanner with a refundable deposit. Buy a scanner only if performing diagnostics more than once a year.
How to Clear the Code After You Fix It
- Use an OBD-II scan tool to erase the P0037 code.
- Perform a complete drive cycle to allow the readiness monitors to run.
- Rescan the vehicle to confirm the code has not returned.
Drive cycle (~20 minutes): To reset O2 sensor and Catalyst monitors: 1) Start the engine cold and idle for 2-3 minutes. 2) Drive at a steady 45-60 mph for 10-15 minutes. 3) Perform gentle decelerations without aggressive braking. 4) Cool down completely and repeat if monitors are not 'Ready'.
Readiness monitors affected: Heated O2 Sensor Monitor, Catalyst Monitor
Before emissions retest: drive at least 50 miles to fully set monitors.
Watch out for:
- Clearing the code without fixing the root cause results in the code returning immediately.
- Disconnecting the battery clears the code but resets all readiness monitors, requiring a lengthy drive cycle before passing emissions.
Will This Fail Emissions / State Inspection?
Yes — this code typically fails an OBD-II emissions inspection.
- California: An active P0037 code results in an automatic smog check failure. CARB regulations require O2 Sensor and Catalyst readiness monitors to be 'Ready' before a re-test, requiring 50-100 miles of driving after repair.
- New York: The NYS DMV vehicle inspection includes an OBD-II scan. The illuminated Check Engine Light from P0037 causes an immediate failure.
- Texas: In the 17 counties requiring emissions testing, a vehicle fails the OBD-II inspection if the Check Engine Light is on due to P0037.
Most Commonly Affected Vehicles
- Subaru Outback, Impreza (incl. WRX), Forester, Legacy (2004-2014) — Extremely common. On 2004-2008 models, a failing upstream Air/Fuel ratio sensor incorrectly triggers P0037 for the downstream sensor. If the rear sensor tests good, suspect the front sensor.
- Toyota Camry, Corolla, Sienna, RAV4, Prius, Tacoma (2002-2015) — Often caused by a failed sensor. Catalytic converter theft on Prius models frequently results in cut wiring triggering this code. Use OEM or Denso sensors.
- Hyundai / Kia Elantra, Sonata, Sorento, Optima, Sportage, Soul (2010-2020) — Widespread issue, typically a failed sensor or wiring problem. Some 2011-2016 models received ECM software updates (e.g., TSB 16-FL-004) to improve emissions monitoring logic.
- Honda Accord, Civic, CR-V, Odyssey (2008-2020) — Usually caused by sensor failure. Highly sensitive to aftermarket sensors, which fail prematurely or lack specific resistance requirements. Stick to OEM or NTK/Denso.
- Mazda 3, 6, RX-8, Miata/MX-5 (2004-2012) — Prone to intermittent codes. If P0037 (low) and P0038 (high) appear together, a wire is shorting to ground and making intermittent contact.
- Ford F-150, Fusion, Focus, Escape (2010-2020) — Wiring issues due to corrosion in wet or salty climates are common. Check the harness where exposed to elements or road spray.
- Chevrolet / GM Silverado, Cruze, Equinox, Traverse (2010-2018) — Commonly a standard sensor failure. On the Cruze, the ECM diagnoses the heater based on calculated resistance; readings over 7,000 Ohms trigger faults.
- BMW 3-Series (E90/E92), 5-Series (E60), X3, X5 (2006-2013) — Commonly appears due to sensor failure. On 6-cylinder engines, Bank 1 is the side with cylinders 1-3 (passenger side on LHD vehicles).
Manufacturer-Specific Notes
- Subaru: On 2004-2008 models, a failing upstream Air/Fuel ratio sensor causes the ECM to misdiagnose the downstream sensor and set P0037. If the downstream sensor and wiring check out, investigate the upstream sensor.
- Toyota: Notoriously sensitive to aftermarket oxygen sensors. Use an OEM (Toyota) or original equipment supplier (Denso) brand sensor to prevent the code from returning.
- Mazda: Intermittent P0037 codes often point to a failing sensor heater on the verge of burnout or a poor connection in the wiring harness affected by vibration and temperature.
- Volkswagen/Audi: On models like the VW CC, a persistent P0037 code that remains after replacing the sensor and verifying wiring traces back to a failed driver circuit within the PCM.
Real Owner Stories
2007 Toyota Corolla with recurring P0037 after catalytic converter theft
Catalytic converter was stolen. After replacement with an aftermarket converter and a non-OEM oxygen sensor, the P0037 code appeared immediately.
What they tried:
- Replaced the generic aftermarket O2 sensor with a quality Denso sensor, but the code returned within minutes.
- Performed diagnostic tests on the sensors, which operated normally.
Outcome: The mechanic traced the issue to a damaged ECM, a rare outcome caused by a short circuit when thieves cut the live wiring harness.
Lesson: Wiring damage is highly probable after a catalytic converter theft. If a new, quality sensor doesn't resolve P0037, suspect a damaged wiring harness or a shorted ECM before replacing more parts.
2010 Subaru Impreza at 120K miles with P0037
Check Engine Light on with codes P0037 and P0038 stored. Owner experienced hesitation and rough idling.
What they tried:
- Tested for power at the harness connector and confirmed 13.6V.
- Tested sensor heater circuit resistance and found 5.8 ohms, within the 5-7 ohm spec.
Outcome: Despite testing good cold, the sensor's internal heater failed intermittently under thermal load. Replacing the sensor resolved both codes.
Lesson: Intermittent faults cause sensors to test within spec when cold but fail when hot. Performing basic electrical tests avoids replacing good parts, but sometimes the sensor is still the culprit.
DIY repair on a vehicle with a persistent P0037 code
Check Engine Light on; scan revealed code P0037.
What they tried:
- Checked the A/F heater circuit fuse in the engine bay; found it intact.
- Visually inspected wiring to Bank 1, Sensor 2; found no damage.
- Tested resistance of the old sensor's heater element; found it open (OL), confirming burnout.
Outcome: Replaced the faulty oxygen sensor. Cleared the code, and the Check Engine Light remained off.
Lesson: A failed sensor is the most common cause. Always perform 2-minute checks: inspect the fuse and wiring. Testing the old sensor's resistance definitively confirms failure before spending money.
How to Prevent This Code From Triggering
- Use Top Tier certified gasoline (Every fill-up) — Higher detergent levels prevent carbon buildup on internal engine components and fuel injectors. This ensures complete combustion, reducing unburned fuel that contaminates oxygen sensors and catalytic converters.
- Replace engine air filter at recommended intervals (Every 15,000-30,000 miles) — A clogged air filter restricts airflow, leading to a rich fuel mixture. Excess fuel fouls oxygen sensors and overheats the catalytic converter.
- Perform regular checks of wiring and connectors (During every oil change) — Routinely inspecting O2 sensor wiring for melting, chafing, or corrosion catches issues before they cause circuit faults. Securing loose wiring away from hot exhaust prevents P0037.
- Address engine misfires and oil leaks promptly (Immediately when detected) — Misfires dump raw fuel into the exhaust; oil leaks contaminate the sensor tip. Both destroy oxygen sensors and damage the catalytic converter.
- Apply dielectric grease to sensor connectors (When replacing a sensor or if corrosion is found) — Dielectric grease inside the electrical connector seals out moisture and prevents corrosion, a common cause of heater circuit faults in wet climates.
Frequently Asked Questions
What does Bank 1, Sensor 2 mean?
Bank 1 is the side of the engine containing cylinder #1. Sensor 2 is the 'downstream' sensor, located in the exhaust pipe after the catalytic converter.
What is the most common mistake when diagnosing P0037?
Replacing the oxygen sensor without performing basic electrical checks. Always test for 12V power at the harness connector and check the associated fuse first. A wiring problem or blown fuse causes the code to return immediately.
Can I replace the oxygen sensor myself?
Yes, this is a common DIY repair requiring a jack, jack stands, and a special oxygen sensor socket. The biggest challenge is the old sensor seizing in the exhaust pipe. Liberally apply penetrating oil and let it soak for easier removal.
I replaced the sensor, but the code came back. What now?
If a new, high-quality sensor doesn't fix it, the fault lies in the electrical circuit. Re-check the fuse and meticulously inspect the wiring for shorts or breaks. Use a multimeter to verify 12V power and check the ground wire's continuity back to the ECM.
What's the difference between the heater circuit and the signal circuit?
The 'heater circuit' uses two wires to get the sensor hot quickly, like a toaster element. The 'signal circuit' generates a voltage based on oxygen levels for the computer. P0037 is a problem with the heater, not the signal.
Will a P0037 code clear itself?
No. P0037 indicates a hard fault in an electrical circuit. The underlying problem must be repaired, and the code must be cleared with a scan tool.
Can a bad battery or alternator cause a P0037 code?
Low overall system voltage sometimes triggers electrical codes. If the battery is weak (below 11V) or the alternator fails, the ECM cannot supply the stable 12V needed for the heater circuit. Test your charging system if you have other electrical symptoms.
Key Takeaways
- A burned-out internal heater inside the Bank 1, Sensor 2 oxygen sensor causes over 80% of P0037 codes.
- Inspect the 10-15A O2 heater fuse and the sensor's wiring harness for melted insulation before spending $50 to $150 on a replacement sensor.
- Driving more than 200 miles with an active P0037 code forces the engine to run rich, risking a $1,000 to $4,000 catalytic converter replacement.
- Expect to pay a shop $125 to $300 for a professional sensor replacement, or DIY the job for $50 to $150 using an OEM-quality Denso or NTK part.
Helpful Videos
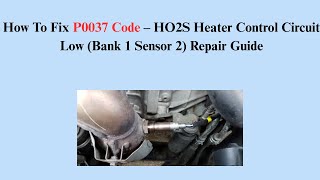
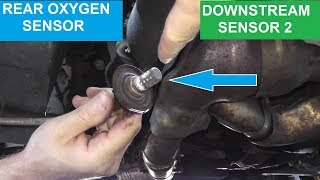
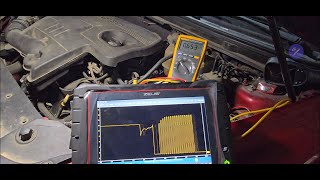


The information in this article is provided for general reference and educational purposes only. Vehicle specifications, procedures, and part compatibility can vary by production date, trim level, and region. Always consult your vehicle's factory service manual and verify part numbers before purchasing or performing repairs. Safety-critical components such as airbags, seat belts, and braking systems should be installed by a qualified professional.
- 🎬 Helpful Videos
- What Does P0037 Mean?
- Can I Drive With P0037?
- Common Causes
- Symptoms
- Diagnostic Flowchart
- Common Fixes & Costs
- DIY vs Professional
- Used vs. New Parts: Buying Guide
- What Happens If You Wait — Timeline
- Cost of Not Fixing It
- Diagnosis Steps
- When This Code Triggers (Freeze-Frame Conditions)
- Related Codes
- Climate & Environmental Factors
- How to Talk to a Mechanic About This Code
- Where to Take It: Dealer vs Independent vs Chain
- When to Walk Away From the Repair
- What Scan Tool You Need for This Code
- How to Clear the Code After You Fix It
- Will This Fail Emissions / State Inspection?
- Most Commonly Affected Vehicles
- Manufacturer-Specific Notes
- Real Owner Stories
- 2007 Toyota Corolla with recurring P0037 after catalytic converter theft
- 2010 Subaru Impreza at 120K miles with P0037
- DIY repair on a vehicle with a persistent P0037 code
- How to Prevent This Code From Triggering
- Frequently Asked Questions
- What does Bank 1, Sensor 2 mean?
- What is the most common mistake when diagnosing P0037?
- Can I replace the oxygen sensor myself?
- I replaced the sensor, but the code came back. What now?
- What's the difference between the heater circuit and the signal circuit?
- Will a P0037 code clear itself?
- Can a bad battery or alternator cause a P0037 code?
- Key Takeaways
- 🎟️ Get 5% Off