

P0030 on 2004-2008 Ford F-150 5.4L: HO2S Heater Circuit Causes and Fixes
On a 2004-2008 F-150 with the 5.4L V8, code P0030 almost always means the passenger side upstream oxygen sensor has failed. The internal heater burns out, requiring replacement of the sensor itself. Before replacing, check the fuse (often #33 in the passenger kick panel) and inspect the wiring harness near the exhaust for melting. Expect to pay $40-$70 for an aftermarket sensor or $65-$90 for an OEM Motorcraft part.
- P0030 points to a problem with the heater inside the passenger-side upstream O2 sensor.
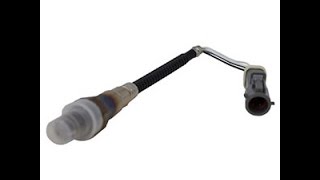
- The most common fix is replacing the sensor (Motorcraft DY-835).
- Always check the fuse (likely #33 in the passenger kick panel) and inspect the wiring for melting before buying parts.
- Access is difficult; removing the passenger front wheel and inner fender is the recommended method.
- An exhaust leak before the sensor can also cause related codes.
What's Unique About the 2004-2008 Ford F-150
For the 11th generation F-150 with the 5.4L Triton V8, Bank 1 is always the passenger side, which corresponds to the 'R' (right) side marking on engine components. The Sensor 1 (upstream) location is high up on the exhaust manifold, notoriously difficult to access near the firewall and transmission dipstick tube. While the cause is usually a simple sensor failure, the labor involved is more intensive than on many other vehicles, with many owners and technicians removing the passenger-side front wheel and inner fender liner for access. 🎬 Watch: Step-by-step guide to removing the fender liner for access. This difficult access also increases the risk of damaging the wiring connector during replacement.
Symptoms You May Notice
- Check Engine Light is on
- Decreased fuel economy
- Failing a state emissions test
- Slightly rough or hesitant engine performance during the first few minutes after a cold start
- Engine may take longer to enter closed-loop mode
- Replacing the wrong sensor (e.g., Bank 2 driver's side, or Sensor 2 downstream). Always confirm Bank 1 is the passenger side and Sensor 1 is upstream, before the catalytic converter.
- Replacing the sensor without first checking the fuse and wiring. A melted pigtail or blown fuse will cause the new sensor to not work and the code to return immediately. 🎬 See this breakdown of P0030 causes and heater circuit fixes.
Most Likely Causes
- Failed Bank 1, Sensor 1 Oxygen Sensor 🔴 High Probability Oxygen sensors are wear items that are subjected to extreme heat and exhaust gases. The internal heater element is often the first part to fail due to thousands of heating and cooling cycles, causing an open or shorted circuit.
How to confirm: With the engine off, disconnect the sensor and measure the resistance between the two heater circuit pins (usually the two same-colored wires) on the sensor side. A healthy sensor should have a resistance between 2 and 30 ohms. An open circuit (infinite resistance, 'OL' on a multimeter) or very high resistance confirms the heater has burned out. 🎬 Watch: How to test O2 sensor resistance with a multimeter.
Typical fix: Replace the Bank 1, Sensor 1 (passenger side, upstream) oxygen sensor. Using a specialized 7/8" offset or crow's foot O2 sensor socket is highly recommended.
Est. part cost: $40-$90 - Damaged Wiring or Connector 🟡 Medium Probability The sensor's wiring harness is routed near very hot exhaust components. Over time, plastic clips can break, allowing the harness to sag and make contact with the exhaust manifold, melting the insulation and causing a short. This is a well-documented issue in owner forums.
How to confirm: Visually inspect the entire wiring harness from the O2 sensor back to the main loom. Look for any signs of melting, chafing, or corrosion on the wires and inside the connector pins. A forum user on F150Forum.com reported their connector completely melted, requiring them to splice in a new pigtail.
Typical fix: Repair the damaged section of wire or replace the pigtail connector. The Motorcraft pigtail is part number WPT-1355.
Est. part cost: $15-$50 - Blown Fuse ⚪ Low Probability A short in the heater circuit wiring or the sensor itself can cause the protective fuse to blow.
How to confirm: Check the fuse for the HO2S heaters. On these trucks, this is located in the Central Junction Box (passenger compartment fuse panel) behind a kick panel on the passenger side. Check your owner's manual, but it is commonly fuse #33 (15A), labeled for 'HEGO' (Heated Exhaust Gas Oxygen).
Typical fix: Replace the blown fuse. If it blows again immediately, a short circuit exists in the wiring or the new sensor that must be found and repaired.
Est. part cost: $1-$5
Rare But Worth Checking
- Exhaust Leak: An exhaust leak before the O2 sensor can introduce fresh air, causing the sensor to give inaccurate readings. While this typically sets fuel trim codes (P0171/P0174), an exhaust leak can sometimes contribute to sensor-related issues by affecting its operating temperature and environment.
- Faulty Powertrain Control Module (PCM): This is extremely rare. The PCM driver that provides the ground signal to control the heater circuit can fail, but all other possibilities (sensor, wiring, fuse) should be exhaustively ruled out before condemning the PCM.
Diagnosis Steps
- Scan for any other codes to see if P0030 is part of a larger problem.
- Locate the fuse for the oxygen sensor heaters in the passenger compartment fuse panel (often fuse #33) and verify it is not blown.
- If the fuse is good, safely raise the vehicle. Consider removing the passenger front wheel and inner fender liner for much-improved access.
- Locate the Bank 1 Sensor 1 O2 sensor on the passenger side exhaust manifold. Visually inspect the sensor's wiring harness for any signs of melting, burning, or physical damage from contact with the exhaust.
- Disconnect the sensor's electrical connector. Check for 12V power at the heater power wire on the vehicle side of the harness with the key on, engine off.
- Check the ground side of the heater circuit on the harness. The PCM provides a controlled ground, so you'll need to check for continuity back to the PCM or use a scan tool to command the heater on to verify the driver is working.
- If power and ground are present at the harness, the issue is the sensor itself. Measure the resistance across the two heater pins (same color wires) on the sensor. A reading between 2-30 ohms is good. A reading of 'OL' (Open Loop) or infinite resistance means the heater is burned out and the sensor must be replaced.
- If all wiring and the fuse are good, and the sensor tests bad, replace the Bank 1, Sensor 1 oxygen sensor. Apply anti-seize compound to the threads if not pre-applied.
- After repair, clear the codes and perform a drive cycle to ensure the Check Engine Light does not return.
Parts You'll Likely Need
- Upstream Oxygen Sensor (Bank 1, Sensor 1)
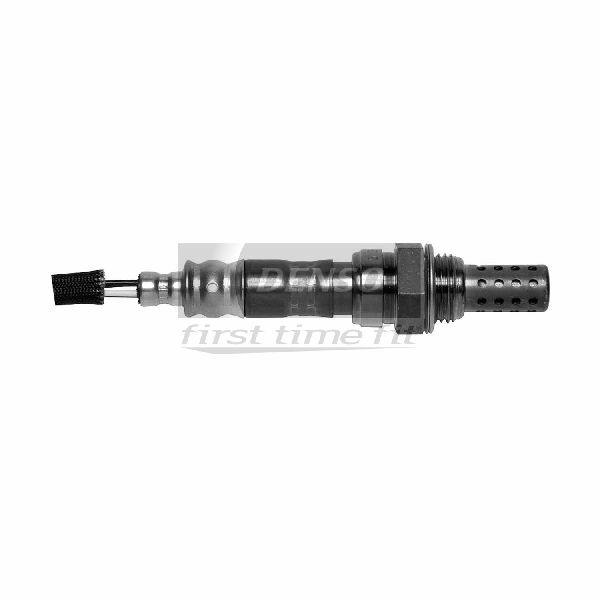
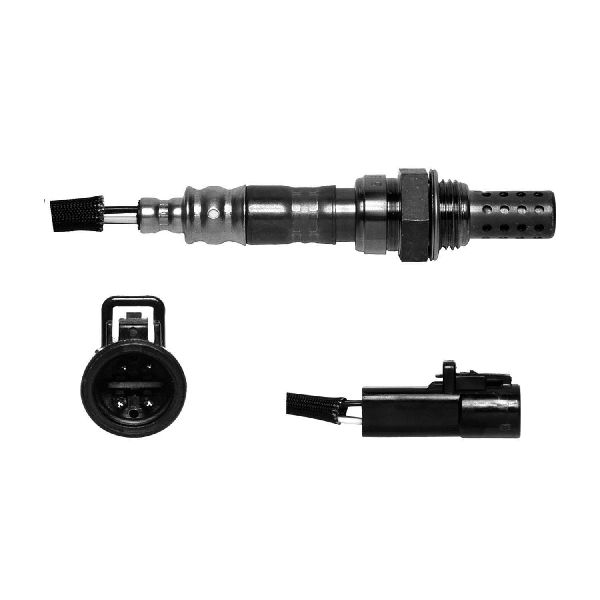
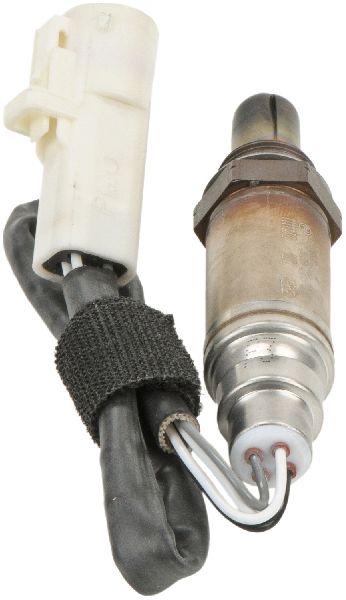
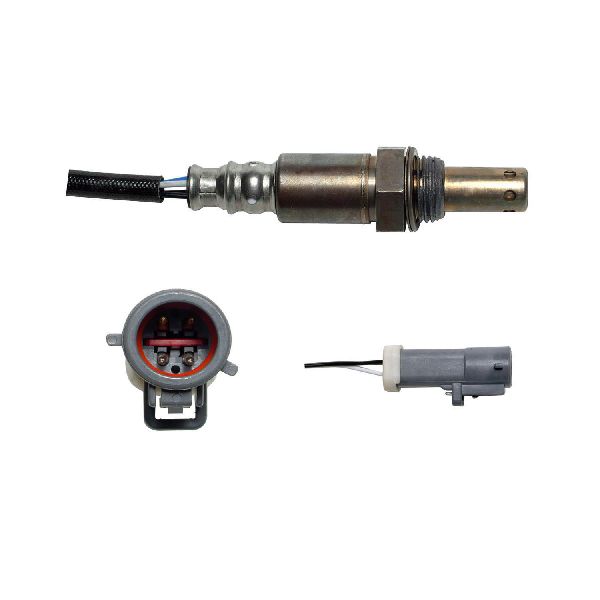
(OEM #DY-835 (Ford Service P/N: XL3Z-9F472-AA))— This is the specific upstream sensor for the passenger side. Its internal heater element is the most common failure point for code P0030.
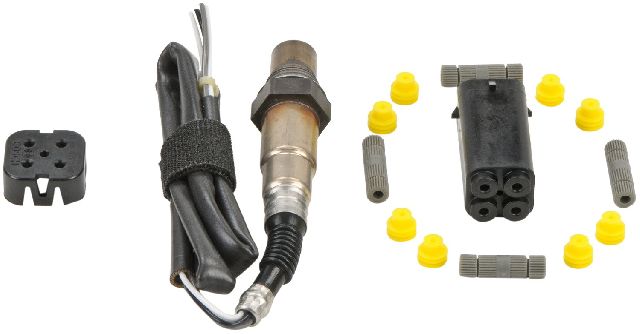
Trusted brands: Motorcraft, Bosch, Denso, NGK/NTK
OEM price range: $65-$90
Aftermarket price range: $40-$70 - Oxygen Sensor Connector Pigtail
(OEM #WPT-1355)— If the original connector has melted from contact with the exhaust manifold, this pigtail is required to be spliced into the harness. This is a common point of failure.
Trusted brands: Motorcraft, Standard Motor Products (S-631), Dorman
OEM price range: $40-$50
Aftermarket price range: $15-$30
Related Codes That Often Appear With This One
- P0135 — This is an almost identical code, also for 'O2 Sensor Heater Circuit Malfunction (Bank 1 Sensor 1)'. P0030 is a generic definition, while P0135 is the specific SAE definition. They point to the exact same problem.
- P0171 — If the O2 sensor is slow to respond due to the heater failure, the PCM may not be able to adjust fuel trim correctly during warm-up, potentially leading to a 'System Too Lean (Bank 1)' code.
- P0053 — This code for 'HO2S Heater Resistance (Bank 1, Sensor 1)' is a more specific version of P0030, indicating the PCM has detected the resistance on the heater circuit is out of the expected range.
Technical Service Bulletins (TSBs) & Recalls
- No specific Technical Service Bulletin (TSB) for P0030 on this platform was identified during research. However, general wiring and connector issues are a known weak point in this area. TSBs can be searched on the Ford Support website.
- Manufacturer TSB Bulletin #TSB-14-0129 notes that for other Ford models, P0030 and related codes like P0135 can be stored in the PCM memory and cause the Malfunction Indicator Lamp (MIL) to illuminate.
- Manufacturer TSB Bulletin #TSB 16-0143 describes instances where Ford hybrid vehicles may exhibit an illuminated MIL with diagnostic trouble codes P0030 and/or P0130, requiring specific service procedures to correct the condition.
Platform-Specific Known Issues
- Access to the Bank 1 Sensor 1 is notoriously difficult. It is located high on the passenger side, near the firewall. Most technicians and experienced DIYers recommend removing the front passenger wheel and the plastic inner fender liner to gain better access.
- A specialized 7/8-inch (22mm) O2 sensor socket, particularly an offset or crow's foot style, is almost essential for removing the sensor due to the tight clearance.
- The wiring harness connector is prone to melting if its retaining clips fail and it rests on the hot exhaust manifold.
Mechanic-Grade Diagnostic Values
- O2 Sensor Heater Element Resistance — expected: 2-5 Ω (ohms) is a common specification.. Failure: A reading of 'OL' (Open Loop/infinite resistance) or a value significantly outside the 2-30 ohm range indicates a failed heater element.
- HO2S Heater Circuit Current (Mode 6 Data) — expected: Between 0.220 amps and 3.0 amps for NTK-type sensors.. Failure: A current reading below 0.220 amps or above 3.0 amps will trigger a fault.
- Heater Circuit Power Supply Voltage — expected: 12V+ at the harness-side connector with Key On, Engine Off.. Failure: No voltage indicates a problem upstream, such as a blown fuse or wiring fault.
- PCM Heater Ground Driver Signal — expected: A pulsing ground signal visible on an oscilloscope when the heater is commanded on.. Failure: A flat line (no activity) on the oscilloscope when the heater should be active points to a failed PCM driver.
Hidden / Shadow Codes Worth Checking
- Mode 6, Test ID $81, Component ID $01: This refers to the onboard diagnostic monitor for the Bank 1 Sensor 1 HO2S Heater. The PCM monitors the electrical current on the circuit during a test. (see via A professional scan tool capable of displaying Mode 6 data. The tool will show the measured current value, along with the minimum and maximum allowable thresholds. A value outside this range confirms the failure that set P0030.)
Scan Tool Commands That Help
- Ford IDS (Integrated Diagnostic System): Key On Engine Off (KOEO) or Key On Engine Running (KOER) Self-Test — Running these on-demand self-tests forces the PCM to actively check all available powertrain circuits, including the HO2S heater circuits. This can confirm if the fault is currently present.
- Ford IDS (Integrated Diagnostic System): Datalogger - HO2S Heater Duty Cycle PID — When diagnosing a potential PCM or wiring issue, monitoring the heater duty cycle PID shows if the PCM is attempting to command the heater on. A steady 0% when the engine is cold could indicate a command issue.
Wiring & Ground Locations
- G104 — On the right (passenger) side fender, located behind the battery.. This is a primary engine bay ground. A poor connection here can cause various electrical issues, including unstable voltage for sensor circuits.
- G203 — Inside the cab, in the lower right (passenger) kick panel area, near the fuse box.. This ground serves multiple interior and instrument cluster components. Since the fuse for the O2 heater is in this same area, a corroded G203 could cause erratic power supply issues to the circuit.
- Firewall Ground Strap — Connects from the firewall to the back of the engine on the passenger side.. This is a main body-to-engine ground. A loose or corroded strap can cause the PCM and sensors to have different ground potentials, leading to incorrect readings and fault codes.
- Transmission Wiring Harness — Runs from the main engine harness, over the transmission, and connects to the O2 sensors and transmission components.. The wiring for the O2 sensors is integrated into this larger harness. It is known to sag and melt on the exhaust manifold, causing shorts not just in the O2 sensor pigtail, but further up the loom.
Real Owner Repair Stories
- f150forum.com user report (2004-2008 F-150 (inferred from context)) — Multiple O2 sensor codes and poor MPG (13 MPG).
❌ Tried (didn't work) Initial diagnosis pointed towards sensors or pigtails.
✅ What actually fixed it The entire transmission wiring harness, which includes the O2 sensor wiring, had melted on the exhaust manifold. Replacing the complete harness (a used one, as new was on backorder) and all four O2 sensors as a preventative measure resolved all codes and restored fuel economy to 16 MPG. - f150forum.com user report (2004 F-150) — Emissions monitors for O2 sensors and catalysts would not become 'Ready', preventing the truck from passing an emissions test.
❌ Tried (didn't work) Driving the truck for several days to complete the drive cycle.
✅ What actually fixed it Replacing the Fuel Pump Driver Module (FPDM). After replacement, all monitors became 'Ready' and the truck passed emissions. - NHTSA ODI #11404251 — An owner reported that their vehicle would not start and a diagnostic scan revealed numerous codes including P0030, P0300, and P0141. They noted checking for loose wires, fuses, and plugs during their troubleshooting.
"I Checked Everything" — The Actual Cause
- While P0030 is an electrical code, a related scenario involves all sensors and wiring appearing normal, yet the system readiness monitors for O2 sensors and catalysts fail to complete. On the 2004-2008 F-150, a known cause for this is a failing Fuel Pump Driver Module (FPDM), which can disrupt the conditions necessary for the PCM to run its diagnostic tests.
OEM Part Supersession History
XL3Z-9F472-AA→DY-835 (Motorcraft P/N)— DY-835 is the service part number corresponding to the original Ford engineering number.
Heads up: No known supersession issues; DY-835 is the correct and widely available part for this application.
Model Year Variations Within This Range
- 2004-2008: While the function is the same, PCM part numbers and internal logic can be unique year-to-year. A forum discussion noted that finding a PCM pinout chart specific to a PCM part number (e.g., 7L3A-12A650-GAD for a 2007) is critical, as generic diagrams for the year range may not be 100% accurate. Always verify wiring colors and pin locations against a diagram for the specific year if possible.
Diagnostic Flowchart
Real Owner Stories
Aggregated from forums and TSBs cited above. Mileages and costs reflect what owners reported in those sources.
2005 Ford F-150 5.4L
Symptoms: The truck felt way under powered and had weird shift points.
What fixed it: Replaced the upstream O2 sensor on the passenger side (Bank 1, Sensor 1).
Source hint: f150forum.com thread '*ecoboost* P0030 after intake tube popped off - Ford F150 Forum'
2004 Ford F-150 5.4L
Symptoms: Discovered a completely melted upstream passenger side O2 sensor connector.
What fixed it: Spliced in a new pigtail connector to replace the melted wiring.
Source hint: f150forum.com thread '2004 f150 o2 sensor'
Related OBD-II Codes
Frequently Asked Questions
Where is Bank 1 Sensor 1 located on my 2004-2008 5.4L Triton V8?
What is the easiest way to access the Bank 1 Sensor 1 on this F-150?
Do I need any special tools to replace the O2 sensor on the 5.4L F-150?
My O2 sensor wiring harness looks melted. Is this a common issue on the 2004-2008 F-150?
Which fuse controls the oxygen sensor heaters on this truck?
Are there any Technical Service Bulletins (TSBs) for the P0030 code on the 2004-2008 F-150?
Helpful Videos

We Have This Part in Stock


The information in this article is provided for general reference and educational purposes only. Vehicle specifications, procedures, and part compatibility can vary by production date, trim level, and region. Always consult your vehicle's factory service manual and verify part numbers before purchasing or performing repairs. Safety-critical components such as airbags, seat belts, and braking systems should be installed by a qualified professional.
- Ford F-150:
- 🎬 Helpful Videos
- 🛍️ Shop This Part
- What's Unique About the 2004-2008 Ford F-150
- Symptoms You May Notice
- Most Likely Causes
- Rare But Worth Checking
- Diagnosis Steps
- Parts You'll Likely Need
- Related Codes That Often Appear With This One
- Technical Service Bulletins (TSBs) & Recalls
- Platform-Specific Known Issues
- Mechanic-Grade Diagnostic Values
- Hidden / Shadow Codes Worth Checking
- Scan Tool Commands That Help
- Wiring & Ground Locations
- Real Owner Repair Stories
- "I Checked Everything" — The Actual Cause
- OEM Part Supersession History
- Model Year Variations Within This Range
- Diagnostic Flowchart
- Real Owner Stories
- 2005 Ford F-150 5.4L
- 2004 Ford F-150 5.4L
- Related OBD-II Codes
- Frequently Asked Questions
- 🎟️ Get 5% Off