

P0013 on 2011-2016 Chevrolet Cruze 1.8L: Exhaust Solenoid Causes and Fixes
P0013 on a 2011-2016 Chevy Cruze almost always points to a faulty Exhaust Camshaft Position Actuator Solenoid. It's an affordable and easy-to-access part located on the front of the engine, making it a common DIY fix that costs between $25 and $60 for the part itself. The code indicates an electrical circuit problem, but the solenoid failing internally is the most frequent root cause.
- P0013 on your Cruze specifically points to an electrical fault in the exhaust camshaft solenoid circuit.
- The most likely fix is replacing the exhaust camshaft position actuator solenoid, a simple and inexpensive DIY job.
- Always check your engine oil level and condition first, as low or dirty oil is a common cause of VVT system problems.
- Consider replacing both the intake and exhaust solenoids at the same time as preventative maintenance.
- Do not confuse the actuator solenoid with the position sensor; they are different parts.
What's Unique About the 2011-2016 Chevrolet Cruze

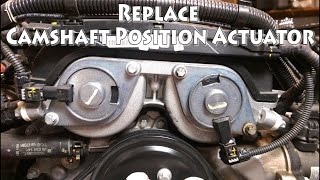
The 1.8L Ecotec engine in the first-generation Cruze uses two identical camshaft actuator solenoids (one for intake, one for exhaust) mounted vertically on the front of the engine, right under the plastic engine cover. They are known to fail by either clogging internally from dirty or low oil, or the internal coil winding failing, creating an open circuit. While the code P0013 specifically points to the exhaust solenoid's electrical circuit, the root cause is very often the solenoid itself failing. GM has issued service bulletins for similar engines that recommend replacing both solenoids at the same time as a preventative measure.
Symptoms You May Notice
- Check Engine Light is on
- Rough or uneven idle
- Engine is hard to start
- Reduced engine power and hesitation during acceleration
- Decreased fuel economy
- Engine stalling, especially when coming to a stop
- Rattling noise from the engine bay on startup or during operation
- Replacing the Camshaft Position SENSOR instead of the Camshaft Position Actuator SOLENOID. The sensor reads the camshaft's position, while the solenoid (also called an oil control valve) is a valve that controls oil flow to move the cam phaser. P0013 is an electrical circuit code for the solenoid.
Most Likely Causes

- Failed Exhaust Camshaft Position Actuator Solenoid 🔴 High Probability These solenoids are a very common failure point on GM Ecotec engines. They can fail electrically when the internal coil breaks, creating an open circuit, or become clogged with oil sludge, which restricts their mechanical movement and can lead to the circuit fault code.
How to confirm: Check the solenoid's resistance with a multimeter; according to service manuals, it should be between 7-12 ohms. A reading of infinity or 'OL' indicates an open circuit and a bad solenoid. A simpler and very effective method is to swap the exhaust solenoid with the identical intake solenoid. If the code changes to P0010 (Intake circuit), the solenoid is confirmed bad.
Typical fix: Replace the exhaust camshaft position actuator solenoid. It is highly recommended to replace both the intake and exhaust solenoids at the same time, as they are the same age and subject to the same conditions.
Est. part cost: $25-$60 - Low or Dirty Engine Oil 🟡 Medium Probability The VVT system is hydraulic and relies on clean oil at the correct pressure. The solenoids have fine mesh screens that can easily get clogged by old, sludgy, or low oil. GM specifies dexos1-approved 5W-30 synthetic oil; using the wrong oil or extending oil change intervals can lead to VVT problems.
How to confirm: Check the engine oil level and condition on the dipstick. If the oil is low, dark, or thick, it's a likely contributor. An oil change is the first step before replacing parts.
Typical fix: Perform an oil and filter change using a full synthetic 5W-30 oil that meets the GM dexos1 specification. Ensure the correct oil filter is used, as incorrect filters can cause pressure issues.
Est. part cost: $40-$80 - Damaged Wiring or Loose Connector ⚪ Low Probability The wiring harness connector can become brittle from heat cycles, and the locking tab can break. Wires can also chafe or break near the connector due to engine vibration and heat, causing an intermittent open or short circuit. A GM Technical Service Bulletin (GCUS-9-2816) for other models also points to an internal broken wire as a possible cause.
How to confirm: Visually inspect the wiring and connector going to the exhaust camshaft solenoid for any signs of damage, corrosion, or looseness. Unplug the connector and check for oil contamination, which can indicate a leaking solenoid. Wiggle the connector and harness with the engine running to see if it affects the idle. In one documented case, the connector simply came undone on its own.
Typical fix: Repair the damaged section of wiring or replace the connector pigtail. If the connector is full of oil, it should be cleaned thoroughly with electrical contact cleaner and the leaking solenoid must be replaced.
Est. part cost: $15-$30
Rare But Worth Checking
- Faulty Engine Control Module (ECM): This is very rare. The ECM's internal driver circuit for the solenoid can fail, but all other possibilities (solenoid, oil, wiring) should be exhaustively ruled out before condemning the ECM.
Diagnosis Steps

- Check Engine Oil: Before any other steps, verify the oil level is full and the oil is clean. The VVT system is entirely dependent on oil pressure. If low or dirty, perform an oil and filter change with 5W-30 dexos1-spec oil.
- Inspect Wiring: Carefully inspect the electrical connector and wiring for the exhaust camshaft solenoid (the rearmost/topmost of the two solenoids on the front of the valve cover). Ensure it's plugged in securely and there's no visible damage, chafing, or oil saturation.
- Swap Solenoids (The Definitive Test): The intake and exhaust solenoids are identical and interchangeable. Unplug both, unbolt them (one 10mm bolt each), and swap their positions. The exhaust solenoid is the one closer to the firewall. Clear the codes with a scanner and drive the vehicle. If the code changes to P0010 (Intake Camshaft Position Actuator Circuit), you have 100% confirmed the solenoid you moved is faulty.
- Test Solenoid Circuit: If the code does not change after the swap, the problem is likely in the wiring or ECM. Use a multimeter to test the solenoid itself. Set the multimeter to Ohms (Ω) and measure the resistance between the two pins on the solenoid. A good solenoid should read between 7 and 12 ohms. A more precise specification is 6.9 to 7.9 ohms at 68°F (20°C). A reading of 'OL' (Open Loop) means the internal coil is broken and the solenoid is bad.
- Check for Voltage at Connector: With the ignition on (engine off), use a multimeter to check for 12V between the control circuit terminal (pin 1) and ground. This confirms the circuit is receiving power.
- Replace the Solenoid: If the solenoid is confirmed bad via the swap test or resistance test, replace it. It is highly recommended to replace both solenoids as a pair. Apply a light coat of fresh engine oil to the new O-rings before installation.
- Further Diagnosis: If a new solenoid, clean oil, and a good connector do not fix the issue, the problem may lie in the wiring harness between the connector and the ECM, or, in very rare cases, the ECM itself.
Parts You'll Likely Need
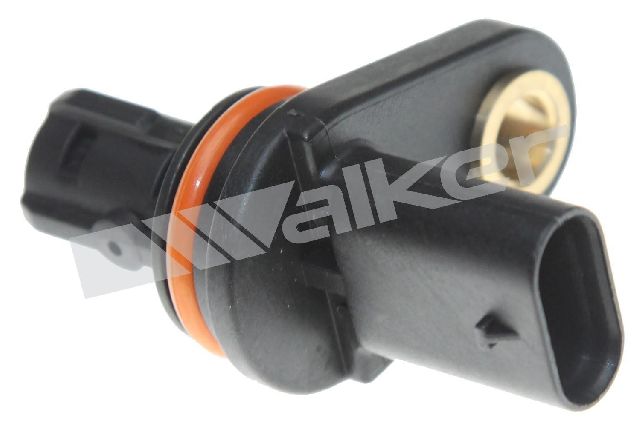
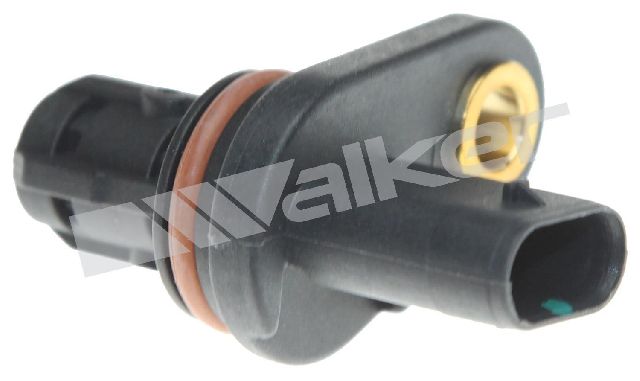
- Camshaft Position Actuator Solenoid Valve
(OEM #55562223 (Superseded by 25195245))— This is the most common cause of P0013. The internal coil fails creating an open circuit, or the valve gets clogged with oil sludge, causing a circuit fault.
Trusted brands: ACDelco (GM Genuine), Delphi, Dorman, INA
OEM price range: $50-$70
Aftermarket price range: $25-$45
Related Codes That Often Appear With This One
- P0014 — P0014 indicates 'Exhaust Camshaft Position Timing Over-Advanced'. It often appears with P0013 because a malfunctioning solenoid circuit (P0013) can cause the camshaft to be stuck in the wrong position, leading to a performance/timing fault (P0014). An owner complaint noted that after replacing the solenoid to fix P0013, code P0014 immediately appeared, suggesting an underlying mechanical timing issue. [NHTSA ODI #11184298]
- P0010 — P0010 is the equivalent circuit code for the *intake* camshaft solenoid. If you see this code after swapping the solenoids for diagnosis, it confirms the solenoid is bad. If both appear at the same time, it could indicate a systemic issue like very dirty oil or a wiring harness problem common to both.
- P2090 / P2091 — These codes are for 'Exhaust Camshaft Position Actuator Solenoid Valve Control Circuit Low/High Voltage'. They are closely related to P0013 and point to a specific type of electrical fault (low or high voltage) in the same circuit.
Technical Service Bulletins (TSBs) & Recalls
- GCUS-9-2816: Mentions P0013 can result from an internal broken wire in the exhaust camshaft position actuator solenoid valve control circuit.
- 17-NA-098: Recommends replacing both camshaft position actuator solenoid valves for codes P0010, P0011, P0013, or P0014 on some GM 2.4L engines.
- 12-06-01-001G: While not for P0013 specifically, this TSB discusses oil consumption issues on GM eng
Platform-Specific Known Issues
- A GM Technical Service Bulletin (#GCUS-9-2816) for other models with similar engines notes that P0013 can be caused by an internal broken wire in the solenoid's control circuit.
- Another TSB for different GM models (#17-NA-098) with similar symptoms recommends replacing both intake and exhaust camshaft position actuator solenoid valves and ensuring the ECM has the latest software calibration for codes P0010, P0011, P0013, or P0014.
- Owners have reported this code appearing alongside P0014, even after replacing the solenoid, which can sometimes point to underlying timing or oil pressure issues. [NHTSA ODI #11184298]
Mechanic-Grade Diagnostic Values
- Exhaust Camshaft Position Actuator Solenoid Resistance — expected: 6.9 - 7.9 Ohms at 68°F (20°C). A general range of 7-12 Ohms is also cited.. Failure: A reading of 'OL' or infinity indicates an open coil. A reading significantly outside the specified range indicates a faulty solenoid.
- Voltage at Solenoid Harness Connector (Pin 1 to Ground) — expected: 12 Volts with ignition ON, engine OFF.. Failure: Significantly less than 12V or 0V indicates a problem with the power supply circuit from the ECM or main relay.
- Voltage at Solenoid Harness Connector (Pin 1) during Scan Tool Bidirectional Test — expected: Voltage should transition from 12V (commanded OFF) to less than 10V (commanded ON).. Failure: If the voltage does not change when commanded, and the solenoid itself tests good, the fault is in the wiring or the ECM driver.
Scan Tool Commands That Help
- GDS2 / Tech2 (or equivalent professional scanner): Exhaust Camshaft Position Actuator Solenoid Valve Control — Use this bidirectional command with the ignition ON to manually turn the solenoid ON and OFF. You should hear an audible click from the solenoid. This tests the entire circuit from the ECM to the solenoid, including the wiring and the solenoid's mechanical function.
Wiring & Ground Locations

- Q6E Connector - Pin 1 — The harness connector at the exhaust camshaft position actuator solenoid.. This is the control circuit terminal where you should test for 12V from the ECM.
- Q6E Connector - Pin 2 — The harness connector at the exhaust camshaft position actuator solenoid.. This is the low reference (ground) circuit terminal. You should test for less than 5 ohms of resistance between this pin and a known good chassis ground.
Real Owner Repair Stories
- YouTube channel 'DIY with Michael Borders' (2011 Chevrolet Cruze (1.4L, but uses same VVT solenoid design)) — Check Engine Light with code P0013.
❌ Tried (didn't work) The owner initially prepared to replace the solenoid.
✅ What actually fixed it Upon inspection, the electrical connector to the exhaust camshaft actuator solenoid had simply come loose and disconnected. Reconnecting it securely and clearing the codes resolved the issue completely.
When the Usual Fixes Don't Work
- While replacing the exhaust VVT solenoid is the most common fix, it is not always the final solution. In a case reported to the NHTSA, a vehicle owner replaced the solenoid which cleared the P0013 code, but the code P0014 immediately appeared. [NHTSA ODI #11184298] This indicates that the electrical circuit fault (P0013) was likely a symptom of a deeper mechanical problem, such as a stuck camshaft phaser or timing issue, which was then correctly identified by the ECM as a performance fault (P0014) once the circuit was restored.
OEM Part Supersession History
55562223→25195245— Part revision or manufacturer change.
Heads up: These parts are generally interchangeable for the specified application.12992408→55567050— Part revision for 1.6L/1.8L applications.
Heads up: Part number 55567050 is also listed for the 1.8L Cruze, indicating multiple valid part numbers may exist depending on the production run. Always verify fitment with VIN.
Model Year Variations Within This Range
- 2011-2016: No significant variations have been identified for the 1.8L engine's VVT system within this year range that would affect the diagnosis or repair of code P0013. The primary components and causes remain consistent.
Diagnostic Flowchart
Other Known Issues on This Vehicle
Issues unrelated to this code that are worth knowing about as an owner of this generation:
- Oil Cooler / Filter Housing Gasket Leak 🔴 High — Extremely common, often occurs after 60,000 miles. Oil leaks onto the hot exhaust manifold, creating a burning smell and fire risk.
- Cracked Plastic Coolant Outlet / Thermostat Housing 🔴 High — Very common failure. The plastic components become brittle from heat cycles and crack, causing significant coolant leaks and potential for overheating. Often fails around 80,000-120,000 miles.
- PCV System Failure (Valve Cover) 🟠 Medium — The PCV check valve diaphragm, integrated into the valve cover, tears. This causes a large vacuum leak, rough idle, hissing noises, and high oil consumption. The entire valve cover must be replaced. (Ref: 10-06-01-008F)
- Automatic Transmission (6T30/6T40) Failure 🟠 Medium — Complaints of harsh shifting, slipping, and complete failure are documented, sometimes at relatively low mileage (<100,000 miles). (Ref: PI0731A (Torque Converter Shudder))
- Negative Battery Cable / Terminal Issues 🟡 Low — A poor connection at the negative battery terminal can cause a wide range of intermittent electrical problems, including no-start conditions and flickering lights. (Ref: 14329 (Recall))
Used vs. New Parts: Buying Guide for This Vehicle
When a used part is the smart pick: For this repair, a used VVT solenoid is NOT recommended. These parts fail due to internal oil sludging and electrical coil fatigue, which are age and mileage-dependent. The low cost of a new aftermarket part makes a used part a poor value with high risk of premature failure.
What to inspect on the donor part:
- Not applicable, as used parts are not recommended for this component.
OEM-only on this vehicle (don't cheap out):
- No parts for this specific repair are considered OEM-only. Quality aftermarket solenoids are widely available and perform well.
Aftermarket brands forum-validated for this vehicle:
- ACDelco (GM Original Equipment)
- Delphi
- Dorman
- INA
Brands owners have reported issues with on this vehicle:
- Unbranded, low-cost solenoids from online marketplaces may have higher failure rates, as noted in some owner forums.
Real Owner Stories
Aggregated from forums and TSBs cited above. Mileages and costs reflect what owners reported in those sources.
2011-2016 Chevrolet Cruze 1.8L
Symptoms: The user experienced codes P0013 and P0014 simultaneously. Other members suggested the solenoid swap diagnostic technique to confirm the failure.
What fixed it: Replacement of the camshaft position actuator solenoid.
Source hint: CruzeTalk Forum - P0013 & P0014 Codes
2011-2016 Chevrolet Cruze 1.8L
Symptoms: Check engine light with code P0013; community members noted it is often a quick and cheap fix related to oil or the exhaust solenoid.
What fixed it: Checking the oil and replacing the exhaust solenoid.
Source hint: Reddit r/Cruze - P0013 Code, what to do?
2011-2016 Chevrolet Cruze 1.8L
Symptoms: The connector to the exhaust camshaft solenoid simply came undone on its own, triggering the circuit code.
What fixed it: Inspecting and securely plugging the electrical connector back in.
Source hint: Diagnosis step 2/3 citing
2011-2016 Chevrolet Cruze 1.8L
Symptoms: Code P0013 appeared alongside P0014 even after the solenoid was replaced, suggesting deeper issues.
What fixed it: Investigation into underlying timing or oil pressure issues.
Source hint: NHTSA ODI #11184298
Related OBD-II Codes
Frequently Asked Questions
Which solenoid is responsible for the P0013 code on my 1.8L Cruze, and where is it located?
Can I test if the solenoid is actually bad before buying a new one for my 2011-2016 Cruze?
Does GM Technical Service Bulletin #17-NA-098 apply to my P0013 code?
What type of oil should I use in my 1.8L Cruze to prevent VVT issues like P0013?
Is it true that a broken wire could be causing my P0013 code instead of a bad part?
Should I replace both solenoids if only the exhaust one is failing?
Helpful Videos
We Have This Part in Stock


The information in this article is provided for general reference and educational purposes only. Vehicle specifications, procedures, and part compatibility can vary by production date, trim level, and region. Always consult your vehicle's factory service manual and verify part numbers before purchasing or performing repairs. Safety-critical components such as airbags, seat belts, and braking systems should be installed by a qualified professional.
- Chevrolet Cruze:
- 🎬 Helpful Videos
- 🛍️ Shop This Part
- What's Unique About the 2011-2016 Chevrolet Cruze
- Symptoms You May Notice
- Most Likely Causes
- Rare But Worth Checking
- Diagnosis Steps
- Parts You'll Likely Need
- Related Codes That Often Appear With This One
- Technical Service Bulletins (TSBs) & Recalls
- Platform-Specific Known Issues
- Mechanic-Grade Diagnostic Values
- Scan Tool Commands That Help
- Wiring & Ground Locations
- Real Owner Repair Stories
- When the Usual Fixes Don't Work
- OEM Part Supersession History
- Model Year Variations Within This Range
- Diagnostic Flowchart
- Other Known Issues on This Vehicle
- Used vs. New Parts: Buying Guide for This Vehicle
- Real Owner Stories
- 2011-2016 Chevrolet Cruze 1.8L
- 2011-2016 Chevrolet Cruze 1.8L
- 2011-2016 Chevrolet Cruze 1.8L
- 2011-2016 Chevrolet Cruze 1.8L
- Related OBD-II Codes
- Frequently Asked Questions
- 🎟️ Get 5% Off