

P1548 on 1994-2008 Audi A4: Boost Pressure Control (N75) Valve Open Circuit Causes and Fixes
On a 1994-2008 Audi A4 with a 1.8T or 2.0T engine, code P1548 almost always means the N75 boost control valve has failed or its wiring is damaged. This causes a severe loss of power (limp mode). Replacing the N75 valve is the most common fix, costing around $50-$100 for the part, and is a simple DIY job.
- P1548 on an Audi A4 means there is an electrical problem with the N75 turbo boost control valve or its wiring.
- The primary symptom is the car entering 'limp mode' with a severe lack of power.
- The most likely cause is a failed N75 valve, which is a common and relatively inexpensive part to replace.
- Diagnosing the issue is straightforward with a multimeter by checking the resistance of the N75 valve.
- This is a very DIY-friendly repair, especially on the 1.8T engine where the valve is easily accessible.
What's Unique About the 1994-2008 Audi A4

On the turbocharged 1.8T and 2.0T FSI engines in the B5, B6, and B7 generation A4s, the N75 valve is a well-known failure point. Due to its location in the engine bay, it's subjected to constant heat cycles which can degrade the internal coil windings and the external plastic housing and wiring over time. On the B7 2.0T FSI, the valve is mounted directly to the hot turbocharger housing, increasing its exposure to extreme temperatures. While other boost-related codes can be ambiguous, P1548 is highly specific, pointing directly to an electrical failure in the N75 circuit, which simplifies diagnosis significantly compared to general underboost (P0299) or overboost (P0234) codes.
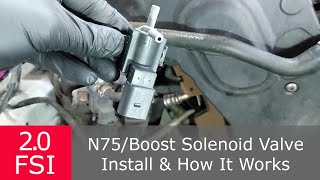
Generation note: This guide covers the B5 (1994-2001), B6 (2001-2005), and B7 (2005-2008) generations of the Audi A4. The 1.8T engine is found in the B5 and B6, while the 2.0T FSI is in the B7. The function of the N75 valve and the meaning of code P1548 are identical across these generations. 🎬 Watch: How the N75 works and how to test it However, the specific part number for the valve and its location differ. On the B5/B6 1.8T, it's typically on the intake pipe near the airbox. On the B7 2.0T, it's mounted directly on the turbocharger.
Symptoms You May Notice
- Significant loss of engine power (limp mode), with boost limited to a base level (e.g., 3-5 PSI).
- Check Engine Light is illuminated.
- Sluggish and slow acceleration, as if the turbocharger is not working.
- Inconsistent, surging, or erratic power delivery during acceleration.
- In rare cases, a momentary overboost followed by the ECU cutting power.
- Replacing the turbocharger. P1548 is an electrical fault with the control system, not a mechanical fault with the turbo itself.
- Replacing the diverter valve (DV). While a faulty DV can cause boost issues, it will not typically cause an 'Open Circuit' code for the N75 valve.
- Searching for a boost leak. While boost leaks are common on these engines, they produce different codes (like P0299/P1556) and symptoms, and would not trigger an electrical circuit fault like P1548.
Most Likely Causes

- Failed N75 Boost Pressure Control Valve 🔴 High Probability The N75 valve is a common failure item due to years of heat cycles in the engine bay causing the internal solenoid coil to break, creating an open circuit. The plastic housing can also become brittle and crack.
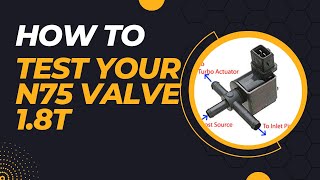
How to confirm: Measure the electrical resistance between the two pins on the N75 valve itself using a multimeter. A healthy valve should read between 25-35 Ohms. If the multimeter reads infinite resistance (OL), the valve's internal coil is broken and it must be replaced. 🎬 See this quick guide on testing your N75 valve Some owners report that a valve can test good when cold but still fail intermittently when hot, making replacement a valid diagnostic step if symptoms persist.
Typical fix: Replace the N75 valve. This is typically a simple procedure involving disconnecting the electrical connector and three small vacuum hoses. The original hoses often use one-time-use clamps that will need to be cut off and replaced with new worm-gear clamps.
Est. part cost: $50-$120 - Damaged Wiring Harness or Connector 🟡 Medium Probability The wiring leading to the N75 valve can become brittle and crack from engine heat and vibration, leading to a break in the wire, often right at the connector. The connector itself can also fail or develop corrosion, causing a poor connection.
How to confirm: Visually inspect the wiring harness leading to the N75 valve for any cracks, fraying, or breaks. Gently pull on the wires at the back of the connector; they may come loose entirely. Wiggle the connector and wiring while the engine is running to see if it causes a change. If the valve's resistance tests good, use a multimeter to check for voltage at the connector with the ignition on to confirm power is reaching the valve.
Typical fix: Repair the broken wire(s) by soldering or using butt connectors. If the connector itself is damaged, replace the pigtail connector for the N75 valve. A repair pigtail is available under part numbers like WG-connector-83094120175.
Est. part cost: $15-$40
Rare But Worth Checking
- Failed Engine Control Module (ECM):
Diagnosis Steps

- Connect an OBD-II scanner and confirm the presence of code P1548 and/or the VAG-specific code 17956.
- Locate the N75 valve. On B5/B6 1.8T engines, it's often mounted on the intake pipe near the front of the engine bay. On B7 2.0T FSI engines, it's typically mounted directly on the turbocharger housing, accessible from underneath the car.
- Carefully inspect the electrical connector and the wires leading to it for any signs of damage, corrosion, or breaks. Pay close attention to the point where the wires enter the back of the connector, as this is a common failure point.
- Disconnect the electrical connector from the N75 valve. On some VAG connectors, you may need a small pick to release the tab.
- Set a multimeter to measure resistance (Ohms). Touch the probes to the two pins on the N75 valve itself.
- A reading between 25-35 Ohms indicates the valve's coil is likely good. A reading of 'OL' or infinite resistance means the valve has an internal open circuit and is faulty.
- If the valve tests good, the problem is in the wiring. Turn the vehicle's ignition to the 'On' position (engine off). Set the multimeter to DC Volts and test for voltage at the pins of the wiring harness connector. One pin should have battery voltage.
- If no voltage is present, trace the wiring back towards the ECU to find the break or check the associated fuse. The wire colors are typically green/yellow and yellow/white on the 1.8T.
- If the valve is confirmed faulty, replace it. Be prepared to replace the single-use hose clamps.
- After the repair, clear the fault codes with a scanner and perform a test drive to ensure boost is restored and the Check Engine Light does not return.
Parts You'll Likely Need

- Boost Pressure Control Valve (N75 Valve)
(OEM #06A906283E (common for 1.8T, often ends in 'C' or 'F'), 06F906283F (common for 2.0T))— This is the most common failure part for code P1548. The internal coil winding breaks, causing the 'open circuit' fault.
Trusted brands: Pierburg (often the OEM supplier), Bosch, Genuine VW/Audi, Hamburg-Technic
OEM price range: $80-$120
Aftermarket price range: $45-$75 - N75 Valve Connector Pigtail — Needed if the original connector or its immediate wiring is cracked, corroded, or broken.
Trusted brands: Dorman, URO Parts, Various aftermarket
OEM price range: $25-$40
Aftermarket price range: $15-$30
Related Codes That Often Appear With This One
- P0299 — If the N75 valve fails intermittently, the ECU may log a P0299 (Turbo/Supercharger Underboost) code due to the inability to build the requested boost pressure, in addition to the P1548 electrical fault.
- P0234 — Less commonly, an intermittent N75 fault could cause a momentary boost spike before failing, leading the ECU to log a P0234 (Turbo/Supercharger Overboost Condition) code.
- 17956 — This is the VAG-specific equivalent of the generic OBD-II code P1548. They mean the exact same thing.
Platform-Specific Known Issues
- B5/B6 1.8T N75 Location and Access: On the earlier 1.8T engines, the N75 valve is located on the main turbo intake pipe, just behind the passenger-side headlight. Access is relatively easy from the top of the engine bay. The vacuum hoses, however, can become very brittle and may crack upon removal, so having replacement silicone hoses on hand is recommended.
- B7 2.0T FSI N75 Location and Access: On the B7 A4 with the 2.0T FSI engine, the N75 valve is mounted directly to the turbocharger housing. It is best accessed from underneath the vehicle. 🎬 Watch: B7 A4 N75 valve replacement walkthrough Its location subjects it to intense heat, which is a primary contributor to both valve and wiring failure. The plastic can become extremely brittle.
Mechanic-Grade Diagnostic Values
- N75 Valve Solenoid Resistance (cold) — expected: 25 - 35 Ohms. Failure: Infinite resistance (OL) indicates an open circuit. A reading outside the specified range, especially when hot, can also indicate a fault.
- N75 Connector Voltage (Key On, Engine Off) — expected: Pin 1 (supply): ~12V (Battery Voltage). Pin 2 (signal): Fluctuating DC voltage (PWM signal from ECU), some users report ~5V.. Failure: No voltage on the supply pin points to a fuse or relay issue. No signal on the other pin points to a wiring or ECU driver fault.
- N75 Valve Resistance (hot) — expected: Should remain within the 25-35 Ohm range.. Failure: A resistance reading that climbs significantly above 35 Ohms (e.g., to 40+ Ohms) when the valve is heated with a heat gun or hot water can identify an intermittent, heat-related failure.
Scan Tool Commands That Help
- VCDS (VAG-COM): Engine -> Output Tests -> Charge Pressure Control Solenoid Valve (N75) — This function directly commands the N75 valve to cycle on and off. You should hear an audible clicking from the valve. A lack of clicking confirms a failed valve or a complete break in the wiring/power supply, which is the primary cause of P1548.
- VCDS (VAG-COM): Engine -> Basic Settings -> Group 011 (on some older models) — On some ECUs, running Basic Settings for Group 011 will cycle the N75 valve, allowing you to observe the wastegate actuator arm moving or listen for the valve clicking. This can be an alternative way to functionally test the circuit.
Wiring & Ground Locations

- N75 Connector (1.8T B5/B6) — On the N75 valve itself, typically mounted on the turbo intake pipe near the passenger headlight.. This is the primary point of failure. Pin 1 is typically Green/Yellow (power) and Pin 2 is Yellow/White (ECU signal). The wires often break right at the back of this connector.
- N75 Connector (2.0T B7) — On the N75 valve mounted to the turbocharger housing, accessed from below.. This is the main failure point. Pin 1 receives 12V+ power from the J757 relay (or equivalent), and Pin 2 is the ground-side signal wire controlled by the ECU.
- ECU Pin T94/32 (2.0T B7) — Pin 32 on the 94-pin main ECU harness connector.. This is the specific pin that provides the ground signal to the J757 relay coil, which in turn powers the N75 valve. A poor connection or break in the wire from this pin can cause power loss to the N75 circuit.
- Earth Connection 131 — In the engine compartment, on the B7 A4.. This is a main engine compartment ground point. While not directly for the N75, a poor connection here can cause a range of electrical issues for engine management components.
Real Owner Repair Stories
- ozAudi Forums user 'Jimmy' (Audi A4 1.8T (generation not specified, but likely B5/B6)) — Recurring P1548 'open to circuit' code immediately after starting, sluggish performance, boost gauge reading only -12 to 3/4 psi.
❌ Tried (didn't work) Replaced MAF sensor., Tested for boost leaks with a tennis ball tester., Inspected diverter valve.
✅ What actually fixed it Replacing the N75 valve itself resolved the P1548 code. The user initially suspected the wiring loom due to common knowledge, but the valve was the true point of failure. - YouTube channel 'Rowdy's Garage' (Audi A4 1.8T B5) — P1548 'N75 Open circuit' fault code, very low boost (4-5 psi).
❌ Tried (didn't work) Initial inspection did not reveal the problem.
✅ What actually fixed it Upon inspecting the N75 connector, the wires pulled completely out. The plastic had become brittle and the wires broke internally right at the connector. The fix was to solder a new connector pigtail onto the harness.
OEM Part Supersession History
058906283C / 058906283F→06A906283E— Updated revision for 1.8T engines for improved reliability.
Heads up: The 'F' revision was superseded by the 'E' revision; they are generally interchangeable but using the latest revision is recommended.06F906283F→06F906283F— Part number has remained stable for the 2.0T FSI engine.
Heads up: While the VW/Audi part number is stable, the OEM supplier is Pierburg, and their part number is 7.00470.07.0.
Model Year Variations Within This Range
- 1994-2005 (B5/B6 1.8T): The N75 valve is located on the turbo intake pipe, making it easily accessible from the top of the engine bay. The part is typically black or brown and has a 'T' shape for the vacuum lines.
- 2005-2008 (B7 2.0T FSI): The N75 valve is a different design, mounted directly to the turbocharger housing. Access requires getting under the car. This location exposes it to much higher temperatures, leading to a higher failure rate of both the valve and its connector.
Diagnostic Flowchart
Other Known Issues on This Vehicle
Issues unrelated to this code that are worth knowing about as an owner of this generation:
- 1.8T Engine Oil Sludge 🔴 High — Very common on 1997-2004 models, especially if oil changes were not frequent or used non-synthetic oil. Can lead to a blocked oil pickup tube and catastrophic engine failure. (Ref: Audi issued a TSB and extended the warranty for affected vehicles, but required strict proof of maintenance.)
- 2.0T FSI Camshaft Follower Wear 🔴 High — Extremely common on all B7 2.0T FSI engines. The follower wears down, and if it fails completely, it can destroy the high-pressure fuel pump (HPFP) and the intake camshaft, leading to thousands in repairs. Recommended inspection/replacement every 20-30k miles. (Ref: Audi released an updated 'Revision B' follower, but it is still considered a wear item that requires regular checks.)
- Multi-Link Front Control Arm Failure 🟠 Medium — Very common on B5 and B6 generations, often starting around 60,000-80,000 miles. Bushings and ball joints wear out, causing clunking noises over bumps, poor alignment, and uneven tire wear. (Ref: No recall, but it is a widely documented and expected maintenance item. The 'pinch bolt' holding the upper arms is notoriously difficult to remove due to corrosion.)
- 2.0T FSI PCV Valve Failure 🟠 Medium — Common failure item on the 2.0T FSI. A torn diaphragm in the PCV valve can cause a loud whistling or 'honking' noise from the engine bay, high idle, and various lean or air-related fault codes.
- 2.0T FSI Intake Valve Carbon Buildup 🟠 Medium — Inevitable on all FSI (direct injection) engines. Over time, carbon deposits build up on the intake valves, restricting airflow and causing misfires, rough idle, and a gradual loss of performance. Typically requires manual cleaning (walnut blasting) every 60,000-80,000 miles.
- 1.8T Timing Belt and Water Pump 🔴 High — This is a critical maintenance item. The timing belt, tensioner, and water pump (with a plastic impeller that can fail) must be replaced every 75,000-90,000 miles. Failure of the belt or tensioner will cause catastrophic engine damage.
Used vs. New Parts: Buying Guide for This Vehicle
When a used part is the smart pick: A used N75 valve is generally not recommended. Given that heat cycles are the primary cause of failure, a used part from a junkyard has an unknown history and is likely to have a very short remaining lifespan. The low cost of a new, quality aftermarket part makes buying used a poor value proposition.
Donor-vehicle mileage cap: roughly under 40000 miles for the part to have meaningful remaining life.
What to inspect on the donor part:
- If considering used, visually inspect the plastic housing for any cracks, brittleness, or signs of heat stress.
- Test the resistance with a multimeter before purchase; it must be between 25-35 Ohms.
- Avoid parts that are covered in oil or show signs of corrosion on the electrical pins.
OEM-only on this vehicle (don't cheap out):
- Engine Control Module (ECM)
Aftermarket brands forum-validated for this vehicle:
- Pierburg (often the original OEM supplier)
- Bosch
- Febi Bilstein
Brands owners have reported issues with on this vehicle:
- Unbranded, no-name parts from online marketplaces are a gamble. While some may work, forum discussions often feature users who have issues with cheap, non-reputable brands failing quickly or not performing correctly.
Real Owner Stories
Aggregated from forums and TSBs cited above. Mileages and costs reflect what owners reported in those sources.
Audi A4 1.8T B5
Symptoms: The vehicle had an N75 valve open circuit fault code.
What fixed it: The wires had broken and pulled out from the back of the N75 electrical connector. Repairing the connector by re-securing the wires resolved the fault.
Source hint: YouTube - 'N75 Valve open circuit fault code fixed Audi 1.8T B5'
Audi A4 1.8T/2.0T FSI
Symptoms: After replacing the N75 valve for an intermittent fault, a hard P1548 open circuit code appeared.
What fixed it: The cause was not the new part, but a broken wire right at the connector. The issue was resolved by soldering the broken wire.
Source hint: Audi-Sport.net - 'N75 replaced - faulty?'
Related OBD-II Codes
Frequently Asked Questions
Where is the N75 valve located on my B6 Audi A4 1.8T?
I have a B7 A4 2.0T FSI. Is the N75 valve in the same easy-to-access spot as the older 1.8T?
My N75 valve tested at 30 Ohms, which is within spec, but I still have P1548 and limp mode. Is the valve definitely good?
The wiring connector to my N75 valve is broken. Is there a repair part available?
I'm about to replace my N75 valve. Are there any other parts I should have on hand?
I have a 2004 VW Passat 1.8T with code P1548. Is the diagnosis the same as for the Audi A4?
What are the wire colors for the N75 valve harness on the 1.8T engine?
Helpful Videos

We Have This Part in Stock



The information in this article is provided for general reference and educational purposes only. Vehicle specifications, procedures, and part compatibility can vary by production date, trim level, and region. Always consult your vehicle's factory service manual and verify part numbers before purchasing or performing repairs. Safety-critical components such as airbags, seat belts, and braking systems should be installed by a qualified professional.
- Audi A4:
- 🎬 Helpful Videos
- 🛍️ Shop This Part
- What's Unique About the 1994-2008 Audi A4
- Symptoms You May Notice
- Most Likely Causes
- Rare But Worth Checking
- Diagnosis Steps
- Parts You'll Likely Need
- Related Codes That Often Appear With This One
- Platform-Specific Known Issues
- Mechanic-Grade Diagnostic Values
- Scan Tool Commands That Help
- Wiring & Ground Locations
- Real Owner Repair Stories
- OEM Part Supersession History
- Model Year Variations Within This Range
- Diagnostic Flowchart
- Other Known Issues on This Vehicle
- Used vs. New Parts: Buying Guide for This Vehicle
- Real Owner Stories
- Audi A4 1.8T B5
- Audi A4 1.8T/2.0T FSI
- Related OBD-II Codes
- Frequently Asked Questions
- 🎟️ Get 5% Off