

P1299 on 1997-2014 Ford E-Series: Cylinder Head Overtemperature Causes and Fixes
P1299 on a Ford E-Series van means the engine is either overheating or, more commonly, a faulty Cylinder Head Temperature (CHT) sensor is tricking the computer. First, check if the engine is actually hot. If not, the CHT sensor has likely failed. Expect to pay $20-$70 for the part, but labor can be high due to its difficult location under the intake manifold. In many cases, the alternator can be removed for access, avoiding the more complex intake manifold removal.
- P1299 is a critical code on your E-Series van. Stop driving immediately to avoid severe engine damage.
- The first step is to determine if the engine is truly overheating or if you have a false alarm from a bad sensor.
- A very common cause is a failed Cylinder Head Temperature (CHT) sensor, which gives a false overheat reading. Check its live data on a cold engine to confirm.
- If the engine is actually overheating, check for low coolant, leaks, and a stuck thermostat.
- Replacing the CHT sensor is a difficult DIY job due to its location under the intake manifold, often requiring alternator removal.
What's Unique About the 1997-2014 Ford E-Series
Unlike many vehicles that use an Engine Coolant Temperature (ECT) sensor, these Ford gasoline engines use a Cylinder Head Temperature (CHT) sensor screwed directly into the metal of the cylinder head. This design is a fail-safe; it can detect an overheat condition even if all coolant has been lost, as it measures metal temperature directly. However, the sensor itself is a frequent failure point, often failing electrically and sending a false P1299 code. Its location is notoriously difficult to access, buried under the intake manifold between the cylinder banks. This makes a simple sensor swap a labor-intensive job, though many owners have successfully replaced it by only removing the alternator for access.
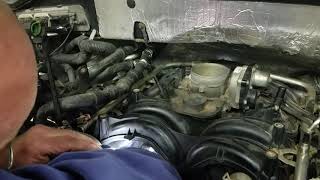
🎬 Watch: This walkthrough shows how to swap the sensor via the alternator.Generation note: This range covers the fourth generation of the Ford E-Series (1992-present), including a major facelift in 2008. However, the fundamental design of the 2-valve and 3-valve 5.4L and 6.8L modular engines and their use of a CHT sensor under the intake manifold remains consistent. The diagnostic and repair process for a P1299 code is similar across this entire year range.
Symptoms You May Notice
- Check Engine Light is on, may be flashing
- Sudden and significant loss of engine power (Limp Mode)
- Engine running rough, shaking, or vibrating
- Temperature gauge on the dashboard may read erratically or shoot to HOT instantly, even on a cold engine
- Engine may stall or shut down completely
- Cooling fans running at high speed constantly
- In some cases with a faulty sensor, there are no symptoms other than the Check Engine Light and the code being stored
- Replacing the thermostat when the actual problem is a faulty CHT sensor sending a false signal.
- Assuming a blown head gasket immediately, when the issue could be a much simpler and cheaper fix like a bad CHT sensor or an air pocket in the system.
- Replacing the wrong sensor. Some owners mistakenly replace the Engine Coolant Temperature (ECT) sender for the dashboard gauge instead of the CHT sensor used by the PCM. On these engines, the CHT sensor is the primary input for the PCM.
Most Likely Causes
- Faulty Cylinder Head Temperature (CHT) Sensor 🔴 High Probability The CHT sensor is a common failure item on these Ford modular engines, often failing electrically and sending a false high-temperature signal. Its location subjects it to extreme heat cycles which can degrade it over time.
How to confirm: Use an OBD-II scanner to read live data from the CHT sensor when the engine is completely cold. If the sensor reads a very high temperature (e.g., over 250°F) immediately upon startup, the sensor is bad. You can also test the sensor with a multimeter; it's a thermistor, so its resistance changes with temperature. A typical cold reading might be ~37k Ohms at 68°F (20°C), while a hot reading should be much lower, around 1.1k Ohms at 212°F (100°C). An infrared thermometer aimed at the cylinder head can confirm the engine is not actually overheating.
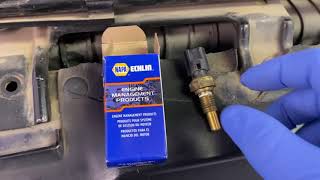
Typical fix: Replace the CHT sensor. It is highly recommended to also replace its electrical pigtail connector, which often becomes brittle and fails from heat exposure. Using a genuine Motorcraft sensor is strongly advised to avoid premature failure.
Est. part cost: $25-$70 - Low Engine Coolant Level 🟡 Medium Probability Leaks can develop over time from radiator hoses, the radiator itself, the water pump weep hole, or a cracked plastic intake manifold (a known issue on earlier 2-valve 5.4L engines). A manufacturer service bulletin, TSB #26-2060, notes that a loss of engine coolant can occur at the heater hose assembly near the engine cooling fan, potentially storing codes P1299 and P1285.
How to confirm: Visually inspect the coolant level in the degas bottle (reservoir). Perform a cooling system pressure test to find the source of any leaks. A leak may not always be visible externally.
Typical fix: Top off the coolant with the correct Ford specification fluid and repair the source of the leak.
Est. part cost: $10-$500 depending on the leaking component - Stuck-Closed Thermostat 🟡 Medium Probability Thermostats are a regular wear item that can fail with age, sticking in the closed position and preventing coolant from circulating to the radiator.
How to confirm: After the engine has warmed up, feel the upper and lower radiator hoses. If the engine is hot but the upper radiator hose is cool or only lukewarm, the thermostat is likely stuck closed.
Typical fix: Replace the thermostat and gasket. It is recommended to use an OEM Motorcraft thermostat.
Est. part cost: $20-$50 - Air Pockets in Cooling System ⚪ Low Probability If the cooling system was recently serviced (e.g., coolant flush, hose replacement), air can become trapped. This creates hot spots, particularly around the cylinder heads, which can trigger a legitimate overheat signal from the CHT sensor. These vans can be difficult to bleed properly.
How to confirm: This is often diagnosed after other causes are ruled out, especially if the problem began immediately after cooling system service. Symptoms can include a gurgling sound from the dashboard and lack of heat from the heater.
Typical fix: Properly bleed the cooling system. This may require using a vacuum-fill tool or parking the vehicle on an incline to help air escape to the highest point of the system.
Est. part cost: $0
Rare But Worth Checking
- Failed Engine Oil Cooler: On 6.8L V10 and some 5.4L V8 engines, the oil cooler can fail internally, leaking high-pressure oil into the cooling system. This creates a thick, brown 'milkshake' sludge in the coolant reservoir, clogs coolant passages, and leads to severe overheating.
- Failing Water Pump: The water pump impeller can corrode or break, or the pump bearing can fail, leading to a complete loss of coolant circulation and a legitimate overheat condition.
- Blown Head Gasket: A major internal engine failure where combustion gases are forced into the cooling system, causing it to over-pressurize and overheat. Look for constant bubbles in the coolant reservoir or use a chemical block tester to check for exhaust gases in the coolant. NHTSA ODI #11474375 describes a case where P1299 was present and diagnosis revealed coolant leaking inside the engine into a cylinder.
- Damaged CHT Sensor Wiring: The wiring harness leading to the CHT sensor can be damaged by heat, age, or chafing against other engine components, causing a short or open circuit that mimics a failed sensor. Always inspect the harness thoroughly during sensor replacement.
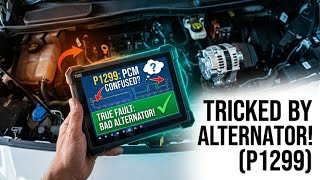
- Failing Alternator: In some documented cases, a failing alternator can introduce electrical noise (AC voltage) into the vehicle's DC system, which interferes with the CHT sensor's signal and causes false high temperature readings. Manufacturer bulletin SSM 52786 notes that a false overheat condition with P1299 may be diagnosed by disconnecting the generator electrical connector and positive cable to see if the condition clears.
Diagnosis Steps
- DO NOT DRIVE. Stop the vehicle immediately to prevent engine damage.
- Check for Actual Overheating: Carefully check if the engine is physically hot. Is steam coming from the engine bay? Is the temperature gauge pegged? Use an infrared thermometer to measure the temperature of the cylinder heads (should be under ~220°F normally). This is the most critical step to determine if you have a real overheat or a sensor issue.
- Scan for Codes: Confirm P1299 is the primary code. 🎬 Watch: A quick guide to diagnosing the P1299 over-temperature code. Note any other codes present, such as P1285, P1289, or P0217, as they provide valuable context.
- Diagnose a Faulty CHT Sensor: If the engine is cold, connect a scanner and view live data for the CHT. If it shows an extremely high temperature (e.g., 260°F+) right away, the sensor or its wiring is faulty. If no scanner is available, you can test the sensor's resistance with a multimeter.
- Inspect the Cooling System: If the engine IS overheating, perform a visual inspection. Check the coolant level in the degas bottle. Look for obvious leaks from hoses, the radiator, intake manifold, or the water pump area.
- Check for 'Milkshake': Inspect the coolant in the reservoir. If it is thick, brown, and milky, suspect a failed engine oil cooler.
- Check Thermostat Operation: Once the engine is at operating temperature, carefully feel the upper radiator hose. If it's not hot, coolant is not circulating, and the thermostat is likely stuck closed.
- Pressure Test the System: If you suspect a leak but cannot see it, use a cooling system pressure tester to find and fix the source of the leak.
Parts You'll Likely Need
- Cylinder Head Temperature (CHT) Sensor
(OEM #9L8Z-6G004-C (supercedes 3L7Z-6G004-BA), 8L3Z-6G004-A)— This sensor is the most common point of failure, sending false signals that trigger the P1299 code even when the engine temperature is normal.
Trusted brands: Motorcraft, Standard Motor Products (SMP), NTK, Walker Products
OEM price range: $35-$70
Aftermarket price range: $20-$50
Related Codes That Often Appear With This One
- P1285 — This code, 'Cylinder Head Over-Temperature Condition', is the first stage warning that often appears before P1299 is triggered. P1285 may only peg the temperature gauge, while P1299 actively engages the limp mode.
- P0217 — This is a generic code for 'Engine Coolant Overtemperature Condition' and can be triggered alongside P1299 during a true overheating event.
- P1289 — This code for 'Cylinder Head Temp Sensor High Input' directly points to an electrical fault in the CHT sensor circuit and is often a precursor to or companion of P1299 when the sensor fails electrically.
Platform-Specific Known Issues
- The CHT sensor is located under the intake manifold, making replacement very difficult. Access often requires removing the alternator. A 19mm crow's foot or stubby ratcheting wrench is highly recommended for the job.
- Early 2-valve engines (pre-~2003) used a plastic intake manifold that was prone to cracking near the front coolant crossover, causing a major coolant leak.
- The 6.8L V10 and some 5.4L V8s can suffer from internal engine oil cooler failure, which contaminates the entire cooling system with oil and requires extensive flushing in addition to replacing the cooler.
Mechanic-Grade Diagnostic Values
- CHT Sensor Resistance — expected: ~37 kΩ @ 68°F (20°C); ~2.4 kΩ @ 176°F (80°C); ~1.1 kΩ @ 212°F (100°C). Failure: An infinite reading (OL) indicates an open circuit. A reading that doesn't change with temperature indicates a failed thermistor.
- CHT Sensor Signal Voltage (at PCM) — expected: Normal operating temperature (~198°F) should be about 2.1 volts. Voltage decreases as temperature increases.. Failure: A voltage reading greater than 4.6V will trigger a high input code like P1289 and can lead to P1299. A reading of 5.0V indicates an open circuit (sensor unplugged).
- CHT Sensor Circuit Ground Reference (at harness connector) — expected: Below 100mV with key on, engine off.. Failure: Voltage significantly higher than 0V indicates a poor ground connection for the sensor circuit, which can skew temperature readings.
Scan Tool Commands That Help
- Ford IDS (Integrated Diagnostic System): Self-Test — Used to retrieve all on-demand and continuous memory diagnostic trouble codes (DTCs) from all vehicle modules, which may reveal related codes that a generic scanner might miss.
- Ford IDS (Integrated Diagnostic System): Datalogger - CHT PID — Used to monitor the live voltage and temperature reading from the CHT sensor. This is critical for determining if the sensor is providing an irrational reading (e.g., spiking to max temp on a cold engine).
Wiring & Ground Locations
- CHT Sensor — On 2-valve and 3-valve 5.4L/6.8L engines, the sensor is located under the intake manifold, in the valley between the cylinder banks, typically behind the alternator.. This is the primary sensor that triggers the P1299 code. Its difficult-to-access location makes diagnosis and replacement labor-intensive.
- PCM Ground — The main PCM ground is typically located on the firewall or inner fender, near the battery. There are also grounds on the radiator support.. A poor PCM ground can cause a variety of erratic electrical issues, including incorrect sensor readings. In rare cases, a bad ground can cause false P1299 codes by creating a floating ground reference for the CHT sensor.
- CHT Sensor Connector — The two-wire connector plugs directly into the CHT sensor under the intake manifold. One wire is the signal wire, the other is a dedicated PCM ground.. This connector and its pigtail are common failure points due to heat and vibration. A corroded or brittle connector can cause an intermittent or high-resistance connection, leading to false high temperature readings and a P1299 code.
Real Owner Repair Stories
- G Auto Repair YouTube Channel (2020 Ford Transit Connect (different vehicle, but demonstrates a key electrical principle applicable to P1299)) — Temp gauge pinned to hot, rough idle, stumbling, codes P1299 and P017D (CHT Sensor Circuit High).
❌ Tried (didn't work) Replacing the CHT sensor., Programming a new PCM.
✅ What actually fixed it The root cause was a failing alternator introducing electrical noise (AC ripple) into the vehicle's electrical system, which interfered with the CHT sensor signal. The issue was confirmed by disconnecting the alternator's main power cable, which made the problem disappear. Replacing the alternator resolved all symptoms and codes. - NHTSA ODI #11685553 — An owner reported a check engine light, white smoke on a cold start, and low coolant. Diagnostic codes included P0302 for a misfire and P1299 for Cylinder Head Protection Active, resulting in a "no power" limp mode condition.
- NHTSA ODI #11485331 — A driver noticed an empty coolant reservoir and retrieved several codes including P1299, P0302, and P0300. The owner attempted repairs by replacing the spark plugs, coils, coolant reservoir, and thermostat.
"I Checked Everything" — The Actual Cause
- While not a vacuum-related code, a similar pattern exists: 'Cooling system checks out, but P1299 persists.' The most documented cause for this is a failing alternator introducing electrical noise into the system. The CHT sensor operates on a low-voltage signal, which is highly susceptible to interference. A bad diode in the alternator can allow AC voltage to 'leak' into the DC system, which the PCM misinterprets as a wild fluctuation in the CHT sensor's resistance, triggering a false overheat event.
OEM Part Supersession History
9L8Z-6G004-A, 9L8Z-6G004-D→9L8Z-6G004-F (Motorcraft DY-1144)— Standard part revision and consolidation by the manufacturer.
Heads up: This is the widely used sensor for many Ford engines in this era, including the 5.4L. Always verify fitment with the vehicle's VIN.N/A→WPT-987 or WPT-1120 (Motorcraft)— This is the service pigtail connector for the CHT sensor.
Heads up: The wiring pigtail is frequently damaged by heat and should be inspected and often replaced with the sensor. Multiple part numbers may fit depending on the exact production year.
Model Year Variations Within This Range
- 1997-2004 (approx.): Engines in this range were primarily the 2-valve SOHC design. Some early models may have had a plastic intake manifold prone to cracking near the coolant crossover, creating a coolant leak that could lead to a real overheat and P1299.
- 2004-2014 (approx.): Engines in this range were primarily the 3-valve SOHC design. While the CHT sensor location and function are similar to the 2-valve, other engine components and potential failure points (like cam phasers) are different. The intake manifold design was improved over the early 2-valve versions.
Diagnostic Flowchart
Used vs. New Parts: Buying Guide for This Vehicle
When a used part is the smart pick: For a P1299 repair, using used parts is generally not recommended for the most common failure components. However, if a larger component like an alternator is diagnosed as the cause, a tested, low-mileage used unit can be a budget-conscious choice.
Donor-vehicle mileage cap: roughly under 80000 miles for the part to have meaningful remaining life.
What to inspect on the donor part:
- For an alternator: Check for a clean housing, smooth-spinning pulley with no bearing noise or roughness, and intact electrical connections. Ask if the donor vehicle had any known electrical issues.
- For a PCM: Ensure the part number matches exactly. Obtain the VIN of the donor vehicle, as it will be needed for reprogramming the PATS (Passive Anti-Theft System).
- For an intake manifold: Inspect carefully for any hairline cracks, especially around coolant passages and mounting points. Ensure all gasket surfaces are clean and free of deep gouges.
OEM-only on this vehicle (don't cheap out):
- Cylinder Head Temperature (CHT) Sensor: The labor to replace this sensor is significant. Using a cheap aftermarket sensor that fails prematurely is a costly mistake. Stick with Motorcraft (OEM).
- Thermostat: An OEM Motorcraft thermostat is designed to open at the precise temperature the PCM expects. Aftermarket thermostats can have slightly different operating ranges, potentially causing persistent issues or other codes.
Aftermarket brands forum-validated for this vehicle:
- For CHT Sensor: Bosch, NTK (if Motorcraft is unavailable).
- For Alternator: Reputable remanufacturers like Bosch or Denso are good alternatives to new OEM.
Brands owners have reported issues with on this vehicle:
- Unbranded, 'white-box' CHT sensors and electrical connectors from online marketplaces. The failure rate is high, and the savings are not worth the risk of repeated labor.
Real Owner Stories
Aggregated from forums and TSBs cited above. Mileages and costs reflect what owners reported in those sources.
2004 Ford Excursion 6.8L V10
Symptoms: The temperature gauge spiked, triggering a P1299 code for overheat protection.
What fixed it: The owner successfully fixed the issue by replacing the Cylinder Head Temperature (CHT) sensor, which was accessed by removing only the alternator.
Source hint: Ford Truck Enthusiasts Forums thread titled 'P1299 code over temp protection'
2001 Ford Expedition 5.4L V8
Symptoms: The temperature gauge spiked and the engine entered limp mode.
What fixed it: The owner replaced the CHT sensor, but the problem returned, highlighting that a faulty sensor is not always the root cause and further diagnosis may be needed.
Source hint: ExpeditionForum.com thread titled 'coolant sensor possible cooling issue code p1299'
2005 Ford F-150 5.4L V8
Symptoms: The P1299 code appeared intermittently for two years, primarily on cold mornings, before it became a persistent problem.
What fixed it: The issue was resolved by replacing the CHT sensor. The repair required removing the alternator and using a modified wrench to access the sensor.
Source hint: YouTube video from a 2005 F-150 owner
Related OBD-II Codes
Frequently Asked Questions
Where is the CHT sensor on my 5.4L E-Series, and is it a difficult part to replace?
My temperature gauge suddenly went to HOT and the engine went into limp mode, but the engine was cold. Is it safe to keep driving?
I'm replacing the CHT sensor. Is an aftermarket part okay, or should I use a specific brand?
I have an older E-Series van. Are there any known coolant leak spots I should check first?
My coolant looks milky and brown. What could cause this on my 6.8L V10?
This P1299 code appeared right after I had the cooling system flushed. What happened?
Helpful Videos
We Have This Part in Stock



The information in this article is provided for general reference and educational purposes only. Vehicle specifications, procedures, and part compatibility can vary by production date, trim level, and region. Always consult your vehicle's factory service manual and verify part numbers before purchasing or performing repairs. Safety-critical components such as airbags, seat belts, and braking systems should be installed by a qualified professional.
- Ford E-Series:
- 🎬 Helpful Videos
- 🛍️ Shop This Part
- What's Unique About the 1997-2014 Ford E-Series
- Symptoms You May Notice
- Most Likely Causes
- Rare But Worth Checking
- Diagnosis Steps
- Parts You'll Likely Need
- Related Codes That Often Appear With This One
- Platform-Specific Known Issues
- Mechanic-Grade Diagnostic Values
- Scan Tool Commands That Help
- Wiring & Ground Locations
- Real Owner Repair Stories
- "I Checked Everything" — The Actual Cause
- OEM Part Supersession History
- Model Year Variations Within This Range
- Diagnostic Flowchart
- Used vs. New Parts: Buying Guide for This Vehicle
- Real Owner Stories
- 2004 Ford Excursion 6.8L V10
- 2001 Ford Expedition 5.4L V8
- 2005 Ford F-150 5.4L V8
- Related OBD-II Codes
- Frequently Asked Questions
- 🎟️ Get 5% Off