

OBD-II Code P1289: Cylinder Head Temperature Sensor Circuit High
The Ultimate Guide to P1289: What It Means, Why It Triggers, and How to Fix It for Good
- P1289 on Ford, Lincoln, or Mercury vehicles indicates an open circuit in the Cylinder Head Temperature (CHT) sensor, confirmed by a live data voltage reading stuck above 4.6V.
- Do not replace the CHT sensor without first testing the wiring harness for a 5-volt reference signal and a solid ground, as broken wires are a frequent cause of this code.
- Expect the vehicle to enter a 'limp mode' that reduces engine power, disables the A/C, and runs the cooling fans at maximum speed to prevent overheating damage.
- If your vehicle sat unused for several weeks before the code appeared, visually inspect the CHT wiring harness under the intake manifold for rodent damage before buying any parts.
What Does P1289 Mean?

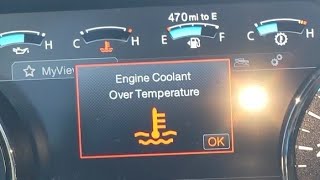
P1289 means the Powertrain Control Module (PCM) is receiving a voltage signal from the Cylinder Head Temperature (CHT) sensor that is higher than the expected range (typically over 4.6 volts). This happens when the sensor fails or there is a break in the wiring, creating an open circuit. The PCM interprets this high voltage as an extremely cold engine (-40°F) or a severe overheat condition, even when the engine temperature is normal. 🎬 See this walkthrough for fixing a sudden overheat warning. The computer relies on this critical sensor data to control the fuel mixture, ignition timing, and cooling fans.
Technical definition: The official SAE definition for P1289 on most Ford, Lincoln, and Mercury vehicles is "Cylinder Head Temperature (CHT) Sensor Signal Greater Than Self-Test Range" or "Cylinder Head Temperature Sensor Circuit High Input". This indicates the PCM detected a CHT sensor voltage exceeding 4.6 volts, which strongly suggests an open circuit in the sensor or its wiring.
Can I Drive With P1289?
Yes, But With Caution. Yes, but only for short distances to reach a safe location or repair shop. The vehicle's computer engages a 'fail-safe' mode, significantly reducing engine power and potentially disabling half the cylinders to prevent overheating damage. Continuing to drive with an incorrect fuel mixture damages the catalytic converters over time, a repair costing $800 to $2,500. The computer also activates the cooling fans constantly as a precaution.
Common Causes

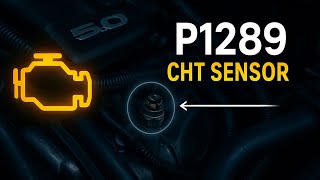
- Faulty Cylinder Head Temperature (CHT) Sensor (Very Common) — The sensor itself is the most frequent cause of failure. Internal electronics fail or develop high resistance, causing it to send an incorrect high voltage signal. This is a well-documented issue on certain Ford models covered by TSB 19-2049. 🎬 Watch: How to fix P1289 and P017D per Ford TSB.
- Damaged, Broken, or Corroded Wiring Harness (Common) — The wiring harness leading to the CHT sensor is exposed to extreme engine heat, making insulation brittle and causing wires to break internally or externally. Connector pins also corrode due to moisture, leading to a poor connection and a high-resistance fault.
- Rodent Damage (Common) — If a vehicle sits for an extended period, rodents build nests in the engine bay and chew through wires. The CHT sensor harness is a common target, and chewed wires create an open circuit that immediately triggers the P1289 code.
- Pinched Wires from Previous Repairs (Less Common) — During repairs requiring intake manifold removal (common on V6 and V8 engines), the CHT sensor wiring gets pinched upon reinstallation. This crushes the wire and causes a short or open circuit.
- Severe Engine Overheating (Rare) — While P1289 is usually an electrical fault, a genuine severe overheating condition caused by low coolant or a stuck-closed thermostat pushes the sensor's reading beyond its maximum range. This is typically accompanied by a P1299 code and obvious physical signs of overheating.
- Faulty Powertrain Control Module (PCM) (Very Rare) — In extremely rare cases, the internal circuit in the PCM that processes the CHT signal fails. Consider a faulty PCM only after definitively ruling out the sensor, connector, and entire wiring harness.
Symptoms

- Cooling Fans Run Constantly at High Speed — As a primary fail-safe measure, the PCM defaults to running the cooling fans at maximum speed to prevent overheating, even if the engine is completely cold.
- Inaccurate or Dead Temperature Gauge — The dashboard temperature gauge drops to its coldest reading and stays there, or falsely shows an overheating warning. A common complaint is the gauge works for a minute after startup and then drops to cold.
- Reduced Engine Power (Limp Mode) — The PCM triggers a fail-safe mode (often logged as companion code P1299) that reduces engine power to prevent damage from a perceived overheat condition, resulting in poor acceleration.
- Check Engine Light is On — The PCM illuminates the Malfunction Indicator Lamp (MIL) as soon as it detects the CHT sensor circuit voltage is out of range.
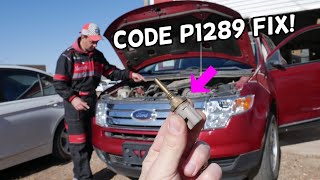
- Air Conditioning (A/C) Does Not Work — As part of its fail-safe strategy, the PCM disables the A/C compressor clutch to reduce the load 🎬 Watch: Fixing P1289 and restoring A/C on Ford Edge models. on the engine when it believes there is an overheating risk.
- Engine is Hard to Start, Stalls, or Idles Roughly — Because the PCM thinks the engine is at -40°F, it commands a very rich fuel mixture. This makes the engine difficult to start, causes it to stall, or leads to a rough idle.
- Poor Fuel Economy — With an incorrect temperature reading, the PCM cannot optimize the air-fuel ratio, leading to a rich running condition that significantly worsens gas mileage.
- CHT Voltage PID Reads > 4.6V (scan-tool only — no driver-felt sign) — Using a scan tool, the live data PID for CHT sensor voltage is stuck at an abnormally high reading, often over 4.6 volts, which the PCM interprets as an open circuit.
Diagnostic Flowchart
Tap your situation to follow the diagnostic path that matches what you're seeing on this code.
Common Fixes & Costs
- Replace the Cylinder Head Temperature (CHT) Sensor — Parts: $35-$75, Labor: $150-$600, ~0.7-3.5 hr book time (Intermediate)
- Repair Damaged Wiring or Connector Pigtail — Parts: $15-$40, Labor: $100-$300, ~1.0-2.0 hr book time (Intermediate)
- Run New Wires from PCM to Sensor — Parts: $15-$40, Labor: $250-$500, ~2.0-4.0 hr book time (Advanced)
- Replace the Engine Thermostat — Parts: $20-$50, Labor: $150-$300, ~1.0-2.5 hr book time (Intermediate)
- Top Off or Flush Engine Coolant — Parts: $20-$40, Labor: $100-$150, ~0.5-1.0 hr book time (DIY)
Used vs. New Parts: Buying Guide
When a used part is worth it: Buying a used Cylinder Head Temperature (CHT) sensor is never recommended. It is a low-cost electronic part with a known failure rate. The labor cost to access the sensor is often high, making it impractical to risk an early failure with a used part.
Donor-vehicle mileage cap: roughly under 20000 miles for the part to have meaningful remaining life.
Donor quality checklist:
- If considering used, it must only be from a very low-mileage vehicle that was wrecked.
- Ensure the part number matches exactly.
- Inspect the plastic connector for any signs of brittleness or heat damage.
Decision logic:
- If The part costs less than $60 new. → Always buy new. The savings from a used part are negligible compared to the risk and labor cost.
- If The labor to replace the part is more than 2 hours. → Always buy a new, high-quality OEM or reputable aftermarket part to avoid repeating the labor-intensive repair.
- If The part is a simple wiring pigtail. → A used pigtail from a junkyard is acceptable if it is in good condition with no corrosion or brittle wires.
Warranty tradeoff: Used parts typically have a 30-90 day warranty at best. New aftermarket sensors carry a 1-year to limited lifetime warranty. A new OEM part provides peace of mind and is the recommended choice.
Worst-case if a used part fails: $250-600 if a used sensor fails shortly after installation, as you will pay for the labor a second time.
What Happens If You Wait — Timeline
- 0-2 weeks: Code P1289 sets, MIL illuminates. Fail-safes activate: fans run constantly, A/C is disabled, temp gauge is dead. Engine enters limp mode. Annoying but no physical damage yet. (MPG impact: 5-15%% · Added cost: $0-25 in wasted fuel.)
- 2 weeks - 3 months: Continued operation with a rich fuel mixture (due to the false -40° reading) begins to affect emissions components. The excess fuel starts to overheat the catalytic converter's internal structure. (MPG impact: 10-25%% · Added cost: $50-150 in wasted fuel.)
- 3-9 months: The catalytic converter substrate begins to melt from sustained high temperatures caused by burning excess fuel. The ceramic monolith vitrifies or cracks, creating a partial exhaust restriction. (MPG impact: 15-30%% · Added cost: $1,200 - $2,500 (Catalytic converter replacement is now likely required for a vehicle like a Ford Edge).)
- 9+ months: Full catalyst meltdown. The exhaust is now severely restricted, causing significant power loss and potential engine damage from excessive backpressure. Fouled spark plugs and damaged oxygen sensors are also likely from the chronic rich condition. (MPG impact: 25-50%% · Added cost: $1,500 - $3,000+ (Includes catalytic converter, O2 sensors, and potentially spark plugs).)
Cost of Not Fixing It
- Immediate: Constant high-speed fan operation, no air conditioning, and entry into 'limp mode' with reduced power. Fuel economy drops by 10-25%. (Added cost: Negligible, but severe inconvenience and poor performance.)
- 1-6 months: Chronically running a rich fuel mixture (due to the false -40° reading) overheats and damages the catalytic converters, leading to premature failure. (Added cost: $800 - $2,500)
- 6+ months: Potential for engine damage if a separate, real overheating event occurs, as the temperature gauge will not provide an accurate warning. Continued rich operation fouls spark plugs and oxygen sensors. (Added cost: $200 - $600 (for plugs/sensors) plus the cost of catalytic converters.)
Diagnosis Steps

- Scan for Codes and Review Freeze Frame Data
Use an OBD-II scanner to confirm P1289 is the primary code. Look for related codes like P1299 (overheat protection active) or P017D. Analyze the freeze frame data to see the engine conditions (speed, temp, load) when the code was set.
Tools: OBD-II Scanner (Beginner) - Analyze Live Sensor Data (Key On, Engine Off)
With a cold engine, turn the ignition on and use a scan tool to view live data. Compare the Cylinder Head Temp (CHT), Engine Coolant Temp (ECT), and Intake Air Temp (IAT) readings. They must all be within a few degrees of each other and the ambient air temperature. A CHT reading of -40°F or a voltage reading above 4.6V on a cold engine confirms a circuit fault.
Tools: OBD-II Scanner with Live Data (Intermediate) - Perform a Thorough Visual Inspection
Trace the CHT sensor wiring harness from the sensor to the main loom. Look for obvious signs of damage like chewed wires from rodents, brittle or melted insulation near hot engine parts, or green corrosion on the connector.
Tools: Flashlight, Inspection Mirror (Beginner) - Check for Reference Voltage and Ground at the Connector
With the sensor unplugged and the ignition on (engine off), test the harness-side connector. Set a multimeter to DC Volts. One pin must have a 5-volt reference signal from the PCM. The other pin is the signal return (ground); it must read close to 0 volts. If the 5V reference or ground is missing, the problem is in the wiring or PCM.
Tools: Multimeter (Advanced) - Test the Sensor's Resistance vs. Temperature
Disconnect the sensor and set a multimeter to Ohms (Ω). Measure the resistance between the two pins on the sensor itself. Compare the reading to a temperature/resistance chart. A healthy sensor's resistance drops as it warms up. An infinite reading (OL) means the sensor is open internally and must be replaced. Expected values: ~37 kΩ @ 68°F (20°C); ~2.4 kΩ @ 176°F (80°C); ~1.1kΩ @ 212°F (100°C).
Tools: Multimeter, Temperature/Resistance Chart (Advanced) - Perform a Harness "Wiggle Test"
With the scan tool connected and displaying live CHT voltage data, have a helper wiggle the wiring harness at key points: the connector itself, where it runs along the engine, and near the PCM firewall connector. If the voltage reading on the scan tool flickers or jumps wildly during the wiggle test, you have pinpointed the location of an internal wire break or short.
Tools: OBD-II Scanner with Live Data (Advanced) - Perform a Voltage Drop Test
For a definitive wiring check, perform a voltage drop test. With the sensor plugged in and the engine running, set your multimeter to DC volts. Place the red lead on the battery positive terminal and the black lead on the 5V reference wire at the sensor connector. A reading above 0.3V indicates excessive resistance in the power-side wiring. Repeat for the ground side by placing the red lead on the battery negative terminal and the black lead on the ground wire at the connector. A reading above 0.3V points to a bad ground connection.
Tools: Multimeter, Back-Probes (Advanced) - Bypass the Harness with Jumper Wires
If you suspect a wiring issue but cannot find it, run two temporary jumper wires directly from the pins at the PCM connector to the pins at the sensor connector, bypassing the factory harness entirely. If this resolves the code and the live data reads correctly, it confirms the fault is in the vehicle's harness, which must be repaired or replaced.
Tools: Jumper Wires, Wiring Diagram, Multimeter (Advanced)
When This Code Triggers (Freeze-Frame Conditions)
- Fault Trigger: Key-On or shortly after startup (The P1289 code sets instantly or within minutes of starting the engine, as the open circuit provides an out-of-range voltage reading immediately.)
- Engine Coolant Temp (CHT): -40°F / -40°C (The freeze frame shows a default, illogical temperature reading of -40 degrees, which is what the PCM registers when it sees the high voltage from the open circuit.)
- Engine RPM: 0 - 800 RPM (The fault is captured at key-on (0 RPM) or during idle immediately after starting, before the vehicle is even driven.)
- Vehicle Speed: 0 mph (Consistent with the code setting at startup, the vehicle speed in the freeze frame data is frequently 0 mph.)
Related Codes
- P1299 — This code means 'Cylinder Head Over-Temperature Protection Active.' P1289 is the cause, and P1299 is the effect. The faulty 'high' signal from the CHT sensor (P1289) tricks the PCM into thinking the engine is overheating, so it activates fail-safe mode (P1299) to reduce power and prevent damage. Fixing the P1289 issue automatically resolves P1299.
- P017D — This is a companion code to P1289 in Ford's TSB 19-2049 for the 2019 F-150 and Mustang. It also relates to the CHT sensor and is triggered by the same sensor failure. They must not be diagnosed separately; replacing the CHT sensor fixes both codes.
- P0118 — 'Engine Coolant Temperature Sensor Circuit High.' This is the generic equivalent code for the Engine Coolant Temperature (ECT) sensor. P1289 is manufacturer-specific (mostly Ford) for the Cylinder Head Temperature (CHT) sensor. A vehicle can have one or both. P1289 points specifically to the CHT circuit.
- P0117 — 'Engine Coolant Temperature Sensor Circuit Low.' This code is for the opposite electrical problem (a short to ground) and refers to the ECT sensor. P1289 indicates an open or high voltage on the CHT circuit, while P0117 indicates a low voltage (short) on the ECT circuit.
Climate & Environmental Factors
- High Humidity / Heavy Rain: Moisture is a primary cause of electrical connector corrosion. In humid climates, water vapor penetrates non-weatherproofed seals over time, leading to oxidation on the connector pins for the CHT sensor. This increases resistance and causes an open circuit fault (P1289).
- Winter / Road Salt: In regions with snow and ice, road salt spray is highly corrosive to electrical systems. The salt mixture gets into the engine bay and attacks wiring harnesses and connectors, accelerating the degradation of the CHT circuit and leading to failure.
- Extreme Temperature Cycles (Hot/Cold): Constant cycling between extreme hot (engine running) and cold (engine off) temperatures makes the plastic insulation on the CHT sensor wiring brittle over time. This leads to cracking and exposes the wire, creating a path for a short or open circuit.
Where to Take It: Dealer vs Independent vs Chain
- Dealer:
Best for: Vehicles still under powertrain warranty, Complex wiring issues where TSBs (Technical Service Bulletins) are involved
Downsides: Labor rates are 1.5-2x higher than independent shops., May be quicker to replace a whole harness than to find and repair a single broken wire. (Typical cost: +50% vs. baseline) - Independent Shop:
Best fit. An experienced independent mechanic diagnoses a P1289 (sensor vs. wiring) effectively and often at a lower cost than a dealer. This is a common code on many Ford vehicles.
Best for: Out-of-warranty vehicles where cost is a major factor., Diagnosing common electrical faults on domestic brands like Ford.
Downsides: Quality varies; look for shops with ASE-certified technicians specializing in electrical diagnostics. (Typical cost: +0% vs. baseline) - Chain Shop:
Acceptable, but with caution. A chain shop replaces a CHT sensor, but if the issue is a wiring break (a common cause), they struggle to diagnose it correctly. Best used if you are certain the sensor is the only problem.
Best for: Simple part replacements if the diagnosis is already certain.
Downsides: Technician skill varies dramatically; lacks the advanced electrical diagnostic experience needed if the problem is a wiring fault and not the sensor itself., More inclined to replace parts without a full diagnosis. (Typical cost: -10% vs. baseline)
When to Walk Away From the Repair
If the estimated repair cost for the P1289 fault exceeds 40-50% of your car's private-party value (from a source like Kelley Blue Book), you should seriously consider selling or trading it in instead of repairing it.
- Car worth $5000, fix is $2500: Walk away. The repair cost is 50% of the car's value, and this money is better used as a down payment on a more reliable vehicle.
- Car worth $15000, fix is $600: Fix it. The repair cost is a small fraction of the vehicle's value and restores its function and resale value.
- Car worth $3000, fix is $1800: Walk away. The repair cost is 60% of the car's value. It is not economically sensible to invest this much into an older, lower-value car.
What Scan Tool You Need for This Code

Minimum: A scanner that reads manufacturer-specific Ford codes and displays live data, specifically the CHT sensor voltage PID.
A basic $20 code reader only shows you the P1289 code. It cannot show you the live CHT voltage, which is critical for confirming the 'circuit high' condition (stuck above 4.6V). Without live data, you are just guessing whether the sensor or the wiring is the problem.
Budget: BlueDriver Pro (~$100) — Connects to your smartphone via Bluetooth and the app reads Ford-specific codes, provides freeze-frame data, and graphs live data for the CHT sensor voltage and temperature, which is enough to diagnose P1289.
Mid-range: Foxwell NT510 Elite / Innova 5610 (~$150) — These handheld scanners offer deeper Ford-specific diagnostics, including access to more modules and potentially some bidirectional tests. The Innova 5610 provides detailed repair solutions and tests specific components.
Professional: Autel MaxiCOM MK808 / MK906BT (~$500-1200) — Provides professional, dealership-level diagnostics. These tablet-based tools offer full bidirectional control to test circuits, comprehensive live data graphing, and access to all vehicle modules, making them ideal for diagnosing complex wiring issues or rare PCM faults.
Rent vs buy: Most auto parts stores like AutoZone offer a loaner tool program. You pay a deposit for the tool (effectively buying it), and you get a full refund when you return it within the rental period (e.g., 90 days). This is a good option for a one-time diagnosis, but be aware that some locations have restrictions on lending scanners.
How to Clear the Code After You Fix It
- Use an OBD-II scan tool to clear the diagnostic trouble codes (DTCs).
- Disconnecting the battery for 15 minutes also clears the code, but a scan tool is preferred.
- Perform a complete drive cycle to allow the vehicle's readiness monitors to run.
Drive cycle (~20 minutes): A general Ford drive cycle involves: cold start, warm up to operating temperature (>170°F), drive for at least 10 minutes with mixed city/highway speeds (including steady cruising between 40-65 mph), and include several idle periods.
Readiness monitors affected: Catalyst Monitor, Oxygen Sensor (HEGO) Monitor, Evaporative System (EVAP) Monitor
Before emissions retest: drive at least 50 miles to fully set monitors.
Watch out for:
- Clearing the code without fixing the underlying sensor or wiring issue causes the code to return almost immediately.
- Not completing a full drive cycle leaves readiness monitors incomplete, causing an automatic failure at an emissions testing station.
- For some monitors like the catalyst, it takes up to 5 complete driving cycles to determine its status.
Will This Fail Emissions / State Inspection?
Yes — this code typically fails an OBD-II emissions inspection.
- California: An active P1289 check engine light is an automatic failure. After repair, a full drive cycle must be completed to set all readiness monitors before a retest is possible.
- New York: The NYS DMV inspection includes an OBD-II scan. An illuminated check engine light for an emissions-related code like P1289 results in an automatic inspection failure.
- Texas: In counties requiring an emissions test, an illuminated check engine light is an automatic failure. You cannot renew your registration until the issue is repaired and the inspection is passed.
Most Commonly Affected Vehicles
- Ford F-150 (2004-2019) — Extremely common across multiple engines. On the 5.4L 3V (2004-2010), the sensor is under the intake, often accessed by removing the alternator. For 2019 5.0L models built before Jan 8, 2019, TSB 19-2049 specifies replacing sensor JL3Z-6G004-A.
- Ford Mustang (2005-2019) — The 5.0L V8 in the 2019 Mustang is covered by TSB 19-2049 for premature CHT sensor failure. On V8 models, the intake manifold must be removed for access, making it a labor-intensive job.
- Ford Edge (2007-2017) — Frequently caused by a faulty CHT sensor located deep in the engine valley between the cylinder heads on the 3.5L V6. Replacement requires removing the upper and lower intake manifolds.
- Lincoln MKX (2007-2017) — Shares the same platform and 3.5L V6 engine with the Ford Edge, and therefore suffers from the same difficult-to-access CHT sensor failures.
- Ford Explorer (2011-2019) — Models with the 3.5L V6 are known for this code, often from a faulty sensor giving false overheating messages when the engine is cold. The repair also requires intake manifold removal.
- Ford Expedition (2005-2014) — Owners of Expeditions with the 5.4L 3V engine report this code. Like the F-150 of the same era, the sensor is located under the intake manifold.
- Ford Focus (2008-2018) — A common failure item on the Focus. Depending on the year and engine, the sensor is located in a tight spot, but intake removal is not typically required.
- Ford Fusion (2010-2019) — Reported on various engines. On the 3.5L V6, it shares the same difficult repair as the Ford Edge.
Manufacturer-Specific Notes
- Ford/Lincoln/Mercury: This is the primary meaning for P1289, indicating a Cylinder Head Temperature (CHT) sensor circuit high input. Ford issued Technical Service Bulletin (TSB) 19-2049 for 2019 5.0L F-150 and Mustang models, and TSB 21-2168 for 2018-2020 2.7L F-150s, which relates to the CHT sensor system. These are not recalls and repairs outside of warranty are not covered.
- Chrysler/Dodge/Jeep: On these vehicles, P1289 typically means 'Manifold Tune Valve Solenoid Circuit', a completely different system related to intake airflow, not engine temperature.
- Nissan: For many Nissan models, P1289 points to an 'Air Fuel Ratio Sensor 1 Heater Circuit (Bank 2)' fault, related to the oxygen sensor system.
- Volkswagen/Audi: On some VW and Audi models, P1289 means 'Turbocharger Bypass Valve - Short to Ground', a fault within the turbocharger control system.
- Chevrolet/GM: For many GM vehicles, P1289 is not a standard code. Some sources link it to accelerator pedal position sensor issues, but it is not a common or consistent definition.
Real Owner Stories
2007 Ford F-150 5.4L - Misdiagnosis leads to wiring fix
P1289 code appeared. Owner replaced the CHT sensor by removing the alternator for access. The code returned within a few miles.
What they tried:
- Replaced CHT sensor (NAPA part) - code returned.
- Visually inspected harness, then used an endoscope to trace it.
- Found the harness connector wrapped around a ground wire behind the engine.
- Performed a continuity test and found a broken wire in the harness.
Outcome: Repaired the broken wire and reassembled the harness. The P1289 code was cleared and did not return.
Lesson: If a new sensor doesn't fix the code, the fault is almost certainly in the wiring. A simple continuity test or wiggle test saves you from buying parts you don't need. The problem is often a broken wire, not the sensor itself.
2015 Ford F-150 with 55k miles - Rodent Damage
Vehicle was hard to start and the check engine light came on with code P1289. An 'engine coolant over temperature' message appeared on the dash despite a cold engine.
What they tried:
- Mechanic scanned the vehicle and confirmed P1289.
- Performed a visual inspection under the intake manifold.
Outcome: The mechanic discovered that a rat or other animal had chewed through the CHT sensor wires. The fix was to repair the damaged wires, not replace the sensor. This required removing the intake manifold for access.
Lesson: If a vehicle has been sitting for any period, especially outdoors, rodent damage is a primary suspect for electrical codes like P1289. A thorough visual inspection for chewed wires prevents an unnecessary sensor replacement.
2014 Ford Edge 3.5L - Dealer Misdiagnosis
While driving, an 'engine coolant over temp' warning appeared, cooling fans turned on high, and the temp gauge dropped to cold. The only code was P1289.
What they tried:
- Owner suspected a bad CHT sensor but didn't want to perform the difficult replacement (requires intake removal).
- Took the vehicle to a dealership, which quoted ~$600 for the CHT sensor replacement.
- Dealership called back and instead diagnosed a bad camshaft sensor, quoting $1200 for the repair.
Outcome: The owner, confused by the diagnosis which didn't match the P1289 code, declined the repair. The case highlights the importance of ensuring the diagnosis aligns with the trouble code.
Lesson: Trust the code. P1289 is specific to the CHT sensor circuit. A diagnosis of a completely unrelated part like a camshaft sensor must be questioned, especially if the cost is significantly higher. Always ask the mechanic to explain how their diagnosis relates to the specific code stored.
2009 Ford F-150 5.4L - The 'Nuclear Option' Fix
A persistent P1289 code would not clear despite multiple repairs. The truck was stuck in limp mode with no A/C and a dead temp gauge.
What they tried:
- Replaced the CHT sensor and pigtail.
- Repaired visible harness damage from rodents.
- Performed a wiggle test, which showed no change.
- Replaced the sensor a second time.
- Replaced the PCM/ECM computer.
Outcome: After all other attempts failed, the owner ran two brand new wires directly from the PCM connector pins (pins 41 and 58) to the CHT sensor connector, completely bypassing the factory harness. This permanently fixed the problem.
Lesson: In rare cases of a stubborn, intermittent open circuit that cannot be located, bypassing the factory harness by running new dedicated wires is a definitive and permanent repair, though it is an advanced procedure.
How to Prevent This Code From Triggering
- Use rodent deterrents if parking outdoors for extended periods. (When storing the vehicle.) — Rodents chew on wire insulation. Using peppermint oil-soaked cotton balls, commercially available rodent-repellent tape (often treated with capsaicin), or ultrasonic emitters in the engine bay deters them from nesting and causing damage.
- Perform periodic visual inspections of the engine bay wiring. (Every oil change.) — Catching problems early is key. Look for brittle, cracked, or rubbing wiring harnesses, especially around the hot parts of the engine like the intake and cylinder heads. Early detection prevents a wire from breaking completely.
- Apply dielectric grease to the connector during sensor replacement. (Any time the CHT connector is serviced.) — Dielectric grease is a non-conductive, waterproof sealant that protects electrical pins from moisture and corrosion. This prevents the high-resistance faults that lead to a P1289 code over time.
- Ensure wiring is properly secured after any engine repair. (After any DIY or professional repair.) — A loose wiring harness rubs against hot or moving engine components, wearing through the insulation and causing a short or open circuit. Use zip ties to secure harnesses away from danger zones, ensuring they follow their original routing.
Frequently Asked Questions
What is the difference between a CHT sensor and an ECT sensor?
A CHT sensor screws directly into the metal cylinder head to measure its temperature, while an ECT sensor measures the liquid engine coolant. Many modern Ford engines use only a CHT sensor to infer coolant temperature.
Why did P1289 come back immediately after I replaced the CHT sensor?
This almost always indicates the fault is in the wiring, not the sensor. An instant return of the code means there is a persistent open circuit (broken wire) or short to power in the harness. You must test the wiring for a 5-volt reference and ground before replacing the sensor again.
Why does my temperature gauge work for a minute and then drop to cold?
This is a classic symptom of a failing CHT sensor or intermittent wiring fault. When you first start the car, the PCM gets a plausible reading, but as the component heats up or vibrates, the connection is lost. The PCM then sees the open circuit, triggers P1289, and drops the gauge to cold as a default.
My car sat for a few months and now has a P1289 code. Is that related?
Yes, vehicles that sit are prime targets for rodents seeking shelter. Rodents frequently chew through engine wiring, and the CHT sensor harness is a common victim. This creates an open circuit and instantly triggers the P1289 code upon starting the vehicle.
Can I replace the CHT sensor myself?
It depends entirely on your vehicle and skill level. On a 2.7L F-150, it is a relatively easy job. On a Ford Edge or Mustang V8, the intake manifold must be removed, which is a complex, multi-hour job best left to an experienced mechanic.
Is a P1289 fix covered by a recall?
No, there are no safety recalls for this issue. Ford issued Technical Service Bulletin (TSB) 19-2049 as a repair guide for dealers on specific 2019 models. Since a TSB is not a recall, you are responsible for the repair cost if your vehicle is outside its warranty period.
Can a bad thermostat cause a P1289 code?
It is extremely unlikely. P1289 is almost always an electrical circuit fault (high voltage/open circuit). A bad thermostat causes a real overheating problem, triggering a P1299 code, but it does not cause the specific electrical signature of P1289.
Key Takeaways
- P1289 on Ford, Lincoln, or Mercury vehicles indicates an open circuit in the Cylinder Head Temperature (CHT) sensor, confirmed by a live data voltage reading stuck above 4.6V.
- Do not replace the CHT sensor without first testing the wiring harness for a 5-volt reference signal and a solid ground, as broken wires are a frequent cause of this code.
- Expect the vehicle to enter a 'limp mode' that reduces engine power, disables the A/C, and runs the cooling fans at maximum speed to prevent overheating damage.
- If your vehicle sat unused for several weeks before the code appeared, visually inspect the CHT wiring harness under the intake manifold for rodent damage before buying any parts.
Helpful Videos

The information in this article is provided for general reference and educational purposes only. Vehicle specifications, procedures, and part compatibility can vary by production date, trim level, and region. Always consult your vehicle's factory service manual and verify part numbers before purchasing or performing repairs. Safety-critical components such as airbags, seat belts, and braking systems should be installed by a qualified professional.
- 🎬 Helpful Videos
- What Does P1289 Mean?
- Can I Drive With P1289?
- Common Causes
- Symptoms
- Diagnostic Flowchart
- Common Fixes & Costs
- Used vs. New Parts: Buying Guide
- What Happens If You Wait — Timeline
- Cost of Not Fixing It
- Diagnosis Steps
- When This Code Triggers (Freeze-Frame Conditions)
- Related Codes
- Climate & Environmental Factors
- Where to Take It: Dealer vs Independent vs Chain
- When to Walk Away From the Repair
- What Scan Tool You Need for This Code
- How to Clear the Code After You Fix It
- Will This Fail Emissions / State Inspection?
- Most Commonly Affected Vehicles
- Manufacturer-Specific Notes
- Real Owner Stories
- 2007 Ford F-150 5.4L - Misdiagnosis leads to wiring fix
- 2015 Ford F-150 with 55k miles - Rodent Damage
- 2014 Ford Edge 3.5L - Dealer Misdiagnosis
- 2009 Ford F-150 5.4L - The 'Nuclear Option' Fix
- How to Prevent This Code From Triggering
- Frequently Asked Questions
- What is the difference between a CHT sensor and an ECT sensor?
- Why did P1289 come back immediately after I replaced the CHT sensor?
- Why does my temperature gauge work for a minute and then drop to cold?
- My car sat for a few months and now has a P1289 code. Is that related?
- Can I replace the CHT sensor myself?
- Is a P1289 fix covered by a recall?
- Can a bad thermostat cause a P1289 code?
- Key Takeaways
- 🎟️ Get 5% Off