

P1115 on 2004-2009 Toyota Prius: Coolant Heat Storage Sensor Circuit Causes and Fixes
This code points to a problem with the temperature sensor for the unique Coolant Heat Storage 'thermos' tank. The most common fix is replacing the sensor (Part No. 89429-47010), which costs about $60-$90 for the OEM part and is a 2/5 DIY difficulty. The sensor is located behind the driver's side front wheel well liner.
- P1115 on a Gen 2 Prius is for the Coolant Heat Storage 'thermos' sensor, not the main engine temp sensor.
- The most likely cause is a failed sensor (Toyota Part #89429-47010).
- Diagnosis is straightforward with a multimeter by checking the sensor's resistance (2-3 kΩ at 68°F).
- The sensor is located behind the driver's side front wheel well liner and requires a 19mm wrench to replace.
- After any repair involving draining coolant, ensure the complex system is properly bled to prevent the code from returning due to trapped air.
What's Unique About the 2004-2009 Toyota Prius

The second-generation Prius (2004-2009) sold in North America is one of the few vehicles with this specific Coolant Heat Storage (CHS) system, often called the 'thermos' by owners. Unlike a standard engine coolant temp sensor that just measures current engine temperature, this sensor's sole job is to measure the temperature of coolant stored in an insulated tank located behind the driver's side front bumper and fender liner. This code is unique to this emissions-reducing system and should not be confused with the main engine coolant temperature sensor codes (like P0115). If the main ECT sensor fails, the ECM will default to a fail-safe temperature of 80°C (176°F), but a P1115 fault points specifically to the CHS sensor circuit.
Symptoms You May Notice
- Check Engine Light is on
- Failure to pass an emissions inspection
- Slightly reduced fuel economy on very short trips due to longer engine warm-up times
- Replacing the main Engine Coolant Temperature (ECT) sensor. This code is for the separate sensor on the coolant storage tank, not the one on the engine itself.
Most Likely Causes

- Failed Coolant Heat Storage (CHS) Tank Temperature Sensor 🔴 High Probability The sensor is a thermistor that can fail over time due to age and countless heating/cooling cycles. It is a common failure point for this system.
How to confirm: Remove the sensor and test its resistance with a multimeter. At 20°C (68°F), it should read 2-3 kΩ. At 80°C (176°F), it should be 0.2-0.4 kΩ. If the reading is infinite (open), near-zero (shorted), or significantly outside this range, it has failed. This test can also be performed with the sensor installed by using an infrared thermometer to measure the tank temperature near the sensor and comparing the resistance reading to the chart.
Typical fix: Replace the sensor. This involves jacking up the driver's side, removing the wheel and fender liner, partially draining the coolant from the CHS tank's petcock, unscrewing the old sensor (19mm wrench), and installing the new one. Be prepared to catch a small amount of coolant.
Est. part cost: $20-$90 - Damaged Wiring or Connector 🟡 Medium Probability The sensor is located in the front driver's side wheel well area, making its wiring susceptible to damage from road debris, corrosion, or previous collision repairs. Rodent damage to the wiring harness in this area is also a known possibility.
How to confirm: Visually inspect the wiring harness and connector for any breaks, corrosion, or loose pins. Perform a continuity test from the sensor connector back to the ECM. According to the wiring diagram, Terminal 2 of the sensor connector (C19) goes to pin 33 (THW2) of the ECM E7 connector. Terminal 1 goes to pin 28 (E2) of the ECM E4 connector. Resistance should be below 1 Ω for continuity and above 10 kΩ when checking for a short to ground.
Typical fix: Repair the damaged section of the wire harness or replace the connector pigtail.
Est. part cost: $10-$45 - Air in the Cooling System ⚪ Low Probability The Prius cooling system, with its multiple loops for the engine, inverter, and CHS tank, is notoriously difficult to bleed completely. Air trapped near the sensor can cause erratic readings, triggering the code.
How to confirm: This is often suspected if the code appears after recent coolant service. Symptoms can include gurgling sounds. The fix is to properly bleed the system. This involves running the CHS pump (by jumping its relay) and putting the car in maintenance mode to run the engine continuously to circulate coolant and purge air.
Typical fix: Perform a thorough, multi-step coolant bleeding procedure specific to the Gen 2 Prius, focusing on bleeding the CHS tank loop and the heater core loop.
Est. part cost: $0
Rare But Worth Checking
- Faulty Engine Control Module (ECM): This is extremely rare. Before condemning the ECM, all other possibilities (sensor, wiring, coolant level) must be exhaustively ruled out.
Diagnosis Steps

- Verify the code with an OBD-II scanner.
- Check for related codes like P1117, P1118, P1121, or P1150 to get more context on the failure (e.g., short, open, or flow issue).
- If recent coolant work was done, suspect air in the system and perform a full bleed procedure first.
- Jack up the front driver's side of the vehicle, secure with a jack stand, remove the wheel, and pull back the plastic fender liner to access the Coolant Heat Storage tank.
- Locate the temperature sensor on the tank. It has a two-wire connector. Visually inspect the sensor's connector and wiring for any obvious damage, corrosion, or loose connections.
- Disconnect the sensor. Using a multimeter set to Ohms (Ω), measure the resistance across the two pins on the sensor itself. Compare the reading to the specification (approx. 2-3 kΩ at 20°C/68°F or 0.2-0.4 kΩ at 80°C/176°F).
- If the resistance is infinite (open) or near zero (short), the sensor is bad and needs to be replaced.
- If the sensor tests good, check the wiring harness. Check for continuity between sensor connector pin 2 and ECM connector E7, pin 33 (THW2). Then check continuity between sensor connector pin 1 and ECM connector E4, pin 28 (E2). Resistance should be below 1 Ω.
- Check for a short circuit by measuring resistance from each of the pins at the sensor connector to chassis ground. The reading should be 10 kΩ or higher.
- If wiring and sensor are confirmed good, and the system is fully bled, the fault may lie with the ECM, but this is highly unlikely.
Parts You'll Likely Need
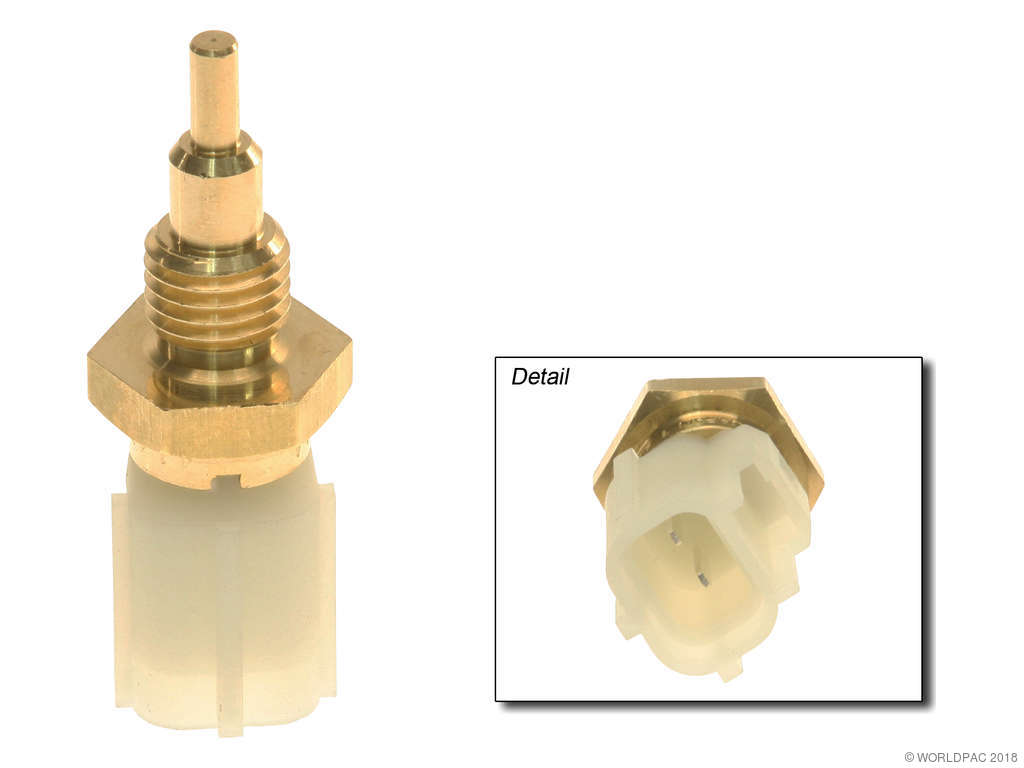
- Coolant Heat Storage Tank Outlet Temperature Sensor
(OEM #89429-47010)— This sensor is the most common failure point for code P1115, as it directly measures the value the ECM is flagging as out of range.
Trusted brands: Toyota (Genuine OEM), Denso, Standard Motor Products, Dorman
OEM price range: $60-$90
Aftermarket price range: $20-$50 - Coolant Temperature Sensor Connector Pigtail
(OEM #90980-11062 (Connector Housing))— If the diagnostic steps point to a damaged connector (broken lock tab, corrosion), replacing the pigtail is the standard repair.
Trusted brands: Standard Motor Products (S-755), Dorman, OEM (individual terminals and housing)
OEM price range: N/A
Aftermarket price range: $10-$45
Related Codes That Often Appear With This One
- P1117 — This code indicates a 'Circuit Low' (short circuit) condition for the same CHS temperature sensor, pointing more directly to a shorted sensor or wiring.
- P1118 — This code indicates a 'Circuit High' (open circuit) condition for the same CHS temperature sensor, pointing more directly to a failed sensor, broken wire, or unplugged connector.
- P1121 — This code relates to the 3-way coolant flow control valve, which is part of the same CHS system and works in conjunction with the tank and sensor. A stuck valve can cause implausible temperature readings.
- P1150 — This code indicates a clog in the coolant path for the CHS system. It can be triggered alongside sensor codes if air pockets or blockages are causing the temperature readings to be implausible.
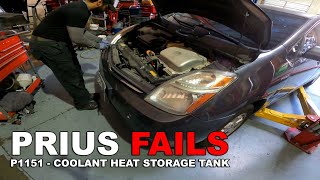
- P1151 — This code indicates the CHS tank is not maintaining temperature as expected, which can be caused by a faulty sensor giving bad data, a bad tank, or other system faults. 🎬 Watch this guide for a full coolant storage tank replacement.
Platform-Specific Known Issues
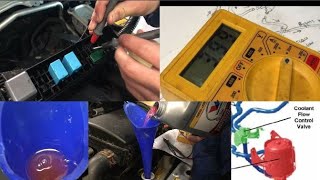
- source — A user on PriusChat documented their experience with codes P1116 and P1151 after a road trip. After replacing the 3-way valve, the codes appeared. They first replaced the CHS sensor, but the code returned. The issue was ultimately traced back to air trapped in the system from the initial repair. The fix required a meticulous bleeding process, including 'burping' the CHS tank relay and purging the heater core, 🎬 See how to burp air pockets using the pump relay. highlighting the system's sensitivity to trapped air.
- YouTube DIY Walkthrough: Multiple YouTube videos provide a visual guide for the repair. One from 'How to Fix Engine Coolant Sensor Toyota Prius Easy Way' shows th
Mechanic-Grade Diagnostic Values
- CHS Sensor Resistance (P1115 Trigger Threshold) — expected: 79 Ω to 156 kΩ. Failure: A resistance reading less than 79 Ω (interpreted as >140°C) or more than 156 kΩ (interpreted as <-40°C) will trigger code P1115.
- CHS Sensor Resistance (P1117 Trigger Threshold) — expected: Greater than 79 Ω. Failure: A resistance reading less than 79 Ω (a dead short) for 0.5 seconds will trigger P1117.
- CHS Sensor Resistance (P1118 Trigger Threshold) — expected: Less than 156 kΩ. Failure: A resistance reading greater than 156 kΩ (an open circuit) for 0.5 seconds will trigger P1118.
- Voltage at ECM Connector (THW2 to E2) — expected: 0.5V to 3.4V with the sensor at 20°C (68°F). The voltage should decrease as the sensor warms up.. Failure: Voltage significantly outside this range, or that doesn't change with temperature, indicates a sensor or wiring fault. A reading near 5V suggests an open circuit, while a reading near 0V suggests a short circuit.
- Techstream Live Data 'Coolant Temp' — expected: Should display a plausible temperature that tracks with the actual temperature of the CHS tank. After a cold soak, it should be near ambient temperature.. Failure: A reading stuck at -40°C (-40°F) indicates an open circuit (P1118). A reading stuck at 140°C (284°F) or higher indicates a short circuit (P1117).
Scan Tool Commands That Help
- Toyota Techstream: Data List > Engine and ECT > Coolant Temp — This is the primary function to view the live temperature reading the ECM is receiving from the CHS sensor. It's used to confirm if the sensor is reporting a logical temperature or is stuck at a high/low value.
- Toyota Techstream: Active Test — Within the Engine and ECT menu, the Active Test function allows the technician to command specific components to operate. This can be used to activate the CHS water pump to aid in bleeding air from the system or to verify the pump's operation, which is crucial if air pockets are suspected.
- Toyota Techstream: DTC INFO / Freeze Frame Data — Used to view the exact vehicle conditions (engine speed, temperature, etc.) at the moment the P1115 code was triggered. This can provide clues as to whether the fault is intermittent or occurs under specific circumstances.
Wiring & Ground Locations

- Engine Control Module (ECM) — Located in the cabin, behind the glove compartment. Access requires removing the glove box assembly.. This is where the sensor signals are processed. All wiring tests for continuity and shorts will terminate at the ECM's connectors.
- ECM Connectors E4 and E7 — These are two of the main connectors on the ECM, located behind the glove box.. The CHS sensor circuit uses pins on both connectors. Pin 28 (E2 - Sensor Ground) is on connector E4, and Pin 33 (THW2 - Signal) is on connector E7.
- Ground Point E2 (at ECM) — This is not a chassis ground, but the specific sensor ground return pin (Pin 28) on the E4 connector of the ECM.. An open circuit on this specific ground pin can cause P1115 and other unrelated sensor codes to appear simultaneously. The repair manual specifically notes to check for this if multiple codes sharing the E2 ground are present.
- Chassis Grounds (EA, EB, etc.) — Multiple chassis ground points are located throughout the engine bay, typically bolted to the frame, engine block, or transmission.. The ECM itself relies on a solid chassis ground. While a general grounding issue is unlikely to cause only a P1115, verifying the main engine-to-chassis grounds are clean and tight is good practice for any electrical diagnosis.
"I Checked Everything" — The Actual Cause
- This code is electrical and not related to vacuum or EVAP leaks, so a smoke test is not a relevant diagnostic step. However, a similar pattern exists: a technician may find the sensor tests good and the wiring has continuity, yet the code persists. In the vast majority of these cases, the root cause is microscopic air pockets trapped in the CHS cooling loop, especially after any coolant service. The system is extremely sensitive, and an air bubble passing the sensor can cause a momentary erratic reading that is sufficient to trigger the code. A 'wiggle test' on the wiring harness while monitoring live data can also reveal intermittent breaks that a simple continuity test might miss.
OEM Part Supersession History
89429-47010→89429-47010— No supersession found.
Heads up: This part number appears to be consistent for the entire 2004-2009 generation.
Model Year Variations Within This Range
- 2004-2009: While the CHS system and this specific sensor are the same across the generation, be aware that other systems (like EVAP/fuel tank) and ECM programming differ between the 2004-2005 and 2006-2009 models. Swapping an ECM from a different year range can introduce new, unrelated fault codes due to wiring and programming incompatibilities.
Diagnostic Flowchart
Other Known Issues on This Vehicle
Issues unrelated to this code that are worth knowing about as an owner of this generation:
- Combination Meter (Dashboard) Failure 🟠 Medium — Common on high-mileage vehicles. Can be intermittent, often failing in cold weather before failing completely. (Ref: TSB T-SB-0172-09 acknowledges the issue and provides a part number for an updated unit. Toyota also issued a Warranty Enhancement Program (ZE3) for this issue.)
- Inverter Coolant Pump Failure 🔴 High — A very common failure. Triggers a master warning light and can cause the hybrid system to shut down. Code P0A93 is typically stored. (Ref: A recall was issued for the inverter water pump on 2004-2009 models due to a manufacturing defect that could cause a short circuit.)
- Brake Actuator / ABS Pump Failure 🔴 High — A well-documented problem where the ABS pump/actuator fails, leading to a loss of braking assist, loud pump noises, and multiple warning lights. It is an expensive repair. (Ref: No direct recall for Gen 2, but Toyota has had customer support programs and faced lawsuits over the issue in later generations. The problem is widely discussed by owners.)
- Excessive Oil Consumption 🟠 Medium — Many 1NZ-FXE engines begin to consume oil at higher mileage (often after 100k-150k miles). This is often attributed to carbon buildup on the low-tension piston rings designed for efficiency. (Ref: No specific TSB or recall, but Toyota's official stance in owner's manuals considers consumption up to 1.1 qt per 600 miles to be within specification.)
- HID Headlight Ballast/Bulb Failure 🟡 Low — On models equipped with HID headlights, the bulbs or ballasts are known to fail. Symptoms start with flickering before complete failure. OEM replacements are costly.
- Main Hybrid Traction Battery (HV) Degradation 🔴 High — As with any hybrid of this age, the high-voltage battery will eventually degrade and require reconditioning or replacement. This is an expected wear item. The most common code is P0A80.
Used vs. New Parts: Buying Guide for This Vehicle
When a used part is the smart pick: For the P1115 code, a used part is generally not recommended for the sensor itself. However, if diagnosis leads to a physically damaged Coolant Heat Storage (CHS) tank, a used OEM tank from a salvage yard is a very common and cost-effective repair, as a new tank is extremely expensive.
Donor-vehicle mileage cap: roughly under 200000 miles for the part to have meaningful remaining life.
What to inspect on the donor part:
- For a used CHS Tank: Inspect thoroughly for dents, cracks, or any signs of collision damage. The tank is located in a vulnerable position behind the driver's side bumper.
- Ensure all hose connections are intact and not broken.
- If possible, get the tank from a vehicle that was not in a front-end collision.
OEM-only on this vehicle (don't cheap out):
- Coolant Heat Storage Tank Outlet Temperature Sensor (89429-47010)
Aftermarket brands forum-validated for this vehicle:
- Denso (OEM supplier for Toyota)
Brands owners have reported issues with on this vehicle:
- Unbranded, ultra-low-cost sensors from online marketplaces. While they may work initially, their accuracy and longevity are questionable for a critical emissions-related component.
Real Owner Stories
Aggregated from forums and TSBs cited above. Mileages and costs reflect what owners reported in those sources.
2004-2009 Toyota Prius 1NZ-FXE
Symptoms: Codes P1116 and P1151 appeared after a road trip and after replacing the 3-way valve. The owner first replaced the CHS sensor, but the code returned.
What fixed it: The issue was ultimately traced back to air trapped in the system from the initial repair. The fix required a meticulous bleeding process, including 'burping' the CHS tank relay and purging the heater core.
Source hint: A user on PriusChat documented their experience with codes P1116 and P1151
Related OBD-II Codes
Frequently Asked Questions
Where is the sensor for code P1115 located on my 2004-2009 Prius?
I just had my coolant changed and now I have a P1115 code. What happened?
How can I test the CHS tank temperature sensor myself?
Is the P1115 code for the main engine coolant temperature (ECT) sensor?
What size wrench do I need to replace the CHS sensor?
My Prius doesn't have the 'thermos' system. Can I still get a P1115 code?
Helpful Videos

We Have This Part in Stock


The information in this article is provided for general reference and educational purposes only. Vehicle specifications, procedures, and part compatibility can vary by production date, trim level, and region. Always consult your vehicle's factory service manual and verify part numbers before purchasing or performing repairs. Safety-critical components such as airbags, seat belts, and braking systems should be installed by a qualified professional.
- Toyota Prius:
- 🎬 Helpful Videos
- 🛍️ Shop This Part
- What's Unique About the 2004-2009 Toyota Prius
- Symptoms You May Notice
- Most Likely Causes
- Rare But Worth Checking
- Diagnosis Steps
- Parts You'll Likely Need
- Related Codes That Often Appear With This One
- Platform-Specific Known Issues
- Mechanic-Grade Diagnostic Values
- Scan Tool Commands That Help
- Wiring & Ground Locations
- "I Checked Everything" — The Actual Cause
- OEM Part Supersession History
- Model Year Variations Within This Range
- Diagnostic Flowchart
- Other Known Issues on This Vehicle
- Used vs. New Parts: Buying Guide for This Vehicle
- Real Owner Stories
- 2004-2009 Toyota Prius 1NZ-FXE
- Related OBD-II Codes
- Frequently Asked Questions
- 🎟️ Get 5% Off