

P0520 on 2010-2015 Chevrolet Camaro 6.2L V8: Engine Oil Pressure Sensor Circuit Guide
P0520 on a 2010-2015 Camaro almost always points to a failed oil pressure sensor. However, the sensor is located behind the intake manifold, making replacement a 4-6 hour job. Before replacing it, it's critical to verify the actual oil pressure with a mechanical gauge to rule out a more serious oil pump issue, which is a known problem on these engines.
- P0520 on the 2010-2015 Camaro indicates a fault in the oil pressure sensor circuit, most commonly the sensor itself.
- Before replacing any parts, you MUST verify the engine's actual oil pressure with a mechanical gauge to rule out a severe mechanical problem like a failing oil pump.
- The sensor is located under the intake manifold, making replacement a difficult and time-consuming job (DIY Difficulty: 5/5).
- When replacing the sensor (ACDelco P/N 12673134), also replace the intake manifold gaskets and the small filter screen underneath the sensor.
What's Unique About the 2010-2015 Chevrolet Camaro
On the Camaro's LS3 and L99 V8 engines, the P0520 code is common, but the fix is complicated by the sensor's location. It is notoriously difficult to access, tucked away at the back of the engine valley, underneath the intake manifold and cowl. This turns a simple sensor swap into a significant repair job requiring the removal of the entire intake assembly. Furthermore, these engines can suffer from a faulty oil pump pressure relief valve, which causes a true low oil pressure condition that can be mistaken for a simple sensor failure, as documented in TSB PIP4158H.
Symptoms You May Notice
- Check Engine Light is on
- Oil pressure warning light or 'Low Oil Pressure' message on the driver information center
- Oil pressure gauge reads 0, maximum, or fluctuates erratically.
- Engine may run rough or enter a reduced power 'limp mode'.
- In cases of actual low oil pressure, ticking or knocking sounds from the engine.
- Remote start may fail to operate or shut off unexpectedly.
- Replacing the oil pump without first confirming a true low oil pressure condition with a mechanical gauge.
- Replacing the instrument cluster because the gauge is reading incorrectly. The gauge simply displays the data sent by the PCM.
- Assuming the engine is bad when low pressure is indicated, without first testing the sensor circuit.
Most Likely Causes
- Failed Engine Oil Pressure Sensor 🔴 High Probability The sensor is subjected to intense heat cycles at the back of the engine, leading to a high failure rate. They can fail internally or leak oil through the sensor body into the electrical connector, disrupting the signal. This is the most common cause of P0520 on the LS3/L99 platform.
How to confirm: After confirming actual oil pressure is good with a mechanical gauge, inspect the sensor's electrical connector for oil. If oil is present, the sensor is bad. If not, but the pressure reading on the scan tool is still incorrect (e.g., stuck at 0 or max PSI), the sensor is the primary suspect.
Typical fix: Replace the engine oil pressure sensor and the small filter screen located beneath it. This requires removing the intake manifold.
Est. part cost: $40-$85 - Damaged Wiring or Connector 🟡 Medium Probability The wiring harness is routed in a hot, tight space between the engine and firewall, making it susceptible to heat damage, chafing, and corrosion over time. The connector itself can become brittle and break during removal.
How to confirm: Visually inspect the wiring harness leading to the oil pressure sensor for any signs of melting, cracks, or breaks. Wiggle the connector with the engine running to see if the gauge reading flickers. Use a multimeter to test for 5V reference, ground, and signal continuity back to the PCM.
Typical fix: Repair the damaged section of the wiring harness with solder and heat shrink, or replace the connector pigtail.
Est. part cost: $15-$30 - Low Engine Oil Level or Incorrect Oil Viscosity ⚪ Low Probability
How to confirm: Physically check the engine oil dipstick to verify the level is correct. Confirm that the oil being used matches the manufacturer's specification (5W-30 synthetic for the LS3/L99). Using oil that is too thick or thin can cause incorrect pressure readings.
Typical fix: Top off or change the engine oil and filter with the correct type and quantity.
Est. part cost: $50-$100
Rare But Worth Checking
- Failing Oil Pump / Stuck Pressure Relief Valve: This is a known issue referenced in GM Technical Service Bulletin PIP4158H. The pressure relief valve in the oil pump can stick, causing intermittent or persistent low oil pressure, especially when the engine is hot. If a mechanical gauge confirms low oil pressure (<20-25 PSI at warm idle), the oil pump is the likely cause. This is a major engine-out or front-cover-off repair.
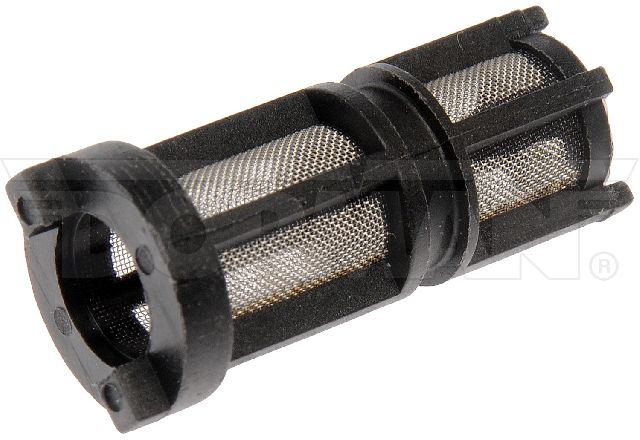
- Clogged Oil Pressure Sensor Filter Screen: There is a small, thimble-sized filter screen (Part #12585328) located in the block, directly under the oil pressure sensor. If it becomes clogged with sludge or debris (sometimes from a failing timing chain tensioner), it can restrict oil flow to the sensor and cause a false low reading or a P0520 code. It should always be replaced when the sensor is changed.
- Powertrain Control Module (PCM) Fault: This is extremely rare. The PCM should only be considered a potential cause after all other possibilities (sensor, wiring, and mechanical pressure) have been definitively ruled out.
Diagnosis Steps
- Check the engine oil level and condition. If low, top it off, clear the code, and see if it returns.
- Connect an OBD-II scanner to confirm P0520 is present and note any other codes.
- Observe the live oil pressure data on the scanner. Compare it to the gauge on the instrument cluster. Note if it's stuck at 0, maxed out (e.g., 130 PSI), or erratic.
- CRITICAL: Connect a mechanical oil pressure gauge to the engine. A common port is located on the driver's side of the block, above the oil filter housing.
- Start the engine and compare the mechanical gauge reading to the manufacturer's specification. A healthy LS engine should have >25 PSI at hot idle and pressure should rise with RPM.
- If mechanical pressure is good: The problem is in the sensor circuit. Proceed to inspect the sensor wiring and connector for damage or oil contamination. If the circuit is intact, the sensor itself has failed.
- If mechanical pressure is low: You have a serious mechanical issue. Do not run the engine. Investigate the oil pump, its pressure relief valve (per TSB PIP4158H), or potential internal engine wear.
- If replacing the sensor, remove the intake manifold to gain access. It is highly recommended to replace the small filter screen (#12585328) underneath the sensor at the same time.
Parts You'll Likely Need
- Engine Oil Pressure Sensor
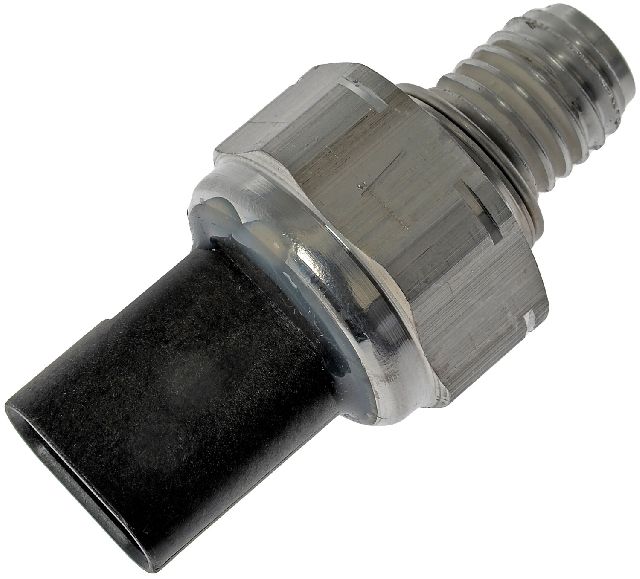
(OEM #12673134)— This is the most common failure point for the P0520 code on this platform due to heat and electronic failure. The OEM part number 12673134 supersedes older numbers like 12621234 and 12596951.
Trusted brands: ACDelco (GM Genuine), Carquest Premium, Dorman
OEM price range: $50-$85
Aftermarket price range: $30-$50 - Intake Manifold Gasket Set
(OEM #19207929 (for LS3))— Required for re-installing the intake manifold, which must be removed to access the oil pressure sensor. These are one-time use gaskets.
Trusted brands: ACDelco, Fel-Pro
OEM price range: $40-$60
Aftermarket price range: $20-$40 - Oil Pressure Sensor Filter Screen
(OEM #12585328)— This small filter can become clogged with sludge and should be replaced whenever the sensor is replaced as a preventative measure. Debris in the oil can clog it, leading to false readings.
Trusted brands: ACDelco (GM Genuine)
OEM price range: $5-$10
Aftermarket price range: $3-$8
Related Codes That Often Appear With This One
- P0521: Engine Oil Pressure Sensor/Switch Range/Performance
- P0523: Engine Oil Pressure Sensor/Switch Circuit High Voltage
Technical Service Bulletins (TSBs) & Recalls
- PIP4158H: Addresses a potential condition of low engine oil pressure at idle when the engine is hot, often caused by a faulty oil pump pressure relief valve sticking. This TSB applies to a wide range of GM V8 engines, including the LS3 and L99.
- 15-06-01-002L: While primarily for DTC P0300 (misfire), this TSB details issues with Active Fuel Management (AFM) lifters on L99 engines, which can collapse or stick. Severe lifter failure can lead to engine damage and potentially affect oil pressure.
Platform-Specific Known Issues
- The oil pressure sensor is located under the intake manifold, making replacement a labor-intensive job that is not easily accessible for DIY repair.
- A known issue with the oil pump pressure relief valve can cause a true low oil pressure condition, as documented in GM TSB PIP4158H. This can mimic a sensor failure.
- Owners on forums like Camaro5.com frequently discuss the sensor failing and causing erratic gauge behavior, confirming it as a very common problem. Some report the connector clip being oriented towards the intake manifold, making it extremely difficult to release without special tools or techniques.
Mechanic-Grade Diagnostic Values
- Engine Oil Pressure Sensor - 5V Reference Wire — expected: ~5.0V with Key On, Engine Off (KOEO). Failure: Voltage significantly below 5.0V (e.g., < 4.5V) indicates a problem with the PCM or a short on the 5V reference circuit. No voltage indicates a wiring or PCM issue.
- Engine Oil Pressure Sensor - Signal Wire Voltage — expected: Varies with pressure. A real-world example showed ~2.5V corresponded to ~40 PSI at idle.. Failure: Voltage stuck at 0V or 5V, or a reading that does not change with engine RPM, points to a failed sensor or wiring issue.
- Engine Oil Pressure Sensor - Low Reference Wire — expected: Near 0V (good ground connection).. Failure: Any significant voltage reading indicates a bad ground connection.
- Mechanical Oil Pressure Specification (LS3/L99) — expected: Minimum 25-30 PSI at hot idle; should increase by about 10 PSI for every 1000 RPM increase.. Failure: Pressure below 25 PSI at hot idle indicates a mechanical issue (oil pump, internal wear, stuck relief valve), not a sensor circuit problem.
Scan Tool Commands That Help
- GDS2 / Tech2 / High-End Scan Tool: Engine Oil Pressure (EOP) Live Data PID — This is the primary scan tool function. Use it to monitor the pressure value the PCM is seeing. A reading stuck at a default value (e.g., 0 PSI or 130 PSI) or one that doesn't correlate with engine RPM strongly suggests a sensor/circuit fault, especially if mechanical pressure is verified as good.
Wiring & Ground Locations
- B107 - Engine Oil Pressure Sensor Connector — Rear of the engine valley, below the intake manifold, near the firewall.. This is the connector for the sensor itself. It is a common point of failure due to heat and oil contamination. It is extremely difficult to access.
- Pin 1 (TN/WH wire) — On the B107 connector. Runs to Pin 50 of the X1 connector at the PCM.. This is the signal wire. Technicians can test voltage here to see what the sensor is sending to the PCM.
- Pin 2 (GY wire) — On the B107 connector. Receives 5V reference from the PCM (e.g., from Pin 41 on X1).. This is the 5-volt reference power supply for the sensor. Must be present for the sensor to operate.
- Pin 3 (OG/BK wire) — On the B107 connector. Provides the low reference (ground) from the PCM (e.g., from Pin 53 on X1).. This is the sensor's ground connection. A poor ground will cause incorrect readings.
- G105 / G106 — These are the primary engine block ground points, typically located on the sides of the engine block near the front.. While the sensor has a dedicated low reference from the PCM, a poor main engine ground can cause a host of electrical issues and erratic sensor behavior. Verifying these grounds are clean and tight is a good practice for any engine electrical diagnosis.
Real Owner Repair Stories
- Camaro5 Forum User 'torakki SS' (5th Gen Camaro SS (year not specified)) — Check Engine Light with code P0523 (Engine Oil Pressure Sensor/Switch Circuit High).
❌ Tried (didn't work) The user attempted to test the old sensor with a multimeter but the results were inconclusive, as the new sensor showed similar readings on the bench.
✅ What actually fixed it Replacing the oil pressure sensor resolved the code, even though bench testing was confusing. The user also noted the difficulty in removing the connector, confirming the white locking tab must be pulled up before the black release tab can be pressed. - YouTube channel 'G's Footage' (2015 Camaro Super Sport) — Check Engine Light with code P0523.
✅ What actually fixed it The sensor was successfully replaced *without* removing the intake manifold. The mechanic worked by feel from the top of the engine, using a special 1 and 1/16 inch oil pressure sensor socket. After replacement and clearing the code, the oil pressure read correctly on the dash and the light did not return. - YouTube channel 'Pro-Street-Tech' (2010-2015 Chevy Camaro SS) — Intermittent low oil pressure warning that would disappear after restarting the engine.
❌ Tried (didn't work) Initial diagnosis pointed to a faulty oil pressure sensor due to inaccurate readings.
✅ What actually fixed it After replacing the oil pressure sensor, the vehicle then showed persistent symptoms of a faulty oil pump relief valve. The ultimate diagnosis pointed to the known issue described in GM TSB PIP4158H, demonstrating that a bad sensor can sometimes mask the underlying mechanical fault.
OEM Part Supersession History
12596951, 12621234→12673134— Improved design and reliability.
Model Year Variations Within This Range
- 2010-2015: There are no significant variations in the engine, oiling system, or sensor circuit related to DTC P0520 across the 2010-2015 model years. The primary differences were cosmetic and infotainment-related (e.g., backup camera added in 2012, MyLink touchscreen in 2013, body facelift in 2014). The diagnosis and repair for P0520 remain consistent for all LS3 and L99 equipped 5th Gen Camaros.
Diagnostic Flowchart
Other Known Issues on This Vehicle
Issues unrelated to this code that are worth knowing about as an owner of this generation:
- AFM Lifter Failure (L99 Engine) 🔴 High — Common on L99 (automatic) engines, especially over 60,000 miles. Can occur earlier. Ticking noise on startup is a key symptom. (Ref: TSB 15-06-01-002L)
- Timing Chain Tensioner Failure (LS3/L99) 🔴 High — The stock spring-loaded tensioner is known to break apart, sending plastic and metal debris into the oil pan, which can clog the oil pickup tube and cause oil starvation. Many owners proactively replace it with the more robust 'damper' style from the older LS2 engine.
- Ignition Key Can Be Bumped Out of 'Run' 🔴 High — Affects 2010-2014 models. The driver's knee can bump the key fob, causing the engine to shut off while driving, resulting in a loss of power steering and brakes. (Ref: Recall #14294)
- Leaking Oil Cooler Lines/Gaskets 🟠 Medium — The gaskets for the factory liquid-to-liquid oil cooler can degrade and leak oil. This is a common leak point to check for on higher-mileage SS models.
- Premature Convertible Top Wear 🟡 Low — Convertible models can experience premature wear on the soft top, specifically rubbing or chafing in certain areas. Addressed by GM via service bulletins for early models. (Ref: Support Bulletin #12052)
Used vs. New Parts: Buying Guide for This Vehicle
When a used part is the smart pick: A used intake manifold is a reasonable choice if the original is cracked or damaged during the sensor replacement. The manifold itself is a durable plastic component with no moving parts.
Donor-vehicle mileage cap: roughly under 100000 miles for the part to have meaningful remaining life.
What to inspect on the donor part:
- For a used intake manifold, check for cracks, especially around the bolt holes.
- Ensure all threaded inserts for fuel rails and other components are intact.
- Verify the gasket surfaces are flat and free of deep gouges that could cause a vacuum leak.
OEM-only on this vehicle (don't cheap out):
- Engine Oil Pressure Sensor: Due to the high failure rate and critical function, using a new, high-quality OEM (ACDelco) sensor is strongly recommended. The labor involved in replacement is too high to risk using a used or questionable aftermarket part.
- Intake Manifold Gaskets: These are one-time-use seals and must always be replaced with new ones.
Aftermarket brands forum-validated for this vehicle:
- ACDelco (GM Genuine) for the sensor and gaskets is the most trusted choice.
- Fel-Pro for intake manifold gaskets is a well-regarded OEM-equivalent.
Brands owners have reported issues with on this vehicle:
- While brands like Dorman are available, some professional technicians and forum users report higher failure rates compared to the OEM ACDelco sensor. Given the labor-intensive nature of the job, avoiding budget-tier sensors is a wise investment.
Real Owner Stories
Aggregated from forums and TSBs cited above. Mileages and costs reflect what owners reported in those sources.
2010 Chevrolet Camaro LS3/L99
Symptoms: The remote start would shut off and the car threw a code for the oil pressure sensor. The owner also noted the difficulty of the repair due to the connector clip being oriented toward the intake manifold.
What fixed it: Replacement of the oil pressure sensor.
Source hint: Camaro5 Forum - Oil pressure sensor
2010-2015 Chevrolet Camaro L99 6.2L V8 — ~65000 miles
Symptoms: Ticking noise on startup and potential oil pressure issues related to lifter failure.
What fixed it: Addressing issues with Active Fuel Management (AFM) lifters that can collapse or stick.
Source hint: TSB 15-06-01-002L
Related OBD-II Codes
Frequently Asked Questions
Does GM TSB PIP4158H apply to my 2010-2015 Camaro if I have low oil pressure symptoms?
Why did my Camaro's remote start stop working when the Check Engine Light came on for P0520?
Is there a specific filter I should replace when fixing the oil pressure sensor on my LS3?
Can I access the oil pressure sensor on my 6.2L V8 without removing the intake manifold?
My L99 Camaro has a ticking noise and P0520; could this be related to the AFM system?
Could using the wrong oil cause a P0520 code on my Camaro?
Helpful Videos
Used OEM Parts in Stock


New Aftermarket Parts Available


The information in this article is provided for general reference and educational purposes only. Vehicle specifications, procedures, and part compatibility can vary by production date, trim level, and region. Always consult your vehicle's factory service manual and verify part numbers before purchasing or performing repairs. Safety-critical components such as airbags, seat belts, and braking systems should be installed by a qualified professional.
- Chevrolet Camaro:
- 🎬 Helpful Videos
- 🛍️ Shop This Part
- What's Unique About the 2010-2015 Chevrolet Camaro
- Symptoms You May Notice
- Most Likely Causes
- Rare But Worth Checking
- Diagnosis Steps
- Parts You'll Likely Need
- Related Codes That Often Appear With This One
- Technical Service Bulletins (TSBs) & Recalls
- Platform-Specific Known Issues
- Mechanic-Grade Diagnostic Values
- Scan Tool Commands That Help
- Wiring & Ground Locations
- Real Owner Repair Stories
- OEM Part Supersession History
- Model Year Variations Within This Range
- Diagnostic Flowchart
- Other Known Issues on This Vehicle
- Used vs. New Parts: Buying Guide for This Vehicle
- Real Owner Stories
- 2010 Chevrolet Camaro LS3/L99
- 2010-2015 Chevrolet Camaro L99 6.2L V8 — ~65000 miles
- Related OBD-II Codes
- Frequently Asked Questions
- 🎟️ Get 5% Off