

P0463 on 2008-2013 Infiniti G37: Fuel Level Sensor 'A' Circuit High Causes and Fixes
This code almost always points to a faulty fuel level sending unit, a very common issue on the G37. The car has two sensors; 'A' is the driver's side unit (Part No. 25060-1NC0C). The sensor fails, sending a voltage signal higher than the ~5V operational range, causing the gauge to read incorrectly (often stuck full). Expect to pay around $170 for an OEM sensor and replace it yourself in about an hour.
- P0463 on a G37 is overwhelmingly caused by a failed fuel level sending unit, usually the one on the driver's side.
- This is a safe-to-drive issue, but your fuel gauge will be unreliable, creating a risk of running out of gas.
- The repair is straightforward for a DIYer, requiring removal of the rear seat cushion and an access panel. The part costs around $170.
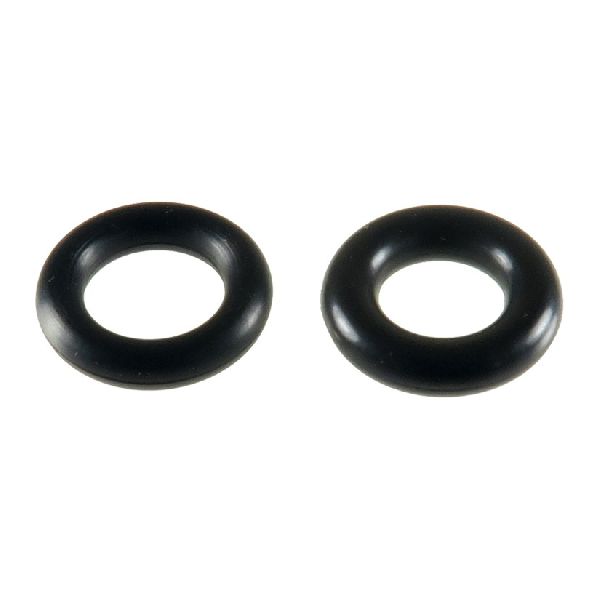
- Always replace the large O-ring gasket when replacing the sensor to prevent dangerous fuel leaks or vapor smells.
What's Unique About the 2008-2013 Infiniti G37

The Infiniti G37, like the related Nissan 370Z, uses a 'saddle' style fuel tank that straddles the driveshaft, requiring two separate fuel level sending units. One unit is integrated with the fuel pump on the passenger side (this is the 'main' or 'primary' unit), and a secondary, standalone sensor ('A' circuit) is on the driver's side. It is extremely common for one or both of these sensors to fail or become dirty from sulfur in fuel, leading to inaccurate fuel gauge readings and triggering codes like P0463. Owners frequently report the gauge getting stuck, especially below a half tank, or reading full or empty when fuel is present.
Symptoms You May Notice
- Inaccurate fuel gauge (stuck on full, empty, or another level)
- Check Engine Light is on
- Fuel range / 'miles to empty' display is incorrect
- Unexpectedly running out of fuel
- Low fuel warning light may be on, even with a full tank
- Replacing the fuel pump when only the sending unit is bad. While the passenger side sender is part of the pump assembly, the P0463 code usually points to the standalone driver's side unit.
- Assuming the issue is with the instrument cluster before properly testing both sending units and the AC Amplifier.
Most Likely Causes

- Faulty Fuel Level Sending Unit (Driver's Side) 🔴 High Probability The contacts on the variable resistor of the sending unit wear out or get contaminated over time, which is a well-documented failure on this platform. This creates an open circuit, causing the voltage signal to spike and trigger the P0463 code.
How to confirm: Access the driver's side sending unit under the rear seat. Disconnect it and measure the resistance with a multimeter while moving the float arm. The resistance should change smoothly from approximately 4-6 ohms at full to 80-83 ohms at empty. If it jumps, drops out, or reads open (infinite resistance), the unit is bad. An open circuit is the direct cause of a 'High Input' code.
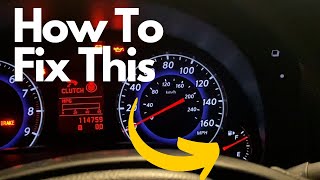
Typical fix: Replace the driver's side fuel level sending unit (OEM Part #25060-1NC0C). Some owners attempt to clean the contacts with a Q-tip and contact cleaner as a temporary fix, but replacement is the permanent solution. 🎬 See how to clean the sensor contacts for a quick fix.
Est. part cost: $150-$200 - Faulty Fuel Level Sending Unit (Passenger's Side) 🟡 Medium Probability While P0463 points to the 'A' circuit (driver's side), a fault in the passenger side unit can sometimes cause erratic system behavior and related codes. This unit is integrated with the main fuel pump assembly (Part #17040-1NC0C).
How to confirm: Diagnosis is the same as the driver's side unit: access the unit under the rear passenger seat and test the sensor's resistance through its range of motion. The resistance values should be similar to the driver's side unit.
Typical fix: The sending unit on this side is often part of the fuel pump module. While some have successfully replaced just the sensor portion, it's common to replace the entire fuel pump assembly.
Est. part cost: $300-$500 for a full assembly - Wiring or Connector Issue ⚪ Low Probability
How to confirm: Visually inspect the wiring and connectors going to both sending units, which are located under the rear seat cushions. Look for any signs of corrosion, damage, or loose pins at the connector on the inspection cover. Use a multimeter to check for continuity and proper voltage at the sensor connector.
Typical fix: Repair the damaged section of the wiring harness or clean/replace the faulty connector.
Est. part cost: $5-$50
Rare But Worth Checking
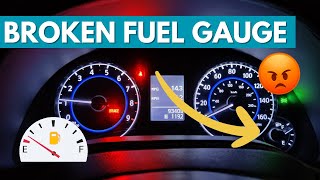
- Faulty AC Amplifier / Unified Meter: In some cases, after both sending units have been replaced and the wiring is confirmed good, the fault may lie within the AC Amplifier module (the white box behind the radio/HVAC controls). 🎬 Watch: Troubleshooting the AC Amplifier and hidden fuel gauge issues. This module processes the signals from the senders before they go to the instrument cluster. This is an uncommon but documented failure point that can cause fuel gauge issues.
- Instrument Cluster Failure: It is very rare for the instrument cluster itself to be the cause. This should only be considered after all other possibilities, including the AC Amplifier, have been ruled out. A faulty cluster would likely present other issues with gauges or lights.
Diagnosis Steps

- Confirm the P0463 code is present using an OBD-II scanner. Note if other codes like P0462 or U1000 are present.
- Note the behavior of the fuel gauge. Is it stuck on Full, Empty, or somewhere in between?
- Disconnect the negative battery terminal.
- Remove the rear seat bottom cushion by pulling the two release tabs at the front edge of the seat.
- On the driver's side, remove the inspection cover (usually held by four Phillips head screws or plastic clips) to access the 'A' sensor.
- Disconnect the electrical connector and inspect for corrosion or damage.
- Use a multimeter set to Ohms (Ω) to test the resistance of the sensor. Connect the probes to the appropriate pins on the sensor unit. Manually move the float arm from bottom (empty) to top (full). The resistance should change smoothly from ~80-83 Ohms (empty) to ~4-6 Ohms (full). An open circuit (infinite resistance or 'OL') confirms a bad sensor, which is the direct cause of a 'High Input' code.
- If the sensor tests good, check the wiring harness for continuity and ensure there are no shorts to power.
- If the driver's side sensor and wiring are good, repeat the test procedure for the passenger side sending unit.
- If both sensors and wiring are confirmed to be good, the problem may be with the AC Amplifier module located behind the radio.
Parts You'll Likely Need

- Fuel Level Sending Unit (Driver's Side)
(OEM #25060-1NC0C)— This is the most common failure point for the P0463 code on a G37. It is the standalone sensor on the driver's side of the fuel tank. This part number supersedes 25060-1NC0A and 25060-EJ80A.
Trusted brands: Infiniti (OEM), Hitachi
OEM price range: $170-$200
Aftermarket price range: $80-$120 - Fuel Tank O-Ring / Gasket
(OEM #17342-CE800)— It is highly recommended to replace the rubber O-ring seal anytime a sending unit is removed to prevent fuel leaks and fumes.
Trusted brands: Infiniti (OEM)
OEM price range: $15-$25
Aftermarket price range: $10-$20
Related Codes That Often Appear With This One
- P0462 — This code means 'Fuel Level Sensor 'A' Circuit Low Input'. It's the opposite of P0463 and can appear intermittently as the sensor fails, or it could point to a failure in the second sending unit.
- U1000 / U1001 — These are CAN communication codes. If they appear with P0463, it could indicate a broader network issue, potentially involving the Unified Meter & A/C Amp. The factory service manual advises diagnosing the U-codes first.
Platform-Specific Known Issues
- The dual sending unit design in the saddle tank is a known weak point. Many owners experience fuel gauge issues during their ownership.
- Contamination on the sensor's resistor contacts from sulfur in fuel can cause temporary issues. Cleaning can sometimes restore function, but failure often reoccurs, making replacement the preferred fix.
- A manufacturer service bulletin for related Infiniti models, Bulletin #ITB22-015, confirms that the fuel level sensor can be replaced separately for codes including P0460, P0461, P0462, and P0463.
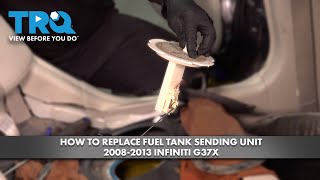
- A video from 1A Auto provides a clear visual guide for the replacement process. 🎬 Watch: Step-by-step guide to replacing the fuel sending unit.
Mechanic-Grade Diagnostic Values
- Driver's Side (Sub) Fuel Level Sensor Resistance — expected: Approximately 43 Ohms at Empty, 3 Ohms at Full.. Failure: Reading of 'OL' (Open Loop/infinite resistance) or values that jump erratically instead of changing smoothly.
- Passenger's Side (Main) Fuel Level Sensor Resistance — expected: Approximately 80 Ohms at Empty, 3 Ohms at Full.. Failure: Reading of 'OL' (Open Loop/infinite resistance) or erratic readings while moving the float arm.
- Unified Meter and A/C Amp Input/Output Voltage — expected: Voltage at the harness connector terminal to ground should correspond with the fuel gauge reading.. Failure: If the voltage does not match the gauge reading, the service manual suggests replacing the Unified Meter and A/C Amp.
Scan Tool Commands That Help
- Infiniti CONSULT-II / CONSULT-III: Data Monitor for METER/M&A — This function allows a technician to see the raw 'FUEL METER' data value that the Unified Meter & A/C Amp is sending to the combination meter. Comparing this value to the physical gauge's reading can determine if the fault is in the cluster or the A/C amp.
- Infiniti CONSULT-III: Work Support - Active Test — The CONSULT tool can perform active tests on various systems. While not explicitly for the fuel gauge, it can be used to check communication with related modules like the BCM and Unified Meter, which is crucial if CAN codes (U1000/U1001) are also present.
- Instrument Cluster Self-Diagnosis Mode: Gauge Sweep Test — This built-in test can quickly verify if the physical gauge needles in the instrument cluster are functional. To enter, with the car off, press and hold the trip reset button, then turn the ignition ON (engine off). After 1 second, release the trip button and press it 3 times within 7 seconds. Holding the trip button should sweep the fuel and temp gauges to half, and releasing it should return them to zero. If the gauge moves correctly, the cluster itself is likely not the problem.
Wiring & Ground Locations
- Unified Meter and A/C Amp Connector — The Unified Meter & A/C Amp is a white plastic box located behind the radio/HVAC control panel, often sitting on top of the CD/radio unit.. This module is the central processing unit for the fuel level signals. All wiring from both sending units routes here before a final signal is sent to the instrument cluster. Checking for continuity between the sensor connectors and this module's connector is a key diagnostic step.
- ECM Ground Connections — Key ground points for the engine management system are located throughout the engine bay, including a main point on the passenger side strut tower near the battery and another point near the intake filter.. A poor ground connection for the ECM or related modules can cause a variety of erratic electrical issues and fault codes. The service manual advises checking ground connections as part of the diagnostic procedure for power supply and circuit issues.
Real Owner Repair Stories
- MyG37.com user 'g37sedan' (2010 Infiniti G37x) — Fuel gauge was stuck at 3/4 of a tank, regardless of the actual fuel level.
❌ Tried (didn't work) Took car to two different Infiniti dealers. First dealer replaced the fuel sending unit and fuel pump with no change. Second dealer could not diagnose the problem., A local mechanic also tried replacing the sending unit and pump, tested wiring and continuity, all with no success.
✅ What actually fixed it The mechanic used advanced diagnostic software which pointed to the 'A/C amp'. They replaced the Unified Meter & A/C Amplifier (a used part from a 2010 G37x) located behind the radio, which immediately solved the problem. The gauge began reading correctly when tested with external sending units at empty and half levels. - YouTube channel 'Yayas Garage' (Infiniti G37S) — Fuel gauge reads correctly from full down to half, then gets stuck at half a tank, leading to running out of gas unexpectedly.
❌ Tried (didn't work) Replaced the driver's side (secondary) fuel level sensor., Replaced the passenger's side fuel level sensor (part of the fuel pump assembly).
✅ What actually fixed it After replacing both sending units did not fix the issue, the owner researched forums and concluded the next logical step was to replace the 'AC module unit' (Unified Meter & A/C Amp) located behind the radio and navigation system, which is responsible for processing the signals from the senders.
When the Usual Fixes Don't Work

- In multiple documented cases, owners have replaced both the driver's side and passenger's side fuel level sending units, which are the most common causes, only to find the problem persists. In these instances, the root cause was ultimately traced back to a faulty Unified Meter & A/C Amplifier module located behind the dashboard radio. This indicates that while the sending units are the highest probability cause, a complete diagnosis must include the processing module if replacing the senders does not resolve the P0463 code and associated symptoms.
OEM Part Supersession History
25060-EJ80A, 25060-1NC0A→25060-1NC0C— Standard part revision and improvement by the manufacturer.
Heads up: The newest part number, 25060-1NC0C, is the correct and backward-compatible replacement for the earlier versions on all 2008-2013 G37 models.
Model Year Variations Within This Range
- 2008-2011 vs 2012-2013: While the fuel sending unit failure is common across all years, earlier models (pre-2012) are known to have a higher risk of a separate, major issue with internal engine oil gallery gaskets. While unrelated to P0463, it's a significant consideration for owners of early-year G37s. No significant variations in the fuel sending system itself have been noted across the 2008-2013 range.
Diagnostic Flowchart
Other Known Issues on This Vehicle
Issues unrelated to this code that are worth knowing about as an owner of this generation:
- Rear Timing Cover Oil Gallery Gasket Failure 🔴 High — Common on pre-2012 models, typically seen from 80k-150k miles. The original paper gasket fails, causing a severe internal oil leak and loss of oil pressure.
- Concentric Slave Cylinder (CSC) Failure (Manual Transmission) 🔴 High — Extremely common failure on 6MT models, can occur as early as 40k miles but more typical around 80k+. The internal slave cylinder fails, causing the clutch pedal to stick to the floor and lose pressure.
- Cracked/Peeling Dashboard 🟡 Low — Very common on 2008-2009 models. The dashboard material bubbles, cracks, or peels, especially around the instrument cluster and vents.
- Heater Hose Connector Failure 🟠 Medium — The plastic heater hose connector near the firewall becomes brittle and can crack, causing a sudden and major coolant leak. Often occurs around or after 100,000 miles.
- Axle 'Clicking' Noise on Acceleration 🟡 Low — A clicking or popping noise from the rear axles when accelerating from a stop. It is not a mechanical failure but an issue of fretting/corrosion on the hub mating surface. (Ref: ITB13-008c - Recommends applying special grease to the wheel hub bearing surface.)
Used vs. New Parts: Buying Guide for This Vehicle
When a used part is the smart pick: A used Unified Meter & A/C Amp from a reputable salvage yard can be a cost-effective solution, as this is an electronic module not subject to mechanical wear. Several owners have successfully fixed their issue using a used unit.
Donor-vehicle mileage cap: roughly under 80000 miles for the part to have meaningful remaining life.
What to inspect on the donor part:
- For a fuel sending unit, visually inspect the resistor strip for dark spots, burns, or physical wear on the contacts. However, internal failure is not always visible.
- For a Unified Meter & A/C Amp, ensure the donor vehicle did not have flood damage or other major electrical issues.
- Verify the part number on the used component exactly matches the one you are replacing.
OEM-only on this vehicle (don't cheap out):
- Fuel Level Sending Unit: Due to the extremely high failure rate of this specific part, installing a used sender is a significant risk. The resistor contacts wear out over time, so a used part may have limited life remaining or could be faulty already. New OEM or OEM-equivalent is strongly recommended.
Aftermarket brands forum-validated for this vehicle:
- Hitachi: Hitachi is the original equipment manufacturer (OEM) for many Nissan/Infiniti electrical parts, including ignition coils and potentially the fuel senders. Buying a Hitachi-branded part (e.g., Hitachi FLJ0013) is often identical to the genuine Infiniti part but at a lower cost.
Brands owners have reported issues with on this vehicle:
- No-name, unbranded sensors from online marketplaces. While cheaper, their reliability and accuracy are questionable, and they may fail prematurely, forcing you to do the job again.
Real Owner Stories
Aggregated from forums and TSBs cited above. Mileages and costs reflect what owners reported in those sources.
2008-2013 Infiniti G37
Symptoms: The owner's gas gauge level was not working. After replacing both sending units, the problem persisted.
What fixed it: The final fix was replacing the A/C Amplifier module located behind the radio.
Source hint: MyG37.com: Thread 'gas gauge level not working'
2008-2013 Infiniti G37
Symptoms: An owner experienced a P0463 code and the car would not start for a few hours.
What fixed it: The owner pulled the fuel pump assembly to access and clean the sending unit contacts, which resolved the issue.
Source hint: G35Driver.com: Thread 'DIY: Fuel Sending Unit Fix'
2008-2013 Infiniti G37
Symptoms: The owner experienced a P0463 code along with a U1000 CAN communication code, which caused the car to be stuck in park and the gauge cluster to be unresponsive.
What fixed it: The source thread describes the symptoms in detail but does not specify the final repair that resolved the multiple issues.
Source hint: MyG37.com: Thread 'Car Stuck in Park and Unresponsive Gauge Cluster (Code: U1000 and P0463)'
Related OBD-II Codes
Frequently Asked Questions
My G37's fuel gauge is stuck on full. Is this related to the P0463 code?
The G37 has two fuel sending units. Which one causes the P0463 code?
Can I just clean the fuel sending unit on my G37 instead of replacing it?
Where are the fuel sending units located on the Infiniti G37?
I replaced both sending units and still have the P0463 code. What else could be the problem?
I have a P0463 code and my whole instrument cluster is dead. Are these issues connected?
What is the part number for the driver's side fuel sending unit for a G37?
Helpful Videos

We Have This Part in Stock


The information in this article is provided for general reference and educational purposes only. Vehicle specifications, procedures, and part compatibility can vary by production date, trim level, and region. Always consult your vehicle's factory service manual and verify part numbers before purchasing or performing repairs. Safety-critical components such as airbags, seat belts, and braking systems should be installed by a qualified professional.
- Infiniti G37:
- 🎬 Helpful Videos
- 🛍️ Shop This Part
- What's Unique About the 2008-2013 Infiniti G37
- Symptoms You May Notice
- Most Likely Causes
- Rare But Worth Checking
- Diagnosis Steps
- Parts You'll Likely Need
- Related Codes That Often Appear With This One
- Platform-Specific Known Issues
- Mechanic-Grade Diagnostic Values
- Scan Tool Commands That Help
- Wiring & Ground Locations
- Real Owner Repair Stories
- When the Usual Fixes Don't Work
- OEM Part Supersession History
- Model Year Variations Within This Range
- Diagnostic Flowchart
- Other Known Issues on This Vehicle
- Used vs. New Parts: Buying Guide for This Vehicle
- Real Owner Stories
- 2008-2013 Infiniti G37
- 2008-2013 Infiniti G37
- 2008-2013 Infiniti G37
- Related OBD-II Codes
- Frequently Asked Questions
- 🎟️ Get 5% Off