

P0461 on 2014-2024 Ram ProMaster 3500: Fuel Gauge Problems and Fixes
On a 2014-2024 Ram ProMaster, code P0461 is almost always caused by a failed fuel level sending unit. This part is integrated into the fuel pump module. The repair is easier than on most vehicles because the fuel pump is accessed through a panel inside the cab, next to the driver's seat, avoiding the need to drop the fuel tank.
- P0461 on a ProMaster means your fuel gauge is unreliable. Manually track your mileage to avoid running out of fuel.
- The most likely cause is a failed fuel level sending unit, which is part of the main fuel pump module.
- The biggest advantage for this repair is the in-cab access panel next to the driver's seat, which eliminates the need to drop the fuel tank.
- Before buying parts, inspect the electrical connector at the pump for corrosion, as this can cause the same symptoms and is a much cheaper fix.
- The repair is DIY-friendly for those comfortable with basic safety precautions for working with fuel systems.
What's Unique About the 2014-2024 Ram ProMaster 3500
The most significant feature of the Ram ProMaster regarding this code is the location of the fuel pump access panel. Unlike most trucks and vans that require dropping the heavy and hazardous fuel tank, the ProMaster's fuel pump module is accessed from inside the cab. A removable panel next to the driver's seat provides direct access to the top of the tank, making diagnosis and replacement of the fuel level sensor significantly faster and easier. This is a well-documented feature praised by owners and mechanics.
Generation note: The 2014-2024 Ram ProMaster 3500 belongs to a single generation, based on the Fiat Ducato. While it has received facelifts (notably in 2023), the fundamental design, including the in-cab fuel pump access location, remains consistent across this year range.
Symptoms You May Notice
- Erratic fuel gauge (jumps between full, empty, or other levels).
- Fuel gauge stuck on empty or full.
- Check Engine Light (MIL) is illuminated.
- Low fuel warning light may be on even with a full tank, or not come on when the tank is empty.
- Inaccurate 'Distance to Empty' reading on the trip computer.
- Replacing the instrument cluster. While a faulty gauge is theoretically possible, it is extremely rare for this code. The problem is almost always at the sensor or its wiring.
- Assuming the fuel tank must be dropped. Many technicians unfamiliar with the ProMaster may quote a high labor cost assuming the tank needs to be removed. The in-cab access panel makes this unnecessary.
Most Likely Causes
- Faulty Fuel Level Sending Unit 🔴 High Probability The sending unit is a mechanical component with a float and a variable resistor that moves constantly within the fuel tank. Over time, the resistor strip wears out from the wiper arm's constant movement, causing dead spots or erratic readings. This is the most common failure point for P0461.
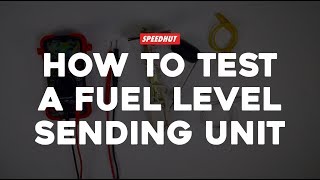
How to confirm: Access the fuel pump module connector. Disconnect it and measure the resistance across the two pins for the level sensor (often pins 2 and 3) with a multimeter. Manually move the float arm (if the unit is removed) or gently rock the vehicle to slosh fuel; the resistance reading should change smoothly. 🎬 Watch: A mechanic demonstrates how to test the sending unit. If it jumps, is open (OL), or doesn't change, the sender is bad.
Typical fix: Replace the entire fuel pump module, as the sending unit is integrated into it.
Est. part cost: $250-$700 - Wiring or Connector Issue 🟡 Medium Probability The main connector is located on the floor under a cover, where moisture or dirt can accumulate and cause corrosion. Additionally, a poor or corroded fuel tank grounding strap can cause erratic voltage readings and trigger P0461 even if the sensor itself is good.
How to confirm: Visually inspect the 4-pin connector on top of the fuel pump module for corrosion, moisture, or pushed-out pins. Trace the wiring for chafing. Locate and inspect the fuel tank grounding strap for corrosion or looseness and clean it.
Typical fix: Clean the connector terminals with electrical contact cleaner. Repair any damaged sections of the wiring harness. Clean or replace the grounding strap.
Est. part cost: $0-$50 - Stuck or Damaged Float Arm ⚪ Low Probability Debris in the fuel tank or physical damage to the tank could potentially cause the float arm to become stuck, preventing it from moving with the fuel level. The float itself can also develop a leak, fill with fuel, and sink to the bottom of the tank.
How to confirm: After removing the fuel pump module, visually inspect the float and arm. It should move freely throughout its entire range of motion without binding. The float should be buoyant and not saturated with fuel.
Typical fix: If the float is simply stuck, it may be possible to free it. If the arm or float is broken or saturated, the entire fuel pump module must be replaced.
Est. part cost: $0-$700
Rare But Worth Checking
- Powertrain Control Module (PCM) Fault: In very rare cases, the fault can be with the PCM itself, either a software glitch or a hardware failure in the circuit that reads the sensor's voltage. This should only be considered after the sensor and wiring have been proven to be good. Sometimes a PCM software update (reflash) from a dealer can resolve the issue if the logic for interpreting the sensor data is too sensitive.
Diagnosis Steps
- Safety First: Before starting, disconnect the vehicle's battery. Work in a well-ventilated area and have a fire extinguisher nearby. Gasoline and its vapors are highly flammable.
- Locate the Access Panel: Find the fuel pump access panel on the floor of the cab, located next to the driver's seat, under the floor mat/covering.
- Remove the Cover: Remove the screws holding the cover plate to expose the top of the fuel pump module and its electrical connector.
- Inspect the Connector: Disconnect the 4-pin electrical connector. Carefully inspect both the harness side and the pump side for any signs of green or white corrosion, moisture, or damaged pins. Clean as necessary.
- Scan Tool Data (Optional): If you have an advanced scan tool, observe the live data for 'Fuel Level Sensor Voltage' or 'Resistance'. An erratic or unchanging value points towards a problem in the circuit. 🎬 See how to test the sensor without removing the pump.
- Test the Sensor Circuit: Using a multimeter set to Ohms (Ω), probe the two terminals on the fuel pump module that correspond to the level sensor. The resistance should be within the manufacturer's specified range (e.g., typically between 40 Ohms for full and 250 Ohms for empty, but check service info for exact specs).
- Confirm Failure: Gently rock the van side-to-side to make the fuel slosh in the tank. The resistance reading on your multimeter should change smoothly. If the reading jumps erratically, reads as an open loop (OL), or doesn't change at all, the sending unit has failed.
- Verify Power and Ground: If the sensor seems okay, check for proper voltage and ground at the harness connector side to rule out a wiring issue. Also, locate and inspect the fuel tank ground strap for corrosion or damage, as this is a known issue.
Parts You'll Likely Need
- Fuel Pump and Level Unit Module
(OEM #68210305AF)— The fuel level sensor (sending unit) is integrated into the fuel pump module and is not typically sold separately. Replacing the entire assembly is the standard repair. The part number 🎬 Watch: This walkthrough shows how to replace the fuel sensor. 68210305AF replaces previous versions 68210305AA, AB, AC, AD, and AE.
Trusted brands: Mopar, Bosch, Delphi, TYC, Spectra Premium
OEM price range: $500-$700
Aftermarket price range: $250-$450
Related Codes That Often Appear With This One
- P0462 — This code indicates 'Fuel Level Sensor 'A' Circuit Low Input', meaning the signal is stuck at the low end of its range. It often points to the same root causes as P0461, such as a short in the wiring or a failed sensor.
- P0463 — This code indicates 'Fuel Level Sensor 'A' Circuit High Input', meaning the signal is stuck at the high end. It also points to a failure in the same sensor or circuit, often an open circuit.
Platform-Specific Known Issues
- This issue primarily affects the gasoline-powered ProMaster models with the 3.6L Pentastar V6 engine, as they use the fuel pump assembly (68210305AF) where this failure is common. The 3.0L EcoDiesel models, available in earlier years, use a different fuel system and may not be as prone to this specific part failure, though the P0461 code can still occur from wiring or other issues.
Mechanic-Grade Diagnostic Values
- Fuel Level Sensor Resistance — expected: Approximately 20-40 Ohms (Full) to 220-250 Ohms (Empty). The reading must change smoothly as the float moves.. Failure: An open circuit (OL), infinite resistance, or erratic jumps in the reading while moving the float indicates a worn or failed sensor.
- Fuel Level Sensor Voltage (Live Scan Tool Data) — expected: Approximately 0.5V (Empty) to 4.5V (Full).. Failure: A voltage that is stuck, erratic, or does not correspond to the estimated fuel level is a sign of a fault in the sensor or wiring.
- Signal Circuit Continuity — expected: Less than 5.0 Ohms.. Failure: Resistance higher than 5.0 Ohms between the PCM/BCM connector and the fuel pump harness connector points to excessive resistance in the wiring.
Scan Tool Commands That Help
- Aftermarket (e.g., AlfaOBD, Autel): ECU/Module Scan and Code Clearing — On 2018 and newer models, a '12+8 Security Gateway (SGW) Bypass Cable' is required to allow aftermarket scan tools to clear codes or perform active diagnostics. The SGW module is located behind the glove box.
- Dealer (wiTECH): PCM/BCM Software Update (Reflash) — If the sensor and wiring test good, the issue could be a software glitch. While no specific TSB for P0461 on the ProMaster was found, this is a very common fix for this code on other Ram vehicles and should be investigated if hardware checks out.
Wiring & Ground Locations
- Fuel Pump Module Connector — On top of the fuel pump module, accessible via the in-cab panel next to the driver's seat.. This 4-pin connector is the primary point for testing the sensor circuit. It can be susceptible to moisture and corrosion, causing the P0461 code. The sensor signal and return wires are located here.
- Fuel Tank Ground Strap — A braided metal strap connecting the fuel tank (or fuel pump module mounting plate) to the vehicle's chassis/frame.. A corroded or loose ground strap can cause a floating or unstable ground reference for the sending unit, leading to erratic voltage readings and triggering P0461 even if the sensor itself is good.
- Security Gateway Module (SGW) — For 2018+ models, this module is located behind the glove box panel.. This module prevents unauthorized access to the vehicle's network. A bypass cable must be connected to it to allow most aftermarket scan tools to perform functions beyond reading codes, such as clearing them.
Technical Service Bulletins (TSBs) & Recalls
- TSB Bulletin #1800824 — This manufacturer bulletin notes that P0461 (Fuel Level Sensor 1 Performance) may be present alongside other performance codes like P0191 (Fuel Rail Pressure Sensor) and P0401 (EGR System Performance).
- TSB Bulletin #1800724 — A manufacturer service bulletin describing instances where P0461 (Fuel Level Sensor 1 Performance) is triggered in conjunction with EGR and SCR catalyst efficiency codes.
Real Owner Repair Stories
- YouTube channel 'ipartout studio' (2020 Ram ProMaster 1500 3.6L) — Check Engine Light with code P0463 (Circuit High), but the fuel gauge was still working correctly.
❌ Tried (didn't work) Initial assumption was a wiring issue since the gauge worked.
✅ What actually fixed it The fuel level sensor was replaced. The technician tested the old sensor and found its resistance readings were unstable and would jump around, confirming it was faulty despite providing a somewhat usable signal to the gauge. Notably, the sensor was a separate, clip-on component on the fuel pump assembly and was replaced without replacing the entire pump module.
When the Usual Fixes Don't Work
- While the standard repair is to replace the entire fuel pump module, at least one technician has documented that the fuel level sensor on the ProMaster can be a separate, clip-on part. If a standalone sensor is available, it can be replaced independently, saving significant cost. However, most aftermarket and OEM suppliers sell the complete module assembly, making this a parts-sourcing challenge rather than a technical one.
OEM Part Supersession History
68210305AA, 68210305AB, 68210305AC, 68210305AD, 68210305AE→68210305AF— Standard part revision and improvement by the manufacturer.
Heads up: All previous part numbers are replaced by 68210305AF for the 3.6L V6 model. Using the latest revision is always recommended.
Model Year Variations Within This Range
- 2018-2024: These models are equipped with a Security Gateway Module (SGW) that restricts diagnostic access. An SGW bypass cable is necessary for any aftermarket scan tool to perform functions like clearing codes or running active tests.
- 2022-2024: The 3.6L Pentastar engine was updated (sometimes called Pentastar Upgrade or PUG) and paired with a new 9-speed automatic transmission. While many core components are similar, some engine accessories and wiring, like the addition of an EGR system, are different. However, the fuel pump module and access method for this code remain the same.
- 2023-2024: These models feature a significant front-end facelift and updated interior electronics, including the Uconnect 5 system. These changes do not affect the diagnosis or repair of code P0461.
Diagnostic Flowchart
Other Known Issues on This Vehicle
Issues unrelated to this code that are worth knowing about as an owner of this generation:
- Premature Transmission Failure (62TE) 🔴 High — Widespread, especially on 2014-2021 models under heavy load. The 62TE transmission, originally for lighter minivans, struggles with the ProMaster's weight, leading to torque converter or internal component failure. A recall (44A) was issued for 2019-2021 models for a rollaway risk due to debris in the transmission. (Ref: Recall 44A (NHTSA 23V-313))
- Cracked Oil Filter / Cooler Housing (3.6L Pentastar) 🔴 High — Extremely common across all vehicles with the 3.6L Pentastar engine. The plastic housing, located in the engine valley, cracks from heat cycles, causing major oil and/or coolant leaks. Onset can be as early as 60,000 miles.
- Sliding Door Mechanism Failure 🟠 Medium — Very common. Issues include broken handles, failed latches, seized rollers, and faulty electrical contact pins for the power locks. This can result in the door being stuck closed or not securing properly.
- Transmission Mount Failure 🔴 High — Reported on earlier models, where the transmission mounts can fail, causing the transmission to shift or, in extreme cases, drop, leading to catastrophic damage.
- Electrical Issues & Grounding Problems 🟠 Medium — Owners report various electrical gremlins, including malfunctioning instrument clusters, radio resets, and issues with power locks. These are sometimes traced back to poor grounding straps or corroded connections. (Ref: TSB 08-023-23 for Uconnect 5 radio issues on 2022-2023 models.)
Used vs. New Parts: Buying Guide for This Vehicle
When a used part is the smart pick: A used fuel pump assembly from a verified low-mileage wrecked vehicle can be a cost-effective option. The failure is typically the electronic sending unit, not the pump motor itself, so a used part has a reasonable chance of a long service life.
Donor-vehicle mileage cap: roughly under 75000 miles for the part to have meaningful remaining life.
What to inspect on the donor part:
- Verify the donor vehicle's mileage.
- Inspect the electrical connector on the used part for any signs of corrosion, melting, or pushed-out pins.
- If possible, test the resistance (Ohms) across the two sender pins while moving the float arm to ensure a smooth, consistent sweep.
Aftermarket brands forum-validated for this vehicle:
- Delphi
- Denso
- Bosch
Brands owners have reported issues with on this vehicle:
- Generic, unbranded parts from marketplaces like eBay or Amazon are generally not recommended due to inconsistent quality and difficult warranty claims.
Real Owner Stories
Aggregated from forums and TSBs cited above. Mileages and costs reflect what owners reported in those sources.
2016 Ram ProMaster 3500 (3.6L V6)
Symptoms: The fuel gauge was reading empty and the check engine light was on.
What fixed it: Replacing the entire fuel pump/sending unit assembly resolved the problem. The repair was done through the access hatch by the driver's seat.
Source hint: promasterforum.com - "Fuel gauge reading empty with check engine light"
2017 Ram ProMaster 3500 (3.6L V6)
Symptoms: The check engine light came on with code P0461 and the fuel gauge was behaving erratically.
What fixed it: After confirming the wiring was good, replacing the fuel pump assembly fixed the issue.
Source hint: promasterforum.com - "P0461 Fuel Level Sensor A Circuit Range/Performance"
Related OBD-II Codes
Frequently Asked Questions
Where is the fuel pump access panel on my 2014-2024 ProMaster?
Can I just replace the fuel level sensor, or do I need the whole pump assembly?
My ProMaster has the 3.0L EcoDiesel. Is it still likely that the sending unit failed for my P0461 code?
Before I buy a new fuel pump for a P0461 code, what's the first thing I should check?
How can I test the fuel level sensor myself to confirm it's bad?
Is a stuck float a common problem on the ProMaster?
Helpful Videos


Used OEM Parts in Stock


New Aftermarket Parts Available


The information in this article is provided for general reference and educational purposes only. Vehicle specifications, procedures, and part compatibility can vary by production date, trim level, and region. Always consult your vehicle's factory service manual and verify part numbers before purchasing or performing repairs. Safety-critical components such as airbags, seat belts, and braking systems should be installed by a qualified professional.
- Ram ProMaster 3500:
- 🎬 Helpful Videos
- 🛍️ Shop This Part
- What's Unique About the 2014-2024 Ram ProMaster 3500
- Symptoms You May Notice
- Most Likely Causes
- Rare But Worth Checking
- Diagnosis Steps
- Parts You'll Likely Need
- Related Codes That Often Appear With This One
- Platform-Specific Known Issues
- Mechanic-Grade Diagnostic Values
- Scan Tool Commands That Help
- Wiring & Ground Locations
- Technical Service Bulletins (TSBs) & Recalls
- Real Owner Repair Stories
- When the Usual Fixes Don't Work
- OEM Part Supersession History
- Model Year Variations Within This Range
- Diagnostic Flowchart
- Other Known Issues on This Vehicle
- Used vs. New Parts: Buying Guide for This Vehicle
- Real Owner Stories
- 2016 Ram ProMaster 3500 (3.6L V6)
- 2017 Ram ProMaster 3500 (3.6L V6)
- Related OBD-II Codes
- Frequently Asked Questions
- 🎟️ Get 5% Off