

P0460 on 2009-2018 Ram 1500: Causes and Fixes for Fuel Level Sensor Circuit Malfunction
For a 2009-2018 Ram 1500, code P0460 almost always means the fuel level sending unit has failed. Since it's part of the fuel pump module inside the tank, the fix is to replace the entire module. Expect to pay $150-$400 for an aftermarket part and 2-4 hours of labor. The repair can be done by dropping the fuel tank or by lifting the truck bed for access.
- P0460 on a 4th-gen Ram 1500 points overwhelmingly to a bad fuel level sending unit.
- The sending unit is part of the fuel pump module, so the entire module must be replaced.
- You can either drop the fuel tank or remove the truck bed to access the module for replacement.
- Before replacing parts, always check the wiring and connector on top of the fuel tank for corrosion or damage, as it's a common and cheaper failure point.
- Do not trust your fuel gauge if this code is present; use your trip odometer to track fuel usage and avoid running out of gas.
What's Unique About the 2009-2018 Ram 1500
On the fourth-generation Ram 1500, this code is a very common indicator of a failed fuel level sending unit. The sending unit, which is a sensor that reads the fuel level, is integrated directly into the fuel pump module. While Mopar does not sell the sensor separately, some owners have successfully performed a DIY repair using aftermarket-only sensors. However, the standard and most reliable repair is to replace the entire fuel pump assembly. Owners have two main repair strategies: dropping the fuel tank from underneath the truck or removing/lifting the truck bed to access the pump from above. Lifting the bed is often preferred as it avoids the difficulty and danger of handling a heavy, full fuel tank.
🎬 See this walkthrough on how to drop the fuel tankGeneration note: This guide covers the fourth-generation Ram 1500 (DS/DJ), produced from 2009 to 2018. The platform continued as the Ram 1500 'Classic' for several years after 2018, and this information is generally applicable to those models as well.
Symptoms You May Notice
- Check Engine Light is on.
- Fuel gauge behaves erratically, fluctuating or dropping to empty suddenly.
- Fuel gauge is stuck on full or empty, regardless of the actual fuel level.
- Low fuel warning light comes on at incorrect times or stays on constantly.
- Inaccurate 'Distance to Empty' reading on the instrument cluster.
- Remote start feature is disabled (as the truck believes it has no fuel).
- Replacing the instrument cluster before testing the fuel sending unit and wiring.
- Replacing the PCM without proper diagnostics.
- Assuming the fuel pump itself is bad when only the level sender has failed.
Most Likely Causes
- Failed Fuel Level Sending Unit 🔴 High Probability The variable resistor on the sending unit's arm wears out over time from constant contact and movement. Fuel additives and contaminants, particularly sulfur, can accelerate this wear on the resistor card, creating 'dead spots'.
How to confirm: Use a scan tool to monitor the fuel level sensor voltage/resistance. If the reading is stuck or doesn't change smoothly as fuel is used or added, the sender is likely bad. A definitive test involves removing the unit and measuring its resistance with a multimeter. The resistance should change smoothly from approximately 20-40 ohms (Full) to 220-250 ohms (Empty) as you move the float arm. Any sudden jumps or open loop (OL) readings confirm a bad sender.
Typical fix: Replace the entire fuel pump module assembly, as the sending unit is integrated into it.
Est. part cost: $150-$400 - Damaged Wiring or Connector 🟡 Medium Probability The main harness connector sits on top of the fuel tank, exposed to moisture, road salt, and debris, which can lead to corrosion of the pins. Wires in the harness can also be damaged from road debris, improper service, or animal chews.
How to confirm: Visually inspect the wiring harness and the main connector on top of the fuel tank for any signs of corrosion (green crust), broken wires, or loose pins. Perform a continuity and voltage drop test on the sensor circuit between the pump connector and the PCM. A voltage drop of more than 0.5V indicates excessive resistance that needs to be located.
Typical fix: Clean the connector terminals with a contact cleaner or repair/replace the damaged section of the wiring harness. In some cases, a new connector pigtail is required.
Est. part cost: $10-$100
Rare But Worth Checking
- Faulty Instrument Cluster: While rare, the gauge itself can fail internally, causing it to display incorrect readings even with a good signal from the sensor. This is less likely than a sensor or wiring issue.
- Faulty Powertrain Control Module (PCM): This is extremely rare and should only be considered after all other possibilities, including wiring and the sensor itself, have been exhaustively tested and ruled out.
Diagnosis Steps
- Read the trouble codes with an OBD-II scanner. Note all active and pending codes, paying special attention to P0462 or P0463.
- Using the scanner's live data function, monitor the 'Fuel Level' parameter and sensor voltage. Observe if the reading is erratic, stuck, or clearly incorrect based on the known amount of fuel in the tank.
- Perform a visual inspection of the fuel tank, wiring harness, and the main connector on top of the tank. Look for any obvious signs of damage, corrosion, or loose connections.
- If access is possible, disconnect the fuel pump connector. Test for proper power and ground at the connector to rule out a supply issue.
- To definitively test the sender, you must gain access to the fuel pump module. This requires either dropping the fuel tank or lifting the truck bed.
- Once accessed, remove the fuel pump module. Use a multimeter set to Ohms to measure the resistance across the sending unit's terminals while slowly moving the float arm from empty to full. The resistance should change smoothly without any dropouts or spikes. Compare the readings to the manufacturer's specifications (approx. 20-250 Ohms). Any erratic readings confirm a faulty sending unit. 🎬 Watch a mechanic fix the P0463 gas gauge issue
Parts You'll Likely Need
- Fuel Pump Module Assembly
(OEM #Varies by year, engine, and tank size. Common PNs include 68092755AB (3.6L V6), 55398693AF (5.7L V8). Always verify with VIN.)— This is the most common failure. The assembly includes the fuel pump, fuel pressure regulator, fuel filter, and the integrated fuel level sending unit. Replacing the entire module is the standard repair.
Trusted brands: Mopar, Delphi, Bosch, Spectra Premium, Autopart Premium
OEM price range: $300-$600
Aftermarket price range: $150-$350
Related Codes That Often Appear With This One
- P0463 — P0463 (Fuel Level Sensor 'A' Circuit High Input) often appears with P0460. It indicates the PCM is seeing a voltage signal that is higher than the normal operating range, which can be caused by the same failing sensor or an open in the circuit.
- P0462 — P0462 (Fuel Level Sensor 'A' Circuit Low Input) indicates the signal voltage is below the normal range, often pointing to a short in the circuit or a faulty sensor.
- U1403 — U1403 (Implausible Fuel Level Signal Received) is a network code that can be set alongside P0460, indicating that other modules on the vehicle network are receiving illogical data from the fuel system. 🎬 Watch: Diagnosing P0460, P0463, and U1403 codes step-by-step
Technical Service Bulletins (TSBs) & Recalls
- TSB 08-024-10: Addresses customer complaints of inaccurate or fluctuating fuel gauges at 3/4 of a tank or above. The procedure involves replacing the fuel sending unit, clocking the fuel module to a new position, and installing a fuel jumper hose. While for an older model year, it shows a history of this type of failure.
Platform-Specific Known Issues
- A broken plastic baffle inside the fuel tank has been reported in some forum discussions. While not common, if the baffle breaks loose, it can interfere with the float arm's movement, causing erratic readings and potentially damaging the sending unit over time.
- The choice between dropping the tank and lifting the bed is a major point of discussion. Lifting the bed (or tilting it) is often cited as easier, especially for a DIYer, as it avoids wrestling with a heavy tank that may be full of fuel. It typically requires removing 6-8 bed bolts, the fuel filler neck, and taillight connectors.
Mechanic-Grade Diagnostic Values
- Fuel Level Sensor Resistance — expected: Approx. 20-40 Ohms (Full) to 220-250 Ohms (Empty).. Failure: Readings are erratic, jump suddenly, or show an open loop (OL) when moving the float arm.
- Fuel Level Sensor Signal Voltage — expected: Varies, but typically ~0.5V (Empty) to ~4.5V (Full) on a 5V reference circuit.. Failure: Voltage is stuck at 0V, 5V, or does not change smoothly as the fuel level changes.
- Voltage Drop Test on Sensor Circuit — expected: Less than 0.5V between the sensor connector and the PCM connector.. Failure: A voltage drop greater than 0.5V indicates excessive resistance in the wiring or connectors that needs to be located and repaired.
- Fuel Pump Power Wire (at pump connector) — expected: 12V for 2-3 seconds when the key is first turned to the 'ON' position, then cuts out.. Failure: No voltage indicates a problem upstream (relay, TIPM, wiring). Continuous voltage with key off indicates a stuck relay.
Scan Tool Commands That Help
- Professional Scan Tool (e.g., wiTECH): Fuel Pump Relay Actuation Test — To command the fuel pump relay on and off to verify the functionality of the relay and the power circuit to the pump, bypassing the key-on timer. This helps isolate a faulty relay from a wiring issue.
- Professional Scan Tool (e.g., wiTECH): Read Fuel Pump Control Module (FPCM) Data — On 2013+ models equipped with an FPCM, this allows viewing of inputs and outputs directly from the module that controls the pump, helping to differentiate between a PCM, FPCM, or pump/sender failure.
Wiring & Ground Locations
- Fuel Pump Power Wire — At the fuel pump module connector on top of the tank. For 2009-2010 models, this is often a Dark Blue wire with an Orange stripe. For other years, it may be a Dark Green wire with a white or black stripe.. This wire supplies power to the entire module. While a power issue usually affects the pump motor first, intermittent power can cause erratic signals from the integrated level sensor.
- Fuel Level Sensor Signal Wires — Within the same harness and connector as the pump power, on top of the fuel tank. These are smaller gauge wires. A wiring diagram for the specific year is essential for correct identification.. These two wires (signal and return/ground) are the direct circuit for the P0460 code. Corrosion or damage here is a primary cause of the fault.
- TIPM (Totally Integrated Power Module) Connector — The main fuse box under the hood. The fuel pump circuit wires run into one of the large multi-pin connectors on the underside.. Corrosion (often a green crust) on the pins of the TIPM connectors is a known issue that can cause high resistance, leading to P0460 and other fuel-related codes. This is often missed as technicians focus on the tank-side connector.
Real Owner Repair Stories
- RamForum.com user (2016 Ram 6.4 Hemi (in a 2500, but TIPM architecture is similar)) — Crank no start, fuel-related codes.
❌ Tried (didn't work) Replaced the TIPM.
✅ What actually fixed it The user found a broken blue wire in the green connector underneath the TIPM. Repairing the wire resolved the issue. This highlights that connector corrosion and wire fatigue at the TIPM itself can be the root cause, not the module or the pump.
OEM Part Supersession History
68049550AE→68049550AF— Standard revision update for the Fuel Pump Control Module (FPCM) used on some 2013 models.
Heads up: While these parts supersede, forum users report that for 2013+ models, replacing the FPCM does not require reprogramming.68409160AB, 68409160AC, 68409160AD, 68409160AE→68409160AF— Multiple revisions of the fuel pump/level unit module for newer (2019+) models, indicating ongoing design changes. While outside the primary vehicle range, it shows a pattern of Mopar updating this component frequently.
Model Year Variations Within This Range
- 2009-2012: These models use a traditional fuel pump relay, which is integrated (soldered) into the TIPM circuit board. A failure of this non-serviceable relay can mimic a bad fuel pump and requires either a TIPM replacement or an external relay bypass kit.
- 2013-2018: A mid-cycle refresh occurred in 2013. Many trucks in this range began using a separate Fuel Pump Control Module (FPCM) instead of a simple relay in the TIPM. This module controls pump speed via PWM signals. When diagnosing, it's crucial to determine if the vehicle has an FPCM, as it adds another potential point of failure between the PCM and the fuel pump.
Diagnostic Flowchart
Other Known Issues on This Vehicle
Issues unrelated to this code that are worth knowing about as an owner of this generation:
- 5.7L HEMI Lifter/Camshaft Failure ('Hemi Tick') 🔴 High — Common, especially on 2009-2014 models, often appearing between 75,000 and 120,000 miles. A ticking noise, particularly when the engine is warm at idle, is the primary symptom.
- Broken Exhaust Manifold Bolts 🟠 Medium — Very common on 5.7L HEMI engines. The rear-most bolts are prone to snapping due to thermal stress, causing an exhaust leak and a ticking sound that is most noticeable on a cold start and may quiet down as the engine warms up.
- Totally Integrated Power Module (TIPM) Failure 🔴 High — Widespread on 2009-2012 models. A faulty TIPM can cause a vast array of bizarre electrical issues, including the fuel pump not shutting off, engine failing to start, horn blaring randomly, and power windows/locks acting on their own. (Ref: Subject of a class-action lawsuit, but no universal recall was issued. Some specific issues had limited service campaigns.)
- Air Suspension System Leaks 🟠 Medium — Common on trucks equipped with the optional four-corner air suspension. Leaks can develop in the air springs or lines, causing the compressor to run excessively and the truck to sag at one or more corners, particularly overnight.
- Water Leaks from Third Brake Light 🟡 Low — A frequent issue where the gasket for the high-mount third brake light fails, allowing water to leak into the cab, potentially staining the headliner and causing dampness.
Used vs. New Parts: Buying Guide for This Vehicle
When a used part is the smart pick: A used fuel pump module is almost never a smart choice. The fuel level sending unit is a wear item, and a used part from a junkyard likely has significant wear and an unknown history. The labor to replace the module is high, so installing a used part carries a significant risk of having to do the job again soon.
Donor-vehicle mileage cap: roughly under 30000 miles for the part to have meaningful remaining life.
What to inspect on the donor part:
- Verify the part number exactly matches the original.
- Inspect the electrical connector pins for any signs of corrosion or heat damage.
- Check that the plastic housing is not cracked or damaged.
- If possible, ask for the mileage of the donor vehicle; anything over 50,000 miles is a major gamble.
OEM-only on this vehicle (don't cheap out):
- While not strictly OEM-only, the fuel pump module is a critical component where OEM (Mopar) or a reputable OEM supplier (like Bosch or Delphi) offers the highest chance of a long-lasting repair.
Aftermarket brands forum-validated for this vehicle:
- Bosch: Often cited as a reliable choice, and may be an OE supplier.
- Delphi: Generally considered a reputable brand and potential OE supplier, though some users report mixed experiences.
Brands owners have reported issues with on this vehicle:
- Generic/unbranded eBay or Amazon pumps: While extremely cheap, these have a very high failure rate reported on forums. The low initial cost is often negated by needing to replace it again shortly after.
- Airtex / Carter: Some forum discussions mention these brands as having spotty reliability compared to OEM or Bosch.
Real Owner Stories
Aggregated from forums and TSBs cited above. Mileages and costs reflect what owners reported in those sources.
Ram 1500
Symptoms: The fuel gauge would drop to empty intermittently, especially after the fuel level went below half a tank, which triggered the P0460 code.
What fixed it: The dealer replaced the fuel sending unit to resolve the issue.
Source hint: RamForum.com: A thread on the forum corroborated that the fuel gauge dropping to empty intermittently after hitting half a tank is a common symptom leading to a P0460 code, with the dealer fix being a new fuel sending unit.
Ram 1500
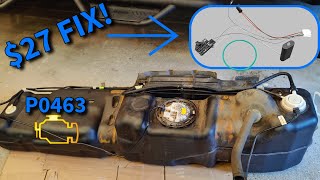
Symptoms: The gas gauge was not working, the remote start feature was disabled, and the truck had a P0463 code stored.
What fixed it: Replaced only the fuel level sensor with an aftermarket part. This fixed the code and re-enabled the remote start, although the owner noted the gauge then read slightly low.
Cost: $20-$30
Source hint: YouTube - 'How I Fixed My Ram 1500 P0463 – Gas Gauge/Fuel Level Sensor'
Related OBD-II Codes
Frequently Asked Questions
Is it easier to drop the fuel tank or lift the bed to replace the fuel pump on my Ram 1500?
My remote start stopped working and my fuel gauge is erratic. Are these issues related to the P0460 code?
Can I just replace the small fuel level sensor, or do I need to buy the entire fuel pump assembly?
What resistance values should I expect when testing the fuel level sending unit on my Ram?
Besides the sending unit itself, what's another common cause for P0460 on these trucks?
I read about TSB 08-024-10 for fuel gauge problems. Does this apply to my truck?
Could a broken part inside the fuel tank cause my erratic fuel gauge?
Helpful Videos
We Have This Part in Stock



The information in this article is provided for general reference and educational purposes only. Vehicle specifications, procedures, and part compatibility can vary by production date, trim level, and region. Always consult your vehicle's factory service manual and verify part numbers before purchasing or performing repairs. Safety-critical components such as airbags, seat belts, and braking systems should be installed by a qualified professional.
- Ram 1500:
- 🎬 Helpful Videos
- 🛍️ Shop This Part
- What's Unique About the 2009-2018 Ram 1500
- Symptoms You May Notice
- Most Likely Causes
- Rare But Worth Checking
- Diagnosis Steps
- Parts You'll Likely Need
- Related Codes That Often Appear With This One
- Technical Service Bulletins (TSBs) & Recalls
- Platform-Specific Known Issues
- Mechanic-Grade Diagnostic Values
- Scan Tool Commands That Help
- Wiring & Ground Locations
- Real Owner Repair Stories
- OEM Part Supersession History
- Model Year Variations Within This Range
- Diagnostic Flowchart
- Other Known Issues on This Vehicle
- Used vs. New Parts: Buying Guide for This Vehicle
- Real Owner Stories
- Ram 1500
- Ram 1500
- Related OBD-II Codes
- Frequently Asked Questions
- 🎟️ Get 5% Off