

P0441 on 2006-2013 Lexus IS: EVAP Incorrect Purge Flow Causes and Fixes
On a 2006-2013 Lexus IS, code P0441 is most often caused by a faulty purge valve (solenoid) or a cracked vacuum hose connected to it. The valve is located in the engine bay and is an easy DIY fix, with the part costing around $60-$100. A broken plastic nipple on the valve itself is a very common point of failure.
- For a P0441 code on a 2006-2013 Lexus IS, start your diagnosis in the engine bay, not at the gas cap.
- The most likely cause is a cracked plastic nipple on the purge valve itself or a brittle vacuum hose connected to it, due to engine heat.
- The repair is very simple and accessible for a DIYer, often requiring only a single bolt to be removed.
- The 'Check VSC' light is a secondary warning and typically does not indicate a problem with the stability control system when a P0441 code is present.
What's Unique About the 2006-2013 Lexus IS

For the second-generation Lexus IS (IS250 and IS350), the P0441 code is very frequently traced back to the engine bay, rather than the charcoal canister or gas cap. The purge valve and its associated rubber hoses are situated at the rear of the engine, where high temperatures can make the plastic and rubber components brittle over time. Owners often discover a cracked vacuum line or a broken nipple on the purge valve itself, making visual inspection a crucial first step. The simultaneous illumination of the "Check VSC" light is a common Lexus trait for many check engine codes and is not specific to the EVAP system.
Symptoms You May Notice

- Check Engine Light is on
- "Check VSC" and traction control lights may also illuminate
- Slightly rough idle, especially if the purge valve is stuck open
- Difficulty starting the engine immediately after refueling
- A faint fuel smell may be noticeable
- Significantly negative long-term fuel trims (e.g., -20%) may be observed on a scan tool if the purge valve is stuck open, indicating the ECU is compensating for a fuel-vapor-rich vacuum leak.
- Replacing the charcoal canister before thoroughly checking the purge valve and its hoses in the engine bay.
- Replacing the gas cap when the issue is a cracked hose or faulty purge valve. While a gas cap is a valid first check, on this specific vehicle, the problem is frequently under the hood.
Most Likely Causes

- Faulty or Broken Purge Valve (VSV) 🔴 High Probability The valve is located in a high-heat area at the back of the engine, causing its plastic components and nipples to become brittle and crack over time.
How to confirm: Remove the engine cover and locate the valve at the rear of the intake manifold. Visually inspect the valve and its nipples for cracks. A slight touch can cause a brittle nipple to break. With the valve removed, try blowing through it; if air passes through, it is stuck open and faulty. A functional valve should be closed when unpowered. A running test involves disconnecting the purge line at the valve and feeling for intermittent suction with your finger; constant suction indicates a stuck-open valve.
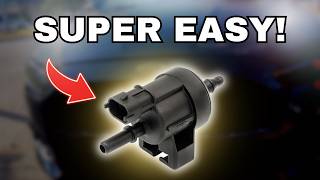
Typical fix: Replace the purge valve assembly. It is typically held on by a single 10mm or 12mm bolt. 🎬 See this professional walkthrough on how to replace your purge valve
Est. part cost: $60-$120 - Cracked or Disconnected EVAP Vacuum Hose 🔴 High Probability Like the purge valve, the rubber hoses connected to it are exposed to significant engine heat, causing them to dry rot, become brittle, and crack or slip off the connection.
How to confirm: While inspecting the purge valve, carefully check all connected rubber hoses for cracks, breaks, or loose connections. A hose may look fine but be disconnected or split on the underside.
Typical fix: Replace the cracked section of vacuum hose. It's good practice to use fuel-grade hose for durability. Ensure clamps are secure.
Est. part cost: $5-$20 - Loose or Faulty Gas Cap 🟡 Medium Probability
How to confirm: Ensure the gas cap is tightened until it clicks. Inspect the rubber O-ring on the cap for cracks or damage. Even if it looks okay, an old cap can fail to seal properly. Replacing it is a common and inexpensive diagnostic step.
Typical fix: Tighten the cap correctly. If the seal is damaged or the code returns, replace the gas cap with a new OEM part 🎬 Watch: Two quick DIY methods to fix the P0441 code for best results.
Est. part cost: $25-$40 - Clogged or Failed Charcoal Canister ⚪ Low Probability This can be caused by habitually overfilling the fuel tank, which forces liquid gasoline into the canister designed only for vapor.
How to confirm: The canister is located at the rear of the car, between the mufflers. Diagnosis often requires a professional smoke test to check for blockages or leaks. 🎬 Watch: How to check vacuum lines from the charcoal canister You may also find charcoal pellets in the EVAP lines if it has failed internally.
Typical fix: Replace the charcoal canister assembly. This is a more involved repair but can be done by a DIYer.
Est. part cost: $200-$500+
Rare But Worth Checking
- Faulty Vapor Pressure Sensor: This is a rare cause for P0441 alone and will typically be accompanied by other codes like P0450-P0453.
- Damaged Wiring to Purge Valve: Check the electrical connector and wiring to the purge valve for any visible damage, corrosion, or loose connection, though this is not a common point of failure.
Diagnosis Steps
- Read the code with an OBD-II scanner to confirm P0441 is present and note any other codes.
- Inspect the gas cap. Ensure it is tight and the seal is in good condition. If in doubt, replacement is a cheap test.
- Remove the plastic engine cover (typically held on by two 10mm nuts).
- Locate the purge valve (VSV) at the rear of the engine, near the intake manifold.
- Carefully inspect the purge valve and all attached rubber hoses for any visible cracks, brittleness, or breaks. A broken plastic nipple on the valve itself is a common failure point that can be confirmed with a gentle touch.
- If a visual fault is found (broken nipple, cracked hose), replace the damaged part.
- If no visual fault is found, test the purge valve. With the engine off, disconnect the valve and attempt to blow through it. If air passes, the valve is stuck open and must be replaced.
- If the valve and hoses appear fine, the next step is a professional smoke test to check the entire EVAP system for hidden leaks.
Parts You'll Likely Need

- Vapor Canister Purge Valve / Solenoid (VSV)
(OEM #90910-12276, 25860-31070)— This is the most common component to fail, either by getting stuck or having its plastic housing/nipple crack from engine heat.
Trusted brands: Denso (OEM), Aisin, Standard Motor Products (SMP)
OEM price range: $80-$140
Aftermarket price range: $40-$80 - Vacuum Hose — The hoses connected to the purge valve often become brittle and crack, causing a vacuum leak that triggers the code.
OEM price range: $10-$30
Aftermarket price range: $5-$15 - Fuel Tank Cap
(OEM #77300-53010)— A worn-out gas cap seal is a common cause for all EVAP codes and is an easy first part to replace during diagnosis. Using an OEM cap is recommended.
Trusted brands: Lexus (OEM)
OEM price range: $25-$40
Aftermarket price range: $15-$25
Related Codes That Often Appear With This One
- P0445 — This code indicates a large leak in the EVAP system, which can be triggered by the same cracked hose or faulty valve causing the incorrect purge flow.
- P0440 — This is a general EVAP system malfunction code that can appear alongside P0441, pointing to a broader issue within the system.
- P0455 — Indicates a gross (large) leak was detected, often pointing to a completely disconnected hose, a broken purge valve nipple, or a very loose gas cap.
Platform-Specific Known Issues
- Brittle Purge Valve Nipple: A well-documented failure mode on ClubLexus involves the plastic nipple on the purge valve itself becoming extremely brittle from heat cycles. An owner reported that upon simply touching one of the vacuum lines connected to the valve, the nipple cracked and came apart completely, instantly revealing the source of the P0441 code. This makes a hands-on inspection, not just a visual one, critical.
Mechanic-Grade Diagnostic Values
- Purge Valve (VSV) Connector Voltage — expected: With the key on and engine off, one pin should show battery voltage (approx. 12V) and the other (signal wire to ECU) should also show battery voltage. When the ECU commands the valve to open (during a bidirectional test or specific engine running conditions), the signal wire voltage should drop to near 0V as the ECU provides ground.. Failure: No voltage on the power pin indicates a wiring or fuse issue. Voltage on the signal wire that does not drop to 0V when commanded indicates a wiring problem or a faulty ECU driver. If voltage tests are good but the valve doesn't operate, the valve itself is faulty.
- Long-Term Fuel Trim (LTFT) — expected: Typically within +/- 5% at idle.. Failure: Consistently high negative values (e.g., -15% to -25%) can indicate a stuck-open purge valve. The ECU is detecting a rich condition from excess fuel vapors entering the intake manifold and is commanding less fuel to compensate.
Scan Tool Commands That Help
- Toyota Techstream / Professional Scan Tool (e.g., Snap-on): Evaporative System Check (Automatic Test Mode) — This is a forced test or "cold soak bypass" used to verify a repair without waiting the 5+ hours the vehicle normally requires to run its internal EVAP monitor. It manually activates the vent and purge valves to seal the system, draw a vacuum, and monitor for pressure changes, confirming system integrity in about 10-15 minutes.
- Toyota Techstream / Professional Scan Tool: Active Test: Control the Purge VSV — This bidirectional command allows a technician to manually open and close the purge valve while the engine is running. This is used to confirm the valve's mechanical operation and check for an immediate change in engine idle or short-term fuel trims, which verifies if the valve is responding and if flow is occurring.
Wiring & Ground Locations
- Purge Valve (VSV) Connector — At the rear of the engine, attached to the intake manifold, below the rear engine cover support on the driver's side.. This is the primary connector to test for power, ground, and signal from the ECM. Corrosion or damage here will prevent the purge valve from operating correctly.
- Engine Control Module (ECM) — Located in the engine compartment on the left (driver's) side.. The ECM provides the ground signal that activates the purge valve. Tracing the signal wire back to the ECM connector (e.g., A5, E5, E4, E3, E6) is the final step in diagnosing a wiring fault.
- Ground Point E1 — Located on the left rear of the engine compartment.. This is a major engine ground point. While not exclusively for the EVAP system, a poor connection here can cause a variety of sensor and actuator issues, including erratic purge valve operation.
Real Owner Repair Stories
- ClubLexus user 'Digger08' (Lexus IS (2nd Gen)) — Check Engine Light with P0441, Check VSC light, no drivability issues or rough idle.
❌ Tried (didn't work) Confirmed it was not the gas cap, as P0446 was not present.
✅ What actually fixed it Located the purge valve at the back of the engine. Upon touching one of the vacuum lines connected to it, the plastic nipple on the valve itself cracked and broke off due to heat embrittlement. Replacing the purge valve (Part #90910-12276) for $88 resolved the code. - ClubLexus user 'Alyyashar' (2006 Lexus IS250) — P0441 code, very high negative long-term fuel trims (-20% on both banks), and excessive fuel consumption.
❌ Tried (didn't work) Replacing the gas cap did not solve the problem or the negative fuel trims.
✅ What actually fixed it The user was advised by another forum member that the high negative trims strongly pointed to a stuck-open purge valve. The recommended diagnostic step was to disconnect the purge line at the valve while the engine is running and feel for suction to confirm if it was stuck open. The story highlights how fuel trims can be a key indicator for this specific failure mode. - NHTSA ODI #10381931 — An owner reported a recurring issue where codes P0441 and P0440 were initially dismissed as a loose gas cap; however, the problem was eventually traced to a canister switching valve that had shorted out, requiring replacement.
Documented NHTSA Reports
- NHTSA ODI #11386326 — A report involving multiple EVAP codes, including P0441 and P0455, noted that these issues were accompanied by a VSC error, which resolved after clearing the memory.
OEM Part Supersession History
25860-31070→90910-12276— Standard part evolution and consolidation across multiple Toyota/Lexus platforms.
Diagnostic Flowchart
Real Owner Stories
Aggregated from forums and TSBs cited above. Mileages and costs reflect what owners reported in those sources.
Lexus IS (2006-2013)
Symptoms: Check Engine Light (P0441), VSC light, Trac light on. No drivability issues or rough idle.
What fixed it: Replaced the purge valve. The spigot on the old part was brittle and had broken. The repair took ~3 minutes to install.
Cost: $88
Source hint: ClubLexus.com - P0441 trouble code (Thread ID: 730338)
2009 Lexus IS250
Symptoms: Check engine light P0441. The light would come on more often when on and off the gas pedal around 60-70 mph. Redlining the car would make the code go away for a couple of days.
What fixed it: Replaced the purge valve.
Source hint: Reddit r/LexusIS
Lexus IS (2006-2013)
Symptoms: Check Engine Light with P0441 code.
What fixed it: Found and reconnected a disconnected vacuum hose with a green tab near the purge valve area. (Another user in the same thread reported their hose had dry-rotted instead of just coming loose and required replacement).
Source hint: ClubLexus.com - P0441 CEL solution (Thread ID: 546886)
Related OBD-II Codes
Frequently Asked Questions
Why did my 'Check VSC' and traction control lights come on with the P0441 code on my Lexus IS?
Where is the purge valve (VSV) located on the 2006-2013 Lexus IS?
I touched the vacuum line on my Lexus IS purge valve and the plastic nipple broke off. Is this normal?
Can overfilling my gas tank cause the P0441 code on my Lexus IS?
How can I test if the purge valve on my IS250 or IS350 is stuck open?
Does the P0441 code mean I just need a new gas cap?
Helpful Videos
![How to Fix P0441 Engine Code in 3 Minutes [2 DIY Methods / Only $4.50]](https://img.youtube.com/vi/ifwpcNQCSvI/mqdefault.jpg)


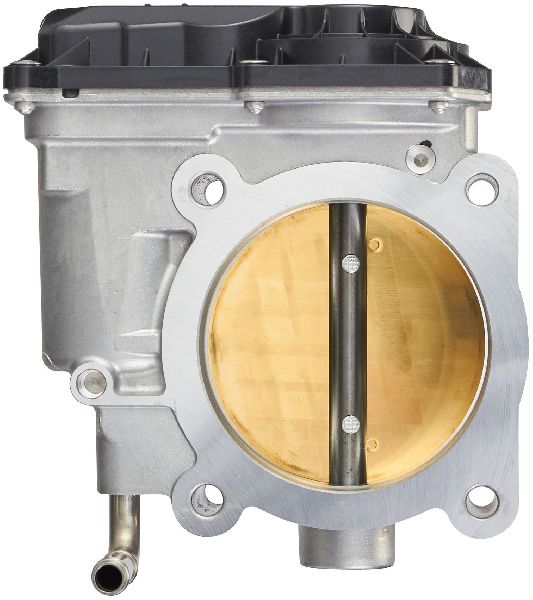
We Have This Part in Stock


The information in this article is provided for general reference and educational purposes only. Vehicle specifications, procedures, and part compatibility can vary by production date, trim level, and region. Always consult your vehicle's factory service manual and verify part numbers before purchasing or performing repairs. Safety-critical components such as airbags, seat belts, and braking systems should be installed by a qualified professional.
- Lexus IS:
- 🎬 Helpful Videos
- 🛍️ Shop This Part
- What's Unique About the 2006-2013 Lexus IS
- Symptoms You May Notice
- Most Likely Causes
- Rare But Worth Checking
- Diagnosis Steps
- Parts You'll Likely Need
- Related Codes That Often Appear With This One
- Platform-Specific Known Issues
- Mechanic-Grade Diagnostic Values
- Scan Tool Commands That Help
- Wiring & Ground Locations
- Real Owner Repair Stories
- Documented NHTSA Reports
- OEM Part Supersession History
- Diagnostic Flowchart
- Real Owner Stories
- Lexus IS (2006-2013)
- 2009 Lexus IS250
- Lexus IS (2006-2013)
- Related OBD-II Codes
- Frequently Asked Questions
- 🎟️ Get 5% Off