

P0331 on 2005-2010 Scion tC 2.4L: Knock Sensor Circuit Causes and Fixes
On a 2005-2010 Scion tC, P0331 almost always means the single knock sensor has failed or its wiring is damaged. Rodents chewing the wiring is a surprisingly common cause. The sensor is difficult to access behind the intake manifold, making replacement labor-intensive. Expect a shop repair to cost between $470 and $770. Due to the labor, using an OEM or Denso sensor and replacing the short wire harness at the same time is highly recommended.
- P0331 on this car points to a problem with the single knock sensor or its wiring, despite the 'Sensor 2' in the code name.
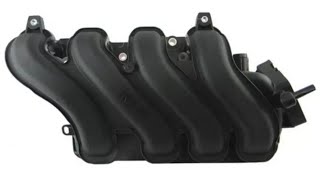
- The most difficult part of the repair is removing the intake manifold to access the sensor, which significantly increases labor costs.
- Due to the high labor cost, it is wise to use a high-quality OEM or Denso sensor and replace the short wiring pigtail at the same time to avoid a repeat repair.
- Always replace the intake manifold gaskets when performing this job to prevent future vacuum leaks.
- Check for rodent damage to the wiring harness, as this is a very common cause of this code on 2AZ-FE engines.
What's Unique About the 2005-2010 Scion tC
The main challenge on the Scion tC is the location of the knock sensor. It is bolted to the back of the engine block, buried underneath the intake manifold. This turns a relatively inexpensive part into a labor-intensive repair, as the entire intake manifold must be removed for access. While the code says "Sensor 2," these cars only have one sensor; the code is a generic SAE definition being applied to a single-sensor circuit. Many owners find that rodents have chewed the sensor's wiring harness, which is a common point of failure on 2AZ-FE engines due to its location.
Symptoms You May Notice
- Check Engine Light is on
- Reduced engine power and sluggish acceleration
- Decreased fuel economy
- Audible engine pinging or knocking, especially under load
- Engine hesitation
- Replacing spark plugs or ignition coils without diagnosing the knock sensor circuit first. While these can cause knocking, they typically set other codes (like P030x misfire codes).
- Replacing the knock sensor without replacing the short, brittle wiring harness that connects to it, leading to the code returning.
- Improperly repairing a rodent-damaged wire without restoring the electrical shielding, which leads to signal interference and a persistent code.
Most Likely Causes
- Faulty Knock Sensor 🔴 High Probability The sensor is subjected to intense heat and vibration cycles, leading to internal failure of the piezoelectric element over time. It's a common failure item on high-mileage 2AZ-FE engines.
How to confirm: After confirming wiring is intact, the most definitive test is to replace the sensor. Resistance can be tested with a multimeter after removing the intake manifold for access; a reading outside the manufacturer's specification indicates failure. The specific resistance for the 2AZ-FE sensor should be 120 to 280 kΩ at 20°C (68°F).
Typical fix: Replace the knock sensor. Since the intake manifold must be removed, it is highly recommended to replace the intake manifold gaskets and the short knock sensor wire harness (pigtail) at the same time to prevent future issues and vacuum leaks.
Est. part cost: $30-$260 - Damaged Wiring or Connector 🟡 Medium Probability The wiring harness runs in a high-heat area behind the engine. More commonly, the soy-based wiring insulation used by Toyota during this era is attractive to rodents. Many owners discover wires chewed completely through at the sensor connector or along the sub-harness.
How to confirm: Visually inspect the harness from the sensor to the main loom for any signs of damage, melting, or tell-tale signs of rodents (chew marks, droppings). A continuity test with a multimeter is necessary if damage is suspected but not visible. The wire is shielded to prevent electrical interference; improper repair of the shield can cause the code to persist.
Typical fix: Repair the damaged section of the wire or, more reliably, replace the entire knock sensor connector pigtail/sub-harness. Splicing shielded wires requires care to avoid signal interference.
Est. part cost: $15-$50
Rare But Worth Checking
- Faulty Powertrain Control Module (PCM): This is very rare. The knock sensor and its wiring should be thoroughly tested before considering the PCM as the cause.
- Excessive Engine Vibration: Severe vibrations from other issues like worn engine mounts or a persistent misfire can sometimes generate erratic signals that the PCM interprets as a sensor fault.
Diagnosis Steps
- Read the code with an OBD-II scanner and confirm P0331 is present. Note any other codes, especially P0327 or P0328.
- Clear the codes and perform a test drive to see if the code returns immediately. This helps confirm a hard fault.
- Visually inspect the area around and behind the intake manifold for signs of rodent damage to the wiring harness. This is a very common cause.
- If access is possible, check the knock sensor connector for corrosion or damage. However, full access typically requires removing the intake manifold.
- Remove the intake manifold assembly. 🎬 See this step-by-step guide for removing the intake manifold. This is a multi-hour job requiring care. Label all vacuum lines and connectors.
- Once the manifold is off, closely inspect the knock sensor and its short wiring harness for breaks, melting, chafing, or chew marks.
- Disconnect the sensor. Test its internal resistance with a multimeter. The correct reading should be between 120 and 280 kΩ at room temperature. An open circuit (infinite resistance) or a reading far outside this range indicates a faulty sensor.
- Test the wiring harness. With the sensor unplugged and ignition ON, check for a reference voltage of 4.5 to 5.5 V between terminals KNK1 and EKNK on the harness-side connector. Also test for continuity from the sensor connector to the main engine harness plug. Repair or replace the harness if any open or short circuits are found.
- If the sensor and wiring test good, the fault may lie with the PCM, but this is extremely uncommon.
Parts You'll Likely Need
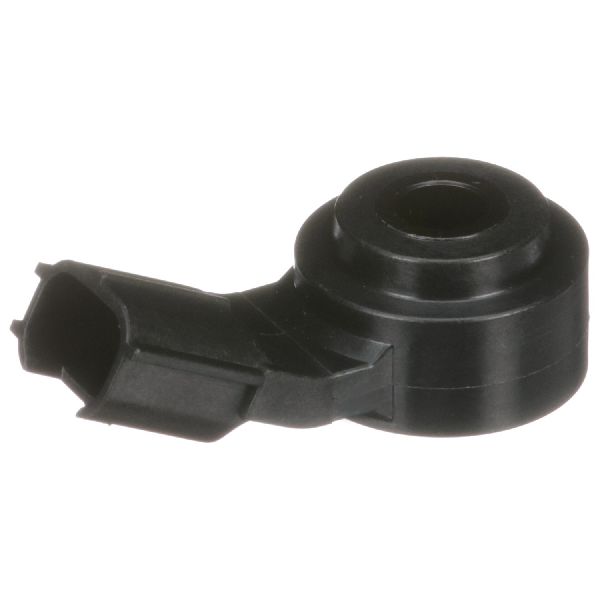
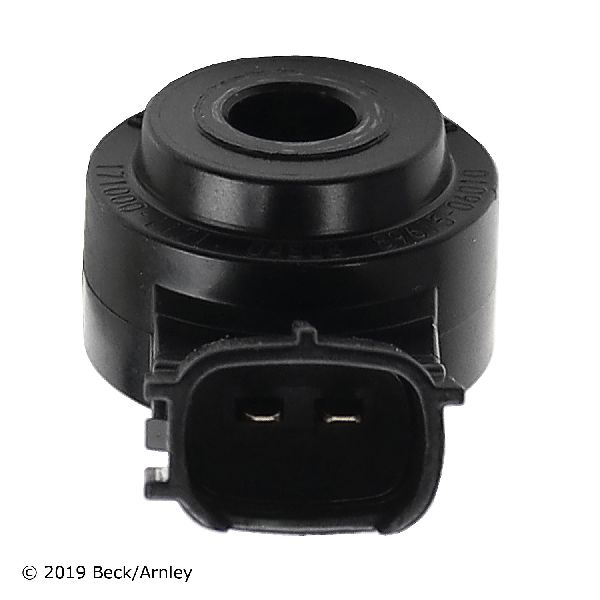
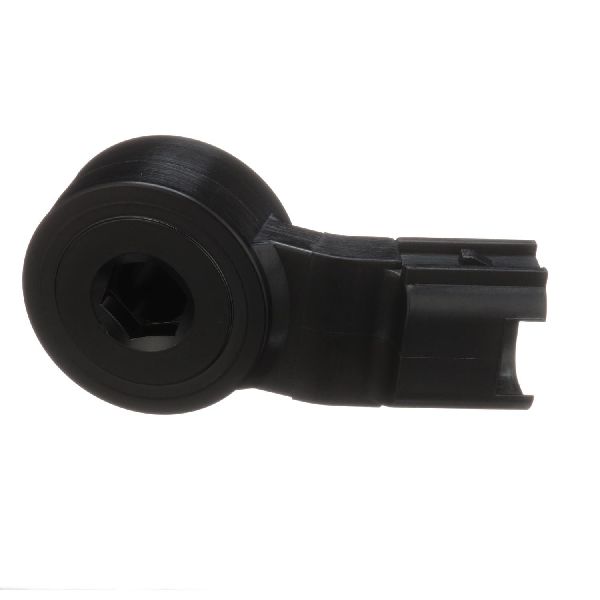
- Ignition Knock (Detonation) Sensor
(OEM #89615-06010)— This is the most common failure point for code P0331. The original part number may have been 89615-20090, which was superseded by 89615-06010.
Trusted brands: Denso (OEM Manufacturer), NTK, Standard Motor Products
OEM price range: $119-$261
Aftermarket price range: $30-$125 - Intake Manifold Gasket Set
(OEM #17177-28040)— The intake manifold must be removed to access the knock sensor. The gaskets are single-use and must be replaced to prevent vacuum leaks.
Trusted brands: Fel-Pro, Mahle, Toyota OEM
OEM price range: $20-$40
Aftermarket price range: $10-$25 - Knock Sensor Wire Harness / Connector
(OEM #82219-48010 (Harness often sold with sensor in kits))— This short harness between the sensor and the main engine loom is prone to heat damage and rodent damage. It is wise to replace it during the job. Aftermarket pigtails like Standard Motor Products S2328 are also available.
Trusted brands: Toyota OEM, Standard Motor Products, Dorman
OEM price range: $25-$60
Aftermarket price range: $15-$30
Related Codes That Often Appear With This One
- P0327 — This code indicates 'Knock Sensor 1 Circuit Low Input', which points to a similar electrical fault within the same circuit, often a short or open.
- P0328 — This code indicates 'Knock Sensor 1 Circuit High Input', also pointing to an electrical fault in the knock sensor circuit, often seen when wires are chewed.
Technical Service Bulletins (TSBs) & Recalls
- T-SB-0094-11 (Rev2): Details the repair procedure for excessive oil consumption, which involves replacing pistons and rings.
- S-SB-0031-14 (Rev1): Outlines the inspection procedure for confirming excessive oil consumption on the Scion tC and xB.
- ZE7 Warranty Enhancement: Toyota extended the warranty to cover repairs for the excessive oil consumption issue.
Platform-Specific Known Issues
- The 2AZ-FE engine was subject to a warranty enhancement program for excessive oil consumption (TSB S-SB-0031-14, T-SB-0094-11). While not directly causing P0331, severe oil consumption can lead to carbon buildup and conditions that may cause detonation, which the knock sensor is designed to detect.
Mechanic-Grade Diagnostic Values
- Knock Sensor Internal Resistance — expected: 120 to 280 kΩ at 20°C (68°F). Failure: A reading of infinity (open circuit) or a value significantly outside the specified range.
- Knock Sensor Harness Voltage — expected: 4.5 to 5.5 V. Failure: Voltage below 4.5V or above 5.5V indicates a problem in the wiring or the ECM.
- Scan Tool Live Data: Knock Feedback Value — expected: The value should change dynamically while driving under varying loads (e.g., A/C on, revving engine).. Failure: A static or unchanging value suggests the sensor or circuit is not responding.
- Wiring Harness Continuity (ECM to Sensor) — expected: Less than 1 Ω on signal and ground wires.. Failure: High resistance or an open circuit (OL) indicates a broken wire.
- Wiring Harness Short to Ground (Signal Wire) — expected: Greater than 1 MΩ between the KNK1 terminal and chassis ground.. Failure: Low resistance indicates a short circuit in the harness.
Scan Tool Commands That Help
- Toyota Techstream: Data List > Powertrain / Engine > "Knock Feedback Value" — This is a critical live data PID to monitor during a test drive. A healthy sensor circuit will show fluctuating values as the ECM adjusts timing. A static value points to a fault in the sensor or wiring.
- Generic OBD-II Scanner: Read Freeze Frame Data — When P0331 is set, freeze frame data captures the engine conditions (RPM, load, speed, etc.) at that moment. This is useful for determining if the fault occurs under specific conditions, like high RPM or heavy load.
Wiring & Ground Locations
- Knock Sensor Connector (B18) — On the back of the engine block, underneath the intake manifold.. This is the primary connection point for the sensor. It's a common spot for rodent damage and heat-related wire degradation. Pin 1 is EKNK (sensor ground), Pin 2 is KNK1 (signal).
- ECM Pin KNK1 — At the main Engine Control Module (ECM), located behind the glove compartment.. This is the terminal where the knock sensor's signal wire terminates. Testing for continuity between this pin and the sensor connector pin is a key diagnostic step.
- ECM Pin E1 — At the main Engine Control Module (ECM).. This is the sensor ground terminal in the ECM for the knock sensor circuit.
- Engine Ground Points E3, Ed, Ee — Various points on the rear of the engine block and cylinder head. E3 is top rear, Ed is left rear, Ee is on the rear.. A poor engine ground can introduce electrical noise and cause the entire sensor system, including the knock sensor, to malfunction and report false or erratic readings.
- Main Battery Ground — One primary ground cable runs from the battery negative terminal to a point under the starter on the transmission/engine block; another goes to the chassis under the battery tray.. These are the main ground paths for the entire vehicle. Corrosion or a loose connection at these points can cause a wide range of difficult-to-diagnose electrical issues, including sensor codes.
Real Owner Repair Stories
- Camry Forums user (2007 Toyota Camry 2.4L (2AZ-FE engine)) — Check Engine Light with code P0328 (High Input), which is related to P0331.
❌ Tried (didn't work) Initially soldered a new pigtail connector onto the harness after discovering rodent damage. The code persisted.
✅ What actually fixed it The user discovered the original wiring was shielded. The initial repair did not properly address the shielding, which is critical for preventing electrical interference that can cause high/low input codes. The fix requires either replacing the harness section with a properly shielded wire or carefully repairing the original shielded wire to ensure continuity of the shield to ground. - Cobalt SS forum user (Cobalt SS with LNF engine (tuned, ~23 psi boost)) — Intermittent P0331 code with slight power loss.
❌ Tried (didn't work) Added fuel additive/octane booster, which only made the code go away temporarily. Visually inspected and tested the sensor and wiring, which all appeared to be good.
✅ What actually fixed it The owner switched to a one-step colder spark plug (NGK LTR6IX-11). This resolved the code, indicating the sensor was correctly detecting minor detonation (knock) caused by the existing plugs being too hot for the tuned application.
OEM Part Supersession History
89615-20090→89615-06010— Standard part number consolidation and potential minor design revision by Toyota.
Heads up: None. The new part number (89615-06010) is the correct and direct replacement for the original.
Diagnostic Flowchart
Other Known Issues on This Vehicle
Issues unrelated to this code that are worth knowing about as an owner of this generation:
- Excessive Oil Consumption 🔴 High — Very common on 2006-2011 models. Caused by defective piston ring design. Owners may need to add a quart of oil every 1,200-1,500 miles. (Ref: T-SB-0094-11, S-SB-0031-14, Warranty Extension ZE7)
- Stripped Cylinder Head Bolt Threads 🔴 High — A known design flaw, particularly in earlier 2AZ-FE blocks (approx. 2002-2006), where the rear head bolt threads in the aluminum block can pull out, causing head gasket failure and catastrophic coolant loss. Repair requires installing thread inserts like Time-Serts or an NS300L kit. (Ref: TSB EG015-07 (recommends short block replacement))
- Melting/Breaking Rear Hatch Handle 🟡 Low — Extremely common. The rubber on the hatch release switch melts and becomes sticky, and the plastic handle assembly breaks from normal use. Aftermarket reinforced handles are available. (Ref: A limited warranty extension was offered but has since expired.)
- Water Pump Failure 🟠 Medium — Water pump seals can fail, leading to coolant leaks and potential engine overheating, which can exacerbate the head bolt issue.
- Power Window Regulator Failure 🟡 Low — Common for the front window regulators to fail, causing the window to get stuck, move slowly, or drop into the door. Caused by brittle plastic clips.
Used vs. New Parts: Buying Guide for This Vehicle
When a used part is the smart pick: For this repair, using used parts is generally not recommended for the electronic components. However, if the intake manifold itself were damaged during removal, a used manifold from a junkyard is a perfectly acceptable and cost-effective replacement.
Donor-vehicle mileage cap: roughly under 150000 miles for the part to have meaningful remaining life.
What to inspect on the donor part:
- For a wiring harness/pigtail: Inspect VERY carefully for any signs of rodent chew marks, brittle or cracked insulation, and corrosion inside the connector pins. Avoid any harness that feels stiff or has been exposed to oil leaks.
- For an intake manifold: Check for cracks, especially around mounting points. Ensure all threaded inserts for bolts are intact and not stripped.
OEM-only on this vehicle (don't cheap out):
- Ignition Knock (Detonation) Sensor
Aftermarket brands forum-validated for this vehicle:
- Denso (this is the OEM manufacturer, often available for less than the Toyota-branded box)
- NTK
Brands owners have reported issues with on this vehicle:
- Unnamed, no-brand sensors from online marketplaces. The labor to replace this sensor is too high to risk using a part with questionable quality control, as a premature failure would require repeating the entire multi-hour job.
Real Owner Stories
Aggregated from forums and TSBs cited above. Mileages and costs reflect what owners reported in those sources.
2007 Toyota Camry 2.4L 2AZ-FE
Symptoms: After the Check Engine Light came on, the owner discovered that rodents had chewed the knock sensor wires completely off behind the engine.
What fixed it: The damaged, shielded knock sensor wires had to be carefully repaired, or the entire sub-harness had to be replaced to resolve the code.
Source hint: Camry Forums - 2007 LE 2.4 Knock Sensor
Related OBD-II Codes
Frequently Asked Questions
My mechanic says the intake manifold has to be removed to fix P0331 on my 2007 Scion tC. Is this correct?
I found chewed wires near the back of my engine. Could this cause the P0331 code?
My 2008 Scion tC is burning a lot of oil. Is this related to my P0331 knock sensor code?
What is the correct resistance for the knock sensor on the 2.4L 2AZ-FE engine?
Is it safe to continue driving my Scion tC with an active P0331 code?
Do other Toyota vehicles with the 2.4L engine have this same knock sensor problem?
Helpful Videos
![How to Fix P0331 Engine Code in 2 Minutes [1 DIY Method / Only $10.58]](https://img.youtube.com/vi/Sy2Zyg1B1E4/mqdefault.jpg)
Used OEM Parts in Stock

New Aftermarket Parts Available


The information in this article is provided for general reference and educational purposes only. Vehicle specifications, procedures, and part compatibility can vary by production date, trim level, and region. Always consult your vehicle's factory service manual and verify part numbers before purchasing or performing repairs. Safety-critical components such as airbags, seat belts, and braking systems should be installed by a qualified professional.
- Scion tC:
- 🎬 Helpful Videos
- 🛍️ Shop This Part
- What's Unique About the 2005-2010 Scion tC
- Symptoms You May Notice
- Most Likely Causes
- Rare But Worth Checking
- Diagnosis Steps
- Parts You'll Likely Need
- Related Codes That Often Appear With This One
- Technical Service Bulletins (TSBs) & Recalls
- Platform-Specific Known Issues
- Mechanic-Grade Diagnostic Values
- Scan Tool Commands That Help
- Wiring & Ground Locations
- Real Owner Repair Stories
- OEM Part Supersession History
- Diagnostic Flowchart
- Other Known Issues on This Vehicle
- Used vs. New Parts: Buying Guide for This Vehicle
- Real Owner Stories
- 2007 Toyota Camry 2.4L 2AZ-FE
- Related OBD-II Codes
- Frequently Asked Questions
- 🎟️ Get 5% Off