

P0325 on 2006-2012 Toyota RAV4 3.5L V6: Knock Sensor Circuit Causes and Fixes
P0325 on a RAV4 V6 means there's a fault with the Bank 1 (rear) knock sensor circuit. The most common causes are a rodent-damaged wiring harness or a failed sensor, both located under the intake manifold. Due to the difficult access, it's highly recommended to replace both sensors and the harness at the same time. This is a labor-intensive job.
- P0325 on the RAV4 V6 points to a circuit problem with the rear knock sensor, located under the intake manifold.
- The most common cause is not the sensor itself, but a wiring harness chewed by rodents.
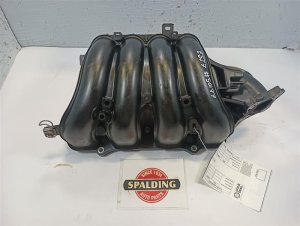
- This is a difficult DIY repair due to the location. Accessing the parts requires removing the upper and lower intake manifolds.
- To avoid doing the job twice, always replace both knock sensors, the wiring harness, and the intake gaskets at the same time.
- Use high-quality OEM (Denso) or reputable aftermarket sensors to ensure a lasting repair.
What's Unique About the 2006-2012 Toyota RAV4
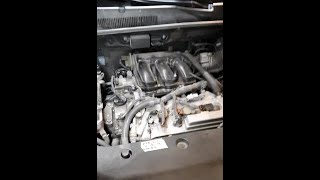
On the Toyota 2GR-FE V6 engine, the two knock sensors and their dedicated wiring harness are buried deep in the engine valley, underneath the entire lower intake manifold assembly. This location makes them a prime target for rodents seeking shelter and warmth, who often chew through the soy-based wire insulation. This makes a damaged harness an extremely common cause for P0325 and P0330 codes. The difficult access turns a simple sensor or wiring issue into a labor-intensive repair, making it critical to diagnose correctly and replace related components proactively to avoid doing the job twice.
Symptoms You May Notice
- Check Engine Light is on
- Reduced engine power and sluggish acceleration (limp mode)
- Noticeably worse fuel economy
- Transmission may not shift into overdrive gear
- Audible engine pinging or knocking, especially under load (less common, as the ECM defaults to a safe timing map)
- Replacing only the knock sensor without thoroughly inspecting or replacing the wiring harness. The code often returns because the underlying issue was chewed or brittle wires.
- Using cheap, low-quality aftermarket knock sensors. These parts often have incorrect resistance values, are not calibrated correctly, and can fail quickly, causing the code to reappear. Many forum users report issues with non-OEM sensors.
- Replacing only the Bank 1 sensor. Given the 4-6 hours of labor to access the components, it is considered poor practice not to replace the Bank 2 sensor and the harness at the same time.
Most Likely Causes
- Damaged Knock Sensor Wiring Harness 🔴 High Probability The harness is located in the warm, protected engine valley, which attracts rodents. The soy-based wiring insulation used by many manufacturers during this period is a known attractant, leading to chewed wires. Owners frequently discover nests and wire damage upon removing the intake manifold.
How to confirm: After removing the upper and lower intake manifolds, visually inspect the wiring harness (Part No. 82219-06010) that connects the two knock sensors for signs of chewing, fraying, or brittle insulation. Damage is often found right at the connector ends.
Typical fix: Replace the knock sensor sub-harness. While splicing is possible for minor damage, the heat and labor involved make a full harness replacement the most reliable long-term solution. Some owners proactively wrap the new harness in capsaicin-infused or specialized rodent-repellent tape.
Est. part cost: $25-$50 for the OEM harness - Failed Knock Sensor (Bank 1) 🟡 Medium Probability The sensor operates in a high-heat environment deep within the engine valley and can fail electronically over time due to thermal stress.
How to confirm: After accessing the sensor, test its resistance with a multimeter. Disconnect the sensor and measure between its two pins. 🎬 Watch: How to test knock sensor resistance with a multimeter. A healthy sensor should read between 120k and 280k ohms at room temperature (68°F/20°C). An open circuit (infinite resistance) or a reading far outside this range indicates a bad sensor.
Typical fix: Replace the knock sensor (Part No. 89615-06010). It is strongly recommended to replace both sensors (Bank 1 and Bank 2) and the harness at the same time due to the high labor cost to access them. Using OEM/Denso sensors is critical, as aftermarket sensors are known to fail prematurely.
Est. part cost: $120-$180 per OEM sensor - Corroded or Loose Electrical Connector ⚪ Low Probability Moisture can sometimes find its way into the engine valley, especially if the manifold gaskets are old, leading to corrosion on the connector pins over many years.
How to confirm: Inspect the connector pins on the harness and the sensor for any green or white corrosion or physical damage. Also check the main engine harness connector where this sub-harness plugs in.
Typical fix: Clean the connectors with an electrical contact cleaner. If the connector is damaged, a new pigtail may need to be spliced in.
Est. part cost: $15-$30 for a pigtail
Rare But Worth Checking
- Faulty Engine Control Module (ECM): This is extremely rare. Before condemning the ECM, all other possibilities (sensor, wiring, connections) must be exhaustively ruled out. An ECM failure might be suspected if the code returns immediately after replacing all circuit components with known-good OEM parts.
Diagnosis Steps
- Scan the vehicle for codes. Confirm P0325 is present. Note any other codes, especially P0330, as this strongly points to the harness.
- Plan for disassembly. This is an advanced DIY job. You will need to remove the air intake assembly, throttle body, and both the upper (surge tank) and 🎬 See this step-by-step walkthrough of the manifold removal and replacement. lower intake manifolds.
- Once the lower intake manifold is removed, you will have access to the engine valley where the two knock sensors and their harness are located.
- Critical Step: Visually inspect the entire knock sensor harness (Part No. 82219-06010) for signs of rodent damage (chewed wires), brittleness, or heat damage. This is the most likely culprit. Check the connectors as well.
- If the harness is damaged, it must be replaced. If it looks intact, proceed with testing the sensors.
- Disconnect the connector for the Bank 1 sensor (rear). Using a multimeter set to Ohms, measure the resistance across the sensor's terminals. It should be between 120k-280k ohms at 68°F. If it's out of spec, the sensor is bad.
- Best Practice: Regardless of what you find, replace BOTH sensors and the harness simultaneously. The cost of the extra parts is minimal compared to the labor cost of a potential second repair.
- When reassembling, ensure the new sensors are torqued to the correct specification, 🎬 Watch: A mechanic's guide to installing and torquing the sensors. which is 15 ft-lbs (20 Nm). Do not overtighten, as it can damage the piezoelectric crystal inside the new sensor and make it overly sensitive or fail.
- Always use new intake manifold gaskets during reassembly to prevent vacuum leaks. Clean the mating surfaces thoroughly before installing the new gaskets.
- After reassembly, clear the codes with a scan tool and perform a comprehensive test drive to ensure the repair was successful.
Parts You'll Likely Need
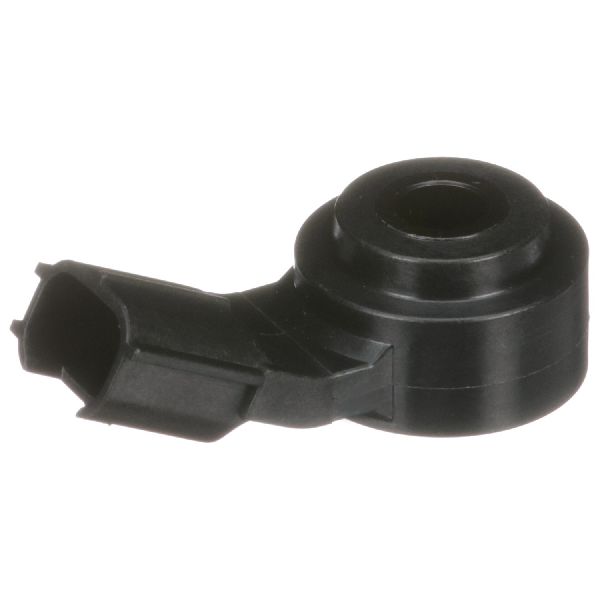
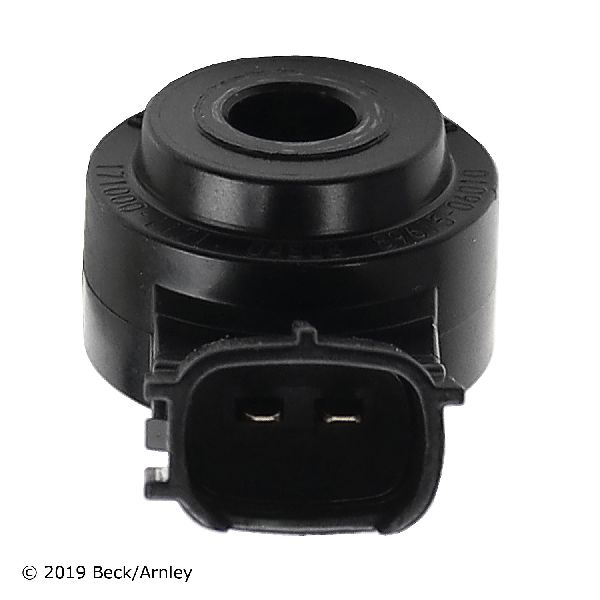
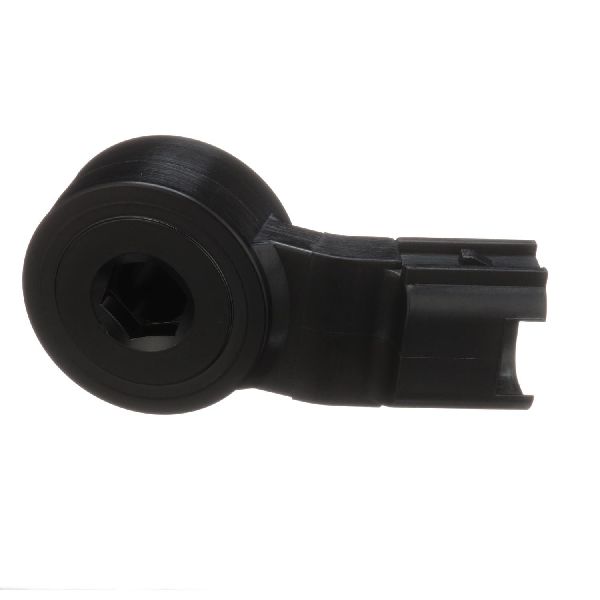
- Knock Sensor
(OEM #89615-06010)— This is the sensor that detects engine knock. It can fail electronically, triggering the circuit code. Bank 1 (P0325) is the rear sensor. It is highly recommended to replace both.
Trusted brands: Toyota/Denso (OEM), NGK/NTK
OEM price range: $120-$180
Aftermarket price range: $40-$90 - Knock Sensor Wire Harness
(OEM #82219-06010)— This sub-harness connects both knock sensors to the main engine harness. It is frequently damaged by rodents or becomes brittle from heat, causing an open or short in the circuit.
Trusted brands: Toyota (OEM), Dorman
OEM price range: $25-$50
Aftermarket price range: $20-$35 - Intake Manifold Gasket Set
(OEM #Fel-Pro MS 96736 (Aftermarket example))— The upper and lower intake manifolds must be removed for this job. The gaskets are one-time use and must be replaced to prevent vacuum leaks.
Trusted brands: Fel-Pro, Mahle, Toyota (OEM)
OEM price range: $40-$60
Aftermarket price range: $20-$40
Related Codes That Often Appear With This One
- P0330 — P0330 is the identical code but for Bank 2 (the front cylinder bank). If rodents have damaged the harness, they often chew the wires for both sensors, causing both codes to appear simultaneously. If you have both codes, a damaged harness is almost certainly the cause.
Platform-Specific Known Issues
- A user on RAV4World forums documented their P0325 and P0330 repair on a 2007 V6, finding a mouse nest and completely chewed-through harness under the intake manifold. They replaced both sensors and the harness to resolve the issue.
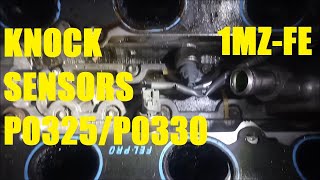
- Multiple YouTube videos by independent mechanics showcase the 2GR-FE knock sensor replacement, consistently pointing to rodent damage on the harness as the primary cause found during teardown.
Mechanic-Grade Diagnostic Values
- Knock Sensor Internal Resistance — expected: 120kΩ to 280kΩ at 20°C (68°F). Failure: An open circuit (infinite resistance) or a reading significantly outside the specified range.
- Knock Sensor Circuit to Ground Resistance at ECM — expected: 1 MΩ or higher. Failure: Low resistance indicates a short to ground in the wiring harness.
- Knock Sensor Mounting Bolt Torque — expected: 15 ft-lbs (20 Nm). Failure: Under-torquing can lead to poor signal detection; over-torquing can damage the sensor's internal piezoelectric element.
Scan Tool Commands That Help
- Toyota Techstream: Freeze Frame Data Analysis — Use to review engine conditions (RPM, load, temp, etc.) at the exact moment the P0325 code was set. This helps determine if the fault occurs under specific conditions, like high RPM, which is a condition for the DTC test to run.
- Oscilloscope / Advanced Scan Tool: Live Waveform Analysis — Connect to the KNK1 (Bank 1) and EKNK/E1 (Ground) pins at the ECM to view the sensor's output waveform while the engine is running. A complete lack of signal or a noisy/erratic signal when tapping the block points to a wiring or sensor issue. The normal vibration frequency is around 7.1-7.6 kHz.
Wiring & Ground Locations
- KNK1 (Knock Sensor 1 Signal) — At the Engine Control Module (ECM). On a 2-connector ECM, this is often on the larger connector (e.g., C55, pin 95). The exact pin varies by year and specific ECM, so a wiring diagram is essential.. This is the primary terminal for testing the Bank 1 knock sensor signal directly at the ECM, bypassing all engine bay wiring to isolate the fault between the sensor/harness and the ECM.
- EKNK / E1 (Sensor Ground) — At the Engine Control Module (ECM). This is the ground reference pin for the knock sensor circuit (e.g., C55, pin 94).. A bad ground connection at the ECM can cause a floating signal or incorrect readings, triggering a circuit code even if the sensor and signal wire are good.
- Engine Harness Grounds — The 2GR-FE has several critical harness grounds bolted to the engine. One is on the front cylinder head (Bank 2) and another is on the rear head (Bank 1), often near the valve covers and attaching to a boss on the side of the head.. While the knock sensor has a dedicated ground return to the ECM, overall sensor performance can be affected by poor engine grounding. A loose or corroded main engine ground can introduce electrical noise that may interfere with sensitive sensor signals.
Real Owner Repair Stories
- YouTube video by user 'Rob P' (2005-2012 Toyota RAV4 V6 (2GR-FE)) — Check Engine Light, VSC, and 4WD lights on. Transmission would not shift into overdrive. Cruise control inoperative. Code P0333 (Bank 2 High Input) was present, but the cause is identical for P0325.
❌ Tried (didn't work) The owner suspected rodent damage from the start and did not report trying other fixes first.
✅ What actually fixed it The owner disassembled the intake manifold and found significant rodent nesting material and a chewed-through knock sensor wiring harness. Replacing the harness and sensors resolved the codes and symptoms.
OEM Part Supersession History
89615-20090→89615-06010— Part consolidation and potential design revision across multiple Toyota models.82219-41010→82219-06010— Part update for the knock sensor sub-harness.
Model Year Variations Within This Range
- 2006-2012: The 2GR-FE V6 engine and its core components, including the knock sensor locations and part numbers, remained consistent throughout the 2006-2012 RAV4 generation. A mid-cycle refresh for the 2009 model year was primarily cosmetic and did not affect the engine or this specific repair.
Diagnostic Flowchart
Other Known Issues on This Vehicle
Issues unrelated to this code that are worth knowing about as an owner of this generation:
- Rupturing VVT-i Oil Supply Hose 🔴 High — Common on 2006-2009 models. An original rubber/metal line can fail without warning, causing rapid oil loss and catastrophic engine failure. (Ref: Limited Service Campaign (LSC) 90K, later extended. Toyota replaced the original rubber hose with an all-metal line (Part No. 15772-31030).)
- Leaking/Failing Water Pump 🟠 Medium — Known to fail prematurely, sometimes before 100,000 miles. Can start as a slow leak or a bearing noise, but if ignored can lead to overheating. (Ref: No official recall, but updated parts are available. Replacement is labor-intensive.)
- Clunking Intermediate Steering Shaft 🟡 Low — Common on 2006-2008 models. Owners report a clunking or popping noise from the steering column when turning at low speeds. (Ref: Toyota issued TSB ST002-08 (later superseded) with an updated intermediate shaft (Part No. 45260-42090) to fix the issue.)
- Brief Engine Rattle at Cold Startup 🟡 Low — Affects some 2AR-FE (4-cyl) engines more than the 2GR-FE, but can occur. A brief rattle for about one second after a cold start, related to the VVT-i cam gear actuator. (Ref: TSB T-SB-0041-13 addresses this for the 2AR-FE engine by replacing the intake camshaft timing gear assembly.)
Used vs. New Parts: Buying Guide for This Vehicle
When a used part is the smart pick: For this specific repair, using used parts is strongly discouraged. The primary failure points are an electronic sensor and a wiring harness that becomes brittle with heat and is a target for rodents. The labor to access these parts is extensive (4-6 hours), making the risk of a premature failure from a used part not worth the small cost savings.
What to inspect on the donor part:
- Not applicable as used parts are not recommended.
OEM-only on this vehicle (don't cheap out):
- Knock Sensor: It is critical to use OEM (Toyota/Denso) or a top-tier OEM supplier like NGK/NTK. Aftermarket sensors are widely reported on forums to have incorrect resistance values, leading to immediate or premature failure and the return of P0325/P0330 codes.
- Knock Sensor Harness: The OEM harness (82219-06010) is inexpensive and designed for the high-heat environment. While some aftermarket versions exist, the reliability of the OEM part is worth the small price difference given the labor involved.
Aftermarket brands forum-validated for this vehicle:
- Fel-Pro (for Intake Manifold Gaskets)
- Mahle (for Intake Manifold Gaskets)
Brands owners have reported issues with on this vehicle:
- Generic, unbranded knock sensors from online marketplaces. These are the most common source of repeat failures after this repair.
Real Owner Stories
Aggregated from forums and TSBs cited above. Mileages and costs reflect what owners reported in those sources.
2007 Toyota RAV4 V6
Symptoms: Check engine light with P0325 and P0330 codes; found a mouse nest and completely chewed-through harness under the intake manifold.
What fixed it: Replaced both knock sensors and the sub-harness.
Source hint: RAV4World.com forum user documented in 'vehicle_specific_issues'
2006-2012 Toyota RAV4 3.5L V6
Symptoms: P0325 code, sluggish acceleration (limp mode), and noticeably worse fuel economy.
What fixed it: Replacement of the knock sensor sub-harness (Part No. 82219-06010) due to rodent damage found during teardown.
Source hint: YouTube videos by independent mechanics cited in 'vehicle_specific_issues'
2006-2012 Toyota RAV4 V6
Symptoms: P0325 code; visual inspection showed green/white corrosion on the connector pins in the engine valley.
What fixed it: Cleaned the connectors with electrical contact cleaner.
Source hint: Common causes section regarding 'Corroded or Loose Electrical Connector'
Related OBD-II Codes
Frequently Asked Questions
Why is the knock sensor harness on my 2006-2012 RAV4 V6 so prone to failure?
Can I just replace the Bank 1 sensor (P0325) without removing the whole intake manifold?
What are the specific part numbers I need for a P0325 repair on my RAV4 3.5L?
Is there a way to prevent rodents from chewing the new harness after I fix it?
What is the correct torque spec for the new knock sensors on the 2GR-FE engine?
How can I test if the sensor itself is bad before buying a new one?
Helpful Videos
Used OEM Parts in Stock



New Aftermarket Parts Available


The information in this article is provided for general reference and educational purposes only. Vehicle specifications, procedures, and part compatibility can vary by production date, trim level, and region. Always consult your vehicle's factory service manual and verify part numbers before purchasing or performing repairs. Safety-critical components such as airbags, seat belts, and braking systems should be installed by a qualified professional.
- Toyota RAV4:
- 🎬 Helpful Videos
- 🛍️ Shop This Part
- What's Unique About the 2006-2012 Toyota RAV4
- Symptoms You May Notice
- Most Likely Causes
- Rare But Worth Checking
- Diagnosis Steps
- Parts You'll Likely Need
- Related Codes That Often Appear With This One
- Platform-Specific Known Issues
- Mechanic-Grade Diagnostic Values
- Scan Tool Commands That Help
- Wiring & Ground Locations
- Real Owner Repair Stories
- OEM Part Supersession History
- Model Year Variations Within This Range
- Diagnostic Flowchart
- Other Known Issues on This Vehicle
- Used vs. New Parts: Buying Guide for This Vehicle
- Real Owner Stories
- 2007 Toyota RAV4 V6
- 2006-2012 Toyota RAV4 3.5L V6
- 2006-2012 Toyota RAV4 V6
- Related OBD-II Codes
- Frequently Asked Questions
- 🎟️ Get 5% Off