

P0137 on 2011-2016 Kia Optima Hybrid: Causes and Fixes for O2 Sensor Low Voltage
This code almost always points to a faulty downstream oxygen sensor (Bank 1, Sensor 2). Owners typically resolve this by replacing the sensor. Expect to pay between $50-$120 for an aftermarket sensor (e.g., from brands like DIY Solutions or Walker) and up to $200 for an OEM part. It's a straightforward DIY replacement for those with basic tools, often only requiring an O2 sensor socket.
- P0137 on your Optima Hybrid means the downstream O2 sensor is sending a low voltage signal.
- The most likely cause by far is a failed O2 sensor (Bank 1, Sensor 2).
- Before buying parts, check for exhaust leaks between the catalytic converter and the sensor.
- Also, inspect the sensor's wiring and connector for any obvious damage.
- Replacing the sensor is a DIY-friendly job that can save you significant labor costs.
What's Unique About the 2011-2016 Kia Optima
For the 2011-2016 Optima Hybrid, the P0137 code is a very common and straightforward issue, typically related to the sensor itself failing from age and exposure. There are no widespread, unique platform-specific defects that cause this code. However, it's worth noting that Kia has issued several TSBs for ECU logic updates on this platform, such as PI1802 for the Knock Sensor Detection System (KSDS). While this TSB is intended to detect rod bearing wear and will set a P1326 code, not P0137, ensuring your vehicle's software is up-to-date is a good general practice. The P0137 issue remains almost exclusively a sensor or wiring problem.
Generation note: The 2011-2016 year range covers the third generation (TF) of the Kia Optima, including its hybrid variant. The causes and fixes for P0137 are consistent across this generation and also apply to its platform-mate, the Hyundai Sonata Hybrid of the same era.
Symptoms You May Notice
- Check Engine Light is on
- Decreased fuel efficiency
- Rough or unstable idle
- Failing a vehicle emissions test
- Noticeable odor of exhaust fumes
- Hesitation or lack of power during acceleration
- Replacing the upstream O2 sensor (Sensor 1) instead of the downstream one (Sensor 2).
- Replacing the catalytic converter when the actual problem is a cheap and simple O2 sensor.
- Clearing the code without diagnosis. Sometimes a temporary glitch can set the code, but if it returns, a real fault exists.
Most Likely Causes
- Faulty Downstream Oxygen (O2) Sensor 🔴 High Probability O2 sensors are wear-and-tear items exposed to extreme heat and exhaust gases. The internal heating element can fail, or the sensor can simply degrade over its 60,000-100,000 mile lifespan, making it the most common reason for this code.
How to confirm: Use an OBD-II scanner to monitor the live data for the Bank 1 Sensor 2 voltage ('O2S B1S2'). A healthy downstream sensor should show a relatively stable voltage, typically between 0.6V and 0.8V, when the engine is warm and at a steady RPM. If the voltage is stuck low (e.g., below 0.2V) or is not responding, the sensor is almost certainly bad.
Typical fix: Replace the Bank 1, Sensor 2 oxygen sensor. This often requires a special O2 sensor socket to get around the wire, but is otherwise a simple unbolt-and-replace job.
Est. part cost: $50-$250 - Exhaust Leak 🟡 Medium Probability Corrosion or failed gaskets can create leaks in the exhaust system, especially in regions that use road salt. A leak located before the downstream sensor can allow outside air into the exhaust stream, which the sensor will read as a lean (low voltage) condition.
How to confirm: Visually inspect the exhaust pipes and flanges between the catalytic converter and the downstream O2 sensor for cracks, holes, or black soot marks indicating a leak. A common method is to have a helper briefly block the tailpipe with a shop towel (use gloves) while the engine is running; this will increase pressure and make leaks more audible.
Typical fix: Repair the leak by replacing the damaged exhaust section or gasket.
Est. part cost: $20-$300 - Damaged Wiring or Connectors ⚪ Low Probability The wiring harness for the O2 sensor runs under the vehicle and is exposed to road debris, moisture, and heat. Wires can become frayed, melted on the exhaust, or corroded at the connector pins, causing a short or open circuit that results in a low voltage reading.
How to confirm: Visually inspect the entire wiring harness from the O2 sensor to where it enters the cabin. Unplug the connector and check for any bent, corroded, or recessed pins. Use a multimeter to check for continuity and proper voltage at the connector according to the vehicle's service manual.
Typical fix: Repair the damaged section of the wiring harness or clean/replace the connector.
Est. part cost: $10-$100
Rare But Worth Checking
- Engine Running Lean: This is rare to see without other codes. If the engine is running lean (too much air, not enough fuel), it can cause a legitimate low voltage reading. However, you would almost certainly have other codes like P0171 (System Too Lean) or P2096 (Post Catalyst Fuel Trim System Too Lean). If you have these codes, address the cause of the lean condition first (e.g., vacuum leak, fuel pressure issue).
- Faulty Powertrain Control Module (PCM): PCM failure is extremely rare but possible. This should only be considered after all other possibilities, including the sensor, wiring, and exhaust system, have been thoroughly ruled out by a professional.
- Blown Fuse: The O2 sensor's internal heater circuit is often protected by a fuse. If this fuse blows, the sensor may not heat up properly, leading to incorrect low voltage readings. Check the fuse box in the engine compartment for a fuse labeled 'SENSOR' or similar.
Diagnosis Steps
- Connect an OBD-II scanner and confirm P0137 is the primary code. Note any other codes present, especially P0037, P0136, or P2096.
- Use the scanner's live data feature to observe the voltage of 'O2S B1S2' (Bank 1, Sensor 2) with the engine fully warmed up. At idle, it should be fairly steady, around 0.6-0.8 volts.
- If the voltage is stuck low (e.g., <0.2V), it strongly suggests a bad sensor or a significant exhaust leak upstream of the sensor.
- Turn off the engine and allow the exhaust to cool. Visually inspect the exhaust system from the catalytic converter back for any signs of leaks, such as cracks or black soot.
- Locate the downstream O2 sensor. Inspect its wiring harness and connector for any signs of melting, corrosion, or physical damage.
- Check the fuse for the O2 sensor heater circuit, typically located in the engine bay fuse box.
- If the wiring and fuse are good and no exhaust leaks are found, the O2 sensor itself is the most likely culprit and should be replaced.
- For advanced diagnosis, you can use a multimeter to test the sensor's heater circuit resistance and check for voltage and ground at the connector, referencing a service manual for specifications.
Parts You'll Likely Need
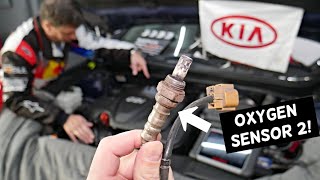
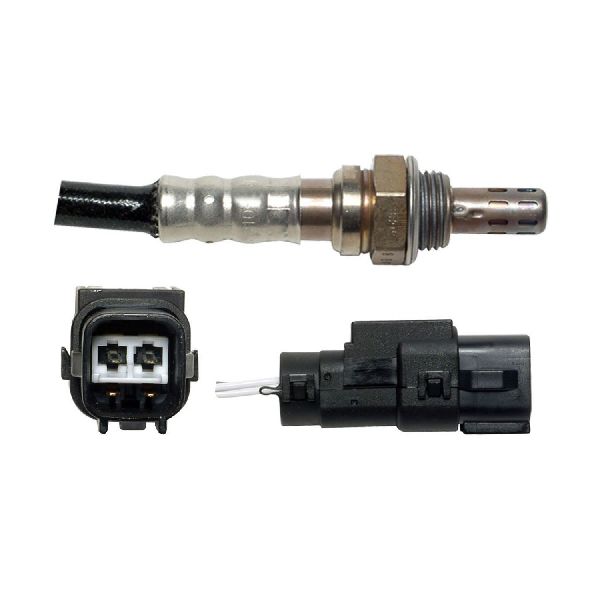
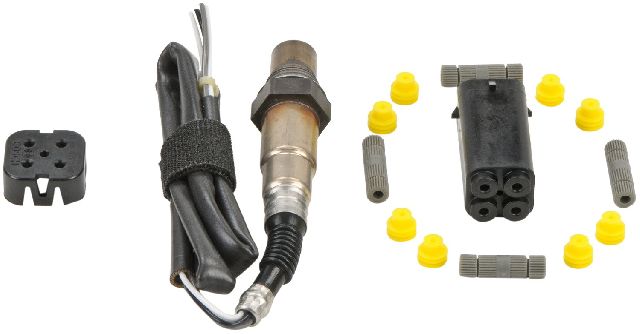
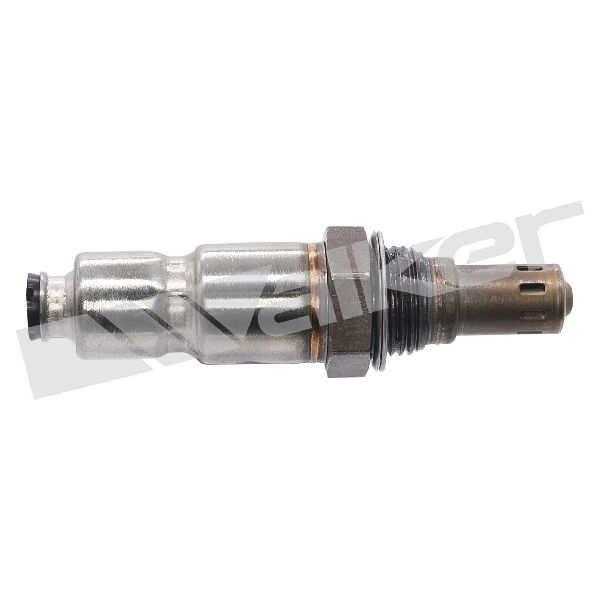
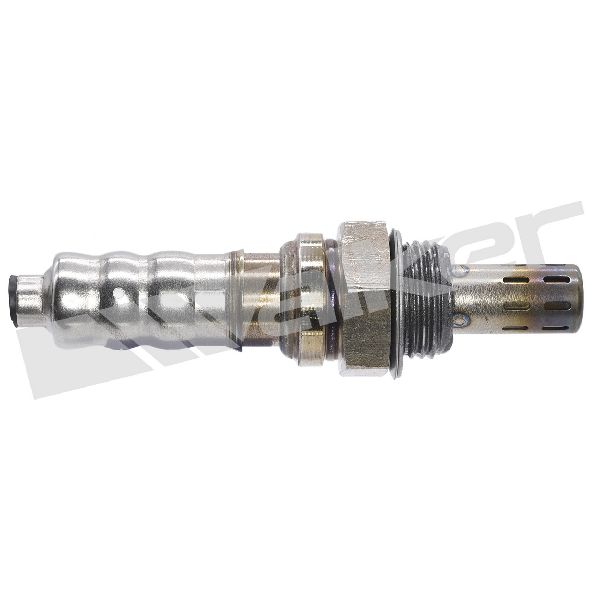
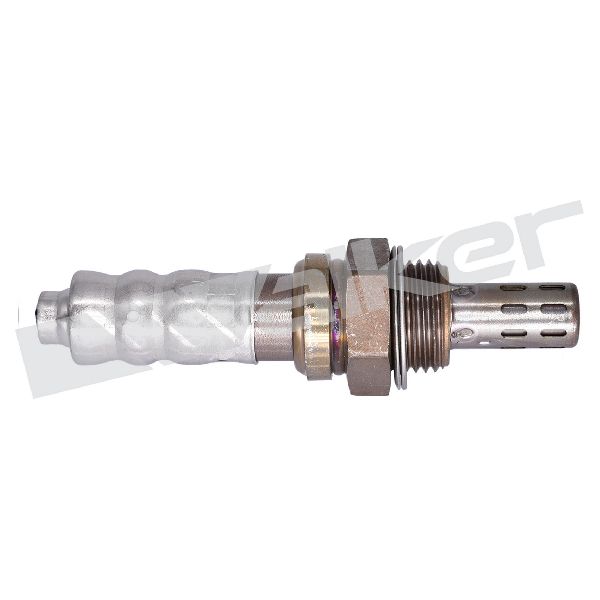
- Downstream Oxygen Sensor (Bank 1, Sensor 2)
(OEM #39210-2G200)— This sensor is the most frequent point of failure for a P0137 code. It directly measures the value that is reported as 'low voltage'. Part number varies by specific production date.
Trusted brands: Bosch, Denso, NGK/NTK, Walker, DIY Solutions
OEM price range: $130-$200
Aftermarket price range: $50-$120
Related Codes That Often Appear With This One
- P0136 — This code indicates a general malfunction in the same O2 sensor circuit (Bank 1, Sensor 2).
- P0037 — This code points to a problem with the heater circuit within the same Bank 1, Sensor 2 oxygen sensor. Since the heater is part of the sensor assembly, the fix is the same: replace the sensor.
- P2096 — This code indicates the post-catalyst fuel trim system is too lean. An exhaust leak or a failing O2 sensor giving false low readings can trigger both P0137 and P2096.
Technical Service Bulletins (TSBs) & Recalls
- TSB PI1802: This is a Product Improvement Campaign for the Knock Sensor Detection System (KSDS) ECU logic. It is NOT a direct cause or fix for P0137, but rather an important software update for the Theta II engine to detect premature bearing wear, which would trigger code P1326.
Platform-Specific Known Issues
- While not directly causing P0137, the NHTSA records for similar Kia models show this code can appear alongside a host of other engine-related codes during significant powertrain issues, as seen in owner complaints for the Sorento (ODI #11513767, #11499800). This suggests that while P0137 is often a standalone sensor failure, it can also be a symptom of a larger problem if many other codes are present.
Mechanic-Grade Diagnostic Values
- Downstream O2 Sensor (B1S2) Signal Voltage — expected: A steady voltage between 0.6V and 0.8V when the engine is warm and at a constant RPM.. Failure: The PCM logs P0137 when the sensor's output voltage drops below 400 millivolts (0.4V) for 20 seconds or more.
- O2 Sensor Heater Circuit Resistance — expected: While a specific value for this exact model was not found, typical O2 sensor heater circuits have a resistance between 5 and 15 Ohms. A reading of infinity indicates an open circuit (bad heater), and a reading near zero indicates a short.. Failure: An out-of-spec resistance reading. This would typically set a heater circuit code like P0037.
- Wiring Harness Continuity — expected: Less than 1.0 Ohm of resistance between the sensor connector pin and the corresponding PCM pin.. Failure: Resistance above 1.0 Ohm suggests a compromised wire or corroded connection.
Scan Tool Commands That Help
- Kia GDS (Global Diagnostic System) or advanced aftermarket scanner: Live Data Graphing for O2 Sensor B1S2 — This is the primary diagnostic step. It allows a technician to visually confirm if the sensor's voltage is stuck low, fluctuating erratically, or responding slowly, which points directly to a sensor or wiring issue versus an intermittent fault.
Wiring & Ground Locations
- Downstream O2 Sensor Connector — The connector for the downstream sensor is typically mounted on a bracket attached to the vehicle's underbody, near the sensor's location on the exhaust pipe after the catalytic converter.. This connector is a common point for corrosion or damage from road debris. A poor connection here can cause the low voltage reading that triggers P0137.
- Sensor Physical Details — The sensor itself has a thread size of M18x1.5 and typically uses a 4-wire square female connector.. Knowing the thread size is critical for using the correct re-threading tool if the exhaust bung threads are damaged. The wire and connector details are essential for sourcing the correct replacement part.
Real Owner Repair Stories
- YouTube channel 'Car Confections' (2013 Kia Optima) — Check Engine Light with code P0137 for Bank 1 Sensor 2.
❌ Tried (didn't work) The video directly proceeds to replacement, implying no other steps were taken.
✅ What actually fixed it The problem was resolved by replacing the downstream (Bank 1, Sensor 2) oxygen sensor with a new NTK sensor. After replacement and clearing the code, the Check Engine Light did not return.
OEM Part Supersession History
39210-2G200→N/A, still current— This is the primary OEM part number for the downstream sensor on many 2.4L models in this range.
Heads up: Some parts listings show different part numbers for vehicles with/without California Emissions, or for manual vs. automatic transmissions (though the hybrid is auto-only). Always verify fitment with VIN. For example, part 39210-2G400 is listed for some manual transmission models.N/A→N/A— Aftermarket cross-references for 39210-2G200 include Denso 234-4238 and NGK/NTK 25199.
Model Year Variations Within This Range
- 2011-2013: Initial third-generation design. The Optima Hybrid was introduced in 2011.
- 2014-2016: Received a mid-cycle refresh for the 2014 model year, including redesigned front/rear bumpers, LED lighting options, and interior updates like a new instrument cluster screen. The underlying 2.4L hybrid powertrain and the cause of P0137 remained the same.
Diagnostic Flowchart
Other Known Issues on This Vehicle
Issues unrelated to this code that are worth knowing about as an owner of this generation:
- Catastrophic Engine Failure (Theta II) 🔴 High — Widespread across 2011-2019 models with the 2.0L and 2.4L GDI engines. Failure can occur at any mileage, often before 100,000 miles. Caused by metallic debris from manufacturing restricting oil flow, leading to rod bearing failure. (Ref: Multiple recalls (e.g., NHTSA 21V844) and a class-action lawsuit settlement resulted in a lifetime warranty extension for the engine short block for affected VINs. TSB PI1802 installs the Knock Sensor Detection System (KSDS) to warn of impending failure.)
- Hybrid Brake Actuator Failure 🔴 High — Common in hybrid models as they age. The actuator pump motor wears out from internal leaks, leading to a loss of braking assist and multiple warning lights (ABS, Brake).
- Steering Column Gear Wear 🟠 Medium — Owners report stiff steering or a clicking/locking feeling, especially at low speeds. This is often caused by premature wear of a plastic gear within the electronic power steering column. (Ref: Several TSBs have been issued, but no universal recall covers all affected models.)
- Electronic Parking Brake (EPB) Actuator Failure 🟠 Medium — The EPB actuator motor or its internal gears can fail, causing grinding noises and an inability to engage or disengage the parking brake. (Ref: Related recalls exist for the console switch (Hyundai Recall 164) and TSBs for related logic (Kia SA317), but often the actuator itself requires replacement.)
- General Electrical Problems 🟡 Low — Reports include flickering interior lights, infotainment system glitches, and parasitic battery drain even with a new battery. These issues can be intermittent and difficult to diagnose, sometimes pointing to faulty control modules or software. (Ref: Various software updates have been released by Kia to address specific electronic issues.)
Used vs. New Parts: Buying Guide for This Vehicle
When a used part is the smart pick: It is strongly recommended to avoid used oxygen sensors. They are a wear-and-tear item with a finite lifespan (typically 60k-100k miles). A used sensor from a junkyard has unknown remaining life and may fail shortly after installation, wasting time and money.
What to inspect on the donor part:
- Not applicable as used sensors are not recommended.
OEM-only on this vehicle (don't cheap out):
- While not strictly OEM-only, using a reputable brand is critical. Avoid generic, unbranded sensors.
Aftermarket brands forum-validated for this vehicle:
- NTK (often the original equipment manufacturer)
- Denso
- Bosch
Brands owners have reported issues with on this vehicle:
- Unbranded, 'white-box' sensors from online marketplaces. Forum discussions consistently advise against the cheapest available options as they often fail prematurely or are not calibrated correctly for the vehicle.
Real Owner Stories
Aggregated from forums and TSBs cited above. Mileages and costs reflect what owners reported in those sources.
2011-2016 Kia Optima 2.4L Hybrid
Symptoms: The owner discovered the P0137 code and was concerned about the severity and whether the vehicle would pass a state inspection.
What fixed it: The owner monitored the O2 sensors and found them to be operating normally, suggesting the code may have been a temporary electrical glitch or required further monitoring.
Source hint: Reddit (r/MechanicAdvice)
Kia Ceed (Related Model)
Symptoms: The owner reported a P0137 code indicating low voltage for the lambda sensor behind the catalytic converter.
What fixed it: After monitoring the sensor and seeing normal voltage, the owner cleared the code and it did not return, indicating a temporary electrical glitch.
Source hint: Kia Forums (kia-forums.com)
Related OBD-II Codes
Frequently Asked Questions
Does TSB PI1802 for the Knock Sensor Detection System (KSDS) fix my P0137 code?
Is the P0137 code related to the Theta II engine recalls on my 2011-2016 Kia Optima Hybrid?
How long should the downstream O2 sensor last on my Optima before I see this code?
Can I use parts from a Hyundai Sonata Hybrid to fix this?
What voltage should I see for 'O2S B1S2' on my scanner to confirm the sensor is good?
Could a simple fuse be the reason for my P0137 code?
Helpful Videos
We Have This Part in Stock

The information in this article is provided for general reference and educational purposes only. Vehicle specifications, procedures, and part compatibility can vary by production date, trim level, and region. Always consult your vehicle's factory service manual and verify part numbers before purchasing or performing repairs. Safety-critical components such as airbags, seat belts, and braking systems should be installed by a qualified professional.
- Kia Optima:
- 🎬 Helpful Videos
- 🛍️ Shop This Part
- What's Unique About the 2011-2016 Kia Optima
- Symptoms You May Notice
- Most Likely Causes
- Rare But Worth Checking
- Diagnosis Steps
- Parts You'll Likely Need
- Related Codes That Often Appear With This One
- Technical Service Bulletins (TSBs) & Recalls
- Platform-Specific Known Issues
- Mechanic-Grade Diagnostic Values
- Scan Tool Commands That Help
- Wiring & Ground Locations
- Real Owner Repair Stories
- OEM Part Supersession History
- Model Year Variations Within This Range
- Diagnostic Flowchart
- Other Known Issues on This Vehicle
- Used vs. New Parts: Buying Guide for This Vehicle
- Real Owner Stories
- 2011-2016 Kia Optima 2.4L Hybrid
- Kia Ceed (Related Model)
- Related OBD-II Codes
- Frequently Asked Questions
- 🎟️ Get 5% Off