

P0134 on 1998-2011 Mercury Grand Marquis 4.6L V8: Causes and Fixes for O2 Sensor Inactivity
This code almost always means the upstream oxygen sensor on the passenger side has failed. A new sensor is the most common fix. Before replacing, check the associated 20A fuse. Expect to pay $35-$70 for a quality aftermarket sensor (NTK or Denso are often preferred by owners) and around $65-$85 for an OEM Motorcraft part.
- P0134 on your Grand Marquis points directly to the passenger-side upstream O2 sensor.
- Before buying parts, perform a quick visual inspection of the sensor's wiring for any obvious melting or damage, paying attention to the exhaust manifold and transmission dipstick tube areas.
- Also check the O2 sensor heater fuse (Fuse #13, 20A in the engine bay fuse box for 2003+ models); a simple blown fuse can cause this code.
- If the wiring and fuse are okay, the sensor itself has almost certainly failed and needs to be replaced. Many owners recommend using an NTK or Denso brand replacement.
What's Unique About the 1998-2011 Mercury Grand Marquis
On the robust Panther platform, which includes the Grand Marquis, Crown Victoria, and Town Car, the 4.6L V8 and its emissions systems are generally reliable but not immune to age. The P0134 code is a straightforward issue, typically stemming from the sensor itself failing after many years and miles. Due to the engine bay's spacious layout, access to the Bank 1 (passenger side) upstream sensor is better than in many other V8 vehicles, making it a common DIY repair. Owners on forums like crownvic.net frequently document this as a manageable one-hour job.
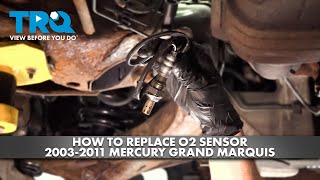
🎬 See how to replace the sensor on 1998-2002 modelsGeneration note: The 1998-2011 range covers two key versions of the Grand Marquis: the 1998-2002 models and the updated 2003-2011 models 🎬 Watch: Step-by-step O2 sensor replacement for 2003-2011 models which received a new frame and chassis. While the engine is the same, fuse box layouts and some wiring may differ. For example, on 2003 and newer models, the O2 sensor heater fuse is typically a 20A fuse (position 13) in the engine compartment fuse box.
Symptoms You May Notice
- Check Engine Light is on
- Reduced fuel economy
- Rough or unstable idle
- Engine hesitation during acceleration
- Failing a state emissions test
- Black smoke from exhaust or smell of gasoline if running excessively rich
- Replacing the wrong O2 sensor (e.g., the downstream sensor or the sensor on the driver's side). 'Bank 1' is always the passenger side on a Ford V8, and 'Sensor 1' is always upstream (before the catalytic converter).
- Replacing the O2 sensor repeatedly without checking the wiring harness for damage or testing the heater circuit fuse.
Most Likely Causes
- Failed Bank 1, Sensor 1 Oxygen Sensor 🔴 High Probability Oxygen sensors are a wear-and-tear item and typically fail after 80,000-100,000 miles. The internal heating element, which is necessary for the sensor to activate quickly, is a frequent point of failure and will prevent the sensor from sending a signal. 🎬 Watch: Understanding O2 sensor heater circuit failures and fixes
How to confirm: Using a scan tool, watch the live data for 'O2S11' (or similar). A healthy sensor's voltage will fluctuate rapidly between approximately 0.1 and 0.9 volts. If the voltage is stuck, often around 0.45V, or shows no reading, the sensor is inactive and has likely failed. You can also test the heater circuit resistance between the two same-colored wires on the sensor connector; a good heater will read approximately 5-8 ohms.
Typical fix: Replace the upstream oxygen sensor on the passenger side. This requires a special 22mm (or 7/8") oxygen sensor socket. Applying anti-seize compound to the threads of the new sensor is recommended.
Est. part cost: $35-$70 - Damaged O2 Sensor Wiring or Connector 🟡 Medium Probability The sensor's wiring harness is routed near the hot exhaust manifold. Over time, the protective loom can degrade, leading to melted or frayed wires and a loss of signal. On Panther platforms, the harness can also chafe against the transmission dipstick tube, causing a short.
How to confirm: Visually inspect the wiring harness from the O2 sensor back to the main engine harness. Look for any signs of melting, chafing, or broken wires. Check that the connector is clean, free of corrosion, and securely plugged in. A real-world example from a forum detailed a case where squirrels chewed the wiring, and a poor repair led to recurring P0134 codes even after multiple sensor replacements.
Typical fix: Repair the damaged section of wire or replace the connector pigtail if it is corroded or broken.
Est. part cost: $10-$30 - Blown O2 Sensor Heater Fuse ⚪ Low Probability A short in the heater circuit wiring or the sensor itself can cause the fuse to blow. This is less common than the sensor failing on its own but is a simple and crucial check.
How to confirm: Check the fuse for the Heated Exhaust Gas Oxygen (HEGO) sensors. On 2003-2011 models, this is typically a 20A fuse in position 13 of the power distribution box in the engine compartment. Consult your owner's manual or an online fuse diagram for the specific fuse location for your year.
Typical fix: Replace the blown fuse. If the new fuse blows immediately, it indicates a short circuit in the wiring or the sensor that must be diagnosed and repaired.
Est. part cost: $1-$5
Rare But Worth Checking
- Exhaust Leak: A significant exhaust leak from the manifold gasket or the collector flange before the O2 sensor can introduce outside air, disrupting the exhaust flow enough to prevent proper sensor readings. This usually triggers lean codes (P0171) but can contribute to P0134 in some cases.
- Faulty Powertrain Control Module (PCM): This is extremely rare. The PCM itself can fail, but this should only be considered after all other possibilities, including the sensor, wiring, fuse, and connector, have been thoroughly ruled out by testing continuity from the sensor connector to the PCM pins.
Diagnosis Steps
- Read the code with an OBD-II scanner to confirm P0134 is the only code present.
- Visually inspect the Bank 1, Sensor 1 (passenger side, upstream) oxygen sensor and its wiring harness. Look for any obvious damage like melted plastic, frayed wires, or a loose connector. Pay special attention to where the harness passes the exhaust manifold and transmission dipstick tube.
- Check the fuse for the O2 sensor heater circuit. For 2003+ models, this is usually fuse #13 (20A) in the engine bay fuse box. If it's blown, replace it and see if the code returns.
- With a scan tool, monitor the live data for the Bank 1 Sensor 1 voltage (often labeled 'O2S11'). The engine must be running and fully warmed up. A good sensor will show voltage fluctuating rapidly between ~0.1V and ~0.9V. If the voltage is flat, stuck (e.g., at 0.45V), or absent, the sensor is not active.
- If the sensor is inactive, test the heater circuit. Disconnect the sensor and use a multimeter to measure resistance between the two same-colored wires on the sensor side. A good reading is between 5 and 8 ohms. Then, with the key on (engine off), check for 12V power on the corresponding pins of the harness-side connector.
- Check for exhaust leaks between the cylinder head and the O2 sensor by listening for ticking sounds or using the soapy water method on a cold engine.
- If the fuse, wiring, and connector are good, and there are no exhaust leaks, the oxygen sensor itself is faulty and should be replaced.
Parts You'll Likely Need
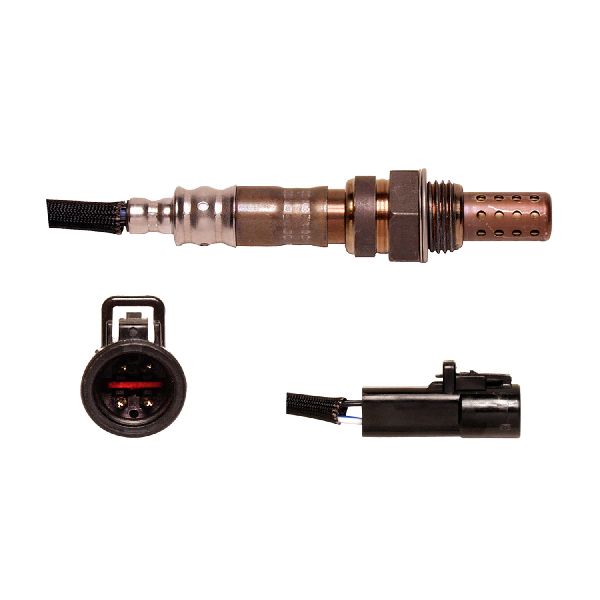
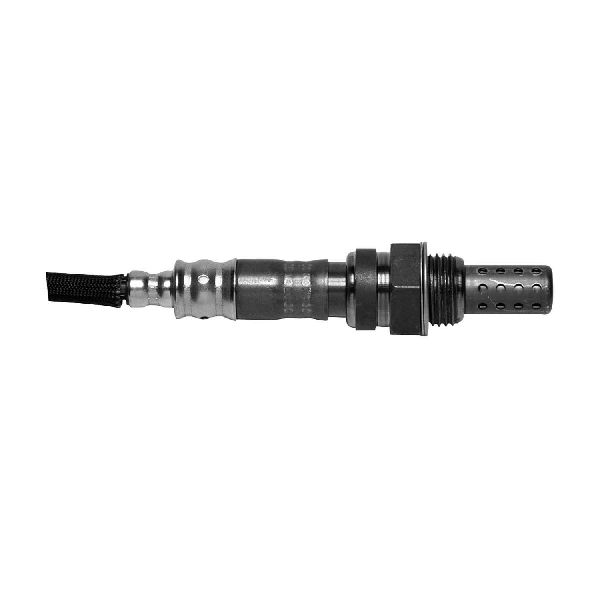
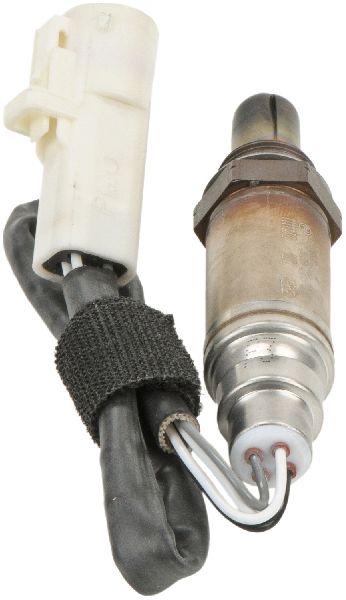
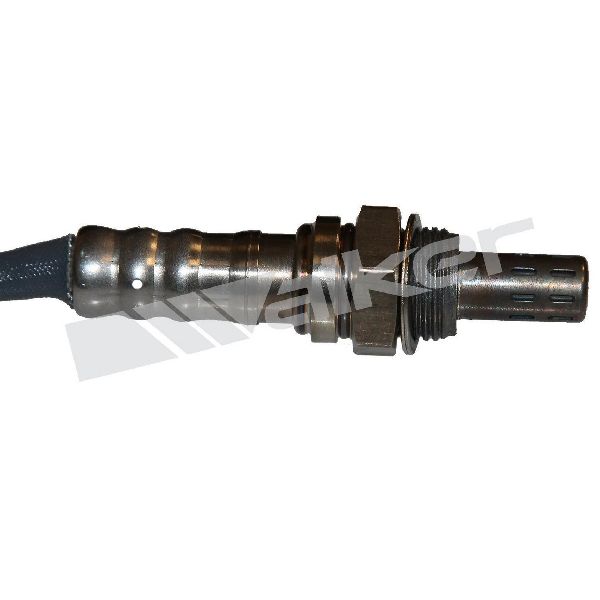
- Upstream Oxygen Sensor (Bank 1, Sensor 1)
(OEM #5W6Z-9G444-BA (also DY-1092))— This is the sensor identified by the code. Its internal heating element or sensing capability fails over time, causing the 'no activity' fault. While Motorcraft is the OEM brand, many owners on forums like crownvic.net and S197forum.com prefer to use NTK or Denso sensors, as they are often the original equipment supplier to Ford. Some users report occasional compatibility issues with Bosch sensors on this platform.
Trusted brands: Motorcraft, NTK (NGK), Denso, Bosch
OEM price range: $65-$85
Aftermarket price range: $35-$70
Technical Service Bulletins (TSBs) & Recalls
- No specific Technical Service Bulletins (TSBs) directly addressing a widespread P0134 fault were found in research for this specific platform. The issue is typically resolved through standard diagnosis.
Platform-Specific Known Issues
- On Panther platform vehicles, the O2 sensor wiring harness for Bank 1 can sometimes make contact with the transmission dipstick tube, leading to chafing and an electrical short over time. This should be inspected during diagnosis.
Mechanic-Grade Diagnostic Values
- O2 Sensor Heater Circuit Resistance — expected: 2 - 14 Ohms, with 5-8 Ohms being typical for a healthy sensor at room temperature.. Failure: An infinite resistance (OL) reading indicates a broken heater element. A reading of 0 ohms indicates a shorted element.
- PCM or Sensor Ground Path Resistance — expected: Less than 0.5 Ohms.. Failure: A reading higher than 0.5 Ohms (e.g., 1.8 Ohms) indicates excessive resistance in the ground circuit, which can prevent the sensor from operating correctly.
- Harness-Side Heater Circuit Power — expected: 12V (Battery Voltage) with key on, engine off.. Failure: 0V indicates a blown fuse or a break in the power wire from the fuse box.
- Signal Wire Integrity Test (Ford-specific) — expected: With the sensor unplugged and a test light connected to battery positive, touching the signal wire pin on the harness connector should drive the O2 sensor voltage on a scan tool to its maximum readable value (e.g., ~1.6V).. Failure: If the voltage on the scan tool does not change, it indicates an open or short in the signal wire between the connector and the PCM.
Scan Tool Commands That Help
- Professional Scan Tool (e.g., iCarsoft, Autel): Oxygen Sensor Response Test — This active test helps verify if a sensor is lazy or non-responsive. The tool guides the user to rev the engine and checks if the sensor voltage correctly spikes to a rich reading (~0.9V) and drops to a lean reading (~0.1V) on throttle application and release.
Wiring & Ground Locations
- G100 / G103 — At the front of the right (passenger side) front fender apron.. These are primary engine bay ground points. Corrosion or a loose connection here can affect multiple sensors and systems, including the PCM and its sensor grounds.
- G101 — At the rear of the left (driver side) front fender apron.. Another critical chassis ground point for various harnesses in the engine compartment. A poor connection can cause floating grounds and erratic sensor behavior.
- G106 — At the center rear of the engine.. This ground is located on the engine itself and is critical for grounding engine-mounted sensors and the PCM harness correctly. A bad ground here can directly impact sensor reference voltages.
- Cylinder Head Ground Stud — On the rear of the cylinder heads, often a stud used for a bracket.. Main engine harness grounds are often attached directly to the cylinder heads. A loose or corroded connection here is a common source of difficult-to-diagnose electrical issues.
- PCM Connector (Bank 1 Sensor 1 Pins) — At the main PCM connector in the engine bay. For early models (e.g., 96-98), the signal wire may be Yellow/Light Blue and the ground may be Gray/Light Blue.. Knowing the specific pins allows for a definitive continuity test of the wiring harness between the sensor connector and the PCM, bypassing all intermediate connections to confirm wire integrity.
Real Owner Repair Stories
- Composite story from crownvic.net user experiences (2004 Mercury Grand Marquis, ~130,000 miles) — Check Engine Light on, slightly worse gas mileage.
❌ Tried (didn't work) Replaced the Bank 1, Sensor 1 O2 sensor with a new Bosch part. Cleared code, but it returned within two days., Swapped the new Bosch sensor for a new Motorcraft sensor. Code returned again.
✅ What actually fixed it After the code returned a second time, the owner checked the 20A fuse (#13) in the engine bay, which was good. A visual inspection of the wiring harness revealed that the plastic loom had become brittle and fallen away where the harness runs near the transmission dipstick tube. The wires had chafed against the metal tube, causing an intermittent short in the heater circuit. Repairing the damaged wires and re-securing the harness away from the tube permanently resolved the P0134 code.
OEM Part Supersession History
5W6Z-9G444-BA→5W6Z-9G444-AA, which was then superseded by a series of other numbers, with the current replacement often being GU2Z-9G444-A (Motorcraft DY-1401).— Standard part consolidation and minor revisions by the manufacturer over time.
Heads up: Always verify the part number against the vehicle's VIN. While GU2Z-9G444-A is a common replacement, using the specific part for the vehicle's model year is crucial, especially considering the change from case-grounded to isolated-ground sensors.
Model Year Variations Within This Range
- Approx. 1998-2002: These earlier models typically use a 'case-grounded' type of O2 sensor. The sensor's ground reference is established through its body being screwed into the exhaust manifold.
- Approx. 2003-2011: These later models use an 'isolated-ground' type of O2 sensor. This design features a dedicated ground wire within the harness that provides a cleaner ground reference directly from the PCM. Installing a case-grounded sensor on a system designed for an isolated-ground sensor (or vice-versa) will cause it to function incorrectly and trigger a fault code.
Diagnostic Flowchart
Real Owner Stories
Aggregated from forums and TSBs cited above. Mileages and costs reflect what owners reported in those sources.
Ford Crown Victoria 4.6L V8
Symptoms: Triggered both P0134 and P0154 codes simultaneously.
What fixed it: Replacing the upstream oxygen sensors and verifying the fuses first.
Source hint: crownvic.net thread titled 'P0134 and P0154'
Mercury Grand Marquis 4.6L V8
Symptoms: The P0134 code remained even after replacing the oxygen sensor with a brand new unit.
What fixed it: Performing deeper electrical diagnosis, specifically testing wiring continuity to the PCM and checking related relays.
Source hint: Reddit r/AskMechanics thread titled 'P0134 Remains After O2 Sensor Replacement. Why??'
Mercury Grand Marquis 4.6L V8
Symptoms: The P0134 code persisted despite replacing the oxygen sensor three separate times.
What fixed it: Finding and repairing squirrel-damaged wiring that had been improperly repaired previously.
Source hint: Cartalk Community thread titled '3 replacements of O2 sensor and still have P0134 code'
Related OBD-II Codes
Frequently Asked Questions
Where is the Bank 1, Sensor 1 oxygen sensor located on my 4.6L Grand Marquis?
Which fuse should I check for the O2 sensor heater circuit on a 2003-2011 Grand Marquis?
Is there a known wiring issue on the Panther platform that causes code P0134?
How can I test if the O2 sensor heater element has failed on my Grand Marquis?
What tools are required to replace the upstream oxygen sensor on this 4.6L V8?
Are there any Technical Service Bulletins (TSBs) from Mercury regarding the P0134 code?
Helpful Videos
We Have This Part in Stock


The information in this article is provided for general reference and educational purposes only. Vehicle specifications, procedures, and part compatibility can vary by production date, trim level, and region. Always consult your vehicle's factory service manual and verify part numbers before purchasing or performing repairs. Safety-critical components such as airbags, seat belts, and braking systems should be installed by a qualified professional.
- Mercury Grand Marquis:
- 🎬 Helpful Videos
- 🛍️ Shop This Part
- What's Unique About the 1998-2011 Mercury Grand Marquis
- Symptoms You May Notice
- Most Likely Causes
- Rare But Worth Checking
- Diagnosis Steps
- Parts You'll Likely Need
- Technical Service Bulletins (TSBs) & Recalls
- Platform-Specific Known Issues
- Mechanic-Grade Diagnostic Values
- Scan Tool Commands That Help
- Wiring & Ground Locations
- Real Owner Repair Stories
- OEM Part Supersession History
- Model Year Variations Within This Range
- Diagnostic Flowchart
- Real Owner Stories
- Ford Crown Victoria 4.6L V8
- Mercury Grand Marquis 4.6L V8
- Mercury Grand Marquis 4.6L V8
- Related OBD-II Codes
- Frequently Asked Questions
- 🎟️ Get 5% Off