

P0036 on 2004-2024 Ford F-150: O2 Sensor Heater Circuit Fixes
This code points to a problem with the heater circuit for the oxygen sensor located after the catalytic converter on Bank 1 (passenger side). The most common fix is replacing the Bank 1, Sensor 2 oxygen sensor itself. In some cases, especially with aftermarket sensors, the replacement part can be faulty. Wiring damage is also a common culprit. Expect to pay $40-$80 for an aftermarket sensor and $70-$150 for an OEM part.
- P0036 specifically refers to the heater circuit for the downstream (post-catalytic converter) oxygen sensor on the passenger side (Bank 1).
- The most common cause is a failed heating element inside the oxygen sensor itself.
- Driving with this code is safe, but it will cause an automatic failure on an emissions test.
- Before replacing the sensor, always perform a quick visual inspection of the wiring for damage and check the O2 sensor heater fuse.
- This is a manageable DIY repair for most owners with basic tools, but the sensor can sometimes be seized in the exhaust pipe, requiring more effort to remove.
What's Unique About the 2004-2024 Ford F-150

On the Ford F-150, a P0036 code is a very common and straightforward issue. Due to the truck's high ground clearance, the downstream oxygen sensors and their wiring are exposed to potential damage from road debris, water, and corrosion. While the sensor itself is the most frequent culprit, owners should pay close attention to the wiring harness that runs along the frame rail, as chafing or melting on the exhaust components is a known possibility, especially on older or modified trucks. Some owners have discovered melted wiring harnesses near the engine, requiring repair or replacement of the harness. In some later model trucks (2015+), issues with faulty splice packs in the main engine harness have been identified as a rare but possible cause, leading to intermittent connection problems.
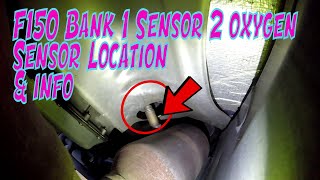
Generation note: This guide covers the 11th (2004-2008), 12th (2009-2014), 13th (2015-2020), and 14th (2021-2024) generations of the Ford F-150. The function and location of the Bank 1, Sensor 2 O2 sensor are consistent across these generations. 🎬 Watch: Bank 1 Sensor 2 location and function explained However, the specific fuse location for the heater circuit varies. For 2009-2014 models, check fuse #76 in the under-hood fuse box. For 2015-2017 models, check fuse #95 in the under-hood fuse box. For 2018 3.5L models, some forum discussions point to fuse #37 (25A) in the Battery Junction Box (BJB). For 2004-2008 models, the fuse panel is located under the right-hand side of the instrument panel. Always verify the correct fuse in your owner's manual for your specific model year.
Symptoms You May Notice
- Check Engine Light is on.
- Failure to pass an emissions inspection.
- In very rare cases, a slight decrease in fuel economy over time.
- In some instances, especially if other codes are present, rough idling or other performance issues may be noticed.
- Replacing the wrong oxygen sensor (e.g., Bank 2 or Sensor 1). Always confirm you are working on Bank 1 (passenger side) and Sensor 2 (downstream/post-catalytic converter).
- Using low-quality aftermarket sensors. Some forum users have reported getting new, out-of-the-box faulty sensors from economy brands, leading to the same code returning immediately.
- Not clearing the code after repair. In some cases, the code may not clear immediately and may require a few drive cycles to turn off.
Most Likely Causes

- Failed Bank 1, Sensor 2 Oxygen Sensor 🔴 High Probability The internal heating element of the sensor is a common failure point due to age and countless heat cycles. The resistance of the heater element can go out of specification, causing the code.
How to confirm: Disconnect the sensor and measure the resistance across the two heater circuit pins (usually the two wires of the same color, e.g., both black or both white). An open circuit (infinite resistance) or a value far outside the manufacturer's specification indicates a failed heater element. A typical healthy heater measures between 3 and 30 ohms, with many Ford sensors falling in the 5-15 ohm range.
Typical fix: Replace the Bank 1, Sensor 2 oxygen sensor. It is recommended to use OEM (Motorcraft) or high-quality aftermarket brands like Bosch or NTK, as some owners report immediate or premature failure with cheaper 'economy' brands.
Est. part cost: $40 - $150 - Damaged Wiring or Connector 🟡 Medium Probability The wiring harness for the downstream O2 sensor is routed along the truck's frame and can be damaged by road debris, corrosion, or contact with hot exhaust components. On some Ford Escapes, a similar platform, melted wiring in the harness was a common discovery for this code, suggesting a similar pattern could occur on F-150s.
How to confirm: Visually inspect the entire length of the wiring harness from the sensor to where it connects to the main loom. Look for frayed wires, melted plastic, or corrosion in the connector pins. Check for 12V power at the harness-side connector with the key on, engine off.
Typical fix: Repair the damaged section of the wire or replace the connector pigtail. Ensure the repaired harness is secured away from heat sources.
Est. part cost: $10 - $30 - Blown Fuse ⚪ Low Probability A short circuit in the O2 sensor itself or its wiring can cause the associated fuse to blow. This can happen from water intrusion or melted wires.
How to confirm: Locate and inspect the fuse for the oxygen sensor heater circuit in the under-hood fuse box (BJB) or interior fuse panel. For 2009-2014 models, it's often fuse #76. For 2015-2017 models, it's often fuse #95. For 2018 models, check fuse #37. Always consult your owner's manual for the exact location.
Typical fix: Replace the blown fuse. If the new fuse blows immediately, it indicates a persistent short circuit in the wiring or the sensor that must be found and fixed.
Est. part cost: $1 - $5
Rare But Worth Checking
- Faulty Powertrain Control Module (PCM): This is extremely rare. The PCM should only be considered a potential cause after all other possibilities (sensor, wiring, fuses) have been exhaustively tested and ruled out.
- Corroded Exhaust System Ground Strap: A poor ground connection for the exhaust system can sometimes cause erratic sensor readings and trigger heater circuit codes. Check ground straps from the engine/body to the frame and exhaust.
Diagnosis Steps

- Turn the ignition off and allow the exhaust to cool completely.
- Visually inspect the Bank 1, Sensor 2 oxygen sensor (passenger side, after the catalytic converter) and its wiring harness. Look for any signs of physical damage, melting, or corrosion.
- Check the fuse for the O2 sensor heater circuit. Refer to your owner's manual or the 'generation_notes' section for common fuse locations for your year.
- If the fuse is good, disconnect the O2 sensor electrical connector.
- Using a multimeter set to Ohms, measure the resistance between the two heater pins on the sensor side of the connector (these are typically the two wires of the same color). A reading of OL (Open Loop) or infinite resistance means the heater is burned out. A good sensor typically reads between 3-30 ohms.
- If the sensor resistance is within spec, check for power and ground at the vehicle-side connector. With the key on (engine off), one pin should have 12V power, and the other should be a ground controlled by the PCM.
- If power or ground is missing, trace the wiring back to the PCM/fuse box to find the break in the circuit. Pay special attention to areas where the harness is near hot exhaust components or could be subject to physical damage.
- If the sensor, fuse, and wiring all test good, the issue may be with the PCM, but this is highly unlikely.
Parts You'll Likely Need
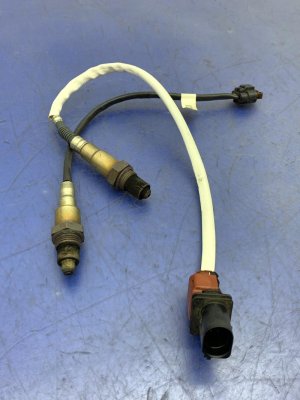
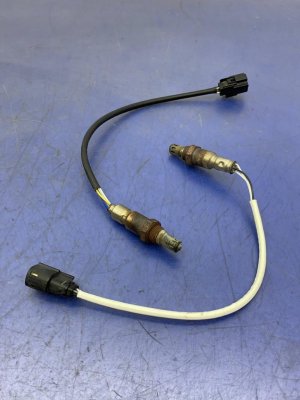
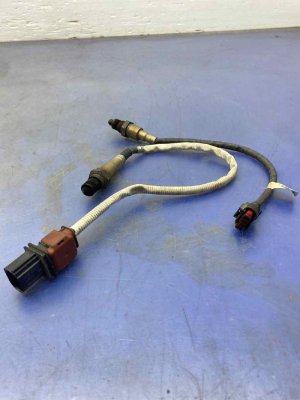
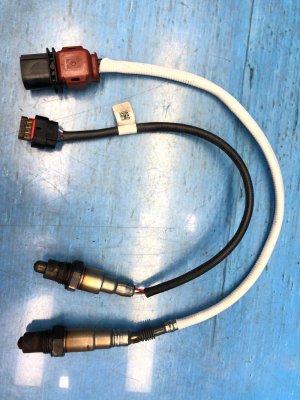
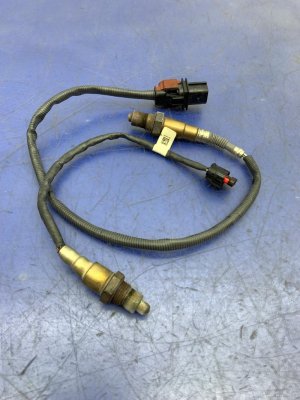
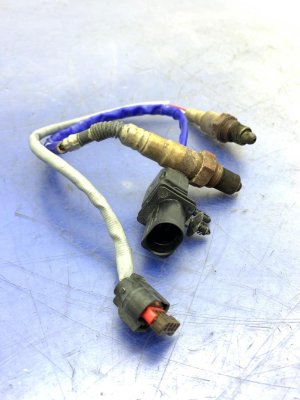
- Oxygen Sensor (Bank 1, Sensor 2)
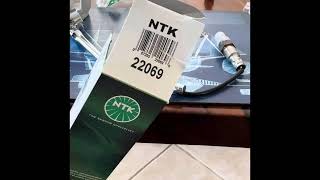
(OEM #Varies by engine and year. Motorcraft is the OEM brand. Example: A 2018 5.0L may use an NTK 22069 as a compatible replacement.)— The internal heater element is the most common point of failure for this code.
Trusted brands: Motorcraft, Bosch, Denso, NTK
OEM price range: $70-$150
Aftermarket price range: $40-$80
Related Codes That Often Appear With This One
- P0137 — P0137 (O2 Sensor Circuit Low Voltage Bank 1 Sensor 2) can appear with P0036 because a failed heater can prevent the sensor from reaching the correct temperature to produce a proper voltage signal. 🎬 See how to fix both P0036 and P0137 codes
- P0056 — P0056 is the equivalent heater circuit code for Bank 2, Sensor 2. If both appear, it could point to a common issue like a blown fuse that supplies power to both sensor heaters, or a systemic issue like a custom tune or wiring problem affecting both sides.
- P0141 — P0141 is an older or alternative code for the same Bank 1 Sensor 2 heater circuit fault. A user on a forum reported their truck first showing P0141, and after replacing the sensor, it threw P0036, indicating a persistent issue that was ultimately solved with a quality Bosch sensor.
Technical Service Bulletins (TSBs) & Recalls
- TSB 18-2212: While this TSB is specifically for the 2016-2018 Ford Edge with a 2.0L EcoBoost engine, it's notable because the fix for a P0036 code was a PCM software update, not a sensor replacement. This indicates Ford has acknowledged overly sensitive fault logic in some cases. While not directly applicable to the F-150, it sets a precedent for software-related causes.
Platform-Specific Known Issues
- {'title': 'Faulty Aftermarket Sensors', 'description': 'A forum user with a 2018 3.5L F-150 reported getting a P0036 code after replacing the original sensor with an economy-priced Walker brand part. After a second Walker sensor also failed, the issue was resolved by installing a Bosch sensor. This highlights the importance of using high-quality replacement parts.'}
- {'title': 'Fuse Location Confusion', 'description': 'While later models have clearly identified fuses (e.g., #95 for 2015-2017), owners of 2018+ models have had to consult wiring diagrams, with some identifying fuse #37 (25A) in the BJB as the correct one for their 3.5L EcoBoost.'}
- {'title': 'Heat Shield Obstruction', 'description': 'On some models, like the 2018 F-150 with the 5.0L engine, a heat shield covers the Bank 1 Sensor 2, making access more challenging. A special slotted O2 sensor socket is highly recommended for this job.'}
Mechanic-Grade Diagnostic Values
- O2 Sensor Heater Element Resistance — expected: 3 to 30 Ohms. Many Ford sensors are between 5-15 Ohms.. Failure: Infinite resistance (Open Loop/OL) or a reading far outside the expected range.
- Heater Circuit Supply Voltage — expected: ~12V (Battery Voltage) with Key On, Engine Off.. Failure: 0V indicates a blown fuse or a break in the power wire.
- Heater Circuit Current Draw (via Bi-Directional Scan Tool) — expected: 0.5 - 1.5 Amps when activated.. Failure: 0 Amps indicates an open circuit in the heater element or wiring.
- Live Data O2 Sensor Temperature (via Scan Tool) — expected: Should reach ~600°F within 2 minutes of a cold start.. Failure: Failing to reach operating temperature (e.g., staying below 500°F) points to a faulty heater.
Scan Tool Commands That Help
- Professional Scan Tool (e.g., FORScan, iCarsoft, Autel, Snap-on): O2 Sensor Heater Activation / Bi-Directional Control — This command allows a technician to manually turn the O2 sensor heater on and off. It's used to verify the integrity of the control circuit and to monitor current draw in real-time to confirm the heater element is working.
- FORScan: Live Data PID Monitoring (O2S12.HTR, O2S12.V, etc.) — Used to monitor the status of the heater (On/Off), the voltage of the sensor, and other parameters in real-time. This helps distinguish between a constant fault and an intermittent one that only occurs under specific conditions.
Wiring & Ground Locations
- PCM Pin 95 (1998 Model Year) — At the 104-pin Powertrain Control Module connector.. For a 1998 F-150, this pin is the heater control for Bank 1, Sensor 2 (RR HO2S). The wire color is listed as White/Black (WHT/BLK). This is the ground-side control wire that the PCM pulses to activate the heater.
- Heater Power Wire (Harness Side) — In the 4-pin connector for the Bank 1, Sensor 2 O2 sensor.. This wire should have battery voltage (~12V) whenever the key is in the 'ON' position. For older models (e.g., '97), this wire is often Red. Lack of voltage here points to a blown fuse or a break in the power feed wire.
- Heater Control Wire (Harness Side) — In the 4-pin connector for the Bank 1, Sensor 2 O2 sensor.. This is the wire the PCM uses to complete the ground for the heater circuit. On older models (e.g., '97), this wire may be Yellow/Light Blue. Checking for continuity between this pin and the corresponding PCM pin (e.g., Pin 95 on a '98) confirms the wire is intact.
Real Owner Repair Stories
- Ford F150 Forum (2018 F-150 3.5L) — Check Engine Light with code P0141, which then changed to P0036 after an initial repair attempt.
❌ Tried (didn't work) Replacing the original O2 sensor with a new Walker brand sensor., Replacing the first Walker sensor with a second new Walker sensor.
✅ What actually fixed it The issue was finally resolved by installing a Bosch brand oxygen sensor. The two previous economy-brand sensors were apparently faulty out of the box. - Ford F150 Forum (2001 F-150 4.6L 4x4) — Check Engine Light with codes P0161 and P0156 (Bank 2 Sensor 2 heater and circuit malfunction).
❌ Tried (didn't work) Initial visual inspection.
✅ What actually fixed it After obtaining a wiring diagram, the owner began unwrapping the wiring harness and discovered that the O2 sensor wires (along with VSS wires) were broken inside the loom, just above the transmission. Repairing the broken wires resolved the codes.
OEM Part Supersession History
ML3Z9G444B, DY1577→ML3Z-9G444-C— Part revision or manufacturer change.
Heads up: This part is listed for the 2.7L downstream sensor on 2021-2025 F-150s. Using older part numbers may not be ideal.ML3Z9F472A, ML3Z9F472F, DY1580→ML3Z-9F472-FA— Part revision or manufacturer change.
Heads up: This is an upstream sensor for the 3.5L Hybrid, but illustrates the frequent supersessions. Always verify the exact part number for your specific VIN, engine, and sensor position, as upstream/downstream and left/right are often different.
Model Year Variations Within This Range

- 1997-2003 (10th Gen): Wiring colors and PCM pinouts are specific to this generation. For example, on a '98, the B1S2 heater control wire is White/Black at PCM pin 95. On a '97, the heater power wire is often Red and the control wire is Yellow/Light Blue.
- 2018-2020 (13th Gen Refresh): For the 5.0L engine, a heat shield was noted as covering the Bank 1 Sensor 2, making access more difficult and requiring a slotted O2 sensor socket.
- 2011+: Later model trucks (approx. 2011+) may store permanent diagnostic trouble codes (P-DTCs). These codes cannot be cleared with a simple scanner command and will only be removed by the PCM after it runs its internal tests and verifies that the repair was successful over one or more drive cycles.
Diagnostic Flowchart
Used vs. New Parts: Buying Guide for This Vehicle
When a used part is the smart pick: For this specific repair, sourcing a used part is generally not recommended for the oxygen sensor itself. However, if the cause is a damaged connector or a section of the wiring harness, a used pigtail or harness from a reputable auto recycler can be a cost-effective and reliable solution.
Donor-vehicle mileage cap: roughly under 80000 miles for the part to have meaningful remaining life.
What to inspect on the donor part:
- For a wiring harness/pigtail, inspect for any signs of brittleness, cracking, or melting of the plastic conduit and wire insulation.
- Check connector pins for corrosion (green or white powder) or signs of water intrusion.
- Ensure locking tabs on the connector are intact and not broken off.
- Avoid harnesses from vehicles with obvious signs of fire, flood, or major physical damage in that area.
OEM-only on this vehicle (don't cheap out):
- While not strictly 'OEM-only', experience from multiple owners suggests that using extremely cheap, unbranded 'economy' oxygen sensors often leads to immediate or premature failure. Sticking to OEM (Motorcraft) or well-regarded OEM suppliers is highly recommended to avoid doing the job twice.
Aftermarket brands forum-validated for this vehicle:
- Bosch
- NTK / NGK
- Denso
Brands owners have reported issues with on this vehicle:
- Walker Products (based on a specific forum user's report of two consecutive failures)
Real Owner Stories
Aggregated from forums and TSBs cited above. Mileages and costs reflect what owners reported in those sources.
2018 F-150 3.5L
Symptoms: A P0036 code appeared after replacing the original oxygen sensor.
What fixed it: The issue was resolved by installing a Bosch sensor after two consecutive economy-priced Walker brand sensors were found to be faulty out of the box.
Source hint: Ford F150 Forum - f150forum.com/f118/went-p0141-p0036-oxygen-sensor-o2-555318/
2018 F-150 5.0L
Symptoms: Check Engine Light with codes P0036 and P0137. A heat shield over the sensor made access difficult.
What fixed it: The problem was fixed by replacing the Bank 1, Sensor 2 oxygen sensor.
Source hint: YouTube - F150 Code P0036 and P0137 How to Fix
2019 Ford Expedition
Symptoms: A recurring P0036 code was present even though the O2 sensor itself tested good with a resistance of 3.9 ohms.
What fixed it: A professional technician traced the fault to a known bad splice pack (Splice 106) in the main engine harness. A full harness replacement was recommended.
Source hint: YouTube - Ford Boss Me - 2019 Ford Expedition Max - O2 Sensor code P0036
Related OBD-II Codes
Frequently Asked Questions
Where is the Bank 1, Sensor 2 oxygen sensor located on my Ford F-150?
What fuse should I check for code P0036 on my 2015-2017 F-150?
I'm replacing the O2 sensor on my F-150. What brand should I buy?
How can I test the old oxygen sensor to confirm it's bad?
Is there a Ford TSB for P0036 on the F-150?
I have a 2018 F-150 with the 5.0L engine. Is there anything special I need to know for this repair?
Helpful Videos

We Have This Part in Stock

The information in this article is provided for general reference and educational purposes only. Vehicle specifications, procedures, and part compatibility can vary by production date, trim level, and region. Always consult your vehicle's factory service manual and verify part numbers before purchasing or performing repairs. Safety-critical components such as airbags, seat belts, and braking systems should be installed by a qualified professional.
- Ford F-150:
- 🎬 Helpful Videos
- 🛍️ Shop This Part
- What's Unique About the 2004-2024 Ford F-150
- Symptoms You May Notice
- Most Likely Causes
- Rare But Worth Checking
- Diagnosis Steps
- Parts You'll Likely Need
- Related Codes That Often Appear With This One
- Technical Service Bulletins (TSBs) & Recalls
- Platform-Specific Known Issues
- Mechanic-Grade Diagnostic Values
- Scan Tool Commands That Help
- Wiring & Ground Locations
- Real Owner Repair Stories
- OEM Part Supersession History
- Model Year Variations Within This Range
- Diagnostic Flowchart
- Used vs. New Parts: Buying Guide for This Vehicle
- Real Owner Stories
- 2018 F-150 3.5L
- 2018 F-150 5.0L
- 2019 Ford Expedition
- Related OBD-II Codes
- Frequently Asked Questions
- 🎟️ Get 5% Off