

P0031 on 2013-2018 Toyota RAV4 2.5L: A/F Sensor Heater Circuit Causes and Fixes
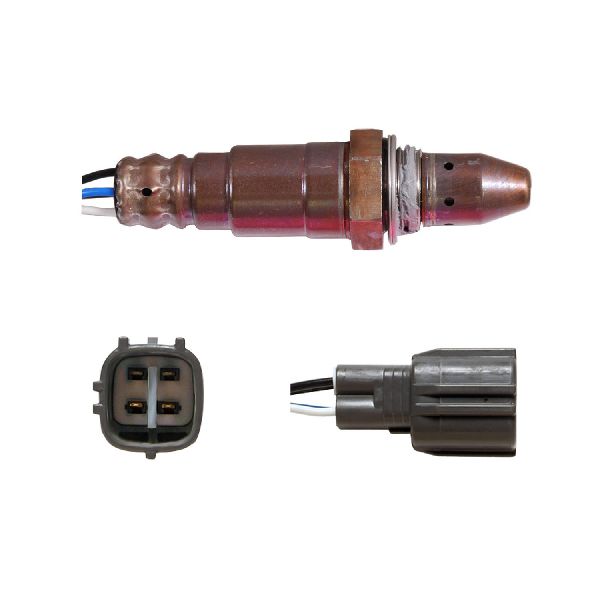
For a 2013-2018 RAV4 with the 2.5L engine, code P0031 almost always means the upstream Air/Fuel Ratio (A/F) sensor has failed. Before replacing it, check the 15A 'A/F HTR' fuse in the engine bay. An OEM Denso sensor (p/n 234-9133) costs around $150-$190, and the repair is DIY-friendly (2/5 difficulty) due to the sensor's easy accessibility on the front of the exhaust manifold.
- P0031 on your RAV4 points to the heater circuit of the front Air/Fuel Ratio sensor.
- ALWAYS check the 15A 'A/F HTR' fuse in the engine bay before buying any parts.
- The most likely fix is replacing the Bank 1, Sensor 1 A/F sensor.
- Use a quality OEM brand like Denso (p/n 234-9133) for the replacement part to ensure compatibility and longevity.
- The repair is very accessible on the 2.5L engine, making it a good DIY task to save on labor costs.
What's Unique About the 2013-2018 Toyota RAV4
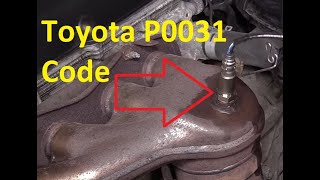
On the 2.5L 2AR-FE engine in the 2013-2018 RAV4, this is a very common and straightforward repair. The Bank 1 Sensor 1 is located directly on the front of the exhaust manifold, making it one of the most accessible A/F sensors on any vehicle. This high accessibility turns what could be a difficult job on other cars into a task that most DIYers can complete in under an hour with basic tools.
Symptoms You May Notice
- Check Engine Light is on
- Reduced fuel economy
- Rough idle, especially when the engine is cold
- Vehicle may fail an emissions test
- Immediately replacing the A/F sensor without first checking the 'A/F HTR' fuse. This is a 2-minute check that can save you the cost of an unnecessary part.
Most Likely Causes
- Failed Air/Fuel Ratio Sensor (Bank 1, Sensor 1) 🔴 High Probability The internal heater element simply wears out and fails from age and countless heat cycles. This is the most common point of failure for this code.
How to confirm: After confirming the fuse is good, disconnect the sensor and measure the resistance between the two heater pins (usually the two same-colored wires) with a multimeter. A healthy sensor will have a low resistance, typically between 0.8 and 1.4 ohms at room temperature. An infinite reading (OL) confirms the heater has an open circuit and has failed.
Typical fix: Replace the Air/Fuel Ratio sensor.
Est. part cost: $150-$220 - Blown A/F Heater Fuse 🟡 Medium Probability A short in the sensor's heater element or its wiring can cause the dedicated fuse to blow as a protective measure.
How to confirm: Locate the fuse box in the engine compartment near the battery. Find the 15A fuse labeled 'A/F HTR'. Pull the fuse and visually inspect it or test it for continuity with a multimeter.
Typical fix: Replace the blown fuse. If the new fuse blows immediately, it confirms a short circuit in the wiring or the sensor itself that must be found and repaired.
Est. part cost: $1-$5 - Damaged Wiring or Connector ⚪ Low Probability The wiring harness for the sensor is exposed to high heat from the exhaust manifold, which can cause insulation to become brittle and crack over time. Rodents can also chew on the wires, causing a short or open circuit.
How to confirm: Visually inspect the wiring harness from the sensor to where it connects to the main engine harness. Look for any signs of melting, chafing, corrosion in the connector pins, or breaks.
Typical fix: Repair the damaged section of wire or replace the connector pigtail.
Est. part cost: $10-$30
Rare But Worth Checking
- Failed A/F Heater Relay: The A/F heater circuit is controlled by a relay, typically located in the same engine bay fuse box. While uncommon, this relay can fail, preventing power from reaching the sensor's heater. This should be tested after confirming the fuse and sensor are good.
- Faulty Engine Control Module (ECM): This is extremely rare. The ECM should only be considered as a potential cause after all other possibilities (sensor, fuse, relay, wiring) have been exhaustively tested and ruled out.
Diagnosis Steps
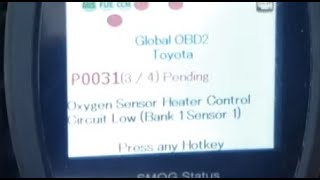
- Confirm the P0031 code is present using an OBD-II scanner.
- Open the fuse box in the engine compartment and locate the 15A 'A/F HTR' fuse. Visually inspect and test the fuse. Replace if blown.
- If the fuse is good, locate the A/F sensor on the front of the exhaust manifold.
- Inspect the sensor's electrical connector and wiring for any visible damage, melting, or corrosion.
- If the wiring appears intact, disconnect the sensor.
- Using a multimeter set to ohms, measure the resistance across the two heater pins on the sensor side of the connector (often the two wires of the same color). A good sensor should read a very low resistance (e.g., 0.8-1.4 ohms). An 'OL' or infinite reading indicates the heater element has failed and the sensor must be replaced.
- If the sensor tests good, the next step is to check for 12V power at the vehicle-side connector with the key on. If power is missing, suspect the A/F heater relay or a break in the power wire.
Parts You'll Likely Need
- Air/Fuel Ratio Sensor (Bank 1, Sensor 1)
(OEM #89467-0R050 (supersedes 89467-0R060, 89467-21020))— The internal heater element fails over time, which is the direct cause of the P0031 code in the vast majority of cases.
Trusted brands: Denso (OEM), NTK
OEM price range: $180-$220
Aftermarket price range: $100-$160
Technical Service Bulletins (TSBs) & Recalls
- While no TSB is directly for P0031 on this specific RAV4, an older TSB for 2004-2005 Camrys (EG009-05) shows a history of Toyota addressing similar A/F sensor circuit codes (P0031/P0051) with updated parts and ECM logic, indicating the sensitivity of this system.
Mechanic-Grade Diagnostic Values
- A/F Sensor Heater Current Draw — expected: Nominally 5-7 amps when active, duty-cycle controlled by the ECM.. Failure: DTC P0031 is set when current is less than 0.8 A, indicating an open or high-resistance circuit.
- A/F Sensor Heater Power Supply Voltage — expected: Battery voltage (approx. 12V) at the sensor connector's power pin with key on, engine off.. Failure: Little to no voltage indicates a problem upstream, such as the A/F HTR fuse or relay.
- A/F Sensor Heater Control Duty Cycle — expected: Typically 100% duty cycle (full power) for about 20 seconds after a cold start, then varies as needed to maintain temperature.. Failure: No duty cycle command from the ECM could indicate an ECM issue, but this is very rare.
Hidden / Shadow Codes Worth Checking
- Mode 06, Test ID $07, Comp ID $81: This monitor tracks the 'Maximum A/F sensor heater current'. A technician can use a professional scan tool to view this data and see the raw current value the ECM is reading from the heater circuit, confirming if it is below the minimum threshold. (see via A professional scan tool capable of reading Toyota-specific Mode 06 data, such as Toyota Techstream.)
Scan Tool Commands That Help
- Toyota Techstream: Confirmation Driving Pattern & All Readiness Check — After a repair, a technician can perform a specific driving pattern (e.g., idle 5 min, hold 3000 rpm for 1 min, idle 5 min) and then use the 'All Readiness' utility to confirm the P0031 monitor has run and passed, verifying the fix without waiting for the check engine light.
- Toyota Techstream: Active Test: Control the Injection Volume for A/F sensor — While not a direct test of the heater, this is an advanced diagnostic step. If P0031 is accompanied by performance issues, this test can force the engine rich or lean to verify the A/F sensor's *reporting* function is still working, which helps isolate the problem to just the heater circuit.
Wiring & Ground Locations
- A/F Heater Relay (EFI MAIN Relay) — Located within the 'Integration Relay' assembly in the main engine compartment fuse/relay block.. This relay supplies the 12V power to the A/F sensor's heater circuit. If this relay fails, the heater will not receive power, causing P0031 even if the fuse and sensor are good.
- A/F Sensor Connector (A1A) — On the front of the engine, connected to the A/F sensor on the exhaust manifold.. This is the primary test point. Pin +B (Power) should have 12V with key on. Pin HA1A (Heater Control) is the wire going to the ECM, which provides a duty-cycled ground to operate the heater.
Real Owner Repair Stories
- YouTube video, various forums (2008 Toyota Sienna (V6, similar electrical design)) — Check Engine Light with codes P0031 and P0051 (for Bank 2), VSC and TRAC OFF lights also on.
❌ Tried (didn't work) Initial diagnosis pointed towards replacing both A/F sensors.
✅ What actually fixed it Owner checked the fuse box and found the 25A 'A/F' fuse was blown. Replacing the fuse cleared all codes and warning lights, saving the cost of two sensors. - Common narrative from RAV4World and r/MechanicAdvice forums (2013-2018 Toyota RAV4 2.5L) — Check Engine Light on, slight dip in fuel economy.
❌ Tried (didn't work) In some cases, replacing the sensor with a cheap, unbranded aftermarket part from an online marketplace did not fix the code or the code returned quickly.
✅ What actually fixed it The most common successful repair path was: 1. Check the 15A A/F HTR fuse (usually found to be good). 2. Test resistance on the sensor heater pins and find an open circuit (OL reading). 3. Replace the sensor with an OEM Denso (234-9133) part. 4. Clear codes, which then stayed off. - Cross-Manufacturer Reference (Toyota Corolla) — An owner reported that the engine light would not go out despite replacing the O2 sensor 7 to 10 times and resetting the system (NHTSA ODI #10901973).
- Cross-Manufacturer Reference (Toyota Sequoia) — A report noted that a check engine light found P0031 for the AF sensor B1S1, which was replaced, but the owner later experienced recurring VSC TRAC OFF and service engine lights (NHTSA ODI #10531943).
OEM Part Supersession History
89467-0R060, 89467-21020→89467-0R050— Standard part refinement and consolidation by the manufacturer.
Heads up: While physically similar, it is critical to use a sensor with the correct internal heater resistance. Using cheap, off-brand sensors is known to cause persistent codes because their heater characteristics do not match what the Toyota ECM expects. Stick with Denso or NTK.
Model Year Variations Within This Range
- 2016-2018: The RAV4 received a mid-cycle refresh in 2016. While this did not change the P0031 fault, these later models have a noticeably quieter cabin due to added insulation and a reworked, more compliant suspension. Toyota Safety Sense became standard for 2017+ models.
Diagnostic Flowchart
Other Known Issues on This Vehicle
Issues unrelated to this code that are worth knowing about as an owner of this generation:
- Torque Converter Shudder 🟠 Medium — Common on 2013-2015 models, typically between 25-50 mph under light load. Can occur at various mileages. (Ref: Toyota TSB T-SB-0023-15 Rev2 and Warranty Enhancement Program (ZH1) were issued to address this by replacing the torque converter and updating ECM logic.)
- Unresponsive or Laggy Infotainment Screen 🟡 Low — Frequently reported across the generation. The touchscreen may become non-responsive, freeze, or reboot randomly. (Ref: No specific TSB, but common fixes include a soft reboot (holding the power knob), a factory reset, or a battery disconnect. In some cases, a software update or head unit replacement is required.)
- Oil Leaks from Timing Cover / Valve Cover 🟡 Low — Seeping or minor leaks can develop at higher mileages (over 100k miles). Not usually an urgent failure but should be monitored. (Ref: No TSB, this is considered a common wear-and-tear item.)
- Battery Fire Risk Recall (Improperly Sized Replacement Battery) 🔴 High — Affects all 2013-2018 models where an incorrectly sized 12V replacement battery may have been installed. (Ref: NHTSA Recall 23V734000. The battery hold-down bracket can contact the terminals of a smaller battery, causing a short circuit.)
Used vs. New Parts: Buying Guide for This Vehicle
When a used part is the smart pick: For this specific repair, a used part is almost never a good choice for the sensor itself. However, obtaining a used wiring harness pigtail from a junkyard is a smart move if your original connector is melted or damaged. A used fuse/relay box is also a viable option if the relay is the point of failure.
Donor-vehicle mileage cap: roughly under 150000 miles for the part to have meaningful remaining life.
What to inspect on the donor part:
- For a wiring pigtail, ensure the plastic is not brittle and the locking tab is intact.
- Check for any signs of corrosion on the pins or melting on the connector body.
- If pulling a relay, look for a donor vehicle with no signs of electrical fire or water damage in the fuse box area.
OEM-only on this vehicle (don't cheap out):
- Air/Fuel Ratio Sensor
Aftermarket brands forum-validated for this vehicle:
- Denso (is the OEM supplier)
- NTK
Brands owners have reported issues with on this vehicle:
- Generic, unbranded sensors from online marketplaces like eBay or Amazon are frequently reported on forums to fail quickly or not work at all, as their internal heater resistance may not match OEM specifications.
Real Owner Stories
Aggregated from forums and TSBs cited above. Mileages and costs reflect what owners reported in those sources.
2015 Toyota RAV4 — ~350000 miles
Symptoms: P0031, P0500, P0717, P0776, P2808. Almost every light is on the dash, the transmission is shifting erratically or just throws the car into neutral, odometer and speedometer stopped working.
What fixed it: No fix reported. A commenter noted for P0031: 'upstream o2 sensor heater Circuit , sensor is probably bad'.
Source hint: r/mechanic - 2015 Toyota RAV4
2014 Toyota RAV4
Symptoms: Check engine light on with code P0031.
What fixed it: Checked the A/F HTR fuse (it was fine) and replaced the front sensor with a Denso part.
Source hint: RAV4World Forum
2013-2018 Toyota RAV4
Symptoms: P0031 code triggered; advised to check fuse first.
What fixed it: Replaced the sensor twice before realizing the issue was a wiring short.
Source hint: Reddit (r/rav4club & r/MechanicAdvice)
Toyota Avalon Reference
Symptoms: After owning a certified pre-owned vehicle for one month, the check engine light came on. Diagnosis confirmed the P0031 code was present on one of the AF sensors (NHTSA ODI #10573840).
Related OBD-II Codes
Frequently Asked Questions
Which specific fuse should I check for a P0031 code on my 2013-2018 RAV4?
Is there a TSB for P0031 on the 2013-2018 RAV4 2.5L?
What brand of Air/Fuel Ratio sensor should I use for my 2.5L 2AR-FE engine?
Can I use a used sensor from a junkyard to fix this code?
My RAV4 has a P0031 and the transmission is shifting into neutral; are these related?
Does the battery recall on the 2013-2018 RAV4 affect the A/F sensor?
Helpful Videos
We Have This Part in Stock


The information in this article is provided for general reference and educational purposes only. Vehicle specifications, procedures, and part compatibility can vary by production date, trim level, and region. Always consult your vehicle's factory service manual and verify part numbers before purchasing or performing repairs. Safety-critical components such as airbags, seat belts, and braking systems should be installed by a qualified professional.
- Toyota RAV4:
- 🎬 Helpful Videos
- 🛍️ Shop This Part
- What's Unique About the 2013-2018 Toyota RAV4
- Symptoms You May Notice
- Most Likely Causes
- Rare But Worth Checking
- Diagnosis Steps
- Parts You'll Likely Need
- Technical Service Bulletins (TSBs) & Recalls
- Mechanic-Grade Diagnostic Values
- Hidden / Shadow Codes Worth Checking
- Scan Tool Commands That Help
- Wiring & Ground Locations
- Real Owner Repair Stories
- OEM Part Supersession History
- Model Year Variations Within This Range
- Diagnostic Flowchart
- Other Known Issues on This Vehicle
- Used vs. New Parts: Buying Guide for This Vehicle
- Real Owner Stories
- 2015 Toyota RAV4 — ~350000 miles
- 2014 Toyota RAV4
- 2013-2018 Toyota RAV4
- Toyota Avalon Reference
- Related OBD-II Codes
- Frequently Asked Questions
- 🎟️ Get 5% Off