

U0140 on 2009-2015 Honda Pilot: Lost Communication With Body Control Module Guide
This code means the Body Control Module (BCM) has stopped communicating with other computers in the vehicle. The most common causes are a weak battery, poor electrical grounds, or a faulty BCM. Expect to start with simple electrical checks before considering a BCM replacement.
- U0140 on a Honda Pilot means the Body Control Module (BCM) has lost communication.
- Before suspecting a bad BCM, always check the battery, its connections, and all related fuses first, as these are the most common and cheapest fixes.
- Symptoms are widespread and affect many non-engine electronics like lights, locks, and windows.
- Diagnosis can be complex and is best left to a professional with the right scan tools unless you are experienced with automotive electrical systems.
- If the BCM needs replacement, it must be programmed to your specific vehicle, which typically requires a dealer or specialized repair shop.
What's Unique About the 2009-2015 Honda Pilot
For the second-generation Honda Pilot (2009-2015), the U0140 code points to a communication failure with the Multiplex Integrated Control Unit (MICU), which is the Honda-specific term for the BCM and is part of the driver's side fuse box. There are no widespread, unique design flaws that make this specific model exceptionally prone to this code. However, owner experiences and mechanic reports emphasize that electrical basics are the most frequent culprits. A weak battery, corroded terminals, or poor chassis grounds are very common root causes. A known issue on the related first-generation Pilot is water intrusion from a failed body seam behind the driver's fender dripping directly onto the MICU 🎬 Watch: How water leaks can damage your Honda's electronics, which can also occur on these models. The diagnostic process is typical for a CAN bus issue, focusing on universal electrical principles first. Starting with the simplest electrical checks often resolves the issue without needing to replace the expensive and programming-required MICU.
Symptoms You May Notice
- Check Engine Light is on
- Multiple unrelated warning lights on the dashboard (e.g., ABS, Traction Control, Airbag)
- Erratic or non-functional power windows and door locks
- Interior or exterior lights flickering, staying on, or not working at all
- Windshield wipers operating incorrectly or not at all
- Malfunctioning security system, flashing green key light, or keyless entry failure
- Vehicle may not start or crank
- Scan tool cannot communicate with the BCM/MICU
- Replacing individual components like a window motor or light switch when the root cause is the BCM not sending the command.
- Replacing the MICU/BCM without first thoroughly checking the battery, fuses, and all ground connections.
- Mistaking the TPMS module for the BCM/MICU. On this platform, the MICU is the entire driver's side fuse box, not a small, separate module.
Most Likely Causes
- Low Battery Voltage or Poor Connection 🔴 High Probability All modern vehicles with complex electronics are sensitive to voltage. A battery falling below 12.4V can cause modules to drop off the network, triggering false communication codes. Honda Pilots of this era have a relatively small factory ground wire, which can exacerbate voltage drop issues over time.
How to confirm: Test the battery voltage with a multimeter; it should be above 12.4V with the engine off. Test the charging system; it should be 13.5-14.5V with the engine running. Check battery terminals and main ground straps for corrosion and tightness.
Typical fix: Clean battery terminals and cable ends. Charge or replace the battery. Some owners proactively upgrade the main chassis ground wire. 🎬 See this step-by-step guide for upgrading your main ground wire
Est. part cost: $150-$300 - Faulty BCM/MICU Ground Connection 🟡 Medium Probability Corrosion on chassis grounds is a common issue over time, which can interrupt the power supply or reference for the MICU. The main vehicle ground is often on a painted surface from the factory, which can degrade over time.
How to confirm: Locate the main ground wires for the MICU (consult a service manual for specific locations like G501 and G502 near the fuse box) and inspect for corrosion or looseness. Perform a voltage drop test on the ground circuit; it should be less than 0.1 ohms of resistance to the negative battery terminal.
Typical fix: Remove the ground connection, clean the contact point to bare metal, and re-secure it tightly. Apply dielectric grease to prevent future corrosion.
Est. part cost: $0-$10 - Blown Fuse 🟡 Medium Probability
How to confirm: Check all fuses related to the 'MICU', 'BCM', or 'Body' in both the interior (driver's side) and under-hood fuse boxes. Specifically, for a 2012 Pilot, fuses like No. 12, 13, and 15-21 in the under-dash box are related to MICU functions.
Typical fix: Replace the blown fuse. If the fuse blows again immediately, it indicates a short circuit that needs further diagnosis.
Est. part cost: $1-$5 - Faulty Body Control Module (MICU) ⚪ Low Probability While not a frequent failure, the MICU can fail internally due to voltage spikes, water intrusion, or age. Its location under the driver's dash can make it susceptible to water leaks from the cowl or windshield area in some cases.
How to confirm: This is a process of elimination. If the battery, fuses, grounds, and CAN bus wiring have all been tested and confirmed to be good, the MICU itself is the likely culprit. A professional scan tool will show the MICU as completely offline and unresponsive.
Typical fix: Replace the entire under-dash fuse/relay box assembly. The new module must be programmed by a dealer or a qualified shop with tools like the Honda HDS, Autel MaxiSYS, or Launch X431 to match the vehicle's VIN and immobilizer keys.
Est. part cost: $300-$500
Rare But Worth Checking
- CAN Bus Wiring Issue: A short or open in the CAN bus wiring harness can take the MICU/BCM offline. This can be caused by chafing where the harness passes through the firewall, rodent damage under the hood, or corrosion in a connector. This is rare but can be very difficult to diagnose.
- Aftermarket Accessory Interference: Improperly installed aftermarket alarms, remote starters, or stereos that tap into the vehicle's data or power network can disrupt communication and cause this code. These devices can introduce electrical noise or draw unexpected current, causing the MICU to malfunction.
Diagnosis Steps
- Read all codes from all modules using a full-system scan tool. Note which modules are reporting the U0140 code and which modules are offline.
- Check the battery. Ensure it has a static voltage of at least 12.4V and that the terminals and main ground straps are clean and tight.
- Inspect all fuses related to the MICU/BCM in both the under-dash and engine bay fuse panels. 🎬 Watch: Locate and identify every fuse box on your Pilot Refer to the owner's manual for specific fuse numbers.
- Visually inspect the main MICU/BCM ground connections for tightness and corrosion. Key ground points are G501 and G502, located in the driver's side kick panel area. Clean if necessary.
- If simple checks fail, locate the MICU (the driver's side under-dash fuse box). Visually inspect its multiple large connectors (e.g., E, F, G, K, R, T on a 2012 model) for signs of damage, corrosion, or water intrusion.
- With a multimeter, verify that the MICU is receiving proper power (12.2V-12.8V) and ground (less than 0.1 ohms resistance) at its connector pins. This is an advanced step requiring a wiring diagram.
- Test the CAN bus wiring for proper resistance. It should be around 60 ohms between Pin 6 (CAN High) and Pin 14 (CAN Low) at the DLC with the battery disconnected. A reading of 120 ohms suggests an open circuit, while 0 ohms indicates a short.
- Disconnect other modules on the same CAN bus one by one to see if a different faulty module is crashing the network and preventing the MICU from communicating.
- If all wiring, power, and grounds are confirmed good, the MICU is likely faulty and needs replacement and programming.
Parts You'll Likely Need
- Body Control Module (MICU / Fuse Box Assembly)
(OEM #Varies by year/trim, e.g., 38800-SZA-A11, 38800-SZA-A21. Must match original.)— If all other electrical causes are ruled out, the MICU itself has likely failed and is the ultimate fix for this code. It is sold as the entire under-dash fuse box assembly.
Trusted brands: Honda (OEM)
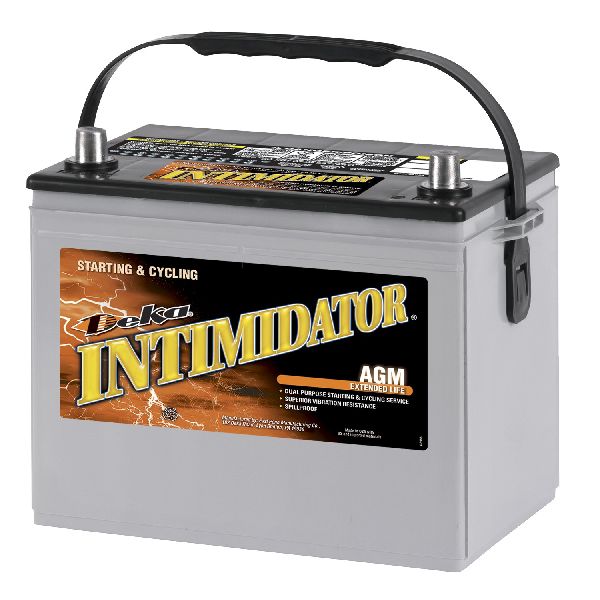
OEM price range: $300-$500 - Battery — A weak or failing battery is a very common cause of network communication codes like U0140.
Trusted brands: Interstate, DieHard, Duralast
OEM price range: $200-$300
Aftermarket price range: $150-$250
Related Codes That Often Appear With This One
- U0100 — Lost Communication with ECM/PCM. If seen with U0140, it suggests a more severe network-wide failure rather than just a BCM issue.
- U0155 — Lost Communication with Instrument Panel Cluster (IPC). This often appears with BCM codes as they are closely linked on the data bus.
- P3400 / P3497 — VCM (Variable Cylinder Management) codes. While unrelated to the BCM communication, these are common on this platform and could appear during a general vehicle scan. Their presence doesn't imply a connection to the U0140 fault.
Platform-Specific Known Issues
- On Honda platforms, the BCM is called the Multiplex Integrated Control Unit (MICU) and is integrated with the driver's side fuse box. It is not a separate, small module.
- Replacement of the MICU requires immobilizer programming with a Honda HDS or equivalent high-end scan tool, otherwise the engine will start and immediately stall.
Mechanic-Grade Diagnostic Values
- CAN Bus Network Resistance — expected: ~60 Ohms. Failure: A reading of ~120 Ohms indicates an open circuit or a missing terminating resistor. A reading near 0 Ohms indicates a short between the CAN High and CAN Low wires.
- CAN Bus Voltage (Key ON, Engine OFF) — expected: CAN High (Pin 6) should be ~2.5-3.5V. CAN Low (Pin 14) should be ~1.5-2.5V.. Failure: Voltages that are stuck high (near 5V or 12V) or low (near 0V) indicate a short to power or ground.
- MICU Ground Circuit Resistance — expected: < 0.1 Ohms. Failure: Higher resistance indicates a poor ground connection, which can cause the module to malfunction.
- MICU Power Supply Voltage — expected: 12.2V - 12.8V (Key ON, Engine OFF). Failure: Low or no voltage indicates a blown fuse, relay issue, or wiring problem in the power supply circuit.
Scan Tool Commands That Help
- Honda HDS (Honda Diagnostic System): Replace MPCS/MICU/IMOES — This function is required after physically replacing the MICU (under-dash fuse box). It registers the new module with the vehicle's immobilizer system, allowing the engine to start.
- Autel MaxiSYS / Launch X431: Immobilizer Setup -> Replace MICU — High-end aftermarket scan tools often have this manufacturer-specific function. It is used to program a new or used MICU to the vehicle's keys and immobilizer system, serving as an alternative to the dealer's HDS tool.
- Honda HDS (or compatible tool): B-CAN System Diagnosis Test Mode — This self-diagnostic mode can be used to check the communication line and test inputs to the MICU without an HDS, using blinks of the interior ceiling light to indicate codes or switch status.
Wiring & Ground Locations
- G501 — Under the driver's side of the dash, behind the kick panel, near the A-pillar. It is a ring terminal bolted to the chassis.. This is a primary ground point for the MICU and other dash components. Corrosion or looseness here can directly cause a U0140 code by interrupting the MICU's ground reference.
- G502 — Under the front passenger's seat area, according to some wiring diagrams.. This is another chassis ground point. While G501 is more directly related, a poor connection at G502 can introduce electrical noise or unstable grounds to the overall system, potentially affecting module communication.
- MICU Connectors (E, F, G, K, R, T, etc.) — Plugged into the back and front of the driver's side under-dash fuse box.. These are the direct power, ground, and data line inputs/outputs for the MICU. Inspecting these for corrosion (especially from water leaks), pushed-out pins, or damage is a critical diagnostic step.
- Data Link Connector (DLC) — Under the driver's side dashboard, typically above the pedals.. Pins 6 (CAN-H) and 14 (CAN-L) provide a direct access point for testing the entire CAN bus network's resistance and voltage without having to access individual modules.
Real Owner Repair Stories
- YouTube user 'Redneck Weekly' (Vehicle appears to be a GM truck, but the principle is universal and relevant.) — U0140 - Lost Communication with Body Control Module.
❌ Tried (didn't work) Initial diagnosis pointed towards a faulty BCM or PCM.
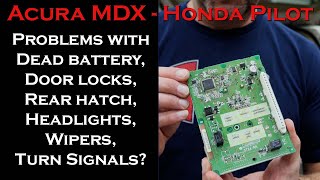
✅ What actually fixed it The user fixed the communication error by running a new, supplemental ground wire directly from the negative battery terminal to the mounting bolts of the Body Control Module (BCM) and also to the Powertrain Control Module (PCM) bracket. This indicates the factory ground path was insufficient or had high resistance. - YouTube user 'Jared's Shop' (2008 Acura MDX (platform relative of the Pilot)) — Multiple weird electrical issues: key fob not working, dead battery, headlights/wipers/turn signals not working intermittently.
❌ Tried (didn't work) Initially suspected a dead battery.
✅ What actually fixed it The root cause was a water leak from a body seam in the roof drip rail, which allowed water to soak into sound-deadening foam and drip directly onto the MICU/fuse box. The fix was drying out the fuse panel and sealing the body seam with Dicor lap sealant. All electrical functions returned to normal after the MICU dried out.
Model Year Variations Within This Range
- 2009-2011 vs 2012-2015: The Honda Pilot received a facelift for the 2012 model year, which included some electrical and interior updates. While the fundamental role of the MICU is the same, fuse box layouts and specific part numbers for the MICU assembly may differ between pre-facelift (2009-2011) and post-facelift (2012-2015) models. Always match the part number from the original unit when sourcing a replacement.
Diagnostic Flowchart
Other Known Issues on This Vehicle
Issues unrelated to this code that are worth knowing about as an owner of this generation:
- Variable Cylinder Management (VCM) Issues 🔴 High — Very common. Can lead to fouled spark plugs, excessive oil consumption, and eventually piston ring damage. Codes P3400/P3497 are common. (Ref: Honda issued warranty extensions (e.g., 13-082) for some model years to address piston ring issues related to VCM.)
- Torque Converter Judder/Shudder 🟠 Medium — Common issue, especially on later 2nd gen and early 3rd gen models. Feels like driving over a rumble strip between 20-60 mph. (Ref: Multiple TSBs exist (e.g., 16-091, 17-014, 17-015) which often involve a transmission fluid flush and a software update to fix the issue.)
- Ticking/Knocking Engine Noise at Warm Idle 🟡 Low — Fairly common. Caused by loose rocker arm bridge bolts on the J35 engine.
- Compliance Bushing Failure 🟠 Medium — Common wear item. The large front lower control arm bushings crack and leak fluid, causing clunking noises over bumps and imprecise steering.
Used vs. New Parts: Buying Guide for This Vehicle
When a used part is the smart pick: A used MICU (the entire driver's side fuse box assembly) from a reputable salvage yard is a very cost-effective option, often saving hundreds of dollars compared to a new OEM part. Since this is an electronic module and not a mechanical wear item, a used unit from a vehicle that was not in a flood or major front-end collision is generally reliable.
Donor-vehicle mileage cap: roughly under 150000 miles for the part to have meaningful remaining life.
What to inspect on the donor part:
- Match the OEM part number EXACTLY. There are many variations based on trim level (LX, EX, Touring) and model year.
- Inspect all connectors for any signs of corrosion, water marks (chalky residue), or melted/burnt plastic.
- Ask the salvage yard about the donor vehicle's history. Avoid parts from flood-damaged cars at all costs.
- Ensure none of the plastic connector housings on the fuse box are cracked or broken.
OEM-only on this vehicle (don't cheap out):
- Body Control Module (MICU) - While a used OEM part is fine, aftermarket or 'remanufactured' units for this specific component are not widely available or trusted. Stick with genuine Honda parts, either new or used.
Brands owners have reported issues with on this vehicle:
- Avoid generic, unbranded 'rebuilt' or 'remanufactured' MICU/fuse box assemblies from online marketplaces unless they come with a lifetime warranty and clear programming instructions.
Real Owner Stories
Aggregated from forums and TSBs cited above. Mileages and costs reflect what owners reported in those sources.
2017 Honda Pilot 2WD
Symptoms: The vehicle's alarm was going off randomly and the lights were flickering.
What fixed it: Users advised checking the battery, alternator, and grounds before replacing the BCM.
Source hint: r/hondapilot on Reddit thread titled 'Body Control Module Failure 2017 Honda Pilot 2WD'
2015 Honda Pilot
Symptoms: Owner was searching for the BCM location to address communication issues but could not find a separate module.
What fixed it: Identified that the BCM (MICU) is actually the fuse box itself, not a separate module behind the dash.
Source hint: r/AskMechanics on Reddit thread titled 'BCM location for 2015 Honda Pilot'
Related OBD-II Codes
Frequently Asked Questions
Where is the BCM located on my 2009-2015 Honda Pilot?
Can I replace the MICU myself to fix the U0140 code?
Why is my Pilot's green key light flashing along with the U0140 code?
Are there specific fuses I should check for MICU communication issues on a 2012 Pilot?
Could a bad ground cause U0140 on my Honda Pilot?
Is there a TSB for the transmission shudder I'm feeling alongside these electrical issues?
Helpful Videos

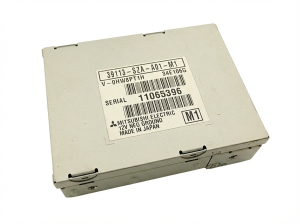
Used OEM Parts in Stock



New Aftermarket Parts Available


The information in this article is provided for general reference and educational purposes only. Vehicle specifications, procedures, and part compatibility can vary by production date, trim level, and region. Always consult your vehicle's factory service manual and verify part numbers before purchasing or performing repairs. Safety-critical components such as airbags, seat belts, and braking systems should be installed by a qualified professional.
- Honda Pilot:
- 🎬 Helpful Videos
- 🛍️ Shop This Part
- What's Unique About the 2009-2015 Honda Pilot
- Symptoms You May Notice
- Most Likely Causes
- Rare But Worth Checking
- Diagnosis Steps
- Parts You'll Likely Need
- Related Codes That Often Appear With This One
- Platform-Specific Known Issues
- Mechanic-Grade Diagnostic Values
- Scan Tool Commands That Help
- Wiring & Ground Locations
- Real Owner Repair Stories
- Model Year Variations Within This Range
- Diagnostic Flowchart
- Other Known Issues on This Vehicle
- Used vs. New Parts: Buying Guide for This Vehicle
- Real Owner Stories
- 2017 Honda Pilot 2WD
- 2015 Honda Pilot
- Related OBD-II Codes
- Frequently Asked Questions
- 🎟️ Get 5% Off