

P1299 on 2002-2010 Ford Explorer 4.6L V8: Cylinder Head Overheating Causes and Fixes
P1299 on a 4.6L V8 Explorer means the engine's computer has activated 'limp mode' due to an overheating signal. This is most often caused by a failed Cylinder Head Temperature (CHT) sensor giving a false reading, not actual overheating. Replacing the CHT sensor, located behind the alternator in the engine valley, is the most common fix. Do not assume the engine is ruined; it's usually just a bad sensor.
- P1299 is a critical code indicating the engine is in a protective 'limp mode' due to high cylinder head temperature. Do not continue to drive.
- The first step is to determine if the engine is actually overheating (steam, pegged temp gauge) or if it's a false warning.
- If the engine is not physically hot, the most likely cause is a failed Cylinder Head Temperature (CHT) sensor.
- On the 4.6L V8, the CHT sensor can be replaced by removing the alternator, which is much easier than removing the intake manifold.
- If the engine is truly overheating, check for low coolant, a stuck thermostat, or a failing water pump.
What's Unique About the 2002-2010 Ford Explorer

Unlike many vehicles that rely on a sensor submerged in coolant (ECT sensor), the Ford 4.6L V8 in this Explorer generation uses a 'dry' Cylinder Head Temperature (CHT) sensor. This sensor screws directly into the cylinder head metal, allowing it to detect an overheating condition even if there's a catastrophic loss of all engine coolant. Because of this design, a very common failure point is the sensor itself sending a false signal, tricking the computer into activating limp mode when the engine temperature is perfectly normal. The sensor's location under the intake manifold, behind the alternator, also makes its replacement a unique, though well-documented, procedure for this specific engine.
Generation note: This guide covers the 2002-2005 (Third Generation) and 2006-2010 (Fourth Generation) Ford Explorer with the 4.6L V8. The earlier models used a 2-valve version of the engine, while the later models used a 3-valve version. However, the meaning of code P1299, the function of the CHT sensor, and the common causes and repair strategies are consistent across both generations.
Symptoms You May Notice
- Check Engine Light is on
- Engine goes into a low-power 'limp mode', feels like it has no power to accelerate
- Message on the dashboard indicating 'Engine Coolant Overtemperature' or similar warning
- Temperature gauge suddenly spikes to HOT, then may return to normal just as quickly
- Engine may run rough or stall
- Cooling fans running on high speed constantly
- Check Gauges light may illuminate
- Replacing the thermostat when the issue is a false signal from a bad CHT sensor.
- Assuming the engine is destroyed because of the 'overtemperature' warning, when it's often just a faulty sensor.
- Replacing the PCM when the issue is a simple wiring fault or bad sensor.
- Overlooking a cracked plastic intake manifold and only topping off coolant, leading to a recurring problem.
Most Likely Causes


- Faulty Cylinder Head Temperature (CHT) Sensor 🔴 High Probability This is the most frequent cause when the engine is not actually overheating. The sensor, a thermistor, fails and sends an erroneous high-temperature signal to the PCM. This is a well-documented failure on Ford's modular V8s.
How to confirm: With a cold engine, use a scan tool to view the live CHT sensor data. If the temperature immediately reads very high (e.g., 250°F+), the sensor is bad. You can also compare the sensor reading to the actual head temperature using an infrared thermometer; a large discrepancy points to a bad sensor. A classic symptom is the temp gauge pegging hot instantly after a cold start.
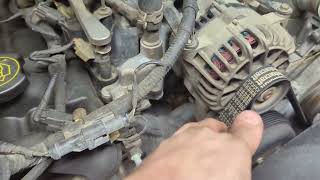
Typical fix: Replace the CHT sensor. On the 4.6L V8, this requires removing the alternator to access the sensor located on the driver's side cylinder head. The coolant does not need to be drained for this repair as it is a 'dry' sensor. Many owners recommend using a genuine Motorcraft part 🎬 Watch: See the CHT sensor and its specific part number. for reliability.
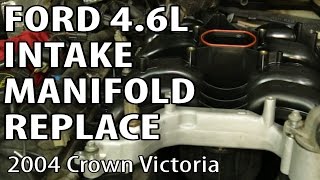
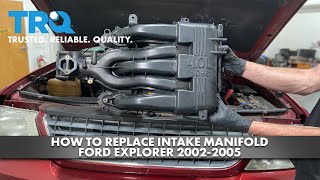
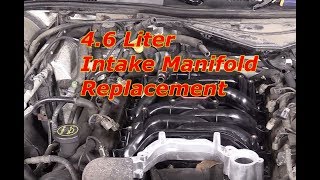
Est. part cost: $25-$85 - Low Engine Coolant Level 🟡 Medium Probability Coolant can be lost over time due to leaks. A notorious weak point on the 4.6L V8 is the plastic intake manifold, which can crack near the thermostat housing or front coolant crossover, causing a slow leak that might not be immediately obvious. 🎬 See how a cracked intake manifold causes hidden coolant leaks. Other common leaks are from hoses, the radiator, water pump, or the thermostat housing itself.
How to confirm: Visually inspect the coolant level in the overflow reservoir when the engine is cold. Check for visible signs of coolant leaks (puddles under the vehicle, crusty residue around hoses, or in the engine valley below the intake manifold). Perform a cooling system pressure test to find leaks that aren't obvious.
Typical fix: Find and repair the source of the leak. If it's a cracked intake manifold, it must be replaced. Then, refill the cooling system with the correct type of coolant (Ford specifies Motorcraft Gold for these years, but always verify) and properly bleed any air from the system.
Est. part cost: $10-$600 depending on the source of the leak (hose vs. intake manifold). - Stuck-Closed Thermostat ⚪ Low Probability
How to confirm: After the engine has warmed up, carefully feel the upper and lower radiator hoses. If the thermostat is working, both should be hot. If the upper hose is hot and the lower hose is cool, the thermostat is likely stuck closed, preventing coolant from circulating through the radiator.
Typical fix: Replace the thermostat and gasket. It is recommended to also replace the coolant at the same time.
Est. part cost: $20-$50 - CHT Sensor Wiring or Connector Issue ⚪ Low Probability
How to confirm: Visually inspect the wiring harness and connector leading to the CHT sensor for any signs of damage, corrosion, or loose connections. The wiring is in a hot engine valley and can become brittle or be damaged by rodents. A short in the wiring can cause a false reading.
Typical fix: Repair the damaged section of wire or replace the connector pigtail. Ensure the connection is clean and secure. The pigtail is often sold as a separate part (e.g., Motorcraft WPT-117).
Est. part cost: $15-$40
Rare But Worth Checking
- Failing Water Pump: While less common than a bad sensor or low coolant, a water pump with a seized bearing or a failing impeller won't circulate coolant effectively, leading to a real overheat condition. Check for coolant leaking from the pump's weep hole or noise from the pump bearing.
- Failing Cooling Fan Clutch/Motor: These Explorers use a mechanical fan with a clutch. If the clutch fails, the fan won't engage properly at low speeds, causing overheating in traffic. If the fan motor on electric fan models fails, the same issue will occur.
- Failing Alternator: In some rare cases, a failing alternator can introduce electrical noise (AC ripple) into the vehicle's electrical system, which can interfere with the CHT sensor's signal and cause a false P1299 code. This can be diagnosed by a technician using a multimeter or oscilloscope to check for AC voltage at the battery while the engine is running.
Diagnosis Steps

- Check for Actual Overheating: First, determine if the engine is truly overheating. Is steam coming from the engine bay? Is the temperature gauge pegged on H? If so, stop immediately. If not, and especially if the gauge spiked instantly on a cold start, the problem is likely electrical.
- Verify Coolant Level: Once the engine is completely cool, check the coolant level in the degas bottle (reservoir). If it's low, top it off and inspect for leaks, paying close attention to the plastic intake manifold in the engine valley.
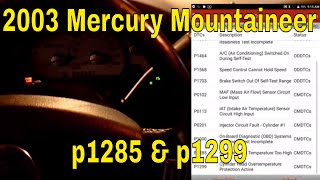
- Scan for Codes: Read the trouble codes with an OBD-II scanner to confirm P1299 and any other 🎬 Watch: Diagnosing P1285 and P1299 codes on a Ford V8. related codes like P1285.
- Check Live Sensor Data: With the scanner, view the live data for the CHT sensor. On a cold engine, it should read ambient temperature. If it reads a very high temperature (e.g., >250°F) right away, the sensor or its circuit is faulty.
- Inspect CHT Sensor and Wiring: Visually inspect the CHT sensor connector and nearby wiring for damage, corrosion, or loose pins. The sensor is located behind the alternator on the driver's side cylinder head.
- Test the Cooling System: If the sensor appears to be reading correctly but the engine is getting hot, perform a cooling system pressure test to find hidden leaks. Check for a stuck thermostat, a failing water pump, or a non-functional cooling fan.
- Repair and Clear: Based on the findings, replace the faulty component. After the repair, clear the P1299 code. Note that after a genuine overheat event, this code may be stored as a 'permanent' code and may require several drive cycles to clear on its own.
Parts You'll Likely Need
- Cylinder Head Temperature (CHT) Sensor
(OEM #9L8Z-6G004-C)— This is the most common failure point for a false P1299 code on this vehicle. It sends the temperature reading that triggers the code. The part number 9L8Z-6G004-C replaces the older part number 3L7Z-6G004-BA.
Trusted brands: Motorcraft, Standard Motor Products, Delphi - CHT Sensor Connector Pigtail
(OEM #WPT-117 (Motorcraft example))— The connector itself can become brittle and fail due to heat cycles in the engine valley.
Related Codes That Often Appear With This One
- P1285 — This code, 'Cylinder Head Over-temperature Sensed,' is a related code that often appears alongside P1299 as part of the same overheating detection event. P1285 indicates the temperature has been exceeded, while P1299 indicates the protective action (limp mode) has been taken.
- P0217 — This is a generic code for 'Engine Coolant Over-temperature Condition' and can be triggered by the same set of real overheating circumstances that would trigger P1299.
Technical Service Bulletins (TSBs) & Recalls
- While no TSBs point specifically to P1299 on the 2002-2010 Explorer 4.6L, related TSBs for other Ford models with different engines (like TSB 19-2346 for 2.0L EcoBoost) show that P1299 is the designated code Ford uses for activating fail-safe cooling across its lineup for various root causes.
Mechanic-Grade Diagnostic Values
- CHT Sensor Resistance vs. Temperature — expected: Approx. 37.3 kΩ at 68°F (20°C), 9.4 kΩ at 122°F (50°C), 1.18 kΩ at 212°F (100°C). Resistance is inversely proportional to temperature.. Failure: An open circuit (infinite resistance) or a short (near zero resistance) at any temperature. Also, any reading that is drastically different from the expected value for a known temperature.
- CHT Sensor Signal Voltage (Key On, Engine Off) — expected: Approx. 3.4V - 3.5V on a cold-soaked engine at 68°F (20°C). Voltage decreases as temperature rises, to approx. 0.70V at 210°F (99°C).. Failure: A reading near 5.0V or near 0.0V on a cold engine, or a reading that doesn't change as the engine warms up.
- CHT Sensor Reference Voltage (Sensor Disconnected, Key On) — expected: Approximately 5.0 Volts on one of the two pins in the connector harness.. Failure: No voltage or significantly less than 5.0V indicates a problem with the wiring or the PCM's 5V reference circuit.
Scan Tool Commands That Help
- OBD-II Scanner: Clear Codes / Reset KAM — After a repair is complete, codes must be cleared. Note: Following a genuine, severe overheat, P1299 may be stored as a 'permanent' DTC (PDTC). A PDTC cannot be cleared with a scanner and will only be removed by the PCM after it successfully runs the monitor on several consecutive drive cycles without the fault reoccurring.
Wiring & Ground Locations
- CHT Sensor Circuit — The CHT sensor has a two-wire connector. One wire is the signal wire to the PCM, the other is a signal return/ground.. For a 3V engine, continuity can be checked between CHT connector pin 2 (Yellow/Gray wire) and PCM connector C175E, pin 41. A break in this wire will cause a fault.
- G104 (Ground) — On early models (c. 2002), this ground is located at the right rear of the engine compartment. This is a common ground point for engine sensors.. A poor connection at G104 can cause erratic readings from multiple engine sensors, including the CHT, leading to false codes.
- G106 (Ground) — On later models (c. 2010), this ground is on the right side of the engine compartment.. A corroded or loose G106 can create a floating ground, causing unpredictable voltage readings from the CHT sensor circuit.
Real Owner Repair Stories
- YouTube user account (Ford vehicle with P1299 (specific model not stated, but logic applies)) — Engine would bog down, temperature gauge would shoot to HOT, multiple warnings on the dash, and the engine would sometimes stall. The issue was intermittent.
❌ Tried (didn't work) Replaced the CHT sensor, Replaced the Powertrain Control Module (PCM)
✅ What actually fixed it The alternator was faulty and introducing excessive AC ripple (electrical noise) into the vehicle's electrical system, which interfered with the CHT sensor's signal. Disconnecting the alternator's main power cable made the problem go away instantly (for testing purposes). Replacing the alternator was the final fix.
OEM Part Supersession History
3L7Z-6G004-BA→9L8Z-6G004-C— Part revision and consolidation.
Heads up: While this is the common supersession for the Explorer, Ford has used multiple CHT sensor part numbers across the 4.6L engine family (e.g., 8L3Z-6G004-A for Panther platforms). Always verify the correct part number for your specific vehicle's VIN before purchasing.
Model Year Variations Within This Range
- 2002-2005 (4.6L 2V Engine): The CHT sensor is typically located at the top front of the driver's side cylinder head, behind the alternator. These models feature an all-plastic intake manifold that is highly prone to cracking at the coolant crossover, causing leaks that can lead to a real overheat condition.
- 2006-2010 (4.6L 3V Engine): The CHT sensor is located at the rear of the right (passenger side) cylinder head. The intake manifold design was improved, but these engines introduced new potential failure points not directly related to P1299, such as cam phaser issues and two-piece spark plugs that can break during removal.
Diagnostic Flowchart
Used vs. New Parts: Buying Guide for This Vehicle
When a used part is the smart pick: For this specific code, using used parts is generally not recommended. The primary failure points are a low-cost electronic sensor (CHT) or a high-failure-rate plastic component (intake manifold). A used part is likely to have a similar risk of failure.
Donor-vehicle mileage cap: roughly under 80000 miles for the part to have meaningful remaining life.
What to inspect on the donor part:
- For an intake manifold, look for a donor vehicle from a dry, non-salt-belt state to minimize corrosion on fittings.
- Inspect a used manifold for any hairline cracks, especially around the thermostat housing and coolant crossover.
- Avoid any parts from a vehicle that shows signs of severe overheating (discolored plastic, burnt wiring).
OEM-only on this vehicle (don't cheap out):
- Cylinder Head Temperature (CHT) Sensor: While quality aftermarket exists, the price difference is small and the OEM Motorcraft sensor is proven. Given the labor to access it, using the best available part is wise.
Aftermarket brands forum-validated for this vehicle:
- Intake Manifold: Dorman is a widely used and generally accepted replacement for the OEM manifold, often at a lower cost.
- CHT Sensor: Standard Motor Products (SMP), Delphi, NTK.
Brands owners have reported issues with on this vehicle:
- Intake Manifold (Dorman Caveat): Some owners report Dorman manifolds have casting flash inside the intake runners that can restrict airflow compared to OEM. Others note that included rubber caps for unused ports can dry-rot and fail prematurely.
Real Owner Stories
Aggregated from forums and TSBs cited above. Mileages and costs reflect what owners reported in those sources.
Ford F-150 4.6L V8
Symptoms: The temperature gauge suddenly spiked, the engine went into limp mode, but the engine was not physically hot to the touch.
What fixed it: The issue was identified as a faulty Cylinder Head Temperature (CHT) sensor.
Source hint: A 2017 owner story on an F-150 forum describing the classic symptoms of a false overheat.
2003 Mercury Mountaineer 4.6L V8
Symptoms: Check Engine Light was on with codes P1285 and P1299 stored.
What fixed it: Diagnosis and repair of the CHT sensor and its related circuit.
Source hint: A YouTube video from 2020 showing the diagnosis and repair process for this shared platform vehicle.
Ford Truck with 4.6L V8
Symptoms: The vehicle stored a P1299 trouble code.
What fixed it: The owner was advised that the likely cause was the CHT sensor, implying its replacement would resolve the code.
Source hint: A 2003 thread on Ford Truck Enthusiasts.
Related OBD-II Codes
Frequently Asked Questions
Where is the Cylinder Head Temperature (CHT) sensor located on my 2004 Explorer 4.6L V8?
My temperature gauge shot up to HOT right after starting my cold Explorer. Is it really overheating?
Do I have to drain the engine coolant to replace the CHT sensor?
What is the most common cause of a coolant leak on the 4.6L V8 that could lead to a real overheat and a P1299 code?
Is there a specific brand of CHT sensor recommended for this repair?
My 2003 Mercury Mountaineer with the 4.6L V8 has this code. Does this article apply?
How can I test the CHT sensor myself to see if it's bad?
Helpful Videos

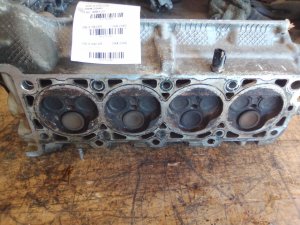
Used OEM Parts in Stock



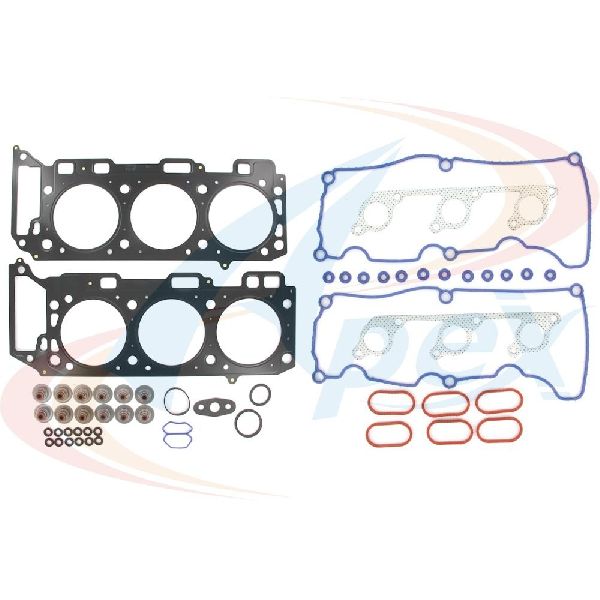
New Aftermarket Parts Available



The information in this article is provided for general reference and educational purposes only. Vehicle specifications, procedures, and part compatibility can vary by production date, trim level, and region. Always consult your vehicle's factory service manual and verify part numbers before purchasing or performing repairs. Safety-critical components such as airbags, seat belts, and braking systems should be installed by a qualified professional.
- Ford Explorer:
- 🎬 Helpful Videos
- 🛍️ Shop This Part
- What's Unique About the 2002-2010 Ford Explorer
- Symptoms You May Notice
- Most Likely Causes
- Rare But Worth Checking
- Diagnosis Steps
- Parts You'll Likely Need
- Related Codes That Often Appear With This One
- Technical Service Bulletins (TSBs) & Recalls
- Mechanic-Grade Diagnostic Values
- Scan Tool Commands That Help
- Wiring & Ground Locations
- Real Owner Repair Stories
- OEM Part Supersession History
- Model Year Variations Within This Range
- Diagnostic Flowchart
- Used vs. New Parts: Buying Guide for This Vehicle
- Real Owner Stories
- Ford F-150 4.6L V8
- 2003 Mercury Mountaineer 4.6L V8
- Ford Truck with 4.6L V8
- Related OBD-II Codes
- Frequently Asked Questions
- 🎟️ Get 5% Off