

P1289 on 2007-2014 Ford Expedition 5.4L: CHT Sensor Circuit High Guide
On a 2007-2014 Expedition with the 5.4L V8, P1289 almost always means the Cylinder Head Temperature (CHT) sensor has failed or its wiring is damaged. Expect symptoms like a dead temperature gauge and fans running constantly. The sensor itself is inexpensive (~$25-$50), but access is difficult as it's located under the intake manifold. A common shortcut is to remove the alternator for access instead of the entire intake.
- P1289 on your Expedition means the CHT sensor circuit has an open, most likely due to a failed sensor or damaged wire.
- Symptoms are severe: the engine enters limp mode, the temp gauge dies, and the cooling fans run constantly.
- The most probable fix is replacing the CHT sensor.
- The repair is challenging for DIYers due to the sensor's location under the intake manifold, often requiring alternator removal.
- Always inspect the wiring harness for damage before replacing the sensor, as a broken wire can mimic a failed sensor.
What's Unique About the 2007-2017 Ford Expedition
Unlike many vehicles that use an Engine Coolant Temperature (ECT) sensor submerged in coolant, the Ford 5.4L 3V engine uses a Cylinder Head Temperature (CHT) sensor. This sensor threads directly into the cylinder head to measure the engine's metal temperature. This design allows the PCM to infer engine temperature even if a catastrophic coolant loss occurs. When the P1289 code sets, the PCM initiates a fail-safe cooling mode, which can include disabling the A/C, running the fans at maximum speed, and altering engine performance to prevent damage.
Generation note: The specified vehicle range (2007-2017) covers the entire third generation (U324) of the Ford Expedition. However, the 5.4L 3V V8 engine was only offered from 2007 to 2014. For the 2015-2017 model years, this engine was replaced by the 3.5L EcoBoost V6, which has different sensor locations and procedures. This guide is specific to the 2007-2014 models with the 5.4L engine.
Symptoms You May Notice
- Check Engine Light is on
- Temperature gauge on the dashboard is inoperative or reads cold.
- Engine cooling fans run constantly at high speed, even on a cold start.
- Air conditioning (A/C) compressor will not engage.
- Engine may enter a reduced power 'limp mode'.
- Potential no-start condition when the engine is hot.
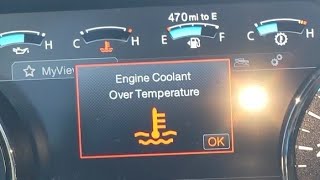
- Engine temperature warning light or message on the instrument cluster.
- Replacing the thermostat. While a faulty thermostat can cause overheating, it will not directly cause the P1289 'Circuit High' code.
- Replacing the water pump. A failing water pump will cause overheating but will not cause an electrical circuit fault code like P1289.
Most Likely Causes
- Failed Cylinder Head Temperature (CHT) Sensor 🔴 High Probability The sensor operates in a high-heat environment and can fail internally over time, creating an open circuit which results in the high voltage reading.
How to confirm: With a scan tool, observe the CHT voltage PID; if it's stuck above 4.6V even when the engine is off, the sensor or circuit is open. You can also test the sensor's resistance with a multimeter. Expected values are approximately 37 kΩ at 68°F (20°C) and should drop to around 2.4 kΩ at 176°F (80°C). An infinite resistance reading (OL) confirms an open/failed sensor.
Typical fix: Replace the CHT sensor.
Est. part cost: $25-$60 - Damaged CHT Sensor Wiring or Connector 🟡 Medium Probability The wiring harness is routed in a hot, tight space under the intake manifold. Wires can become brittle and break, chafe against the engine block, or get damaged by rodents, leading to an open circuit. Previous repairs with poor splices can also corrode and fail.
How to confirm: Perform a 'wiggle test' on the harness while monitoring CHT voltage. Visually inspect the entire length of the wiring from the sensor to the main harness for breaks, chafing, or corrosion. On many 5.4L trucks, the wires are Grey/Red (Signal Return) and Yellow/Light Green (Signal from PCM). A user on expeditionforum.com found a corroded splice in the pigtail was the root cause.
Typical fix: Repair the broken wire(s) or replace the connector pigtail. Some owners create a longer pigtail to route it away from direct heat.
Est. part cost: $10-$30 - Low Engine Coolant ⚪ Low Probability While the sensor doesn't sit in coolant, a very low coolant level can cause a localized hot spot on the cylinder head where the sensor is located. This extreme heat can cause the sensor to fail or produce an out-of-range reading.
How to confirm: Check the engine coolant level in the degas bottle and radiator. Pressure test the cooling system to check for leaks.
Typical fix: Top off the coolant and repair any leaks found.
Est. part cost: $20-$40 for coolant
Rare But Worth Checking
- Faulty Powertrain Control Module (PCM): This is extremely rare. Before condemning the PCM, all other possibilities, including a thorough wiring inspection all the way to the PCM connector, must be exhausted. A faulty PCM driver for the CHT circuit would be the cause.
Diagnosis Steps
- Verify the P1289 code is present using an OBD-II scanner.
- Using live data on the scanner, check the CHT voltage reading. 🎬 Watch: Diagnosing the P1289 code and testing the sensor circuit. If it is stuck at or above 4.6V, this confirms the 'Circuit High' condition.
- Check the engine coolant level to rule out any overheating issues caused by low coolant.
- Visually inspect the wiring harness leading to the CHT sensor. It is located under the intake manifold. Look for any signs of damage, chafing, melting, or rodent activity, which is a known issue.
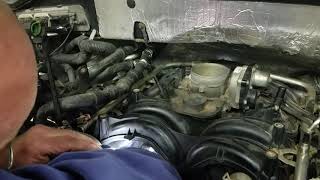
- If wiring looks good, the next step is to test the sensor. Access is difficult. The official method requires removing the intake manifold. However, a widely used shortcut is to remove the alternator and its bracket to gain access.
- Disconnect the sensor. Test the resistance across the two pins of the sensor. A good sensor will have high resistance when cold (~37k ohms @ 68°F) and low resistance when hot (~2.4k ohms @ 176°F). Infinite resistance means the sensor is bad.
- With the sensor disconnected and ignition ON, check the harness-side connector. One wire (often Yellow/Light Green) should have a 5-volt reference signal from the PCM, and the other (often Grey/Red) is the signal return (ground). If the 5V reference is missing, the problem is in the wiring harness or, rarely, the PCM.
- If the wiring and reference voltage are good, the CHT sensor itself is faulty and should be replaced. A 19mm flex-head ratcheting wrench 🎬 See how to access the sensor by removing the alternator. is highly recommended for this job if using the alternator-removal method.
- If replacing the sensor does not fix the issue, the wiring harness between the connector and the PCM is the most likely culprit.
Parts You'll Likely Need
- Cylinder Head Temperature (CHT) Sensor
(OEM #5L1Z-6G004-A)— This sensor is the most common failure point for the P1289 code due to internal failure from heat cycles.
Trusted brands: Motorcraft, NTK, Standard Motor Products (SMP)
OEM price range: $40-$70
Aftermarket price range: $25-$50 - CHT Sensor Connector Pigtail
(OEM #Motorcraft WPT-148)— If the connector itself is corroded or the wires are broken right at the connector, replacing the pigtail is the best repair. This is a common point of failure due to heat and vibration.
Trusted brands: Motorcraft, Dorman
OEM price range: $20-$40
Aftermarket price range: $10-$25
Related Codes That Often Appear With This One
- P1299 — P1299 ('Cylinder Head Over-temperature Protection Active') is often triggered as a result of the P1289 fault. The PCM, lacking a valid temperature signal, activates its fail-safe cooling strategy as a precaution.
- P0119 — P0119 ('Engine Coolant Temperature Sensor Circuit Intermittent') may appear alongside P1289, especially if the wiring fault is intermittent, causing the signal to drop in and out before failing completely open.
Technical Service Bulletins (TSBs) & Recalls
- TSB 06-19-8: Addresses ticking/rattling noises from the VCT/cam phaser system, a common issue on the 5.4L 3V engine.
- SSM 47331: Notes that 5.4L 3V engines may exhibit upper end engine noise, rough running, and misfires, related to the VVT system.
Platform-Specific Known Issues
- The location of the CHT sensor on the 5.4L 3V engine is notoriously difficult to access. It is located on the driver's side cylinder head, underneath the intake manifold, towards the front of the engine.
- A common and effective repair strategy to avoid the high labor of removing the intake manifold is to instead remove the alternator and its mounting bracket. This provides just enough clearance to access the sensor with a 19mm flex-head ratcheting wrench.
- Owners have reported that after repairing a damaged wiring pigtail, they fabricated a longer harness to route the wires away from the intense heat at the back of the intake manifold, potentially increasing the longevity of the repair.
Mechanic-Grade Diagnostic Values
- CHT Sensor Resistance vs. Temperature — expected: ~37 kΩ @ 68°F (20°C); ~2.4 kΩ @ 176°F (80°C); ~1.1 kΩ @ 212°F (100°C).. Failure: An infinite resistance reading (OL) indicates an open/failed sensor. A reading that doesn't change with temperature is also a failure.
- CHT Sensor Connector Voltage (KOEO, Sensor Unplugged) — expected: One pin should show ~5V (VREF from PCM), the other should show near 0V (Signal Return/Ground).. Failure: Absence of the 5V reference points to a wiring issue between the PCM and the connector, or a rare PCM fault.
- Scan Tool CHT Voltage PID (KOEO) — expected: Voltage should correlate with ambient temperature (e.g., 3.0V - 4.0V on a cold engine).. Failure: A voltage reading greater than 4.6V indicates an open circuit and will trigger P1289.
- Wiring Harness Voltage Drop Test — expected: Less than 0.3V.. Failure: A reading above 0.3V indicates excessive resistance in the circuit being tested (either the 5V reference side or the ground side).
Wiring & Ground Locations
- G101 / G102 / G103 / G104 — These are primary engine compartment grounds located on the firewall and inner fenders, typically on the right (passenger) side near the PCM and battery.. The CHT sensor's signal return wire ultimately connects to a chassis ground. A corroded or loose main ground can cause floating voltages and erratic sensor readings, although it would likely cause multiple other codes as well.
- CHT Sensor Connector (C110) — On the sensor itself, located under the intake manifold on the driver's side cylinder head.. This is the primary point of failure for wiring issues. The connector can become brittle from heat, and the wires can break internally or corrode at the pins.
- PCM Connector (C175B) — The middle of the three large connectors on the Powertrain Control Module (PCM), located on the passenger side firewall.. This is the termination point for the CHT sensor wiring. A full continuity test must be performed from the CHT sensor connector (C110) to the appropriate pins at this connector to rule out a wiring break.
Real Owner Repair Stories
- Expedition Forum user Shantheman73 (Ford Expedition (year not specified, but 3rd Gen)) — Check engine light, temp warning light, temp gauge dropping to 'C', codes P0119 and P1289.
❌ Tried (didn't work) Replacing the CHT sensor, Replacing the thermostat, Flushing and replacing coolant
✅ What actually fixed it The vehicle was taken to a dealer who found and repaired a broken wire between the main wiring harness and the CHT sensor connector. - Reddit user Tyler_From_Canada (2007 Ford F150 Lariat 5.4L 3V) — P1289 code, immediate return after clearing.
❌ Tried (didn't work) Replacing the CHT sensor with a new part from NAPA.
✅ What actually fixed it The user found the harness connector behind the engine, performed a continuity test, and discovered a broken wire on pin 1. Repairing the broken wire resolved the code. - F150 Forum user wjfawb0 (2010 Ford F-150 5.4L) — Constant P1289 code that returns in seconds after clearing, limp mode, fans on high, no A/C on cold starts.
❌ Tried (didn't work) Replacing the CHT sensor.
✅ What actually fixed it The user concluded the issue must be wiring damage, likely from a past rodent issue, and the next step was to pull the entire intake manifold to inspect the harness that was not visible with mirrors. This highlights that a sensor replacement is not a guaranteed fix.
When the Usual Fixes Don't Work
- Multiple real-world repair stories indicate that simply replacing the CHT sensor, which is the most common suggested fix, has a high rate of failure in resolving the P1289 code. In many documented cases, owners replaced the sensor (sometimes multiple times) only to have the code return immediately. The actual root cause was frequently found to be a break, chafe, or corrosion in the wiring harness located under the intake manifold—an area difficult to inspect and requiring more extensive labor to access and repair than the sensor itself.
OEM Part Supersession History
F65Z-6G004-AB→8L3Z-6G004-A— Part revision and consolidation over model years.
Heads up: The Pass 2 OEM part number 5L1Z-6G004-A is also superseded by 8L3Z-6G004-A. These parts are generally interchangeable for the 5.4L 3V application.
Diagnostic Flowchart
Other Known Issues on This Vehicle
Issues unrelated to this code that are worth knowing about as an owner of this generation:
- Spark Plug Breakage During Removal 🔴 High — Very common, especially on plugs with over 60k-75k miles. The long, two-piece spark plug design allows carbon to build up on the lower electrode shield, causing it to seize in the cylinder head. Attempting removal often breaks the plug, leaving the lower half in the head, requiring a special extraction tool. (Ref: Ford issued a TSB with special procedures, but breakage is still common.)
- Cam Phaser / VVT System Failure 🔴 High — Extremely common, often appearing as a ticking or diesel-like knocking sound at hot idle ('Triton Tick'). Caused by a combination of failing cam phasers, worn timing chain guides, failing tensioner seals leading to low oil pressure, and clogged VCT solenoids. If ignored, can lead to catastrophic engine failure. (Ref: TSB 06-19-8 and others address the noise and diagnostic procedures.)
- Fuel Pump Driver Module (FPDM) Corrosion 🟠 Medium — Common failure, particularly in regions with road salt. The module was mounted directly to the steel frame without adequate insulation, causing the aluminum housing to corrode and the internal electronics to fail. This results in intermittent stalling, hard starting, or a no-start condition.
Used vs. New Parts: Buying Guide for This Vehicle
When a used part is the smart pick: A used part is a reasonable choice for a replacement wiring harness connector pigtail. Sourcing a pigtail with a few inches of wire from a junkyard vehicle can provide an OEM-quality connector for a low cost.
Donor-vehicle mileage cap: roughly under 150000 miles for the part to have meaningful remaining life.
What to inspect on the donor part:
- For a wiring pigtail, inspect for any signs of brittleness, cracking, or melting on the plastic connector.
- Gently bend the wires attached to the pigtail; if the insulation cracks or feels stiff, do not use it.
- Ensure the locking tab on the connector is intact and functional.
- Avoid any parts from a vehicle with obvious signs of engine fire or rodent infestation.
OEM-only on this vehicle (don't cheap out):
- Cylinder Head Temperature (CHT) Sensor
Aftermarket brands forum-validated for this vehicle:
- Motorcraft (OEM)
- NTK
Brands owners have reported issues with on this vehicle:
- Unbranded or 'white-box' sensors from online marketplaces like Amazon or eBay are frequently cited as failing quickly or being dead-on-arrival.
- Some users have reported issues with store brands like Duralast for this specific sensor, with failures occurring shortly after installation.
- One user noted a NAPA sensor had a plastic body, whereas the original OEM part was brass, indicating a potential quality difference.
Real Owner Stories
Aggregated from forums and TSBs cited above. Mileages and costs reflect what owners reported in those sources.
2005 Ford Expedition 5.4L
Symptoms: The truck had a rough idle and a P1289 code was stored.
What fixed it: The CHT sensor itself was fine. The actual problem was a corroded splice in the sensor's wiring pigtail. The owner repaired the wiring and routed the new pigtail away from engine heat.
Source hint: expeditionforum.com/threads/2005-expedition-rough-idle-with-a-p1289-code-cht.49913/
2010 Ford F-150 5.4L
Symptoms: The P1289 code returned immediately after the CHT sensor was replaced.
What fixed it: This was not a successful repair, but a diagnostic story. The immediate return of the code after sensor replacement strongly indicated that the root cause was a fault in the wiring harness further up from the sensor connector.
Source hint: f150forum.com/f4/2010-p1289-help-484855/
Ford Expedition 5.4L — ~190000 miles
Symptoms: The temperature gauge on the dashboard was dead and the Check Engine Light was on with code P1289.
What fixed it: Replacing the Cylinder Head Temperature (CHT) sensor resolved the issue. The owner noted that using the alternator-removal shortcut and a flex-head ratcheting wrench was essential for the job.
Source hint: ford-trucks.com/forums/1655180-code-p1289-temp-gauge-dead.html
Related OBD-II Codes
Frequently Asked Questions
Where is the CHT sensor located on my 2009 Expedition 5.4L?
Do I have to remove the entire intake manifold to replace the CHT sensor?
My temperature gauge is dead and the engine fans are running constantly, even when cold. Is this caused by P1289?
I replaced the CHT sensor but the P1289 code came back immediately. What should I check next?
What are the correct resistance values for testing the CHT sensor on this engine?
I'm also hearing a ticking noise. Is that related to the P1289 code?
Helpful Videos


We Have This Part in Stock

The information in this article is provided for general reference and educational purposes only. Vehicle specifications, procedures, and part compatibility can vary by production date, trim level, and region. Always consult your vehicle's factory service manual and verify part numbers before purchasing or performing repairs. Safety-critical components such as airbags, seat belts, and braking systems should be installed by a qualified professional.
- Ford Expedition:
- 🎬 Helpful Videos
- 🛍️ Shop This Part
- What's Unique About the 2007-2017 Ford Expedition
- Symptoms You May Notice
- Most Likely Causes
- Rare But Worth Checking
- Diagnosis Steps
- Parts You'll Likely Need
- Related Codes That Often Appear With This One
- Technical Service Bulletins (TSBs) & Recalls
- Platform-Specific Known Issues
- Mechanic-Grade Diagnostic Values
- Wiring & Ground Locations
- Real Owner Repair Stories
- When the Usual Fixes Don't Work
- OEM Part Supersession History
- Diagnostic Flowchart
- Other Known Issues on This Vehicle
- Used vs. New Parts: Buying Guide for This Vehicle
- Real Owner Stories
- 2005 Ford Expedition 5.4L
- 2010 Ford F-150 5.4L
- Ford Expedition 5.4L — ~190000 miles
- Related OBD-II Codes
- Frequently Asked Questions
- 🎟️ Get 5% Off