

P1289 on 1997-2014 Ford E-Series Van 5.4L: Cylinder Head Temperature Sensor Fixes
This code almost always means a failed Cylinder Head Temperature (CHT) sensor or its wiring. On the 5.4L V8, the sensor is hard to reach under the intake manifold. Expect to pay $25-$50 for the part and $200-$450 for labor if you don't do it yourself.
- P1289 on your E-Series van is an electrical fault with the Cylinder Head Temperature (CHT) sensor or its wiring, not an actual overheating problem.
- The most common symptoms are a dead temperature gauge and cooling fans running constantly.
- The sensor is located under the intake manifold, but can often be accessed on the van by just removing the alternator.
- If replacing the sensor doesn't fix the code, the wiring harness in the engine valley is likely damaged, often by heat or rodents.
What's Unique About the 1997-2014 Ford E-Series Van
Unlike many vehicles that use a sensor submerged in coolant (ECT), Ford's 5.4L V8 uses a 'dry' Cylinder Head Temperature (CHT) sensor that screws directly into the head. This design allows the van to detect overheating even if all coolant has been lost. The primary challenge on the E-Series platform is that this sensor is buried deep in the engine valley, under the intake manifold. However, because the E-Series provides engine access through the interior 'doghouse' cover, mechanics can often reach the sensor by only removing the alternator, avoiding the more costly and time-consuming removal of the entire intake manifold, a procedure often required on its F-150 platform mate.
Generation note: The 1997-2014 model years cover the fourth generation of the E-Series, which includes both the 2-valve (approx. 1997-2004) and 3-valve (approx. 2005-2014) versions of the 5.4L V8. While these engines have different valvetrains, the location of the CHT sensor and the diagnostic/repair procedure for code P1289 are functionally identical for both.
Symptoms You May Notice
- Check Engine Light is on
- Temperature gauge on the dashboard is dead or stuck on cold.
- Engine cooling fans run constantly at maximum speed, even on a cold start.
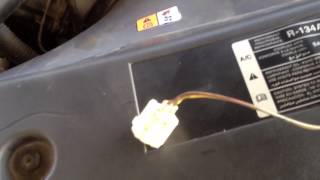
- Air conditioning (A/C) system will not turn on. 🎬 Watch: How a P1289 code can disable your A/C compressor.
- Engine may run poorly or enter a low-power 'limp mode'.
- A message like 'Engine Temp Data Error' or 'Engine Overtemp' may appear on the instrument cluster, even on a cold engine.
- Replacing the thermostat. A faulty thermostat will typically cause a P0128 code or actual overheating/slow warmup, not a P1289 circuit code.
- Searching for or replacing a traditional Engine Coolant Temperature (ECT) sensor. The 5.4L V8 in this van does not use a conventional ECT sensor; it relies solely on the CHT sensor for temperature readings.
Most Likely Causes
- Failed Cylinder Head Temperature (CHT) Sensor 🔴 High Probability The sensor operates in a high-heat environment in the engine valley, which can lead to internal electronic failure over time. It is a known failure point across the Ford 5.4L engine family.
How to confirm: With a scan tool, observe the CHT sensor reading. If it shows an illogical value like -40°F on a warm engine, or if the voltage is stuck above 4.6V, the sensor has failed. You can also test the sensor's resistance with a multimeter; it is a thermistor, so its resistance should decrease predictably as temperature increases. At ~68°F (20°C), resistance should be around 37k Ohms.
Typical fix: Replace the CHT sensor. This is a difficult job due to its location but can often be done on the E-Series by removing only the alternator for access.
Est. part cost: $25-$50 - Damaged CHT Sensor Wiring or Connector 🟡 Medium Probability The wiring harness runs through the hot engine valley, making it susceptible to becoming brittle, cracked, or melted. Rodents are also known to chew on these wires, causing an open circuit.
How to confirm: Visually inspect the wiring harness leading to the CHT sensor for any signs of breaks, melting, or rodent damage. This may require a borescope. Check for 5 volts reference and a good ground at the connector with the key on. If voltage is missing or the ground is bad, the problem is in the wiring, not the sensor.
Typical fix: Repair the broken wire(s) or replace the pigtail connector. In severe cases, the entire engine harness section may need repair.
Est. part cost: $10-$30 for a pigtail connector
Rare But Worth Checking
- Faulty Powertrain Control Module (PCM): This is very uncommon. Before condemning the PCM, you must exhaustively rule out any possibility of a bad sensor or wiring issue. A PCM failure would typically be accompanied by other unrelated trouble codes. In some cases, the internal driver circuit for the CHT in the PCM can fail, causing symptoms that mimic a bad sensor, such as the temp gauge working on restart and then failing.
Diagnosis Steps
- Connect an OBD-II scanner and confirm P1289 is the active code.
- View live data on the scanner. Check the value for the CHT sensor. A reading of -40°F or a voltage measurement above 4.6V points directly to an open circuit fault.
- Disconnect the battery.
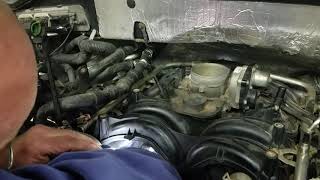
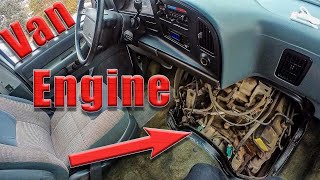
- Remove the engine doghouse cover inside the van for access. 🎬 Watch: How to remove the interior doghouse cover for access.
- Remove the alternator to gain a clear view and path into the engine valley.
- Visually inspect the CHT sensor connector and its wiring harness. Look for obvious signs of damage, such as broken or chewed wires, or a melted connector. A borescope may be helpful.
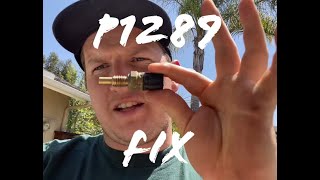
- If wiring looks good, the sensor itself is the most likely culprit. Proceed with replacement using a 19mm or 3/4" deep socket 🎬 See this walkthrough for replacing the CHT sensor. or wrench.
- If wiring is damaged, repair the affected section or replace the pigtail connector. If the code returns immediately after sensor replacement, the fault is almost certainly in the wiring.
- After the repair, reinstall the alternator and reconnect the battery.
- Clear the trouble codes with the scanner and start the engine. Monitor the temperature gauge and live data to ensure the CHT reading is now behaving logically (starting at ambient temperature and climbing slowly).
Parts You'll Likely Need
- Cylinder Head Temperature (CHT) Sensor
(OEM #8L3Z-6G004-A (replaces F65Z-6G004-AB))— This sensor is the most common failure point for code P1289 due to its location in a high-heat environment.
Trusted brands: Motorcraft, NTK, Standard Motor Products
OEM price range: $25-$40
Aftermarket price range: $15-$30 - CHT Sensor Connector Pigtail
(OEM #WPT1120 / 3U2Z14S411ARA / WPT987)— If the wiring is damaged right at the sensor, often from heat or rodents, replacing the connector pigtail is the standard repair.
Trusted brands: Dorman, Motorcraft, Michigan Motorsports
OEM price range: $20-$35
Aftermarket price range: $10-$20
Related Codes That Often Appear With This One
- P1299 — P1299 ('Cylinder Head Overtemperature Protection Active') is often triggered alongside P1289. The PCM sets P1289 due to the bad signal, and then may set P1299 as it activates the fail-safe limp mode in response to the perceived fault.
Technical Service Bulletins (TSBs) & Recalls
- While no TSB is specific to P1289 on the E-Series van, several are relevant to the platform and issue. TSB 19-2049 addresses premature CHT sensor failure causing P1289 on newer 5.0L engines, showing a pattern of CHT issues in Ford trucks.
- TSB 08-7-6 is a critical document for any owner of a 5.4L 3V engine, detailing the complex procedure for removing the two-piece spark plugs to prevent them from breaking off in the cylinder head.
- Manufacturer TSB Bulletin #TSB 16-0163 lists P1289 among several codes that may require specific service procedure steps to correct the condition on Ford vehicles.
Platform-Specific Known Issues
- Rodent Damage is a Common Culprit: An owner on F150online.com reported getting code P1289 on his 2010 5.4L. After replacing the sensor, the code remained. Upon removing the intake manifold, he discovered a squirrel had chewed through the CHT sensor pigtail wiring in the engine valley. This highlights the importance of inspecting the wiring thoroughly, as simply replacing the sensor may not fix the issue.
- Access Without Intake Removal: A user on F150forum.com with a P1289 code successfully replaced the sensor by only removing the alternator. After pulling the alternator, they were able to reach in, disconnect the old sensor, and remove the harness from the valley. They also discovered that rodents had chewed the wires, which was the root cause.
Mechanic-Grade Diagnostic Values
- CHT Sensor Resistance vs. Temperature — expected: Approx. 37,000 - 59,000 Ohms at 50-68°F (10-20°C). Approx. 2,750 Ohms at 194°F (90°C).. Failure: Infinite resistance (open circuit), near-zero resistance (short circuit), or values that don't decrease as temperature rises indicates a failed sensor.
- CHT Sensor Voltage (Key On, Engine Off, Cold) — expected: Approx. 3.4 Volts at ~61°F (16°C).. Failure: A voltage reading greater than 4.6V indicates an open circuit, which triggers code P1289.
- CHT Connector Voltage (Key On, Sensor Unplugged) — expected: One wire should have approximately 5.0 Volts (VREF from PCM), the other should be ground.. Failure: Absence of the 5V reference signal points to a wiring issue between the PCM and the connector, or a faulty PCM.
Wiring & Ground Locations
- PCM Connector C175E Pins 41 & 58 — At the main Powertrain Control Module (PCM). The PCM in E-Series vans is typically located in the engine compartment on the firewall.. For 2006+ models, forum users report these are the specific pins for the CHT sensor circuit. Pin 41 is the signal wire and Pin 58 is the signal return/ground. This is critical information for testing continuity or running new wires if the factory harness is damaged beyond simple repair.
- Engine Harness Ground G118 / G119 / G120 — For a 2005 E-350, ground points are located at the lower right front of the engine compartment (G118), right front of the engine (G119), and right rear of the engine (G120).. While the CHT sensor has a dedicated signal return wire to the PCM, a poor engine or chassis ground can cause floating voltages and erratic sensor behavior. Ensuring these main grounds are clean and tight is a key step in diagnosing any persistent electrical issue.
Real Owner Repair Stories
- F150forum.com user (2006 Ford F-150 5.4L) — P1289 code, temp gauge drops to zero then comes back, poor running.
❌ Tried (didn't work) Replacing the CHT sensor.
✅ What actually fixed it The problem was in the wiring harness. The owner had to identify the two CHT wires (at PCM pins 41 and 58), purchase a new pigtail, and run new wires from the sensor connector to a splice point near the PCM, bypassing the damaged section in the engine valley. - NHTSA ODI #10484858 — An owner reported an illuminated malfunction indicator lamp and performed a Key-On/Engine-Off check with an OBDII scanner, finding code P1289 (Cylinder Head Temp Sensor High Input) alongside P0303 and P0353.
OEM Part Supersession History
F65Z-6G004-AB→8L3Z-6G004-A— Standard part number update and consolidation over the long production run.
Heads up: The parts are fully interchangeable.WPT987→WPT1120 (also 3U2Z14S411ARA)— Part number update for the CHT sensor connector pigtail.
Heads up: The connectors are physically the same; WPT1120 is the most current recommended service part.
Diagnostic Flowchart
Other Known Issues on This Vehicle
Issues unrelated to this code that are worth knowing about as an owner of this generation:
- Spark Plug Ejection (2-Valve) or Breakage (3-Valve) 🔴 High — Very common on both engine variants. 2V engines (pre-2004) can eject plugs due to insufficient thread engagement. 3V engines (2004+) have a two-piece plug design prone to breaking during removal, leaving the lower half seized in the head. (Ref: TSB 08-7-6 provides a specific, detailed procedure for removing the break-prone 3-valve spark plugs to minimize the chance of breakage.)
- Cam Phaser Failure (3-Valve) 🔴 High — Extremely common on the 5.4L 3V engine, typically after 80,000 miles. Caused by wear in the phaser internals or low oil pressure/volume. Results in a characteristic diesel-like knocking or ticking sound at idle. (Ref: TSB 06-19-8 was issued for related VVT solenoid issues. The common fix is replacing the phasers, VCT solenoids, and timing chain components, or installing 'phaser lockouts'.)
- Exhaust Manifold Leaks 🟠 Medium — Common across all years. The cast iron manifolds are prone to warping from heat cycles, and the mounting studs can break, causing an exhaust leak recognized by a ticking noise on acceleration. (Ref: While TSBs like 98-15-6 exist for older or different engines, the issue of warping and broken studs is a well-documented pattern on the 5.4L.)
- Vacuum Leaks Causing HVAC Default to Defrost 🟡 Low — A very common annoyance where, under acceleration (low vacuum), the dashboard vents switch from blowing A/C or heat to the defrost vents. This is caused by a leak in the vacuum lines or a failed vacuum reservoir.
- Timing Chain Tensioner and Guide Wear 🔴 High — Affects both 2V and 3V engines. The plastic timing chain guides can break apart, and the tensioners can fail, leading to chain slack, rattling noises, and potentially catastrophic engine damage if the chain jumps timing.
Used vs. New Parts: Buying Guide for This Vehicle
When a used part is the smart pick: A used engine wiring harness from a junkyard can be a cost-effective solution if a large section of your van's harness is damaged by heat or rodents, making a simple pigtail splice impossible. For the sensor itself, new is always recommended due to the low cost and high labor involved in replacement.
Donor-vehicle mileage cap: roughly under 80000 miles for the part to have meaningful remaining life.
What to inspect on the donor part:
- Inspect the entire length of the harness for brittleness, cracking, or melted insulation, especially in the engine valley.
- Check for any signs of rodent nesting or chewed wires.
- Ensure all connector locking tabs are intact and not broken.
- Look for a donor vehicle from a dry, non-salt-belt region to minimize corrosion on pins and terminals.
OEM-only on this vehicle (don't cheap out):
- Cylinder Head Temperature (CHT) Sensor
Aftermarket brands forum-validated for this vehicle:
- NTK (for CHT Sensor)
- Standard Motor Products (SMP) (for CHT Sensor)
Brands owners have reported issues with on this vehicle:
- Generic, no-name, or ultra-cheap sensors from online marketplaces. Forum users report high failure rates with off-brand sensors, and the labor to replace it is too high to risk using a poor-quality part.
Real Owner Stories
Aggregated from forums and TSBs cited above. Mileages and costs reflect what owners reported in those sources.
2010 Ford F-150 5.4L
Symptoms: The P1289 code was present and did not go away even after replacing the CHT sensor.
What fixed it: After removing the intake manifold, the owner discovered a squirrel had chewed completely through the CHT sensor pigtail wiring. Repairing the wiring harness resolved the code.
Source hint: F150online.com - user story cited in 'Rodent Damage is a Common Culprit'
2005 Ford Expedition 5.4L — 315000 miles
Symptoms: The vehicle had a P1289 code and the temperature gauge was dead.
What fixed it: The owner confirmed that the correct repair involved accessing the CHT sensor, which is located under the intake manifold.
Source hint: Ford Truck Enthusiasts Forums - thread 'code-p1289-temp-gauge-dead'
2006 Ford F-150 5.4L
Symptoms: The P1289 code returned immediately after a new CHT sensor was installed.
What fixed it: The owner determined the fault was in the wiring harness itself, which is a known and difficult repair that may require running new wires from the sensor to the PCM.
Source hint: F150forum.com - thread 'error-p1289-2006-f150-5-4l-replacing-cht-harness'
Related OBD-II Codes
Frequently Asked Questions
Do I have to remove the entire intake manifold to replace the CHT sensor on my E-Series van?
I replaced the CHT sensor on my 5.4L van, but the P1289 code came right back. What should I check next?
My E-Series van's temperature gauge is dead and the A/C won't turn on. Is this related to a P1289 code?
How can I confirm the CHT sensor has failed before I start taking things apart?
I found a repair guide for P1289 on a Ford F-150. Is the process the same for my E-Series van?
Is TSB 08-7-6 related to the P1289 code?
Helpful Videos
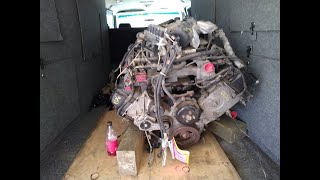
![Ford Econoline E350 5.4l 2V Engine Top-End Teardown [READ DESCRIPTION]](https://img.youtube.com/vi/OUKgMhWZoHA/mqdefault.jpg)
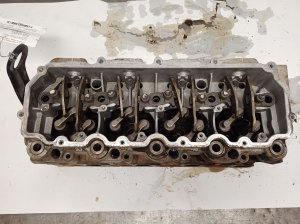
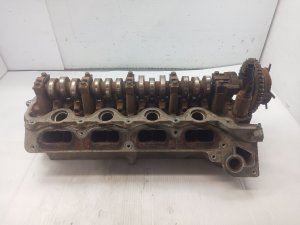
We Have This Part in Stock




The information in this article is provided for general reference and educational purposes only. Vehicle specifications, procedures, and part compatibility can vary by production date, trim level, and region. Always consult your vehicle's factory service manual and verify part numbers before purchasing or performing repairs. Safety-critical components such as airbags, seat belts, and braking systems should be installed by a qualified professional.
- Ford E-Series Van:
- 🎬 Helpful Videos
- 🛍️ Shop This Part
- What's Unique About the 1997-2014 Ford E-Series Van
- Symptoms You May Notice
- Most Likely Causes
- Rare But Worth Checking
- Diagnosis Steps
- Parts You'll Likely Need
- Related Codes That Often Appear With This One
- Technical Service Bulletins (TSBs) & Recalls
- Platform-Specific Known Issues
- Mechanic-Grade Diagnostic Values
- Wiring & Ground Locations
- Real Owner Repair Stories
- OEM Part Supersession History
- Diagnostic Flowchart
- Other Known Issues on This Vehicle
- Used vs. New Parts: Buying Guide for This Vehicle
- Real Owner Stories
- 2010 Ford F-150 5.4L
- 2005 Ford Expedition 5.4L — 315000 miles
- 2006 Ford F-150 5.4L
- Related OBD-II Codes
- Frequently Asked Questions
- 🎟️ Get 5% Off