

P1185 on 1996-2024 Audi: Linear O2 Sensor Ground Short Causes and Fixes
For most 1996-2024 Audis and Volkswagens, code P1185 indicates a 'Linear Oxygen Sensor Common Ground Wire Short To Ground'. This is most often caused by a damaged wiring harness near the exhaust or a failed oxygen sensor itself. A blown fuse for the O2 sensor circuit is also a strong possibility. Inspect the wiring and fuses thoroughly before replacing any parts.
- P1185 on an Audi specifically means there is a short circuit on the ground wire for an oxygen sensor.
- Do not immediately replace the O2 sensor. A thorough inspection of the wiring harness for heat damage or chafing is the most important first step.
- A blown fuse for the O2 sensor circuit is a strong indicator of a short, but you must find the cause of the short before replacing the fuse.
- Ensure you are using the correct definition for Audi, as P1185 means something completely different for other car brands like Hyundai or Dodge.
What's Unique About the 1996-2024 Audi Multiple
On many Audi and VW vehicles, the ECU uses a shared circuit to monitor related oxygen sensors, such as the pre-catalyst and post-catalyst sensors on the same bank. This design means a wiring fault can sometimes trigger ambiguous trouble codes. However, P1185 is quite specific, pointing directly to a short on the ground side of the circuit, which focuses the diagnosis on wiring integrity, the sensor itself, and related fuses rather than broader system performance.
Generation note: The 1996-2024 range covers numerous Audi platforms (e.g., B5, B6, B7, B8, B9 generations of A4; C5 through C8 generations of A6, etc.) and their Volkswagen counterparts. While the meaning of P1185 is consistent, the physical location of the O2 sensors, wire colors, connector types, and fuse locations will vary significantly. For example, on a B6 A4 (2000-2006), the main fuse panel is on the driver's side of the dashboard, accessible when the door is open. Always consult a repair manual or wiring diagram specific to your vehicle's year and model for an accurate diagnosis.
Symptoms You May Notice
- Check Engine Light is on
- Reduced fuel economy
- Rough or unstable idle
- Hesitation or stumbling during acceleration
- Failed emissions test
- Noticeable smell of gasoline from the exhaust (running rich)
- Replacing the oxygen sensor without first inspecting the wiring harness. If the short is in the wiring, a new sensor will not fix the issue and may be damaged.
- Confusing the code with definitions from other manufacturers. On Dodge/Chrysler/Fiat vehicles, P1185 often relates to a MAP sensor correlation issue, not an O2 sensor. On some other platforms, it can indicate an Engine Oil Temperature circuit fault.
Most Likely Causes
- Damaged Oxygen Sensor Wiring Harness 🔴 High Probability O2 sensor wiring is routed near the hot exhaust system and under the vehicle, making it susceptible to heat damage, abrasion against the chassis or heat shields, or impact from road debris. This leads to melted or chafed insulation, causing a short to ground. This is a very common failure point across many vehicle makes.
How to confirm: Visually inspect the entire length of the O2 sensor harness for signs of melting, chafing, or breaks. Pay close attention to where the harness passes near the exhaust manifold, turbocharger, and catalytic converter. Disconnect the sensor and use a multimeter to check for continuity to ground on the ground wire pin in the engine-side connector. A reading of or near 0 ohms indicates a short in the harness.
Typical fix: Repair the damaged section of wire. This involves cutting out the bad section, splicing in new wire using solder and heat-shrink connectors, and protecting the repair with high-temperature wire loom or conduit. In severe cases, the harness pigtail or a larger harness section may need replacement.
Est. part cost: $5-$50 - Failed Oxygen Sensor 🔴 High Probability The internal components of an oxygen sensor, including its heating element and signal wiring, can fail over time. This can create an internal short circuit to the sensor's metal body, which is grounded through the exhaust system. Contamination and age are the primary factors.
How to confirm: Disconnect the sensor and check for a short using a multimeter between the ground pin and other pins on the sensor-side connector. Also, measure the resistance of the heater circuit (typically between two same-colored wires, often white). A reading far outside the typical 2-20 ohm range, or a short to the sensor body, indicates a faulty sensor.
Typical fix: Replace the faulty oxygen sensor. Be sure to identify the correct sensor (e.g., Bank 1 Sensor 1) before purchasing a replacement. Using a dedicated O2 sensor socket can make removal much easier.
Est. part cost: $80-$250 - Blown Fuse for O2 Sensor Circuit 🟡 Medium Probability A direct short to ground in the sensor or its wiring will draw excessive current, causing the corresponding fuse to blow as a protective measure. This is a symptom of the short, not the root cause.
How to confirm: Locate the fuse panel(s) and identify the fuse for the oxygen sensor heater circuits (a wiring diagram is essential here). For a B6 A4, this may be in the panel on the driver's side of the dash. Visually inspect the fuse or test it for continuity with a multimeter. A forum post for one Audi model identified fuse 234 as the one to check, though this varies by model.
Typical fix: Replace the blown fuse AFTER finding and fixing the underlying short circuit. Replacing the fuse without fixing the short will only result in the new fuse blowing immediately.
Est. part cost: $1-$5
Rare But Worth Checking
- Faulty Engine Control Unit (ECU): This is extremely rare. An internal failure in the ECU's O2 sensor monitoring circuit can mimic a short to ground. One forum user reported finding a broken contact on the ECU's circuit board. This should only be considered after all other possibilities (wiring, sensor, fuses) have been definitively ruled out by thorough testing. Water intrusion is a common cause of ECU pin corrosion and failure.
Diagnosis Steps
- Scan for all DTCs to see if other related codes are present, such as heater circuit or pump current faults.
- Perform a thorough visual inspection of the wiring harness for the suspect oxygen sensor(s). Look for any signs of melting, chafing, or physical damage, especially where the harness is near the exhaust manifold, catalytic converter, or passes through the chassis.
- Locate and inspect the fuse for the oxygen sensor heater circuit. A model-specific wiring diagram is needed for this. On a B6/B7 A4, check the fuse panel on the driver's side of the dashboard. If the fuse is blown, a short is confirmed.
- Disconnect the electrical connector for the suspect oxygen sensor.
- With the sensor disconnected, use a multimeter set to Ohms (Ω) to test for a short in the vehicle's harness. Place one probe on the 'common ground' pin of the harness-side connector and the other probe on a known good chassis ground. If you read a low resistance (near 0 Ω), the short is in the vehicle's wiring harness.
- If the harness shows no short to ground, test the oxygen sensor itself. Measure the resistance between the various pins on the sensor's connector. A short between the ground pin and signal or heater pins indicates a failed sensor.
- Repair the wiring or replace the faulty oxygen sensor as needed. Ensure any wiring repairs are insulated with high-temperature materials.
- Replace the fuse if it was blown.
- Clear all fault codes and perform a drive cycle, monitoring live O2 sensor data to ensure the repair was successful.
Parts You'll Likely Need
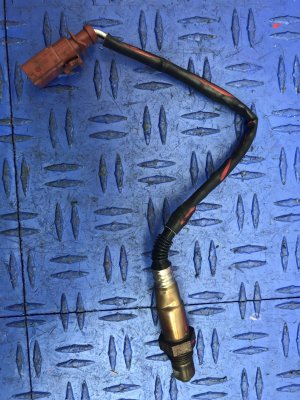
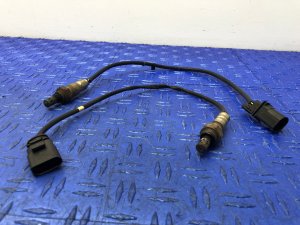
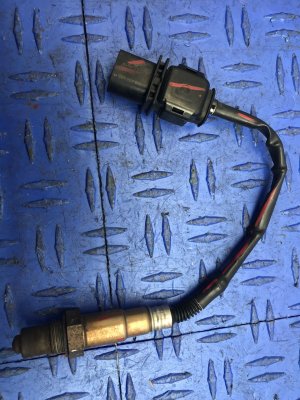
- Oxygen Sensor (Wideband/Linear)
(OEM #Varies by model (e.g., Bosch 17014 for some 1.8T applications))— The fault is often an internal short within the sensor itself, requiring replacement. The exact sensor (Bank 1/2, pre-cat/post-cat) must be correctly identified.
Trusted brands: Bosch, NTK
OEM price range: $150-$300
Aftermarket price range: $80-$200 - Automotive Wire and High-Temp Loom — If the fault is a damaged harness, repairing the wires with appropriate high-temperature materials is necessary to prevent a repeat failure.
OEM price range: $20-$100
Aftermarket price range: $5-$30
Related Codes That Often Appear With This One
- P0134 — P0134 (O2 Sensor Circuit No Activity Detected) can appear with P1185 because a short to ground prevents the sensor from producing a usable signal, which the ECU interprets as 'no activity'.
- P0135 — P0135 (O2 Sensor Heater Circuit Malfunction) is related. While P1185 points to a ground short, other heater circuit codes can be triggered by the same underlying wiring damage or a blown fuse.
- P1179 — P1179 (Linear O2 Sensor / Pump Current Short to ground) is a closely related VAG-specific code that may appear alongside P1185, pointing to the same fundamental issue with the sensor's circuitry.
Platform-Specific Known Issues
- vehicle: Audi A4 (B6, 1.8T) | note: On the 1.8T engine, the wiring harness for the pre-cat O2 sensor is frequently found melted or chafed against the firewall heat shield, just above the turbocharger. This is a very common failure point leading to P1185 and related codes. The connectors are located on the firewall on the driver's side.
- vehicle: Audi A6 (C5, 2.7T) | note: The twin-turbo setup on the 2.7T engine generates significant heat. Both pre-cat O2 sensor harnesses are vulnerable to heat damage, especially if the heat shields are missing or damaged. The downpipe area is a common location for chafing.
Mechanic-Grade Diagnostic Values
- O2 Sensor Heater Element Resistance (cold) — expected: 2 - 20 Ohms. A Bosch LSF4 sensor is specified at 9 Ohms when new.. Failure: Infinite resistance (open circuit) or a value significantly outside the expected range. Some sources state a reading over 20 Ohms indicates a fault.
- VCDS Live Data - Lambda Value (Actual vs. Specified) — expected: In VCDS Measuring Blocks, the actual Lambda value should be very close to the specified value, which is typically 1.0 at idle.. Failure: A large deviation between the actual and specified value, or a static value that does not respond to changes in engine load, indicates a sensor or circuit problem.
- VCDS Live Data - O2 Sensor Voltage (Linear/Wideband) — expected: In Measuring Block 033, the voltage should oscillate rapidly. The time-averaged value should be greater than 0.3V.. Failure: Voltage dropping to near zero or becoming static can indicate a short to ground in the sensor or wiring.
- VCDS Live Data - O2 Sensor Heater Resistance — expected: In Measuring Block 040, the resistance value is displayed. A healthy cold sensor might show around 15 Ohms.. Failure: A very high resistance reading (e.g., 235 Ohms as seen in one forum post) indicates a failed heater element. Note that resistance increases with temperature, so a hot reading of ~48 Ohms can be normal.
Scan Tool Commands That Help
- VCDS (VAG-COM): Guided Readiness Script / Automatic Test Sequence — After a repair, to force the ECU to run the internal tests required to set the readiness monitors, including the O2 sensor and heater circuits. This can be found in [Basic Settings] for the engine controller. For some UDS controllers, this may be labeled 'IDE00553 -- Automatic test sequence'.
- VCDS (VAG-COM): Measuring Blocks (Groups 030-049) — To monitor live data from the oxygen sensors, including lambda values, voltages, heater status, and resistance. This is critical for diagnosing sensor performance before and after a repair.
Wiring & Ground Locations
- G12 — On B6/B7 A4 models, located at the center of the firewall in the engine bay.. This is a major ground point that grounds the Engine Control Module (ECM). A poor connection here could cause a variety of phantom electrical issues, including incorrect sensor readings.
- 220 - Sensor Ground — This is a ground connection point located within the main engine wiring harness itself on a B6 A4.. P1185 specifically refers to a short on the 'common ground wire'. A fault at this internal harness ground point could affect multiple sensors simultaneously and cause this code.
- O2 Sensor Connectors (B6 A4 1.8T) — Mounted to the firewall on the driver's side of the engine compartment. The black connector is for the front (pre-cat) sensor, and the red (or sometimes brown/green) connector is for the rear sensor.. Knowing the physical location and color of the connectors is essential for testing the correct sensor and harness section without confusion.
Real Owner Repair Stories
- YouTube - FIX-iT Sal (2004 Audi A4 1.8T) — Check Engine Light with codes P0036 and P0141 (O2 sensor heater circuit faults, related to the ground short issue).
❌ Tried (didn't work) The video directly proceeds to diagnosis, confirming no power at the sensor.
✅ What actually fixed it The technician found a blown 30A fuse (Fuse #43 on this specific model) for the O2 sensor heater circuit. After confirming the wiring was not shorted, replacing the fuse and the faulty rear O2 sensor resolved the codes. - YouTube - The American Garage (Audi A8 (D3 platform)) — Multiple dashboard warnings, including ABS faults.
✅ What actually fixed it The root cause was found to be deteriorated wire insulation on a main harness, causing wires to short against each other. The fix involved unwrapping the harness, identifying the bare wires, and splicing in new sections of wire to repair the damage. This is a direct parallel to how O2 sensor harnesses fail.
Model Year Variations Within This Range
- Approx. pre-2010 vs. post-2010: Older Audi/VW models typically used Bosch LSU 4.2 wideband sensors. Newer models transitioned to the Bosch LSU 4.9. The LSU 4.9 is considered more robust and accurate because it uses an electrical reference signal instead of a physical reference air cell, which was prone to contamination and failure in the 4.2 design. The sensors are not directly interchangeable as the ECU and controller are specific to each type.
Diagnostic Flowchart
Other Known Issues on This Vehicle
Issues unrelated to this code that are worth knowing about as an owner of this generation:
- Excessive Oil Consumption (B8 2.0T) 🔴 High — Very common on early B8 models (2009-2011.5) with the CAEB engine code. Caused by faulty piston rings and PCV system design. (Ref: Subject of a class-action lawsuit which led to a settlement for repairs.)
- Timing Chain Tensioner/Guide Failure (4.2L V8) 🔴 High — A notorious issue on the 4.2L V8 (found in S4, A6, Allroad). Plastic timing chain guides become brittle and break, causing chain rattle on startup and potentially leading to catastrophic engine failure. Onset can be from 80k miles onwards. (Ref: Multiple TSBs exist, such as one for rattling noises on cold starts.)
- DSG/S-Tronic Mechatronics Failure 🔴 High — Common across many Audi/VW models equipped with DSG transmissions. Symptoms include harsh/jerky shifting, flashing 'PRNDS' indicator, and loss of drive or reverse. Can occur at various mileages.
- Engine Oil Sludge (1.8T) 🔴 High — A well-documented problem on the B5/B6 1.8T engines, often caused by extended oil change intervals, use of non-synthetic oil, or a clogged PCV system. Can lead to oil starvation and turbo/engine failure.
- Turbocharger Failure (C5 2.7T) 🟠 Medium — The twin K03 turbochargers on the 2.7T engine (A6, Allroad, S4) are prone to failure, often due to clogged oil feed lines or simple wear. Replacement is labor-intensive as the engine often needs to be removed.
- Timing Belt Failure (Belt-driven engines) 🔴 High — On interference engines like the 1.8T and 3.0 V6, failure to replace the timing belt, water pump, and tensioner at the recommended interval (typically 60-90k miles) will result in catastrophic engine damage.
Used vs. New Parts: Buying Guide for This Vehicle
When a used part is the smart pick: A used wiring harness pigtail or a complete engine harness from a junkyard can be a cost-effective solution if the original harness is severely damaged (e.g., melted, cut, or corroded). It is often easier to splice in a good used connector than to rebuild a melted one pin by pin.
Donor-vehicle mileage cap: roughly under 120000 miles for the part to have meaningful remaining life.
What to inspect on the donor part:
- For a wiring harness, inspect for any signs of melting, especially near exhaust components.
- Check for brittle or cracked insulation, which can happen with age and heat cycles.
- Ensure connector locking tabs are intact and not broken.
- Avoid harnesses from vehicles with signs of flood or fire damage.
OEM-only on this vehicle (don't cheap out):
- Engine Control Unit (ECU) - Due to immobilizer programming and software variations, a used ECU is not a simple plug-and-play fix and requires specialized tools to adapt.
Aftermarket brands forum-validated for this vehicle:
- Bosch (often the OEM supplier)
- NTK / NGK
Brands owners have reported issues with on this vehicle:
- Unnamed or generic 'white-box' sensors from online marketplaces. Forum users often report premature failures or incorrect readings with ultra-low-cost sensors, leading to repeat repairs.
Real Owner Stories
Aggregated from forums and TSBs cited above. Mileages and costs reflect what owners reported in those sources.
Audi TT
Symptoms: Owner diagnosed an open circuit code (P1118) and attempted to resolve it by swapping sensors, but the fault persisted.
What fixed it: Repairing a broken contact found inside the ECU itself.
Source hint: AudiWorld Forums - Thread on rear O2 sensor issues
Audi A4 (B6, 1.8T)
Symptoms: P1185 and related codes present; wiring harness damage suspected near high-heat components.
What fixed it: Repairing the pre-cat O2 sensor wiring harness that had melted against the firewall heat shield above the turbocharger.
Source hint: vehicle_specific_issues - Audi A4 (B6, 1.8T)
Related OBD-II Codes
Frequently Asked Questions
I have a B6 A4 1.8T; where should I look first for the P1185 wiring issue?
Which fuse should I check for the O2 sensor heater circuit on my Audi A4?
My Audi A6 2.7T is throwing P1185; could the turbos be involved?
Can a faulty ECU cause O2 sensor codes on an Audi TT?
Is P1185 handled differently on a Volkswagen Passat compared to my Audi?
We Have This Part in Stock



The information in this article is provided for general reference and educational purposes only. Vehicle specifications, procedures, and part compatibility can vary by production date, trim level, and region. Always consult your vehicle's factory service manual and verify part numbers before purchasing or performing repairs. Safety-critical components such as airbags, seat belts, and braking systems should be installed by a qualified professional.
- Audi Multiple:
- 🛍️ Shop This Part
- What's Unique About the 1996-2024 Audi Multiple
- Symptoms You May Notice
- Most Likely Causes
- Rare But Worth Checking
- Diagnosis Steps
- Parts You'll Likely Need
- Related Codes That Often Appear With This One
- Platform-Specific Known Issues
- Mechanic-Grade Diagnostic Values
- Scan Tool Commands That Help
- Wiring & Ground Locations
- Real Owner Repair Stories
- Model Year Variations Within This Range
- Diagnostic Flowchart
- Other Known Issues on This Vehicle
- Used vs. New Parts: Buying Guide for This Vehicle
- Real Owner Stories
- Audi TT
- Audi A4 (B6, 1.8T)
- Related OBD-II Codes
- Frequently Asked Questions
- 🎟️ Get 5% Off