

P0563 on 2016-2022 Honda Pilot: System Voltage High Causes and Fixes
P0563 on a 2016-2022 Honda Pilot almost always means the alternator is failing and overcharging the electrical system, with voltage spiking above 15.0V. Before replacing the alternator, 2016-2017 models must be checked for a loose screw per TSB 18-010. Expect to pay $800-$1,600 for professional replacement.
- P0563 means your Pilot's charging system is producing dangerously high voltage, most likely due to a failed internal voltage regulator in the alternator.
- On 2016-2017 models, always check for a loose screw per TSB 18-010 before replacing the alternator.
- An overcharging alternator will damage the battery, so plan to have the battery tested and likely replaced at the same time.
- Malfunctions with the Auto Start-Stop system are a common early warning sign of an impending charging system failure.
What's Unique About the 2016-2022 Honda Pilot

The 3rd generation Honda Pilot (2016-2022) with its J35Y6 engine features a sophisticated, load-responsive charging system and an Auto Start-Stop feature, both of which are highly sensitive to voltage stability. An early warning sign on these vehicles is often erratic behavior or failure of the Auto Start-Stop system. Furthermore, for 2016-2017 models, Honda issued Technical Service Bulletin (TSB) 18-010 for a loose alternator B+ sensing screw that can cause widespread electrical issues and must be checked before condemning the alternator.
Symptoms You May Notice
- "Check Charging System" or battery warning light on the dashboard.
- Check Engine Light is on with P0563 stored.
- Headlights and interior lights are flickering, or appear excessively bright.
- Auto Start-Stop system has a problem or fails to restart the engine at a stop.
- Electronics behaving erratically (e.g., slow power windows, glitchy radio/infotainment screen, key fob not working).
- A whining or grinding noise from the engine bay that increases with engine RPM.
- Difficulty starting the engine or frequent stalling.
- Multiple, seemingly unrelated warning lights appearing at once (VSA, AWD, etc.).
- Replacing the battery without testing the alternator. A new battery will be quickly damaged by an overcharging alternator, and the P0563 code will return.
- On 2016-2017 models, replacing the alternator without first checking for the loose B+ sensing screw as described in TSB 18-010.
Most Likely Causes

- Failing Alternator / Internal Voltage Regulator 🔴 High Probability The voltage regulator, which is responsible for capping the charging voltage, is built into the alternator. When it fails, the alternator defaults to maximum output, causing an overcharging condition. This is the most common failure mode that leads to a P0563 code on this platform.
How to confirm: With the engine running, use a multimeter to measure the voltage at the battery terminals. If the reading is consistently above 15.0 volts (often 15.5V to 17V+), the alternator's voltage regulator has failed. Perform this test with accessories (headlights, A/C) both on and off to check for stability.
Typical fix: Replace the alternator assembly. It is also highly recommended to have the battery load tested, as an overcharging condition can boil the electrolyte and permanently damage it.
Est. part cost: $200-$1000 - Loose Alternator B+ Sensing Screw (TSB 18-010) ⚪ Low Probability Specifically affects 2016 Pilots (VINs 5FNYF....GB111021 thru End of Production) and 2017 Pilots (VINs 5FNYF....HB000001 thru 5FNYF....HB013772) due to an assembly issue where the screw was not properly torqued.
How to confirm: This issue is known to cause flickering lights and multiple warning indicators. Before replacing the alternator on affected model years, remove the rear alternator cover and check the B+ terminal screw (a #2 Phillips head) for tightness.
Typical fix: Tighten the B+ sensing screw to the correct specification of 2 N·m (1.5 lb-ft). Do not over-tighten.
Est. part cost: $0 - Loose or Corroded Battery Terminals/Grounds 🟡 Medium Probability These vehicles utilize a battery sensor on the negative terminal that is critical for the smart charging system. Corrosion or a loose connection here or at the main chassis ground can confuse the PCM, leading to improper charge commands and potential voltage spikes. Owners have noted that the factory primary ground connection is often made to a painted surface, which can be improved by cleaning to bare metal.
How to confirm: Visually inspect the battery terminals for white or blue-green corrosion. Physically check that the terminal clamps are tight. Trace the main ground cable from the battery to the chassis and ensure it is clean and tight.
Typical fix: Clean the battery posts and terminals with a wire brush and terminal cleaner. Ensure all connections, including the battery sensor connector, are secure. Tighten all loose connections.
Est. part cost: $5-$25
Rare But Worth Checking
- Faulty Battery: While a bad battery is more likely to cause a low voltage code (P0562), a battery with an internal short or failing cells can refuse to accept a charge properly, which can confuse the charging system and contribute to voltage spikes. It's often a contributing factor or collateral damage, rather than the root cause.
- Faulty Powertrain Control Module (PCM): In very rare cases, the PCM's internal voltage sensing circuit can fail, causing it to report a high voltage condition even when the voltage is normal. This should only be considered after the alternator, wiring, and grounds have been definitively ruled out.
Diagnosis Steps
- Scan for any other stored trouble codes to see if other systems are affected.
- Visually inspect the battery terminals, posts, battery sensor connector, and main ground connections for tightness and corrosion. Clean and tighten as necessary.
- If you have a 2016-2017 Pilot, check if your VIN falls within the range for Honda TSB 18-010. If so, inspect and tighten the B+ terminal screw on the alternator before proceeding.
- With the engine off, use a multimeter to check the battery's static voltage. A healthy battery should read approximately 12.6 volts.
- Start the engine. Measure the charging voltage at the battery terminals. The normal range is between 13.5 and 14.7 volts.
- If the voltage is consistently above 15.0 volts, the alternator's internal voltage regulator has failed. The alternator needs to be replaced.
- As a final check, turn on all major electrical accessories (high beams, A/C on max, rear defroster). The voltage should remain stable and within the 13.5-14.7V range. If it spikes high, this further confirms a faulty voltage regulator.
- If the voltage is normal but the code persists, there may be an intermittent wiring issue or, in very rare circumstances, a fault with the PCM itself.
Parts You'll Likely Need
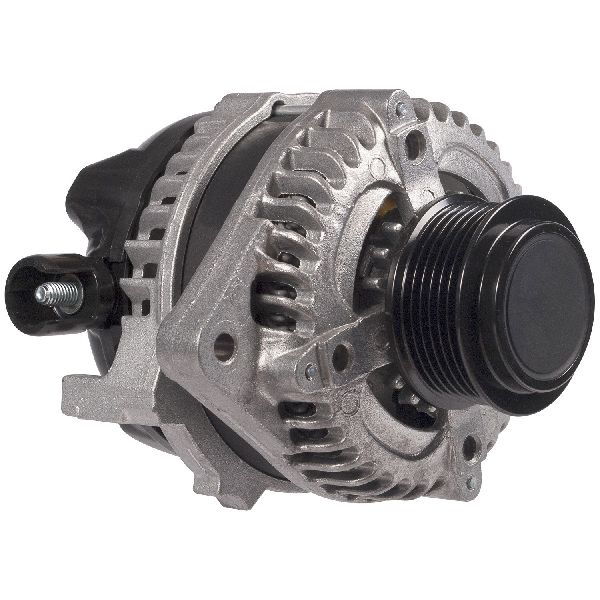
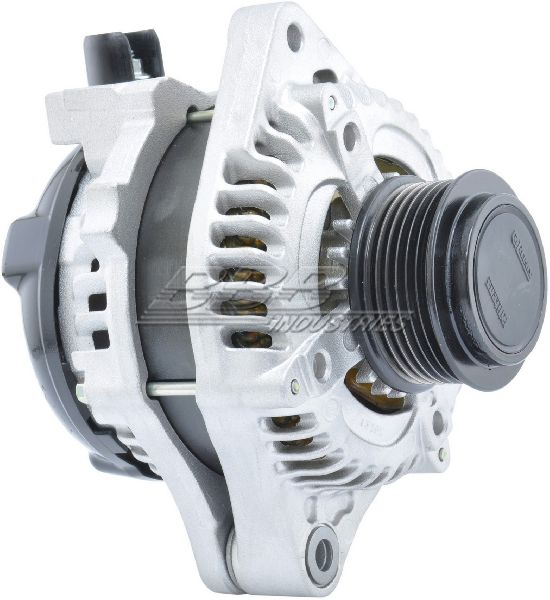
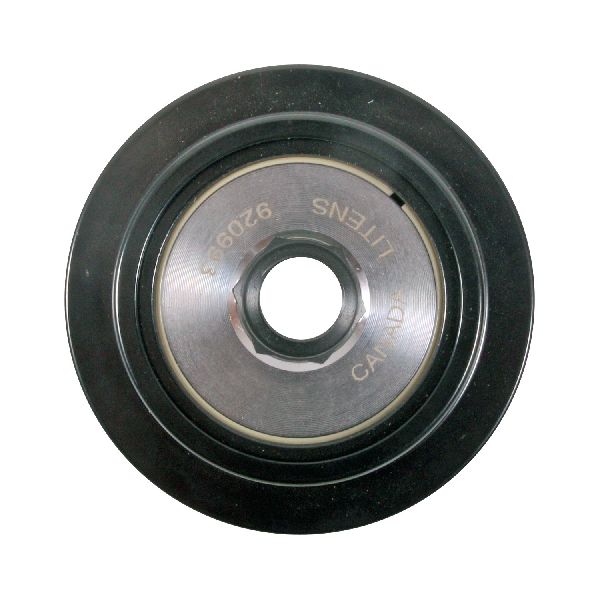
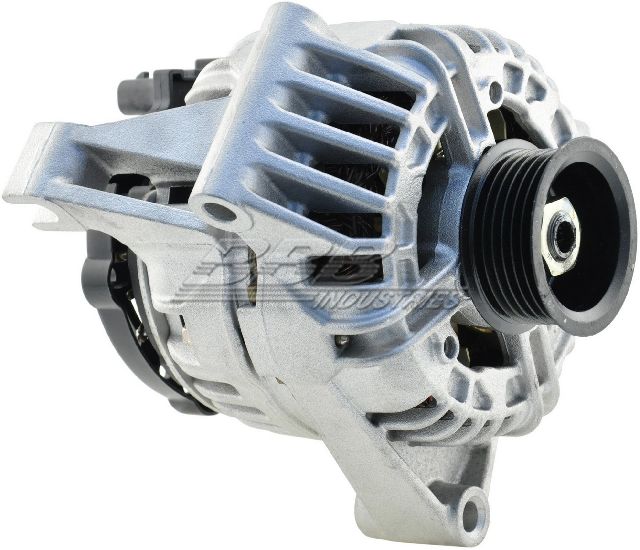
- Alternator
(OEM #31100-5J6-A51 (supersedes 31100-5J6-A01))— This is the primary cause of P0563, as the internal voltage regulator fails and causes an overcharging condition. The entire unit must be replaced.
Trusted brands: Denso (OEM/First Time Fit Remanufactured), Bosch, Duralast, Remy, WAI Global
OEM price range: $700-$1000
Aftermarket price range: $200-$450
Technical Service Bulletins (TSBs) & Recalls

- Honda TSB 18-010: Addresses a loose B+ sensing screw on the alternator for 2016-2017 Pilot, 2016-2017 Odyssey, 2017 Ridgeline, and 2017 Accord V6 models. Symptoms include flickering lights, jerky steering, and multiple warning indicators.
Platform-Specific Known Issues
- TSB 18-010: Loose Alternator B+ Sensing Screw: Some 2016-2017 Pilot models may have a loose alternator B+ sensing screw, causing flickering lights and other electrical faults. This should be checked before replacing the alternator. The fix is to tighten the screw to 2 N·m.
- Auto Start-Stop System Malfunction: Owners on forums frequently report that hesitation or failure of the Auto Start-Stop system is one of the first signs of a developing charging system problem, which may eventually lead to a P0563 code.
Mechanic-Grade Diagnostic Values
- Battery Static Voltage (Engine Off) — expected: ~12.6V. Failure: Below 12.4V indicates a discharged or failing battery.
- Charging Voltage (Engine On, No Load) — expected: 13.5V - 14.7V (Note: Honda's dual-mode system may show ~12V at idle with no load, this is normal). Failure: Consistently above 15.0V indicates overcharging (P0563).
- Charging Voltage (Engine On, High Load) — expected: 13.5V - 14.7V. Failure: Voltage spikes above 15.0V or drops significantly below 13.2V.
- Alternator C-Terminal Voltage (LIN Bus Signal) — expected: Square wave signal visible on an oscilloscope. Voltage varies based on PCM command.. Failure: No signal or a flat line indicates a communication error between the PCM and alternator.
- Alternator FR-Terminal Voltage (Field Reference) — expected: Voltage varies with alternator load (e.g., ~3.0V at idle, drops to ~2.6V with headlights on).. Failure: No voltage or voltage that doesn't change with load suggests a fault in the alternator's internal feedback circuit.
Scan Tool Commands That Help
- Honda HDS (Honda Diagnostic System): DTC Check / Clear — Used to clear the P0563 code and check for any other related DTCs after a repair to verify the fix.
- Honda HDS (Honda Diagnostic System): Live Data Viewer (Alternator Control, IG1, Battery Voltage) — To monitor the PCM's commanded alternator output percentage and compare it with the actual battery voltage to see if the alternator is responding correctly to PCM commands.
- Professional Bi-Directional Scan Tool (e.g., Autel, Foxwell): Battery/Alternator Test — Some advanced scan tools have a guided test that loads the system (by asking the user to turn on lights/AC) and measures voltage drop and charging output to determine the health of the alternator and battery without needing a separate multimeter.
Wiring & Ground Locations

- Main Chassis Ground — Connects the negative battery terminal to the vehicle's chassis, often on the strut tower or inner fender.. A common issue is this ground being bolted to a painted surface from the factory, creating high resistance. Cleaning the contact point to bare metal can improve charging system stability and resolve intermittent electrical issues.
- Engine Ground Strap — A braided strap typically connecting the engine block or cylinder head to the chassis/firewall.. Ensures the alternator, which is mounted to the engine, has a solid ground path back to the battery. A corroded or broken strap can cause erratic voltage regulation.
- Battery Management Sensor (BMS) — A small module integrated into the negative battery terminal clamp.. This sensor reports battery state-of-charge and health to the PCM, which uses the data to control alternator output. A faulty sensor or its associated fuse (often a 7.5A fuse in the under-hood fuse box) can cause incorrect charging commands.
- Alternator 4-Pin Connector — The main electrical plug on the alternator assembly.. Contains critical circuits: Ignition (power to turn on regulator), C-Terminal (PCM control), FR-Terminal (load feedback), and L-Terminal (charge warning lamp). A voltage test at these pins can pinpoint if the fault is the alternator or a command/wiring issue from the PCM.
Real Owner Repair Stories
- YouTube user 'Boosted Motorsports' (2019 Honda Pilot Elite) — No specific codes mentioned, but owner was proactively addressing potential electrical issues and noted unstable voltage.
❌ Tried (didn't work) Not applicable, this was a preventative upgrade.
✅ What actually fixed it The owner discovered the main battery-to-chassis ground was bolted to a painted surface. He scuffed the paint to bare metal and upgraded the primary ground wires with heavy-gauge (1/0) oxygen-free copper wire. He reported an immediate gain of 0.5V in charging voltage and improved electrical stability.
OEM Part Supersession History
31100-5J6-A01→31100-5J6-A51— Part revision or manufacturer change.
Heads up: Most parts catalogs show A01 is superseded by A51. However, some Honda dealer parts sites show the reverse, with A51 being replaced by A01. This is contradictory and implies that VIN verification is absolutely critical when ordering an OEM alternator to ensure the correct part is received.
Model Year Variations Within This Range
- 2019-2022: The 2019 model year refresh introduced an updated 9-speed automatic transmission (on Touring/Elite trims) and made the Honda Sensing suite standard on all trims. While the core engine and charging system remained the same, the infotainment system was updated (including a volume knob) and features like CabinTalk were added, increasing the complexity of the vehicle's electrical load and diagnostics.
- 2019+: Newer models may incorporate a battery cooling fan. Failure of this fan can trigger charging system warnings as a protective measure, adding a diagnostic step not present on earlier 2016-2018 models.
Diagnostic Flowchart
Used vs. New Parts: Buying Guide for This Vehicle
When a used part is the smart pick: A used OEM Denso alternator from a low-mileage (under 60,000 miles) donor vehicle can be a cost-effective and reliable option, as OEM units often have better longevity than some new aftermarket brands. This is a good choice if the budget is tight and you can verify the donor vehicle's history.
Donor-vehicle mileage cap: roughly under 60000 miles for the part to have meaningful remaining life.
What to inspect on the donor part:
- Check for a clean, dry housing. Avoid units covered in oil, as this can indicate a leak from a nearby engine seal (like the spool valve) which can prematurely destroy the alternator.
- Spin the pulley by hand. It should spin smoothly with minimal noise or resistance. A grinding or gritty feeling indicates bad bearings.
- Inspect the electrical connector and the main B+ terminal post for corrosion, melting, or damage.
- If possible, get the VIN of the donor car to confirm it wasn't involved in a flood or front-end collision.
OEM-only on this vehicle (don't cheap out):
- While not strictly 'OEM-only', many professional technicians and forum users strongly advise against cheap, unbranded 'white box' alternators for this vehicle. The complex, PCM-controlled charging system is sensitive, and poorly regulated aftermarket units can cause recurring electrical problems.
Aftermarket brands forum-validated for this vehicle:
- Denso (Remanufactured or New): As the Original Equipment Manufacturer, this is the most recommended brand for fit and reliability.
- Bosch: A widely respected OEM supplier with a reputation for quality remanufactured alternators.
Brands owners have reported issues with on this vehicle:
- Avoid generic, low-cost 'no-name' brands from online marketplaces. While the initial price is low, forum discussions often mention premature failure, leading to repeated labor costs.
Real Owner Stories
Aggregated from forums and TSBs cited above. Mileages and costs reflect what owners reported in those sources.
2016 Honda Pilot
Symptoms: The vehicle had flickering lights, jerky steering, and multiple warning indicators on the dashboard.
What fixed it: The loose B+ sensing screw on the back of the alternator was tightened to the correct specification of 2 N·m (1.5 lb-ft).
Source hint: Honda TSB 18-010
2018 Honda Pilot
Symptoms: The first problem was the Auto Start-Stop system hesitating and then failing to restart the engine at stoplights. Shortly after, the 'Check Charging System' light came on.
What fixed it: Replacing the alternator assembly resolved the issue. The original's voltage regulator had failed.
Source hint: reddit.com/r/hondapilot
2019 Honda Pilot
Symptoms: The 'Check Charging System' and Check Engine lights came on, along with VSA and AWD warning lights. The headlights and interior lights were flickering and appeared excessively bright.
What fixed it: A multimeter test showed over 16 volts at the battery while running. Replacing the alternator, which had a failed internal voltage regulator, fixed the problem.
Source hint: piloteers.org
2017 Honda Pilot
Symptoms: Intermittent electrical problems and a recurring P0563 code, even though the battery terminals were clean and tight.
What fixed it: The main chassis ground connection from the battery was found to be attached to a painted surface. The contact point was sanded to bare metal and the ground cable was re-secured, which solved the voltage issue.
Source hint: piloteers.org
Related OBD-II Codes
Frequently Asked Questions
My 2017 Honda Pilot has flickering lights and multiple warning lights. Does Honda TSB 18-010 apply to my vehicle?
The Auto Start-Stop system on my 2019 Pilot has stopped working. Is this related to the P0563 code?
How can I test the alternator on my Pilot at home to confirm it's the cause of the P0563 code?
My dashboard lit up with VSA, AWD, and Check Engine lights all at once. Can a bad alternator cause all of this?
I cleaned my battery terminals but the 'Check Charging System' light is still on. What's the next step?
What is the most common reason for a P0563 code on a 2016-2022 Pilot?
Helpful Videos
Used OEM Parts in Stock

New Aftermarket Parts Available



The information in this article is provided for general reference and educational purposes only. Vehicle specifications, procedures, and part compatibility can vary by production date, trim level, and region. Always consult your vehicle's factory service manual and verify part numbers before purchasing or performing repairs. Safety-critical components such as airbags, seat belts, and braking systems should be installed by a qualified professional.
- Honda Pilot:
- 🎬 Helpful Videos
- 🛍️ Shop This Part
- What's Unique About the 2016-2022 Honda Pilot
- Symptoms You May Notice
- Most Likely Causes
- Rare But Worth Checking
- Diagnosis Steps
- Parts You'll Likely Need
- Technical Service Bulletins (TSBs) & Recalls
- Platform-Specific Known Issues
- Mechanic-Grade Diagnostic Values
- Scan Tool Commands That Help
- Wiring & Ground Locations
- Real Owner Repair Stories
- OEM Part Supersession History
- Model Year Variations Within This Range
- Diagnostic Flowchart
- Used vs. New Parts: Buying Guide for This Vehicle
- Real Owner Stories
- 2016 Honda Pilot
- 2018 Honda Pilot
- 2019 Honda Pilot
- 2017 Honda Pilot
- Related OBD-II Codes
- Frequently Asked Questions
- 🎟️ Get 5% Off