

OBD-II Code P0562: System Voltage Low
What P0562 means, why it triggers, and how to fix it
- P0562 triggers when system voltage drops below 10.0V for more than 60 seconds, almost always pointing to a dead battery or failing alternator.
- Do not drive with this code; a sudden loss of electrical power causes immediate engine stalling and disables critical safety systems like ABS and power steering.
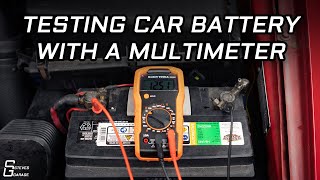
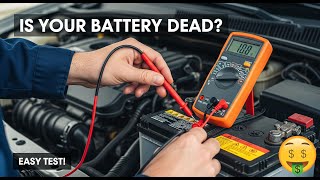
- Start diagnosis with a $20 multimeter: a healthy battery reads 12.6V with the engine off, and the alternator must output 13.5V to 14.8V with the engine running.
- Never replace the alternator or battery without first checking for a loose serpentine belt or cleaning corroded battery terminals, which cost under $20 to fix.
What Does P0562 Mean?

P0562 means your car's Powertrain Control Module (PCM) detects the electrical system's voltage is too low. The computer requires a steady 13.5-14.8 volts to run the engine and electronics. This code triggers when voltage drops below the minimum operating threshold—typically under 10.0 volts for more than 60 seconds.
Technical definition: The SAE/OBD-II definition for P0562 is 🎬 Watch: A quick overview of P0562 causes, symptoms, and fixes. "System Voltage Low." It sets when the Powertrain Control Module (PCM) detects system voltage falling below a calibrated threshold (usually 9.0V-10.0V) for a specified duration (typically 60 seconds) while the engine is running.
Can I Drive With P0562?
No — Do Not Drive. Do not drive. Low voltage causes the engine to stall unexpectedly, creating a severe safety risk in traffic. Critical systems like electronic power steering and ABS brakes become inoperative without warning, requiring extreme driver effort and increasing stopping distances. Continuing to drive with a failing charging system permanently damages the battery and destroys sensitive electronics like the PCM, turning a $400 repair into a $2,000+ multi-module failure.
Common Causes

- Failing alternator or internal voltage regulator (Very Common) — The alternator charges the battery and powers the electrical system while the engine runs. A failing alternator, or its internal voltage regulator, is the most frequent cause of this code.
- Weak or dead battery (Very Common) — A battery that is old, damaged, or unable to hold a charge causes system voltage to plummet, especially during startup or under heavy electrical load.
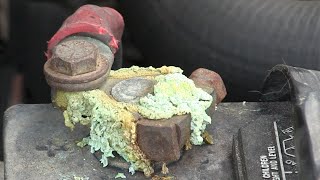
- Loose or corroded battery terminals (Common) — Corrosion or loose connections on the battery posts create high electrical resistance. This blocks the battery from receiving a full charge and delivering proper voltage.
- Damaged or slipping serpentine belt (Common) — The engine's serpentine belt drives the alternator. If this belt slips, cracks, or breaks, it cannot spin the alternator fast enough to generate a charge.
- Faulty wiring or poor ground connection (Less Common) — Damaged B+ cables or a bad ground strap between the engine, battery, and chassis interrupt the flow of electricity, causing severe voltage drops.
- Blown alternator fuse (Less Common) — Many vehicles use a high-amperage fuse in the charging circuit. If this fuse blows, the alternator is completely disconnected from the battery.
- Parasitic battery drain (Rare) — An electrical component that fails to shut off drains the battery overnight, leading to critically low voltage upon startup.
- Faulty Battery Current Sensor (Rare) — On modern vehicles (especially Hondas), a faulty battery current sensor on the negative terminal incorrectly reports charging status, forcing the PCM to undercharge the system.
- Faulty Powertrain Control Module (PCM) (Very Rare) — The PCM itself fails and incorrectly reports a low voltage condition. Rule out all other physical electrical faults before replacing the PCM.
Symptoms

- Check Engine Light and red Battery Warning Light — The Check Engine Light illuminates immediately, almost always accompanied by the red battery or charging system warning icon on the dashboard.
- Engine stalling or slow cranking — The engine stalls while idling or driving. Upon restart, the engine cranks very slowly or clicks rapidly due to insufficient starter power.
- Dimming headlights and erratic interior electronics — Headlights and dashboard displays dim or flicker. The radio, power windows, and HVAC blower motor operate sluggishly or shut down completely.
- Multiple simultaneous warning lights — Low voltage triggers communication errors across the vehicle's network, illuminating ABS, traction control, and power steering warning lights simultaneously.
- Reduced engine power and harsh shifting — Low voltage starves fuel injectors and ignition coils, causing misfires, reduced power, and harsh automatic transmission shifts.
Diagnostic Flowchart
Tap your situation to follow the diagnostic path that matches what you're seeing on this code.
Common Fixes & Costs
- Replace Alternator — Parts: $250-$800, Labor: $150-$500, ~2.5 hr book time (Intermediate)
- Replace Battery — Parts: $150-$350, Labor: $50-$100, ~0.5 hr book time (DIY)
- Clean or Replace Battery Cables/Terminals — Parts: $10-$150, Labor: $50-$150, ~0.8 hr book time (DIY)
- Replace Serpentine Belt — Parts: $20-$60, Labor: $80-$150, ~1.2 hr book time (Intermediate)
- Repair or Replace Ground Straps — Parts: $15-$50, Labor: $75-$200, ~1.0 hr book time (DIY)
DIY vs Professional
- Replace Alternator — Beginner: False
Tools: Socket set, serpentine belt tool, multimeter, torque wrench, safety glasses. - Replace Battery — Beginner: True
Tools: Socket set, terminal cleaner brush, safety glasses, gloves. - Clean or Replace Battery Cables/Terminals — Beginner: True
Tools: Socket set, wire brush, battery terminal cleaner, safety glasses. - Replace Serpentine Belt — Beginner: False
Tools: Serpentine belt tool or breaker bar, belt routing diagram.
Used vs. New Parts: Buying Guide
When a used part is worth it: A used OEM alternator from a low-mileage donor vehicle is a better value than a cheap, unbranded aftermarket part. Avoid used parts from high-mileage vehicles.
Donor-vehicle mileage cap: roughly under 80000 miles for the part to have meaningful remaining life.
Donor quality checklist:
- Verify the donor vehicle's mileage; lower is significantly better.
- Match the part number and amperage rating exactly.
- Visually inspect for corrosion, housing damage, or a worn pulley.
- Demand a minimum 30-day warranty.
Decision logic:
- If Vehicle is newer or you plan to keep it long-term → Buy a new OEM or high-quality remanufactured alternator for maximum reliability.
- If Vehicle is older (>150K miles) and budget is the primary concern → A used OEM or remanufactured part is the most cost-effective choice.
- If The cost of labor is high relative to the part cost → Buy a new part to eliminate the risk of paying for labor twice if a used part fails.
Warranty tradeoff: Used parts offer 30-90 day warranties. Remanufactured parts include 1-year to lifetime warranties. New OEM parts carry 1-2 year manufacturer warranties.
Worst-case if a used part fails: $400-$800 if a used alternator fails after the warranty period, requiring a new part plus repeat labor costs.
What Happens If You Wait — Timeline
- 0-1 week: Check Engine Light and Battery Light illuminate. The issue is intermittent, caused by a loose connection or temporary heavy electrical load. (MPG impact: 0-2%% · Added cost: $0)
- 1 week - 1 month: The battery is consistently undercharged. The engine cranks slowly, and headlights dim at idle. The car requires a jump-start. (MPG impact: 2-5%% · Added cost: $200-$450 (Permanent battery damage from deep discharging).)
- 1-3 months: The vehicle becomes unreliable. The engine stalls frequently as the alternator fails to power the ignition system. The alternator burns out from constantly trying to charge a dead battery. (MPG impact: 5-10%% · Added cost: $600-$1500 (Cost of new battery, failed alternator, and tow).)
- 3+ months: Catastrophic failure. Prolonged low voltage or sudden voltage spikes destroy the Powertrain Control Module (PCM) or Body Control Module (BCM). (MPG impact: 10-15%% · Added cost: $1500-$3000+ (Cost of battery, alternator, and replacement control modules).)
Cost of Not Fixing It
- Immediate (0-1 month): Stranded by a dead battery or engine stalling in traffic. Complete and permanent failure of the battery, requiring replacement. (Added cost: $200-$450)
- Short Term (1-3 months): Damage to the serpentine belt or tensioner from an overworked alternator. Increased risk of damage to sensitive electronics from unstable voltage. (Added cost: $100-$300)
- Long Term (3+ months): Catastrophic failure of expensive electronic modules (PCM, BCM, infotainment) due to prolonged low voltage or voltage spikes from a failing regulator. (Added cost: $800-$2500+)
Diagnosis Steps

- Check Battery Voltage (Engine Off)
Use a multimeter to measure voltage across the battery terminals with the engine off. A healthy battery reads 12.6 volts. A reading below 12.4 volts requires charging and load testing the battery.
Tools: Multimeter (Beginner) - Test the Charging System (Engine On)
Start the engine and measure battery voltage again. A healthy alternator produces 13.5 to 14.8 volts. A reading below 13.2 volts confirms the alternator is failing to charge the system.
Tools: Multimeter (Beginner) - Inspect Battery Terminals and Cables
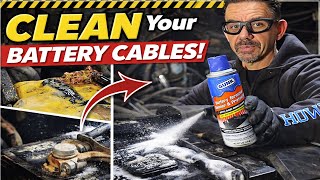
Visually inspect battery posts and cable ends for white/green corrosion or looseness. Clean terminals with a wire brush and ensure connections are tight.
Tools: Wire brush, safety glasses, wrench (Beginner) - Perform a Load Test
With the engine running, turn on the headlights, A/C, and radio. Voltage must remain between 13.5 and 14.8 volts. A drop below 13.2V proves the alternator cannot handle electrical loads.
Tools: Multimeter (Intermediate) - Inspect the Alternator Belt and Fuses
Check the serpentine belt for cracks, fraying, or loose tension. Locate and inspect the high-amperage alternator fuse in the under-hood fuse box.
Tools: Flashlight, fuse puller (Intermediate) - Perform a Charging System Voltage Drop Test
Connect the multimeter's positive lead to the alternator's B+ output stud and the negative lead to the positive battery post. With the engine running under load, the reading must be under 0.5 volts. Higher readings require cable replacement.
Tools: Multimeter (Advanced) - Check for Alternator AC Ripple
Set the multimeter to AC volts. With the engine running, place leads on the battery terminals. A reading above 0.5 volts (500mV) AC indicates failing alternator diodes, requiring replacement.
Tools: Multimeter with AC Volts setting (Advanced) - Check for Parasitic Drain
If the battery dies overnight, set a multimeter to measure amps in series with the negative battery cable while the car is off. A draw above 50-85 milliamps indicates a module is failing to sleep.
Tools: Multimeter with amp setting (Advanced) - Analyze Scan Tool Live Data
Monitor the 'Control Module Voltage' PID on a scan tool. It must mirror the physical battery voltage (13.5V-14.8V). A significant discrepancy indicates a wiring fault to the PCM or a failing PCM.
Tools: OBD-II Scan Tool with Live Data (Advanced)
When This Code Triggers (Freeze-Frame Conditions)
- Engine Coolant Temp: 80-100°F (During or shortly after a cold start)
- RPM: 650-800 (At idle with high electrical load (e.g., A/C, defroster on))
- Engine Load: 40-70% (High electrical demand from accessories is placed on the charging system)
- Vehicle Speed: 0 mph (Car is stationary, but engine is running and accessories are on)
Related Codes
- P0560 — P0560 indicates erratic or unstable voltage. P0562 is specific to voltage dropping below the minimum threshold and staying there.
- P0563 — P0563 means 'System Voltage High' (overcharging). P0562 is a lack of charge. P0563 always requires alternator replacement due to a failed internal regulator.
- P0620 — P0620 indicates a malfunction in the control circuit between the PCM and alternator. P0562 is the resulting symptom (low voltage) of that circuit failure.
- P0625 — P0625 pinpoints a low circuit in the alternator's field coil. This directly prevents the alternator from generating power, immediately triggering P0562.
Climate & Environmental Factors
- Cold Weather: At 32°F (0°C), a battery loses 20% of its power, and 50% at 0°F (-18°C). Cold thickens engine oil, demanding maximum amperage to start. This exposes weak batteries or marginal alternators, instantly dropping voltage below the P0562 threshold.
- Hot Weather: High under-hood temperatures and constant A/C use force the alternator to run at maximum capacity. This heat degrades internal alternator diodes and evaporates battery fluid, accelerating failure.
- High Humidity: Accelerates galvanic corrosion on battery terminals and ground straps. This corrosion creates high electrical resistance, blocking the alternator from charging the battery.
How to Talk to a Mechanic About This Code
Say this: "I have a P0562 System Voltage Low code. Please test the battery, measure alternator output under load, and perform a voltage drop test across the main power and ground cables before recommending any parts."
This proves you understand the diagnostic process. It forces the technician to perform the required multimeter tests rather than blindly selling you a new alternator.
Avoid saying:
- 'My battery light is on, I need a new alternator.'
- 'Just fix whatever's wrong, I need the car back fast.'
- 'The auto parts store scanned it and said to replace the battery.'
Questions to ask before authorizing the repair:
- What was the battery's voltage at rest, and did it pass a load test?
- What was the alternator's voltage output at idle with the A/C and headlights on?
- Did you perform a voltage drop test on the battery cables? What were the readings?
- Are there any Technical Service Bulletins (TSBs) for this code on my vehicle?
- What is the warranty on the recommended parts and labor?
Where to Take It: Dealer vs Independent vs Chain
- Dealer:
Use only if the vehicle is under warranty or requires a specific software update. Otherwise, an independent shop is far more cost-effective.
Best for: Vehicles under factory warranty., Known manufacturer software issues requiring updates (like GM TSB #24-NA-050)., Complex electrical issues on late-model European cars requiring factory scan tools.
Downsides: Labor rates are 40% higher than independent shops., Service writers default to replacing entire assemblies rather than repairing wiring. (Typical cost: +40% vs. baseline) - Independent Shop:
The best choice for 90% of P0562 cases. A skilled independent shop solves this code efficiently and affordably.
Best for: Out-of-warranty P0562 repairs., Diagnosing and replacing batteries, alternators, and corroded cables., Getting a second opinion on a $1,000+ dealership quote.
Downsides: Diagnostic expertise varies; look for ASE-certified electrical specialists., May lack access to the latest manufacturer software updates. (Typical cost: +0% vs. baseline) - Chain Shop:
Use only for a free battery test. Avoid for comprehensive diagnosis, as they frequently misdiagnose bad grounds as failed alternators.
Best for: Free battery testing and simple battery replacements.
Downsides: Technicians lack advanced electrical diagnostic training., High pressure to upsell unnecessary alternators without performing voltage drop tests. (Typical cost: -10% vs. baseline)
When to Walk Away From the Repair
If the estimated repair cost exceeds 40-50% of the car's private-party value, seriously consider selling the vehicle.
- Car worth $3000, fix is $1300: Borderline. An alternator replacement is at the absolute limit of what is reasonable. Get a second opinion from an independent shop.
- Car worth $15000, fix is $800: Fix it. The repair cost is well below the threshold and restores a critical safety function.
- Car worth $2000, fix is $1500: Walk away. The repair cost is 75% of the car's value. It is a poor financial investment.
What Scan Tool You Need for This Code

Minimum: A basic OBD-II code reader pulls the P0562 code, but a $20 multimeter is the actual tool required for diagnosis. If buying a scanner, ensure it displays live data for 'Control Module Voltage'.
A $20 code reader only confirms the code exists. It cannot show the live system voltage the PCM sees. You must use a multimeter to test the battery and alternator directly.
Budget: BlueDriver Pro or Veepeak OBDCheck (~$120) — These Bluetooth scanners connect to your smartphone and display live system voltage. This allows you to monitor voltage drops in real-time from the driver's seat while turning on accessories.
Mid-range: Innova 5610 or Foxwell NT510 Elite (~$330) — These handheld scanners offer robust live data graphing and read manufacturer-specific codes on ABS and SRS modules, which frequently trigger alongside P0562.
Professional: Autel MaxiCOM MK808 (~$500) — Provides full system access and performs the advanced battery registration procedures required on modern European vehicles after a battery replacement.
How to Clear the Code After You Fix It
- Reconnect battery if disconnected for repair
- Use an OBD-II scan tool to erase the P0562 fault code
- Perform a complete drive cycle to allow readiness monitors to set
Drive cycle (~30 minutes): Cold start (sit for 8+ hours). Idle for 2-3 minutes with electrical loads on (A/C, rear defrost). Drive 15 minutes of mixed city/highway speeds (up to 55 mph), then allow the vehicle to cool completely.
Readiness monitors affected: Comprehensive Component Monitor, Misfire Monitor, Fuel System Monitor, Catalyst Monitor, Evaporative System Monitor
Before emissions retest: drive at least 100 miles to fully set monitors.
Watch out for:
- Clearing the code with a scanner is not enough; a drive cycle must be completed to set all readiness monitors for an emissions test.
- Disconnecting the battery clears the code but resets all learned adaptations, causing an automatic emissions inspection failure.
- If the underlying electrical fault is not fixed, P0562 returns immediately upon startup.
Will This Fail Emissions / State Inspection?
Yes — this code typically fails an OBD-II emissions inspection.
- California: An active P0562 code is an automatic failure. After repair, a full drive cycle must be completed to set all readiness monitors before a retest.
- New York: The NYS DMV inspection includes an OBD-II scan. An illuminated Check Engine Light for P0562 results in immediate failure.
- Texas: In emissions-testing counties (Harris, Dallas, Tarrant), an illuminated Check Engine Light from P0562 is an automatic failure.
Most Commonly Affected Vehicles
- Chevrolet / GMC Silverado, Sierra, Tahoe (2022-2025) — TSB #24-NA-050 addresses P0562 appearing with P0606. This is a software anomaly in the Electronic Brake Control Module (EBCM) requiring a dealer update, not a parts replacement.
- Ford Focus, Escape (2015-2022) — Highly prone to premature alternator failures, particularly on the 2.0L engine.
- Volkswagen Jetta, Passat (2011-2023) — Alternator replacement is labor-intensive and expensive. TPI #2022687 exists for TDI models regarding this specific code.
- Honda CR-V, Fit, Accord (2011-2020) — Frequently caused by a faulty battery current sensor on the negative terminal, which forces the PCM to undercharge a perfectly healthy battery.
- Hyundai Accent, Veloster (2010-2017) — Alternator failure is the primary cause, often accompanied by a whining noise from the engine bay.
- Subaru Outback, Impreza, Forester (2010-2019) — Systems are highly sensitive to low voltage at startup. Replacing a 4+ year old battery usually resolves the code.
- Harley-Davidson Touring, Softail, Dyna (2006-Present) — Extremely common code caused by loose battery terminals or a corroded main frame ground. Recall 0171 addresses failing voltage regulators on 2017-2018 Touring models.
- Chrysler/Dodge/Jeep Various (2008-Present) — TIPM (Totally Integrated Power Module) systems are highly sensitive to battery health. Replace weak batteries immediately to prevent module damage.
Manufacturer-Specific Notes
- General Motors (Chevrolet/GMC): On 2022+ trucks, P0562 paired with P0606 is a known software glitch in the EBCM. Do not replace the battery or alternator; get the dealer software update per TSB #24-NA-050.
- Ford: F-Series trucks log P0562 in the Transfer Case Control Module (TCCM) if voltage drops below 9V for 5 seconds during a jump-start. Clear the code; it rarely indicates a hard failure.
- Honda: The PCM controls charging via a battery current sensor. If this $40 sensor fails, the alternator stops charging and triggers P0562. Test the sensor before replacing the alternator.
- Volkswagen: Alternator replacement requires significant disassembly on many transverse engines, driving labor costs above $400. Always verify battery health before condemning the alternator.
- Harley-Davidson: Vibration loosens battery and ground cables constantly. Always tighten the main ground to the frame before testing the stator or voltage regulator.
Real Owner Stories
2012 GMC Sierra with intermittent no-start
Owner experienced intermittent no-start conditions and multiple ABS communication codes alongside P0562. The PRNDL display light would also shut off.
What they tried:
- Replaced battery
- Tested alternator
Outcome: A mechanic found a wiring harness rubbing against a bolt. The exposed wire shorted to ground, causing severe voltage drops and communication failures. Repairing the wire resolved all codes.
Lesson: Do not assume a major component failed. A visual inspection of wiring harnesses for chafing reveals easy-to-fix shorts that cause widespread electrical chaos.
2022 Chevrolet Silverado 5.3L with fluctuating idle
The truck's RPMs fluctuated at idle, nearly stalling with the A/C on. P0562 logged specifically in the Brake System Control Module (BSCM).
What they tried:
- Replaced the battery.
- Replaced the alternator.
- Performed a voltage drop test on the alternator cable.
Outcome: Replacing the battery and alternator did nothing. The actual issue was a software anomaly in the Electronic Brake Control Module (EBCM) overly sensitive to normal voltage fluctuations. A dealer software update (TSB #24-NA-050) fixed it.
Lesson: Always search for Technical Service Bulletins (TSBs) for your specific year and model. Replacing expensive hardware will not fix a software issue.
2008 Chrysler Sebring with P0562 and P0300
After sitting for a month, the car developed a multiple misfire (P0300) and a low voltage code (P0562).
What they tried:
- Replaced spark plugs.
- Replaced fuel injector on cylinder 3.
- Swapped ignition coils.
Outcome: The root cause was a 4-year-old, weak battery. A failing battery starves the ignition system and fuel injectors of power, causing misfires. Replacing the battery resolved both codes.
Lesson: Always address low voltage codes first. A weak battery causes other modules to malfunction and report false errors. Fixing the electrical foundation resolves the other codes automatically.
Harley-Davidson with P0562
Motorcycle triggered P0562, causing hard starting and dimming lights.
What they tried:
- Checked battery voltage.
Outcome: The solution was tightening a loose main ground connection to the frame. Vibration had backed the bolt out, creating high resistance.
Lesson: On motorcycles, vibration loosens connections constantly. Always tighten all battery and ground connections before buying a stator or voltage regulator.
How to Prevent This Code From Triggering
- Clean Battery Terminals (Every 6-12 months) — Corrosion acts as an insulator, preventing the battery from receiving a full charge. Cleaning terminals ensures a solid electrical connection.
- Inspect Serpentine Belt (Every 15,000 miles) — A glazed or loose belt slips on the alternator pulley under load, preventing the alternator from generating proper voltage.
- Perform Annual Battery Load Test (Once per year before winter) — A battery can show 12.6 volts but collapse under load. An annual test catches a failing battery before it leaves you stranded.
- Minimize Short Trips (Daily habit) — Starting the engine drains the battery heavily. Trips under 20 minutes prevent the alternator from fully replenishing the charge, degrading the battery over time.
- Check Main Ground Connections (Every 30,000 miles) — Engine-to-chassis ground straps corrode over time. Tightening these prevents voltage drops that trigger P0562 even with a healthy alternator.
Frequently Asked Questions
What is the first thing to check for a P0562 code?
Test the battery and alternator with a multimeter. A healthy battery reads 12.6V with the engine off, and the alternator outputs 13.5-14.8V with the engine running. This instantly isolates the problem to either a dead battery or a failed charging system.
Can a bad ground cause P0562?
Yes. A corroded or loose ground strap between the battery and chassis creates high electrical resistance. This blocks the alternator from charging the battery, directly causing a low voltage code.
Can I fix a P0562 code myself?
Yes, the most common causes are highly DIY-friendly. You can test the battery, clean corroded terminals, and replace the battery or alternator using basic hand tools and a multimeter. Take the vehicle to a shop if the issue involves complex wiring shorts or module software updates.
Will clearing the code fix the problem?
No. Clearing the code only turns off the check engine light temporarily. Because P0562 stems from a hard electrical failure, the code returns immediately once the computer detects low voltage again.
What are the most common misdiagnosis mistakes for P0562?
The most expensive mistake is replacing the battery or alternator without testing them first. Another frequent error is ignoring heavily corroded battery terminals or a slipping serpentine belt, which cause the exact same symptoms as a failed alternator.
Can aftermarket accessories cause a P0562 code?
Yes. High-draw accessories like large amplifiers or winches pull more current than the factory alternator produces, causing system voltage to plummet. Improper installation also creates parasitic drains that kill the battery overnight.
How much does it cost to fix P0562?
Professional diagnosis costs $75 to $150. Total repair costs range from $0 for tightening a loose battery cable to $400-$1,300 for a full alternator replacement.
Can a jump-start cause the P0562 code?
Yes, jump-starting a deeply discharged battery triggers this code due to the initial severe voltage drop. If the code does not return after fully charging the battery and driving the vehicle, it was a temporary event. If it returns, the underlying charging issue remains.
Key Takeaways
- P0562 triggers when system voltage drops below 10.0V for more than 60 seconds, almost always pointing to a dead battery or failing alternator.
- Do not drive with this code; a sudden loss of electrical power causes immediate engine stalling and disables critical safety systems like ABS and power steering.
- Start diagnosis with a $20 multimeter: a healthy battery reads 12.6V with the engine off, and the alternator must output 13.5V to 14.8V with the engine running.
- Never replace the alternator or battery without first checking for a loose serpentine belt or cleaning corroded battery terminals, which cost under $20 to fix.
Helpful Videos

The information in this article is provided for general reference and educational purposes only. Vehicle specifications, procedures, and part compatibility can vary by production date, trim level, and region. Always consult your vehicle's factory service manual and verify part numbers before purchasing or performing repairs. Safety-critical components such as airbags, seat belts, and braking systems should be installed by a qualified professional.
- 🎬 Helpful Videos
- What Does P0562 Mean?
- Can I Drive With P0562?
- Common Causes
- Symptoms
- Diagnostic Flowchart
- Common Fixes & Costs
- DIY vs Professional
- Used vs. New Parts: Buying Guide
- What Happens If You Wait — Timeline
- Cost of Not Fixing It
- Diagnosis Steps
- When This Code Triggers (Freeze-Frame Conditions)
- Related Codes
- Climate & Environmental Factors
- How to Talk to a Mechanic About This Code
- Where to Take It: Dealer vs Independent vs Chain
- When to Walk Away From the Repair
- What Scan Tool You Need for This Code
- How to Clear the Code After You Fix It
- Will This Fail Emissions / State Inspection?
- Most Commonly Affected Vehicles
- Manufacturer-Specific Notes
- Real Owner Stories
- 2012 GMC Sierra with intermittent no-start
- 2022 Chevrolet Silverado 5.3L with fluctuating idle
- 2008 Chrysler Sebring with P0562 and P0300
- Harley-Davidson with P0562
- How to Prevent This Code From Triggering
- Frequently Asked Questions
- What is the first thing to check for a P0562 code?
- Can a bad ground cause P0562?
- Can I fix a P0562 code myself?
- Will clearing the code fix the problem?
- What are the most common misdiagnosis mistakes for P0562?
- Can aftermarket accessories cause a P0562 code?
- How much does it cost to fix P0562?
- Can a jump-start cause the P0562 code?
- Key Takeaways
- 🎟️ Get 5% Off