

P0520 on 2013-2014 Dodge Charger: Engine Oil Pressure Sensor Circuit Fixes
For a 2013-2014 Dodge Charger, code P0520 almost always points to a faulty engine oil pressure sensor. A factory technical service bulletin (TSB #18-034-14 REV. A) confirms this is a known issue requiring a revised sensor. The part is inexpensive, but labor can vary significantly depending on whether you have the 3.6L V6 (difficult) or 5.7L V8 (moderate) engine.
- P0520 on a 2013-2014 Charger is overwhelmingly likely to be a failed oil pressure sensor.
- A factory TSB (#18-034-14 REV. A) exists for this exact issue, so be sure to use the revised OEM part for the repair.
- Always verify actual engine oil pressure with a mechanical gauge before assuming a major mechanical problem.
- The difficulty of the repair varies significantly between the 3.6L V6 (more difficult, intake removal required) and the 5.7L V8 (less difficult).
- Ignoring this code is unwise, as you lose the ability to monitor the engine's most critical fluid pressure.
What's Unique About the 2013-2014 Dodge CHARGER
The 2013-2014 Dodge Charger, along with many other Chrysler/Dodge/Jeep vehicles from this era, is known for premature oil pressure sensor failures. The issue was so prevalent that the manufacturer released Technical Service Bulletin #18-034-14 REV. A, which applies to a wide range of engines including the 3.6L V6 and 5.7L V8 found in the Charger. The bulletin advises replacing the original sensor with a revised part (OEM Part No. 05149062AB), making this a well-documented pattern failure rather than a random occurrence.
Diagnostic Flowchart
Tap your situation to follow the diagnostic path that matches what you're seeing on this vehicle.
Symptoms You May Notice
- Check Engine Light is on
- Oil pressure warning light may be on
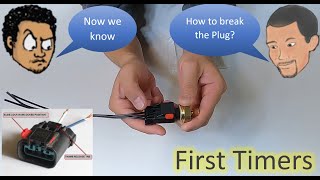
- Oil pressure gauge reading is erratic, stuck at a high value (like 99 PSI), or reads zero. 🎬 See how a faulty sensor causes these erratic pressure readings.
- In some cases, the vehicle may enter a limited power "limp mode".
- Engine may make knocking or clunking sounds if there is a true mechanical oil pressure problem.
- Replacing the oil pump when only the sensor is bad.
- Performing major engine work before verifying actual oil pressure with a mechanical gauge.
- Replacing the sensor with a low-quality aftermarket part that fails again quickly.
Most Likely Causes
- Faulty Engine Oil Pressure Sensor 🔴 High Probability A manufacturer TSB (#18-034-14 REV. A) was issued for this exact problem, indicating a known defect with the original part (often 5149062AA). The sensor can fail internally or leak oil into the electrical connector, disrupting the signal.
How to confirm: Check the sensor's electrical connector for oil contamination. A diagnostic scan tool may show illogical readings (e.g., 99 PSI with the engine off). A shop can test the circuit by jumpering the signal pin to sensor ground, which should result in a 0.0 volt reading, helping to prove the wiring and PCM are good. The ultimate confirmation is to test actual oil pressure with a mechanical gauge; if pressure is normal, the sensor is bad.
Typical fix: Replace the oil pressure sensor with the revised OEM part (05149062AB) or a quality aftermarket equivalent. Some owners on forums strongly recommend using only the Mopar factory sensor to avoid premature failure of aftermarket parts.
Est. part cost: $25-$60 - Wiring or Connector Issue 🟡 Medium Probability The sensor's location is exposed to high heat and vibration, which can degrade the wiring and plastic connector over time. The connector's release tab can become brittle and difficult to remove.
How to confirm: Visually inspect the wiring harness leading to the sensor for any signs of cracking, melting, or chafing. Wiggle the connector with the engine running to see if the gauge reading flickers. Use a multimeter to test for proper voltage (5V reference), ground, and signal continuity back to the PCM.
Typical fix: Repair the damaged section of wiring using solder and heat shrink. Replace the connector pigtail if it is broken or corroded. A pigtail connector can be found on sites like RockAuto or NAPA.
Est. part cost: $15-$30 - Incorrect or Dirty Engine Oil/Filter ⚪ Low Probability
How to confirm: Check the oil level and condition on the dipstick. If the oil is very old, dirty, or the wrong viscosity, it can affect pressure readings. A clogged or incorrect oil filter can also contribute to pressure issues.
Typical fix: Perform an oil and filter change using the manufacturer-specified oil weight (e.g., 5W-20 for the 5.7L Hemi) and a quality filter.
Est. part cost: $40-$80
Rare But Worth Checking
- Failing Oil Pump or Clogged Oil Passages: While P0520 is a circuit code, a severe mechanical issue causing genuinely low or high oil pressure can sometimes trigger it. This is rare and would typically be accompanied by other symptoms like engine noise or code P06DD.
- Faulty Powertrain Control Module (PCM): This is extremely rare. The PCM should only be considered after all other possibilities, including the sensor, wiring, and actual oil pressure, have been thoroughly ruled out by a professional. A shop confirmed the PCM was good in one case by testing the circuit's voltage response.
Diagnosis Steps
- Check the engine oil level and condition. Top off or change if necessary.
- Use an OBD-II scanner to confirm P0520 and check for any other related codes.
- Observe the oil pressure reading on the scan tool or dashboard. An illogical reading (e.g., 99 PSI with engine off) strongly points to a sensor/circuit issue.
- Inspect the oil pressure sensor's electrical connector for damage, corrosion, or oil saturation. Oil leaking through the sensor into the connector is a common failure mode.
- The most definitive test: disconnect the sensor and connect a mechanical oil pressure gauge. Start the engine and compare the reading to the manufacturer's specification. If mechanical pressure is good, the problem is electrical (sensor or wiring).
- If mechanical pressure is good, test the sensor's wiring. Check for 5V reference, a good ground, and signal continuity back to the PCM. A shop can perform a jumper test to confirm the circuit's integrity.
- If wiring is confirmed to be good and mechanical pressure is normal, the oil pressure sensor is faulty and must be replaced.
Parts You'll Likely Need
- Engine Oil Pressure Sensor
(OEM #05149062AB)— This is the revised OEM part specified by TSB #18-034-14 REV. A to fix the P0520 code. It supersedes previous part numbers like 05149062AA and 68060337AA.
Trusted brands: Mopar, Standard Motor Products (SMP), Dorman
OEM price range: $40-$60
Aftermarket price range: $25-$45 - Intake Manifold Gaskets (3.6L V6 only) — For the 3.6L engine, the upper and lower intake manifolds must be removed to access the sensor. It is standard practice and highly recommended to replace the gaskets at this time to prevent vacuum leaks.
Trusted brands: Fel-Pro, Mahle, Mopar
OEM price range: $30-$50
Aftermarket price range: $15-$30
Related Codes That Often Appear With This One
- P0521 — This code indicates 'Engine Oil Pressure Sensor/Switch Range/Performance,' which is a closely related fault often triggered by the same failing sensor.
- P0522 — Indicates 'Engine Oil Pressure Sensor/Switch Low,' often appearing with P0520 when the sensor fails and sends a low voltage signal.
- P0524 — Indicates 'Engine Oil Pressure Too Low'. A Reddit user reported this code along with P0520 when their gauge was stuck at 99 PSI, indicating the PCM was receiving conflicting or nonsensical data from the failing sensor.
- P06DD — This code for 'Engine Oil Pressure Control Solenoid Valve Stuck Off' can appear alongside P0520, especially on the 3.6L engine, pointing to a problem in the oil pressure regulation system. The oil pressure sensor is a primary input for this system.
Technical Service Bulletins (TSBs) & Recalls
- 18-034-14 REV. A: 'P0520- Engine Oil Pressure Sensor Circuit' - This bulletin, which supersedes 18-034-14, confirms the common cause is a faulty sensor and advises replacement with a revised part across multiple engines and vehicle platforms, including the LD (Charger), LX (300), and LC (Challenger).
Platform-Specific Known Issues
- Technical Service Bulletin #18-034-14 REV. A was issued by Chrysler for a wide range of 2013-2014 vehicles, including the Charger, specifically for code P0520. The bulletin instructs technicians to replace the original oil pressure sensor with a revised part.
- On the 3.6L V6 engine, the sensor is located in the engine valley, underneath the lower intake manifold and is part of the oil filter/cooler housing assembly. Replacement is labor-intensive (approx. 2-2.5 hours) and requires removing the upper and lower intake manifolds. 🎬 Watch this step-by-step sensor replacement for the 3.6L engine. It is highly recommended to replace the intake gaskets and consider replacing the entire oil filter housing assembly if it is leaking, as the sensor screws into it.
- On the 5.7L V8 Hemi engine, the sensor is located on the right front of the engine block, near the oil filter housing and behind/below the alternator. Access requires loosening and moving the alternator aside, but it is a much less involved job than on the V6. A special deep socket (often 1-1/16" or 27mm) is needed for removal.
Mechanic-Grade Diagnostic Values
- Engine Oil Pressure (3.6L V6) — expected: Minimum of 4 PSI at hot idle; 25-110 PSI at 3,000 RPM. Hot idle pressures of 9-28 PSI are commonly reported by owners.. Failure: Pressure below the minimum specification when tested with a mechanical gauge indicates a mechanical engine issue, not a sensor problem.
- Engine Oil Pressure (5.7L V8) — expected: Around 25-33 PSI at hot idle; 50-65 PSI while driving.. Failure: Pressure significantly outside this range when tested with a mechanical gauge points to a mechanical problem.
- Sensor Voltage (Key On, Engine Off) — expected: Approximately 4.5 Volts on the signal wire.. Failure: A reading of 5.0V may indicate an open circuit (sensor disconnected), while 0.0V can indicate a short to ground.
- Sensor Circuit Jumper Test — expected: Less than 0.5 Volts.. Failure: If the voltage does not drop to near zero when the signal circuit is jumpered to the sensor ground circuit, it indicates a problem in the wiring or PCM, not the sensor.
Scan Tool Commands That Help
- wiTECH (or equivalent professional scan tool): Monitor Engine Oil Pressure Sensor voltage — Used during Key On, Engine Off testing to observe the sensor's baseline voltage and during the jumper wire test to confirm the circuit's integrity back to the PCM.
Wiring & Ground Locations
- Engine Oil Pressure Sensor Connector (3-wire) — On the 3.6L, it's in the engine valley on the oil cooler housing. On the 5.7L, it's on the right front of the engine block, near the alternator.. This is the primary connection point for testing. The connector itself or the wiring pigtail can fail from heat and vibration. The typical 3-wire sensor uses a 5V reference, a signal return ground, and a variable voltage signal wire.
- PCM Connector C1/C2 — The Powertrain Control Module (PCM) is typically located in the engine bay.. The signal wire from the oil pressure sensor terminates at a specific pin on one of the main PCM connectors. Testing for continuity from the sensor to this pin is necessary to rule out a broken wire. A service manual procedure involves disconnecting these connectors to test for shorts to voltage.
Real Owner Repair Stories
- Reddit user on r/MechanicAdvice (2014 Dodge Charger R/T (5.7L)) — Check engine light on with codes P0520 and P0524. Oil pressure gauge read a constant 99 PSI.
❌ Tried (didn't work) The owner had the oil pressure sensor replaced with an OEM part by a 'backyard mechanic', but the problem returned one month later.
✅ What actually fixed it A professional shop diagnosed the issue again. They performed a circuit test: with the key on and engine off, they saw 4.5V. Disconnecting the sensor made it go to 5.0V. Jumpering the signal pin to the ground pin made it drop to 0.0V. This test proved the wiring and PCM were good, confirming the 'new' OEM sensor had failed prematurely. Replacing the sensor a second time resolved the issue.
OEM Part Supersession History
5149062AA, 68060337AA→05149062AB (often listed as 5149062AB)— The original sensors were prone to premature failure, as acknowledged by TSB 18-034-14 REV. A. The new part is a revised design for better durability.
Heads up: While older designs may physically fit, using the superseded part numbers is not recommended due to the high failure rate. Always use the latest revision (05149062AB).
Helpful Videos
Used OEM Parts in Stock
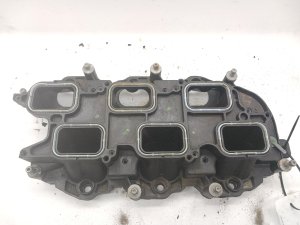


New Aftermarket Parts Available


The information in this article is provided for general reference and educational purposes only. Vehicle specifications, procedures, and part compatibility can vary by production date, trim level, and region. Always consult your vehicle's factory service manual and verify part numbers before purchasing or performing repairs. Safety-critical components such as airbags, seat belts, and braking systems should be installed by a qualified professional.
- Dodge CHARGER:
- 🎬 Helpful Videos
- 🛍️ Shop This Part
- What's Unique About the 2013-2014 Dodge CHARGER
- Diagnostic Flowchart
- Symptoms You May Notice
- Most Likely Causes
- Rare But Worth Checking
- Diagnosis Steps
- Parts You'll Likely Need
- Related Codes That Often Appear With This One
- Technical Service Bulletins (TSBs) & Recalls
- Platform-Specific Known Issues
- Mechanic-Grade Diagnostic Values
- Scan Tool Commands That Help
- Wiring & Ground Locations
- Real Owner Repair Stories
- OEM Part Supersession History
- 🎟️ Get 5% Off