

P0191 on 2011-2023 Dodge Challenger 3.6L: Fuel Rail Pressure Sensor Causes and Fixes
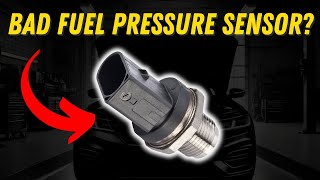
P0191 on a 3.6L Challenger usually means the Fuel Rail Pressure Sensor is failing or there's a problem with its wiring. It can cause stalling and hesitation. Replacing the sensor (Mopar Part No. 05149171AF) is the most common fix, costing around $50-$150 for the part. A weak fuel pump can also be the cause.
- P0191 indicates a performance problem with the Fuel Rail Pressure Sensor's signal, not necessarily a failed sensor.
- Common symptoms include stalling, hesitation, and a loss of power.
- The most likely cause is a faulty fuel rail pressure sensor, followed by wiring/connector issues.
- Always verify actual fuel pressure with a mechanical gauge before replacing parts to rule out a bad fuel pump.
- The sensor is located on the driver's side fuel rail at the back of the engine; access requires removing the upper intake manifold.
What's Unique About the 2011-2023 Dodge Challenger
On the 3.6L Pentastar engine used in the Challenger, the fuel system is a returnless design, meaning pressure is regulated by the fuel pump module itself, not a separate regulator on the rail. This makes the fuel rail pressure sensor a critical input for controlling the pump. While the sensor can fail, owners have also reported that a weakening in-tank fuel pump can trigger a P0191 code, sometimes without any other fuel pressure codes, especially during high-demand situations like hard acceleration or on cold starts. Additionally, the Totally Integrated Power Module (TIPM), which controls the fuel pump, has been a source of electrical issues on this platform, and while less common, a faulty TIPM could theoretically contribute to erratic fuel pressure readings.
Generation note: The 2011-2023 Dodge Challenger is part of the third generation (LC). A major facelift occurred in 2015, but the 3.6L Pentastar V6 and its core fuel system architecture remained consistent throughout these years. The causes and fixes for P0191 are generally applicable across this entire year range.
Symptoms You May Notice
- Check Engine Light is on
- Engine hesitation or stumbling during acceleration
- Rough or unstable idle
- Engine stalling, especially when coming to a stop or at idle
- Hard starting or extended cranking time
- Noticeable loss of engine power
- Reduced fuel economy
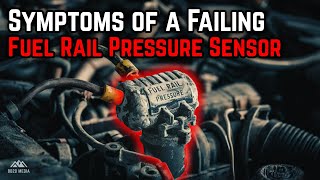
- Crank-no-start condition 🎬 Watch: Common signs and symptoms of a failing fuel pressure sensor
- Replacing the fuel pump when the issue is only a bad sensor or wiring.
- Replacing fuel injectors, which are rarely the cause of a P0191 code.
- Replacing the sensor repeatedly with cheap aftermarket parts that fail quickly, instead of addressing a wiring issue or using an OEM part.
Most Likely Causes
- Faulty Fuel Rail Pressure Sensor 🔴 High Probability Like any electronic sensor, it is exposed to constant heat cycles and vibration at the back of the engine, leading to eventual failure. It's the most frequently cited cause for this code across many platforms. Aftermarket sensors, in particular, have been reported to fail quickly.
How to confirm: With a scan tool, compare the 'Commanded Fuel Pressure' to the 'Actual Fuel Pressure' reading from the sensor. If the actual reading is erratic, stuck on one value, or clearly incorrect while the engine is running, the sensor is likely bad. You can also test the sensor's voltage output; it should typically be between 0.5V and 4.5V and change with engine RPM. A definitive test is to compare the scan tool reading to a mechanical fuel pressure gauge; if the mechanical gauge is steady and the scan tool is not, the sensor is bad.
Typical fix: Replace the fuel rail pressure sensor. It is highly recommended to use an OEM Mopar part to avoid premature failure.
Est. part cost: $50 - $150 - Wiring or Connector Issues 🟡 Medium Probability The sensor is located at the rear of the engine, and its wiring harness can be subject to heat damage, abrasion, or oil contamination over time. Corrosion at the connector pins is also a common issue, leading to poor signal quality.
How to confirm: Visually inspect the sensor's electrical connector and wiring for any signs of corrosion, damage, or loose pins. Perform a 'wiggle test' on the harness while monitoring the fuel pressure reading on a scan tool to see if the value jumps or drops out. Check for 5V reference, ground, and signal continuity at the connector.
Typical fix: Clean the connector terminals with electrical contact cleaner and apply dielectric grease. Repair or replace any damaged sections of the wiring harness.
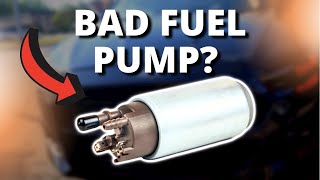
Est. part cost: $5 - $50 - Failing Fuel Pump ⚪ Low Probability A weak fuel pump may not be able to supply the pressure demanded by the PCM, causing the sensor's readings to fall out of the expected range, even if the sensor itself is working correctly. This can sometimes manifest as a P0191 before a more direct low-pressure code like P0087 appears. This is a known issue on the broader Dodge/Chrysler platform. 🎬 Watch: How to tell if your fuel pump is failing
How to confirm: Connect a mechanical fuel pressure gauge to the fuel rail's service port. Compare the mechanical gauge reading to the sensor's reading on a scan tool. If both show low or fluctuating pressure that doesn't meet the specification of ~58 PSI, the fuel pump is the likely culprit. The test should be performed at idle and under load.
Typical fix: Replace the in-tank fuel pump module assembly.
Est. part cost: $200 - $400
Rare But Worth Checking
- Clogged Fuel Filter: The fuel filter is integrated into the fuel pump module on this vehicle. While less common to cause a range/performance code than a low-pressure code, a severely clogged filter can cause erratic pressure drops under load, potentially triggering P0191.
- Powertrain Control Module (PCM) Issue: In very rare cases, the fault can be with the PCM's internal circuitry or software. This should only be considered after all other possibilities (sensor, wiring, and mechanical fuel system) have been exhaustively ruled out.
- Faulty Totally Integrated Power Module (TIPM): The TIPM controls the fuel pump. A failing TIPM can cause intermittent power to the pump, leading to fluctuating fuel pressure that the PCM might interpret as a sensor performance issue. This would likely be accompanied by other random electrical problems.
Diagnosis Steps
- Connect an OBD-II scanner and verify that P0191 is the primary code. Check for any other related fuel system codes (like P0087, P0192, P0193) and review the freeze-frame data to see the conditions under which the code was set.
- Using the scanner's live data function, monitor the 'Fuel Rail Pressure' PID. Observe the reading with the key on/engine off, at idle, and while revving the engine. Note any erratic jumps, dropouts, or values that seem illogical (e.g., reading 0 PSI while running).
- Locate the fuel rail pressure sensor. On the 3.6L Pentastar, it is on the driver's side fuel rail, towards the back of the engine, underneath the upper intake manifold. 🎬 See this walkthrough for replacing the sensor on a Pentastar engine Access may require removing the engine cover and air intake snorkel.
- Inspect the sensor's electrical connector and wiring harness for any visible damage, corrosion, or loose connections. Perform a 'wiggle test' on the harness while watching the live data to check for intermittent connections.
- If wiring seems okay, the next step is to verify actual fuel pressure. Connect a mechanical fuel pressure gauge to the service port (Schrader valve) on the fuel rail. Compare the gauge's reading to the scanner's reading. They should be within a few PSI of each other. The spec is approximately 58 PSI.
- If the mechanical gauge shows steady, correct pressure but the scanner reading is erratic or incorrect, the fuel rail pressure sensor is faulty and should be replaced.
- If both the mechanical gauge and the scanner show low or fluctuating pressure, the problem is likely mechanical (weak fuel pump, clogged filter) or an issue with the power supply to the pump (e.g., TIPM).
- If the sensor and mechanical pressure seem fine, test the sensor circuit. Disconnect the sensor and check for 5V reference and a good ground at the connector with the key on. Test the signal wire for continuity back to the PCM.
- After repairs, clear the DTCs and perform a drive cycle, including idle, acceleration, and cruising, to ensure the code does not return.
Parts You'll Likely Need
- Fuel Rail Pressure Sensor
(OEM #05149171AF (replaces 05149171AE, 05149171AD))— This is the most common component to fail and directly cause a P0191 code by sending incorrect performance data to the PCM.
Trusted brands: Mopar, Bosch, Standard Motor Products (SMP), Delphi
OEM price range: $90-$160
Aftermarket price range: $50-$100
Related Codes That Often Appear With This One
- P0087 — This code for 'Fuel Rail/System Pressure - Too Low' can appear with P0191 if the actual fuel pressure is consistently below the commanded value, often pointing towards a weak fuel pump or clogged filter.
- P0192 — Indicates 'Fuel Rail Pressure Sensor Circuit Low Input', suggesting a short to ground in the sensor's circuit or a sensor that has failed in the low voltage range.
- P0193 — Indicates 'Fuel Rail Pressure Sensor Circuit High Input', suggesting an open circuit, a short to power, or a sensor that has failed in the high voltage range.
- P0171 — This code for 'System Too Lean (Bank 1)' can be triggered if low or erratic fuel pressure prevents enough fuel from being injected to match the air entering the engine.
Platform-Specific Known Issues
- In a thread on RamForum.com (though for a diesel, the diagnostic logic is similar), a user with a persistent P0191 that wasn't fixed by a sensor replacement eventually traced the issue to injector feed tubes, highlighting that mechanical issues can sometimes masquerade as sensor faults.
- A user on a Dodge diesel forum reported that after replacing the sensor did not fix the P0191, the ultimate solution was to have the injectors tested and reprogram the PCM with new injector variance codes, an advanced and
Mechanic-Grade Diagnostic Values
- Fuel Rail Pressure Sensor (FRPS) 5V Reference — expected: Approximately 5.0V DC with connector unplugged and Key On, Engine Off (KOEO).. Failure: Lack of 5V indicates a wiring issue or a problem with the PCM.
- Fuel Rail Pressure Sensor (FRPS) Signal Voltage (KOEO) — expected: Approximately 0.5V.. Failure: A reading stuck high (near 4.5-5.0V) or at 0V points to a faulty sensor or wiring short/open.
- Fuel Rail Pressure Sensor (FRPS) Signal Voltage (Engine Idling) — expected: Approximately 1.3V to 1.8V.. Failure: Voltage that is stuck, erratic, or doesn't respond to changes in engine RPM suggests a sensor or circuit fault.
- Fuel Rail Pressure Sensor (FRPS) Circuit Resistance — expected: Less than 1.0 - 3.0 Ohms on the signal, power, and ground wires between the sensor and PCM connectors.. Failure: High resistance (OL or significantly above spec) indicates an open circuit or corrosion in the wiring harness.
- Low-Pressure Fuel System Pressure (Mechanical Gauge) — expected: 55-65 PSI.. Failure: Pressure that is consistently low, high, or drops off under load points to a fuel pump, filter, or regulator issue, not the sensor itself.
Scan Tool Commands That Help
- wiTECH or other advanced bidirectional scanner: Fuel Pump Relay Actuation / Command Fuel Pump On — This is a critical diagnostic step when a no-start or crank-no-start condition exists with 0 PSI fuel pressure. Manually commanding the fuel pump relay on can bypass potential TIPM or PCM command issues. If the pump runs and builds pressure when commanded by the scanner, but not with a normal key cycle, it points the diagnosis away from the pump itself and towards the control side (PCM, TIPM, or wiring).
- wiTECH (Dealer Tool): View Network Topology — The topology view in wiTECH provides a quick, color-coded overview of all modules on the CAN bus. It can instantly show if the PCM is responsive and whether it has stored DTCs, which is a valuable first look before diving into specific fuel system diagnostics.
Wiring & Ground Locations
- Fuel Rail Pressure Sensor Connector — On the driver's side fuel rail, towards the rear of the engine, underneath the upper intake manifold foam insulation.. This is the primary connection point for testing. It has three pins: a 5V power supply from the PCM, a sensor ground provided by the PCM, and the signal wire that sends pressure data back to the PCM. Corrosion or damage here is a direct cause of P0191.
- Sensor Pin 1 (Varies, check diagram) — On the sensor connector.. This is the 5V reference wire from the PCM. Verifying 5V here is the first step in confirming the PCM is powering the sensor correctly.
- Sensor Pin 2 (Varies, check diagram) — On the sensor connector.. This is the signal wire. Back-probing this pin allows you to measure the voltage the sensor is sending to the PCM in real-time.
- Sensor Pin 3 (Varies, check diagram) — On the sensor connector.. This is the sensor ground circuit. A poor ground connection can cause incorrect voltage readings on the signal wire, leading to a false P0191 code.
Real Owner Repair Stories
- Reddit user in r/MechanicAdvice (2012 Dodge Grand Caravan 3.6L (same engine/fuel system)) — Won't start, fuel pressure at 0 PSI. No sound from the fuel pump on key cycle. Would sometimes start and sputter then die.
❌ Tried (didn't work) Cycling the key would not activate the fuel pump after the pressure had bled off.
✅ What actually fixed it The diagnostic breakthrough was using a scan tool to manually command the fuel pump relay on. This forced the pump to run, built pressure to 60 PSI, and allowed the van to start and run fine. The problem was not the pump itself, but the control circuit (likely TIPM or PCM) failing to activate the pump relay on a normal key cycle when starting from 0 pressure.
OEM Part Supersession History
05149171AD→05149171AE, then 05149171AF— Standard part revision and improvement by the manufacturer.
Diagnostic Flowchart
Other Known Issues on This Vehicle
Issues unrelated to this code that are worth knowing about as an owner of this generation:
- Cracked Oil Filter/Cooler Housing 🔴 High — Extremely common across all years. The plastic housing becomes brittle with heat cycles and cracks, causing significant oil and/or coolant leaks into the engine valley.
- Rocker Arm / Lifter Failure ('Pentastar Tick') 🔴 High — Common, particularly on pre-2016 models, but can occur at any mileage. Caused by needle bearings in the rocker arm failing, leading to a distinct ticking noise and potential camshaft damage if ignored. (Ref: A class-action lawsuit was filed regarding this issue for 2014-2020 models.)
- Left Cylinder Head Defect (Early Models) 🔴 High — Primarily affects 2011-2013 models. Worn valve guides and seats lead to misfires (P0300, P0302, P0304, P0306) and require cylinder head replacement. (Ref: TSB 09-002-14 Rev. B; Covered under an extended warranty (X56) which is now expired for most vehicles.)
- Totally Integrated Power Module (TIPM) Failure 🟠 Medium — Common in Chrysler products from this era. Can cause a wide range of bizarre electrical issues, including fuel pump power loss, intermittent starting, or stalling.
Used vs. New Parts: Buying Guide for This Vehicle
When a used part is the smart pick: For this repair, using used parts is generally not recommended. The primary failure components are electronic (sensor) or high-wear mechanical (fuel pump), which have a finite lifespan. A used part may have significant wear and could fail shortly after installation.
Donor-vehicle mileage cap: roughly under 30000 miles for the part to have meaningful remaining life.
What to inspect on the donor part:
- For a fuel pump module, verify the donor vehicle's mileage is very low.
- Inspect the electrical connector on any part for signs of corrosion, melting, or damaged pins.
- Ensure the part comes from a vehicle that was not in a major collision, which could have damaged the components.
OEM-only on this vehicle (don't cheap out):
- Fuel Rail Pressure Sensor: Forum and mechanic consensus strongly advises against aftermarket sensors for this part, as many have been reported to fail prematurely or be inaccurate out of the box, leading to repeat repairs.
- Totally Integrated Power Module (TIPM): Due to the complexity and high failure rate of aftermarket/rebuilt TIPMs for this platform, an OEM unit or a highly reputable remanufacturer is essential.
Aftermarket brands forum-validated for this vehicle:
- Bosch (often the OEM supplier)
- Delphi
- Standard Motor Products (SMP)
Brands owners have reported issues with on this vehicle:
- Unbranded, 'white-box' parts from online marketplaces are frequently cited as unreliable for this specific sensor.
Real Owner Stories
Aggregated from forums and TSBs cited above. Mileages and costs reflect what owners reported in those sources.
2011 Ram 3.6L (Logic applicable to Challenger 3.6L)
Symptoms: Persistent P0191 code that was not resolved by simply replacing the fuel rail pressure sensor.
What fixed it: Replacing the injector feed tubes and, in some cases, all six injectors to resolve deeper mechanical fuel system issues.
Source hint: RamForum.com - P0191 Code Thread
2010-up Dodge Diesel (Logic applicable to Challenger 3.6L)
Symptoms: The P0191 code returned even after the sensor and fuel filter were replaced.
What fixed it: The issue required advanced diagnostics; while the sensor was new and software was up to date, the solution involved testing injectors and reprogramming the PCM with new injector variance codes.
Source hint: Dodge Diesel - Diesel Truck Resource Forums - P0191 Thread
Related OBD-II Codes
Frequently Asked Questions
Where is the fuel rail pressure sensor located on my 3.6L Pentastar Challenger?
Can I use an aftermarket sensor to fix the P0191 code on my Dodge?
My Challenger has a P0191 and won't start; is this common?
How can I tell if the problem is the sensor or the actual fuel pump?
Does a P0191 always mean the sensor is bad on the Pentastar V6?
Helpful Videos
We Have This Part in Stock



The information in this article is provided for general reference and educational purposes only. Vehicle specifications, procedures, and part compatibility can vary by production date, trim level, and region. Always consult your vehicle's factory service manual and verify part numbers before purchasing or performing repairs. Safety-critical components such as airbags, seat belts, and braking systems should be installed by a qualified professional.
- Dodge Challenger:
- 🎬 Helpful Videos
- 🛍️ Shop This Part
- What's Unique About the 2011-2023 Dodge Challenger
- Symptoms You May Notice
- Most Likely Causes
- Rare But Worth Checking
- Diagnosis Steps
- Parts You'll Likely Need
- Related Codes That Often Appear With This One
- Platform-Specific Known Issues
- Mechanic-Grade Diagnostic Values
- Scan Tool Commands That Help
- Wiring & Ground Locations
- Real Owner Repair Stories
- OEM Part Supersession History
- Diagnostic Flowchart
- Other Known Issues on This Vehicle
- Used vs. New Parts: Buying Guide for This Vehicle
- Real Owner Stories
- 2011 Ram 3.6L (Logic applicable to Challenger 3.6L)
- 2010-up Dodge Diesel (Logic applicable to Challenger 3.6L)
- Related OBD-II Codes
- Frequently Asked Questions
- 🎟️ Get 5% Off