

P0172 on 2011-2016 Scion tC 2.5L: Causes and Fixes for System Too Rich
The P0172 code on a 2011-2016 Scion tC most often points to a dirty Mass Airflow (MAF) sensor or a failing upstream Air/Fuel Ratio (A/F) sensor. Cleaning the MAF sensor with a dedicated cleaner is a simple, low-cost first step that frequently resolves the issue. If that doesn't work, replacing the upstream A/F sensor (Bank 1, Sensor 1) is the next most likely solution. The OEM part is made by Denso, and using an OEM replacement is highly recommended for this sensitive system.
- Start with the simplest fix: Clean the Mass Airflow (MAF) sensor using a dedicated cleaner. This costs less than $15 and resolves the P0172 code in many cases.
- If cleaning the MAF doesn't work, the next most likely cause is a failing upstream Air/Fuel Ratio sensor (Bank 1, Sensor 1).
- Always use the correct sensor. The upstream A/F sensor (OEM part # 89467-21020) is different from the downstream O2 sensor. Replacing the wrong one will not fix the problem.
- Ignoring a P0172 code can lead to reduced fuel efficiency and may eventually damage your expensive catalytic converter.
What's Unique About the 2011-2016 Scion tC
The 2AR-FE engine in the second-generation Scion tC is generally reliable but, like many modern Toyota/Scion engines, its fuel trim is sensitive to sensor inputs. The two most common culprits for a P0172 code are simple: a dirty Mass Airflow (MAF) sensor, which misreads the amount of air entering the engine, or a lazy upstream Air/Fuel (A/F) ratio sensor that provides incorrect oxygen readings to the computer. Owners often find that starting with the easiest and cheapest fix—cleaning the MAF sensor—resolves the issue. Some forum users note that even on Toyota engines with 'self-cleaning' MAF sensors, contamination from the PCV system can still occur over time, necessitating a manual cleaning.
Symptoms You May Notice
- Check Engine Light is on
- Poor fuel economy
- Rough or unstable idle
- Hesitation during acceleration
- Strong smell of fuel from the exhaust 🎬 See this complete guide for fixing P0172 errors on your Scion.
- Black smoke from the tailpipe
- Engine may be difficult to start or may sputter.
- Failed emissions test.
- Replacing the downstream oxygen sensor (Bank 1, Sensor 2). This sensor's primary role is to monitor catalytic converter efficiency, not control the primary air-fuel mixture. Replacing it will not fix a P0172 code.
Most Likely Causes
- Dirty Mass Airflow (MAF) Sensor 🔴 High Probability The MAF sensor's delicate wires can become contaminated with dirt, oil from the PCV system, or residue from aftermarket oiled air filters, causing it to under-report airflow to the ECU. The ECU then injects too much fuel, creating a rich condition. This is a very common and well-documented issue on Scion/Toyota forums.
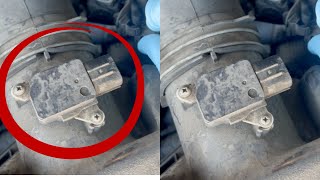
How to confirm: Remove the sensor (located on the air intake tube right after the air filter box) and visually inspect the small wires inside for contamination. A scan tool may show illogical MAF readings (e.g., very low g/s at idle) or a corresponding P0101 code. Often, cleaning is performed as the first diagnostic step due to its low cost and high success rate. 🎬 Watch: Two quick DIY methods to clear the P0172 code.
Typical fix: Remove the sensor and clean it thoroughly with a dedicated MAF sensor cleaner spray. 🎬 Watch: How to clean your MAF sensor to fix a rough idle. Do not touch the wires and allow it to dry completely before reinstalling. If cleaning does not resolve the issue, replacement with an OEM Denso unit is recommended.
Est. part cost: $10-$15 for a can of CRC MAF cleaner. - Failing Air/Fuel Ratio (A/F) Sensor 🟡 Medium Probability The A/F sensor (also called the upstream oxygen sensor or Bank 1, Sensor 1) is a critical component for fuel mixture control and is a common failure point as a vehicle ages. It can become slow to respond ('lazy') or get stuck sending a high voltage signal, tricking the ECU into thinking the engine is running lean, causing it to add excess fuel.
How to confirm: Use a scan tool to monitor the A/F sensor's voltage readings (B1S1). A healthy sensor should fluctuate rapidly. A sensor that is stuck high or switches very slowly indicates a problem. A more definitive test is to measure the resistance of the sensor's heater element.
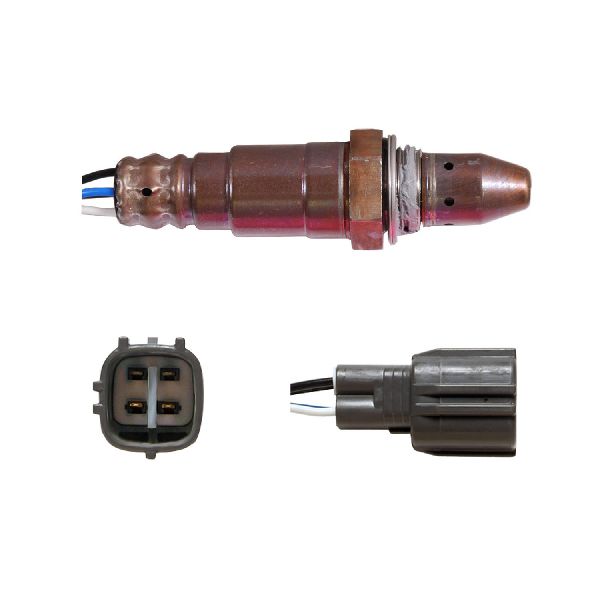
Typical fix: Replace the upstream Air/Fuel Ratio sensor. It is located on the exhaust manifold before the catalytic converter. Using an OEM brand like Denso is highly recommended for compatibility and to avoid issues common with cheaper aftermarket sensors.
Est. part cost: $150-$220 for an OEM Denso sensor. - Leaking Fuel Injector(s) ⚪ Low Probability
How to confirm: Perform a fuel pressure leak-down test. If pressure drops quickly after the engine is off, it may indicate a leaking injector. Another method is to remove the spark plugs after the car has sat and check for a wet, fuel-soaked plug or use a borescope to look for excess fuel in a cylinder. A strong fuel smell from the engine oil dipstick can also be an indicator.
Typical fix: Replace the faulty fuel injector(s). It is often recommended to replace them as a set to ensure balanced flow.
Est. part cost: $70-$150 per injector. - High Fuel Pressure ⚪ Low Probability
How to confirm: Connect a fuel pressure gauge to the fuel rail and check if the pressure is above the manufacturer's specification (typically 44-50 PSI for this system). This could be caused by a faulty fuel pressure regulator or a restriction in the fuel return line.
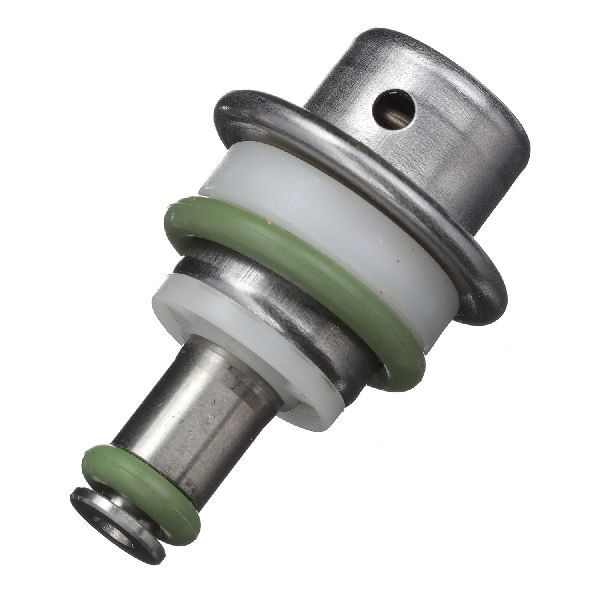
Typical fix: Replace the faulty fuel pressure regulator or clear the restriction in the return line.
Est. part cost: $50-$150 for a regulator.
Rare But Worth Checking
- Stuck Open EVAP Purge Valve: If the EVAP purge valve sticks open, it can allow un-metered fuel vapors from the charcoal canister to enter the intake manifold, creating a rich condition, especially at idle.
- Faulty Engine Coolant Temperature (ECT) Sensor: If the ECT sensor incorrectly tells the ECU that the engine is always cold (by reading a very low temperature), the computer will continuously command a richer fuel mixture, similar to a cold start enrichment.
- Fuel-Diluted Engine Oil: In some cases, especially with frequent short trips where the engine doesn't fully warm up, fuel can dilute the engine oil. These fuel vapors can be drawn into the intake through the PCV system, creating an unaccounted-for rich condition. Checking the oil for a strong fuel smell is a key diagnostic step.
Diagnosis Steps
- Check for other DTCs: Use an OBD-II scanner to see if any other codes are present, which can help pinpoint the root cause (e.g., a P0101 points strongly to the MAF; a P2196 points to the A/F sensor).
- Analyze Freeze Frame Data: Look at the long-term fuel trim (LTFT) value in the freeze frame data. For a P0172, it will be a significant negative number (e.g., -20% or more), confirming the ECU is trying to remove fuel.
- Inspect Air Intake System: Check the engine air filter and intake tube for any blockages, heavy contamination, or restrictions that could limit airflow.
- Clean the MAF Sensor: This is the most common and cheapest fix. Disconnect the battery, remove the MAF sensor, and spray it with dedicated MAF sensor cleaner. Let it dry completely before reinstalling.
- Reset ECU and Test Drive: After cleaning the MAF, reconnect the battery (or clear codes with a scanner) and drive the vehicle for at least 15-20 minutes to see if the code returns.
- Test the Air/Fuel Ratio Sensor: If the code returns, use a scan tool to monitor the Bank 1 Sensor 1 voltage. A healthy sensor will show rapidly fluctuating readings. A lazy or biased sensor that is stuck high needs replacement. For a more definitive test, measure the heater resistance of the A/F sensor; it should be between 1.8 to 3.4 Ω at 20°C (68°F).
- Check Fuel Pressure: If sensors appear to be working, test the fuel pressure to rule out a faulty fuel pressure regulator. Check for fuel in the vacuum line of the regulator, which indicates a ruptured diaphragm.
- Inspect for Leaking Injectors: If all else fails, investigate the possibility of one or more leaking fuel injectors by performing a leak-down test or checking spark plugs for signs of being fuel-fouled (wet and black).
Parts You'll Likely Need
- Air/Fuel Ratio Sensor (Upstream)
(OEM #89467-21020)— This is the primary sensor that controls the air-fuel mixture. It is a common wear item and a frequent cause of the P0172 code when it's not a dirty MAF sensor.
Trusted brands: Denso (OEM supplier, Part No. 234-9041)
OEM price range: $175-$220
Aftermarket price range: $80-$150 - Mass Airflow Sensor Cleaner — A dirty MAF sensor is the most probable cause. Cleaning it is a simple, inexpensive first step that often resolves the code.
Trusted brands: CRC, WD-40 Specialist
Aftermarket price range: $10-$15 - Mass Airflow (MAF) Sensor
(OEM #22204-0V010 (Denso is OEM))— If cleaning the MAF sensor does not fix the issue, the sensor's electronics may have failed, requiring a full replacement. Using the OEM Denso part is highly recommended.
Trusted brands: Denso
OEM price range: $100-$150
Aftermarket price range: $50-$90
Related Codes That Often Appear With This One
- P0101 — This code relates to MAF Sensor Circuit Range/Performance. If the MAF sensor is dirty or failing, it can trigger both P0101 and P0172 simultaneously.
- P2196 — This code means 'O2 Sensor Signal Stuck Rich (Bank 1, Sensor 1)'. It directly points to the upstream A/F sensor as the likely culprit, either because the sensor itself has failed or it is correctly detecting a severe rich condition from another cause.
Platform-Specific Known Issues
- CEL and Slip Indicator Light Together: On some Scion tC models, a P0172 code may be accompanied by the 'Slip Indicator' light turning on simultaneously. This is a known behavior where the ECU disables traction/stability control as a precaution when a significant engine management fault is detected.
- Issues After Cold Air Intake Installation: Installing an aftermarket Cold Air Intake (CAI), especially one with an oiled filter, is a very common trigger for the P0172 code on the Scion tC. The oil from the filter can contaminate the MAF sensor, and the different airflow characteristics can confuse the ECU, leading to incorrect fuel trims.
Mechanic-Grade Diagnostic Values
- Air/Fuel Ratio Sensor Heater Resistance — expected: 1.8 to 3.4 Ω at 20°C (68°F). Failure: Resistance outside of the specified range.
- Fuel Pressure (at fuel rail) — expected: 44 to 50 PSI with the engine running.. Failure: Pressure significantly above 50 PSI indicates a regulator or return line issue. Pressure below 44 PSI suggests a weak pump or clog.
- Fuel Pressure Leak-Down — expected: Pressure should remain above 21 PSI for at least 5 minutes after turning the engine off (some sources suggest up to 20 minutes).. Failure: A rapid drop in pressure below 21 PSI indicates a leak in the system, possibly from a leaking injector or faulty check valve in the fuel pump.
- Mass Airflow (MAF) Sensor Reading at Idle — expected: Approximately 1.6 - 1.7 g/s for a similar 1.5L Toyota engine. The 2.5L 2AR-FE should be slightly higher, likely in the 2.0-4.0 g/s range at a stable, warm idle.. Failure: A reading that is significantly higher than expected at idle (e.g., 5.0+ g/s) can indicate a faulty sensor over-reporting air, causing a rich condition. Conversely, a very low reading can also be a sign of a dirty or failed sensor.
- Long Term Fuel Trim (LTFT) — expected: Ideally close to 0%, but a value between -10% and +10% is generally acceptable.. Failure: A P0172 is typically set when the LTFT exceeds -20% to -25%, indicating the ECU is consistently removing a large amount of fuel to correct a rich condition.
Scan Tool Commands That Help
- Toyota Techstream: Reset Memory (Fuel Trim Reset) — After replacing a component that affects the air-fuel ratio, such as a MAF sensor, A/F sensor, or fuel injectors. This command erases the long-term learned fuel trim values, forcing the ECU to create a new fuel map based on the new part's readings. This can accelerate the diagnostic process and prevent the old, incorrect trim values from causing issues.
Wiring & Ground Locations
- Engine Harness Ground — On the left side of the cylinder head (when facing the engine from the front of the car).. A poor or corroded engine ground can cause erratic behavior from sensors that use the block as a ground reference, including the A/F sensor and ECT sensor. This can lead to incorrect readings and phantom rich or lean conditions. Ensuring this ground is clean and tight is a crucial step in advanced diagnostics.
- MAF Sensor Connector Pins — On the MAF sensor electrical connector.. For advanced diagnostics involving testing for voltage or signal at the sensor: +B is the 12V power supply, VG is the output voltage signal, E2G is the signal ground, THA is the intake air temperature signal, and E2 is the main sensor ground.
- Main Battery Ground — One main ground cable from the negative battery terminal goes to a bolt under the battery tray, and another goes to a bolt on the transmission case, often near the starter.. While less likely to cause a specific P0172 code, a poor main ground connection can cause a host of electrical issues, including weak spark or incorrect sensor readings, which could indirectly contribute to a rich condition. Some owners have noted poor grounding systems on the tC.
Real Owner Repair Stories
- YouTube diagnostic channel 'Pine Hollow Auto Diagnostics' (2014 Toyota Sienna (Uses a V6, but the diagnostic principle for a rich code caused by a faulty MAF is identical)) — P0172 and P0175 (Rich on both banks), stalling.
❌ Tried (didn't work) The vehicle had been to another shop with no resolution.
✅ What actually fixed it The aftermarket MAF sensor that was installed in the vehicle was physically different in design from the OEM Denso sensor. It was over-calculating air at idle (causing the rich code) and under-calculating air at wide-open throttle. Replacing the incorrect aftermarket MAF with a new, OEM-style Denso MAF sensor resolved the fuel trim issues and fixed the code.
OEM Part Supersession History
89467-21020→89467-0R050— Standard part revision by Toyota.
Heads up: The new part number (89467-0R050) is the correct replacement for the original. No known incompatibilities exist when using the superseded OEM part.
Diagnostic Flowchart
Real Owner Stories
Aggregated from forums and TSBs cited above. Mileages and costs reflect what owners reported in those sources.
Scion tC
Symptoms: Experienced a P0172 code shortly after installing an aftermarket Cold Air Intake (CAI).
What fixed it: Troubleshooting focused on determining whether the A/F sensor or the downstream O2 sensor was at fault due to the intake modification.
Source hint: ScionLife.com: 'CEL Code P0172: Help Needed'
2011 Scion tC
Symptoms: Engine running rich and throwing a P0172 code, with the slip indicator light turning on simultaneously after installing modifications.
What fixed it: Investigating the aftermarket modifications that altered airflow and triggered the ECU's rich condition and slip indicator precaution.
Source hint: ScionLife.com: 'Running rich, throwing code: p0172'
2012 Scion tC
Symptoms: Issues with the MAF sensor becoming contaminated by oil from an aftermarket air filter, causing poor running conditions.
What fixed it: Cleaned the MAF sensor and throttle body to remove the oil residue.
Source hint: Reddit r/SciontC: 'Clean MAF/Throttle body tC2'
2006 Scion tC
Symptoms: Persistent P0172 code that remained even after replacing multiple parts.
What fixed it: Diagnosed as likely leaking fuel injectors after other common fixes failed to resolve the rich condition.
Source hint: ScionLife.com: 'Code P0172..'
Related OBD-II Codes
Frequently Asked Questions
Why did my Slip Indicator light turn on at the same time as the P0172 code on my Scion tC?
I just installed a Cold Air Intake (CAI) on my 2.5L tC and got a P0172. Are they related?
What brand of Air/Fuel (A/F) sensor should I use if I need to replace it on my 2AR-FE engine?
How can I test the Air/Fuel Ratio sensor on my 2011-2016 tC before buying a new one?
What should the fuel pressure be on the 2.5L 2AR-FE engine when diagnosing a rich condition?
Can I just clean the MAF sensor on my tC instead of replacing it?
Helpful Videos
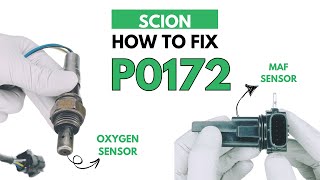
![How to Fix SCION P0172 Engine Code in 3 Minutes [2 DIY Methods / Only $8.77]](https://img.youtube.com/vi/sH6y-NiUZPk/mqdefault.jpg)
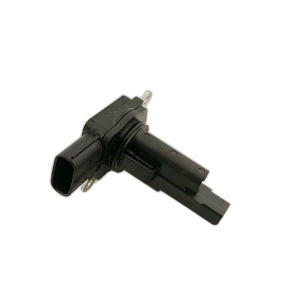
Used OEM Parts in Stock
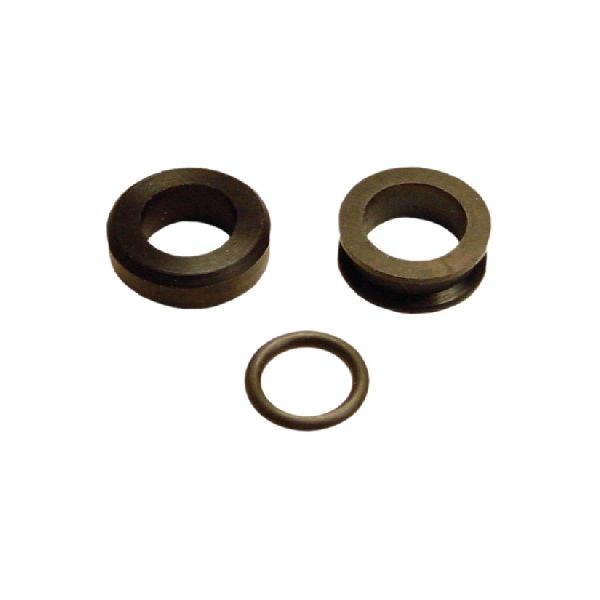
New Aftermarket Parts Available


The information in this article is provided for general reference and educational purposes only. Vehicle specifications, procedures, and part compatibility can vary by production date, trim level, and region. Always consult your vehicle's factory service manual and verify part numbers before purchasing or performing repairs. Safety-critical components such as airbags, seat belts, and braking systems should be installed by a qualified professional.
- Scion tC:
- 🎬 Helpful Videos
- 🛍️ Shop This Part
- What's Unique About the 2011-2016 Scion tC
- Symptoms You May Notice
- Most Likely Causes
- Rare But Worth Checking
- Diagnosis Steps
- Parts You'll Likely Need
- Related Codes That Often Appear With This One
- Platform-Specific Known Issues
- Mechanic-Grade Diagnostic Values
- Scan Tool Commands That Help
- Wiring & Ground Locations
- Real Owner Repair Stories
- OEM Part Supersession History
- Diagnostic Flowchart
- Real Owner Stories
- Scion tC
- 2011 Scion tC
- 2012 Scion tC
- 2006 Scion tC
- Related OBD-II Codes
- Frequently Asked Questions
- 🎟️ Get 5% Off