

P0135 on 2002-2006 Toyota Camry 2.4L: Air/Fuel Sensor Heater Circuit Causes and Fixes
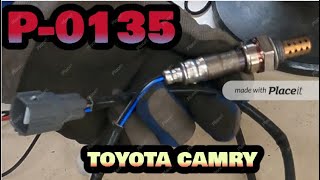
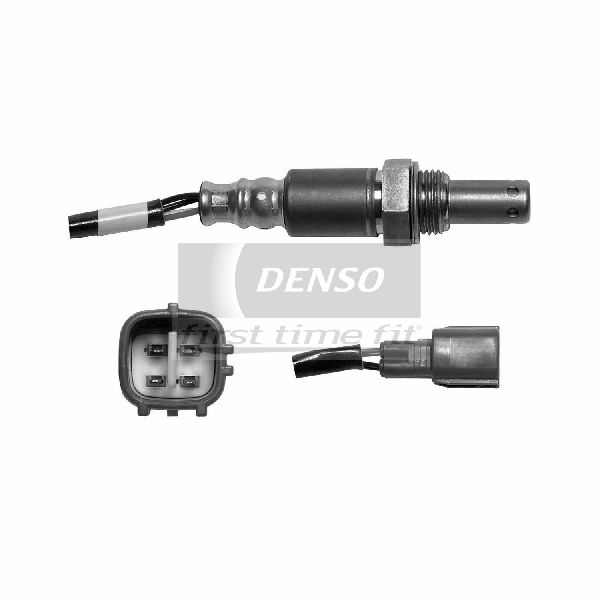
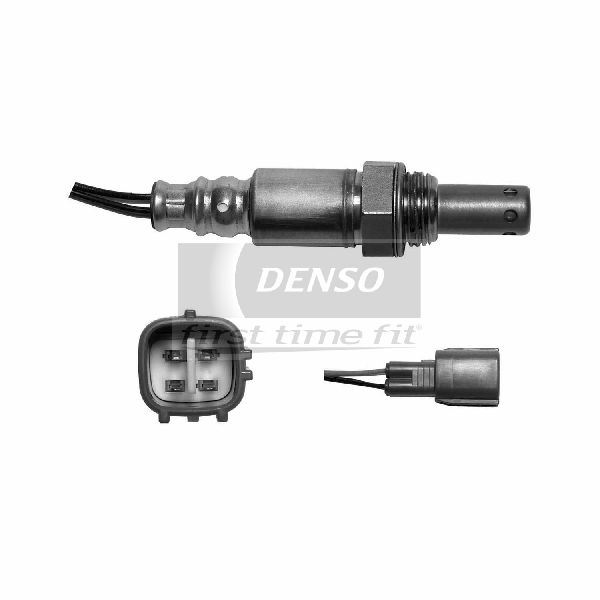
On a 2002-2006 Camry with the 2.4L engine, code P0135 is almost always caused by a failed heater element inside the front Air/Fuel Ratio sensor. Replacing this sensor, which is easy to access on the front exhaust manifold, typically resolves the issue. Expect to pay $60-$120 for a quality aftermarket part (Denso 234-9041 is the correct part) and consider it a 1/5 difficulty DIY job.
- P0135 on this Camry almost certainly means you need a new front Air/Fuel Ratio sensor (also called an upstream O2 sensor).
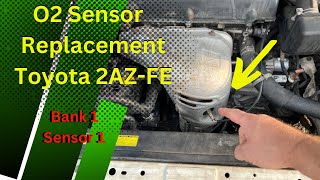
- The correct part is Bank 1, Sensor 1. On the 2.4L engine, this is located at the front of the engine and is very easy to access.
- Use a quality OEM brand like Denso (part #234-9041 is a confirmed fit) for reliability.
- This is a great DIY task for beginners. You will likely need a special 22mm (or 7/8") O2 sensor socket to easily remove and install the sensor.
- Before buying the part, you can confirm the failure by checking the 'A/F HTR' fuse and testing the sensor's heater resistance with a multimeter; an 'OL' reading confirms it's bad.
What's Unique About the 2002-2006 Toyota Camry

For the 2002-2006 Camry with the 2.4L 2AZ-FE engine, this is a very common and straightforward repair. Unlike V6 models where one sensor is tucked against the firewall, the 2.4L engine has its exhaust manifold right at the front of the engine bay, making it exceptionally easy to see and access. This turns a potentially frustrating job into one of the simplest sensor replacements you can perform on this vehicle. 🎬 Watch: A complete P0135 diagnosis and repair walkthrough for this Camry. The 2AZ-FE engine is known to be sensitive to the brand of sensor used, so sticking with the OEM manufacturer (Denso) is highly recommended to avoid repeat failures.
Symptoms You May Notice
- Check Engine Light is on.
- Reduced fuel economy.
- Rough idling, hesitation, or poor engine performance, especially when the engine is cold.
- Failing a vehicle emissions test.
- Hard starting when the engine is cold.
- Replacing the wrong sensor. P0135 is for Bank 1, Sensor 1 (upstream). Do not replace the downstream sensor (Sensor 2), which is located after the catalytic converter.
- Replacing an oxygen sensor to fix a 'rotten egg' smell. On 2002-2004 models, a strong sulfur smell is more likely related to the catalytic converter as described in Toyota TSB EG013R-04. A failing catalytic converter is the most common cause of this smell.
- Using a cheap, universal-fit oxygen sensor. These often require splicing wires, which can introduce resistance issues, and their heater elements may not meet Toyota's specific current draw requirements, causing the code to return.
Most Likely Causes

- Failed Air/Fuel Ratio Sensor (Bank 1, Sensor 1) 🔴 High Probability The internal heater element is a common point of failure due to age and countless heat cycles. It's considered a wear-and-tear item. Many owner experiences confirm this is the most frequent cause.
How to confirm: Disconnect the sensor and measure the resistance between the two same-colored wires (the heater circuit). A reading of infinite resistance ('OL') or one far outside the spec confirms the heater has failed. The specification for a good sensor on this platform is typically between 1.8 and 3.4 ohms at room temperature (68°F/20°C). Some service manuals state a range as wide as 0.8 to 1.4 ohms, but a reading of 'OL' is a definitive failure.
Typical fix: Replace the upstream Air/Fuel Ratio sensor located in the exhaust manifold. Using a Denso-brand sensor is strongly recommended.
Est. part cost: $60 - $150 - Blown Fuse ⚪ Low Probability
How to confirm: Check the 'A/F HTR' fuse in the under-hood fuse box. A visual inspection or continuity test with a multimeter will show if the fuse link is broken.
Typical fix: Replace the blown fuse. If the new fuse blows immediately, it indicates a short circuit in the wiring or the sensor itself that must be diagnosed.
Est. part cost: $1 - $5 - Damaged Wiring or Connector ⚪ Low Probability Wiring in the engine bay is exposed to heat and vibration, which can cause chafing or brittle connectors over time. Proximity to the hot exhaust manifold can melt insulation.
How to confirm: Visually inspect the wiring harness and connector leading to the A/F sensor for any signs of melting, corrosion, or physical damage. Check for voltage at the harness connector to ensure power is reaching the sensor.
Typical fix: Repair the damaged section of wire or clean/replace the connector.
Est. part cost: $5 - $50
Rare But Worth Checking
- Faulty Engine Control Module (ECM): This is extremely rare. The ECM should only be considered after all other possibilities, including the sensor, fuse, and wiring, have been definitively ruled out.
- Poor ECM Ground Connection: A high-resistance ground connection between the ECM and the cylinder head can cause the ECM to misinterpret the heater circuit's current draw, triggering a false P0135 code. This has been noted on other Toyota models with similar engine management systems.
Diagnosis Steps

- Confirm the code P0135 is present using an OBD-II scanner.
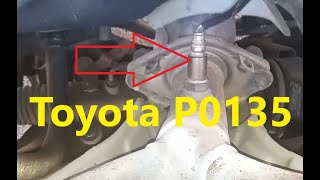
- Locate the Bank 1, Sensor 1 Air/Fuel Ratio sensor. On the 2.4L engine, it is screwed into the exhaust manifold at the very front of the engine bay, just behind the radiator fans.
- Visually inspect the sensor's wiring and connector for any obvious damage like melted plastic, frayed wires, or corrosion.
- Check the 'A/F HTR' fuse in the fuse box under the hood. Some models may also have an 'EFI MAIN' relay controlling the circuit. Replace if blown.
- If the fuse and wiring are okay, disconnect the sensor's electrical connector.
- Using a multimeter set to measure resistance (Ohms), test the sensor's internal heater circuit. Place the probes on the two pins that correspond to the two same-colored wires (often both black). 🎬 See how to test the heater circuit using a multimeter.
- A healthy sensor should have a low resistance, typically between 1.8 and 3.4 ohms when at room temperature (68°F/20°C). A reading of 'OL' (Open Loop/infinite resistance) means the heater is broken and the sensor must be replaced.
- If the sensor resistance is good, check for 12V power at the connector (on the harness side) with the ignition key in the 'ON' position. If there is no power, the issue is in the wiring or fuse/relay.
- If all other steps pass, the most likely culprit is the sensor itself, even if the resistance reading is borderline. Replacing the sensor is the next logical step.
Parts You'll Likely Need
- Air/Fuel Ratio Sensor (Bank 1, Sensor 1)
(OEM #89467-06080)— This is the upstream oxygen sensor, and its internal heater element is the component that fails, triggering the P0135 code. It is the most common solution by a wide margin.
Trusted brands: Denso (OEM Manufacturer), NGK/NTK
OEM price range: $140-$200
Aftermarket price range: $60-$120 - Oxygen Sensor Socket — A special 22mm (or 7/8") socket with a slot for the wire is often required to easily remove and install the sensor, especially if it is seized in the manifold. 🎬 Watch: How to replace the upstream sensor on the 2.4L engine.
Trusted brands: Lisle, OEMTOOLS
Aftermarket price range: $10-$25
Related Codes That Often Appear With This One
- In some cases, P0135 may appear with P0505 (Idle Air Control System Malfunction), especially if starting and idling issues are severe. However, the 2AZ-FE uses an electronic throttle body, so a P0505 code may point to a dirty or failing throttle body rather than a separate IAC valve.
Technical Service Bulletins (TSBs) & Recalls
- EG013R-04: Addresses a sulfur smell on 2002-2004 2.4L models, potentially related to the catalytic converter. It's relevant as a common misdiagnosis for exhaust-related issues.
Platform-Specific Known Issues
- For 2002-2004 models, a sulfur or 'rotten egg' smell from the exhaust is addressed by Technical Service Bulletin (TSB) EG013R-04, which may require catalytic converter replacement, not an O2 sensor.
- The sensor can be difficult to remove if it has seized in the exhaust manifold due to rust. Applying penetrating oil and letting it soak before attempting removal is highly recommended.
Mechanic-Grade Diagnostic Values
- A/F Sensor Heater Resistance — expected: 1.8 to 3.4 ohms at 68°F (20°C) per Pass 2. Some service manuals state 2.5 to 4.0 ohms.. Failure: A reading of 'OL' (open loop) or significantly outside the specified range indicates a failed heater element.
- A/F Sensor Connector Voltage (Harness Side) — expected: Approximately 12V (battery voltage) between pin 1 (+B, Black/Red wire) and chassis ground with ignition ON.. Failure: No voltage indicates an issue with the EFI MAIN relay, A/F HTR fuse, or the wiring from the fuse box.
- A/F Sensor Live Data (Techstream) — expected: Using the 'Control Injection Volume for A/F Sensor' active test, commanding a +25% rich mixture should result in a sensor voltage below 3.0V, and commanding a -12.5% lean mixture should result in a voltage above 3.35V. The sensor should respond within 1.1 seconds.. Failure: Slow response time or voltage not changing as expected indicates a degraded or failing sensor, even if the heater circuit resistance is within spec.
Hidden / Shadow Codes Worth Checking
- Mode $06, TID $07, CID $10: This refers to the non-continuous monitor test for the A/F Sensor Heater. A 'Fail' result for this specific Test ID can appear in Mode $06 data before the main P0135 DTC becomes a pending or active code. (see via A scan tool capable of displaying OBD-II Mode $06 data.)
Scan Tool Commands That Help
- Toyota Techstream: Active Test: 'Control the Injection Volume for A/F Sensor' — This test is invaluable for verifying the sensor's performance and response rate after confirming the heater circuit is electrically sound. It forces a rich or lean condition and measures how quickly and accurately the A/F sensor reports the change, helping to condemn a lazy or failing sensor that might otherwise test okay.
- Toyota Techstream: Active Test: Activate A/F Sensor Heater — Some versions of Techstream may allow direct activation of the heater circuit. This can be used to confirm the ECM's ability to command the heater and to measure current draw with a clamp-on ammeter without running the engine.
Wiring & Ground Locations

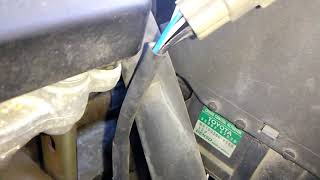
- A/F Sensor Connector (A24) — On the front of the engine, connected to the A/F sensor pigtail, just behind the radiator fans.. This is the primary connection point for testing. Pin 1 (Black/Red) is +B (12V power from EFI MAIN relay). Pin 2 (White) is HA1A (Heater control from ECM). Pin 3 (Blue) is A1A+ (Sensor signal positive). Pin 4 (Pink) is A1A- (Sensor signal negative). The heater circuit is between Pins 1 and 2.
- Ground Point EG — On the left side of the cylinder head (driver's side).. This is a critical engine ground point. While the A/F heater is controlled by the ECM, a poor engine ground can introduce electrical noise and voltage offsets that may affect ECM calculations and potentially contribute to false codes.
- A/F HTR Fuse — 15A fuse located in the under-hood fuse/relay box.. This fuse supplies the power to the A/F sensor heater circuit via the EFI MAIN relay. If this fuse is blown, the heater will not receive power, directly causing a P0135 code.
Real Owner Repair Stories
- Reddit user on r/MechanicAdvice (2003 Honda Civic (Similar P0135 logic)) — P0135 code present.
❌ Tried (didn't work) Replacing the Bank 1 Sensor 1 oxygen sensor.
✅ What actually fixed it The issue was a blown fuse for the heater circuit. The user replaced the sensor first, but the code returned until the fuse was checked and replaced. This highlights the importance of checking fuses before replacing parts. - AliExpress User Review/Guide (2005 Toyota Camry LE 2.4L with 145,000 miles) — Check Engine Light with code P0135, intermittent misfires, rough idle at stoplights.
✅ What actually fixed it Replaced the original A/F sensor with a new OEM Denso unit (part number 89467-06080). After clearing the codes, all readiness monitors completed successfully and symptoms were resolved.
OEM Part Supersession History
89467-06030→89467-06080— Part number consolidation and potential minor internal revisions by the manufacturer.
Heads up: While other part numbers may physically fit, using the specified Denso part (OEM or aftermarket equivalent 234-9041) is critical. The 2AZ-FE's ECU is sensitive to the specific heater resistance and current draw; using an incorrect part can cause the P0135 code to persist even with a new sensor.
Diagnostic Flowchart
Other Known Issues on This Vehicle
Issues unrelated to this code that are worth knowing about as an owner of this generation:
- Stripped Cylinder Head Bolt Threads 🔴 High — Common on earlier 2002-2006 models. An overheat event dramatically increases the risk. Symptoms include sudden, catastrophic coolant loss. (Ref: Related to TSB EG015-07 (updated short block). Repair often involves installing thread inserts like Time-Serts or a specialized NS300L kit.)
- Excessive Oil Consumption 🟠 Medium — More prevalent in later 2AZ-FE engines (2006+) but can occur in this generation. Caused by a faulty piston ring design. Consumption can be as high as 1 quart per 1,200 miles. (Ref: TSB T-SB-0094-11 and T-SB-0158-14 address this issue, which led to a warranty enhancement program (ZZE).)
- Water Pump Failure 🟡 Low — Often reported at higher mileage. A leak can lead to coolant loss and potential overheating, which can trigger the more severe head bolt issue.
- Carbon Buildup in Throttle Body 🟡 Low — Can cause unstable idle or stalling, especially after the battery has been disconnected.
- Leaking Valve Cover Gasket 🟡 Low — A common oil leak point as the vehicle ages due to gasket material deteriorating.
Used vs. New Parts: Buying Guide for This Vehicle
When a used part is the smart pick: For an Air/Fuel Ratio sensor, buying used is almost never a smart choice. These are wear-and-tear items with a finite lifespan, similar to spark plugs or brake pads. The internal heater element and sensing components degrade over time with heat cycles and exposure to exhaust gases.
Donor-vehicle mileage cap: roughly under 10000 miles for the part to have meaningful remaining life.
What to inspect on the donor part:
- If forced to use a used part in an emergency, source it from the lowest-mileage vehicle possible.
- Visually inspect the sensor tip; heavy, black, sooty deposits can indicate it came from a poorly running engine.
- Avoid sensors with any physical damage to the body, connector, or wiring.
- Test the heater circuit resistance with a multimeter before purchase; it must be within the 1.8-3.4 ohm range.
OEM-only on this vehicle (don't cheap out):
- Air/Fuel Ratio Sensor
Aftermarket brands forum-validated for this vehicle:
- Denso (OEM manufacturer)
- NGK/NTK
Brands owners have reported issues with on this vehicle:
- Generic, unbranded 'universal' sensors that require splicing wires. These often have incorrect heater resistance values and introduce points of failure at the splices, leading to the code returning.
Real Owner Stories
Aggregated from forums and TSBs cited above. Mileages and costs reflect what owners reported in those sources.
2004 Toyota Camry 2.4L 2AZ-FE
Symptoms: The car has a hard time starting in the morning. It struggles to stay on unless the gas pedal is pressed. After running for a while, it stabilizes. The check engine light is on with codes P0135 and P0505.
What fixed it: The owner reported replacing the oxygen sensor, though the initial report noted the issue wasn't immediately resolved, suggesting multiple faults like the P0505 (Idle Control) were present.
Source hint: 2CarPros.com forum report
2002-2006 Toyota Camry 2.4L I4
Symptoms: Check engine light on; owner looking for an easy DIY fix for the upstream sensor.
What fixed it: Replacing the upstream A/F sensor (Bank 1, Sensor 1).
Source hint: CamryForums.com threads
2002-2004 Toyota Camry 2.4L
Symptoms: Sulfur or 'rotten egg' smell from the exhaust.
What fixed it: Replacement of the catalytic converter as per TSB EG013R-04.
Source hint: TSB EG013R-04
Related OBD-II Codes
Frequently Asked Questions
Does TSB EG013R-04 mean my P0135 code is actually a catalytic converter problem?
Which specific replacement sensor should I use for my 2.4L Camry to fix P0135?
Where is the Bank 1, Sensor 1 located on my 2AZ-FE engine?
Can a blown fuse cause the P0135 code on a 2002-2006 Camry?
What resistance should I see when testing the A/F sensor heater circuit?
Is the P0135 code related to the head bolt thread failure common on the 2AZ-FE?
Helpful Videos
We Have This Part in Stock


The information in this article is provided for general reference and educational purposes only. Vehicle specifications, procedures, and part compatibility can vary by production date, trim level, and region. Always consult your vehicle's factory service manual and verify part numbers before purchasing or performing repairs. Safety-critical components such as airbags, seat belts, and braking systems should be installed by a qualified professional.
- Toyota Camry:
- 🎬 Helpful Videos
- 🛍️ Shop This Part
- What's Unique About the 2002-2006 Toyota Camry
- Symptoms You May Notice
- Most Likely Causes
- Rare But Worth Checking
- Diagnosis Steps
- Parts You'll Likely Need
- Related Codes That Often Appear With This One
- Technical Service Bulletins (TSBs) & Recalls
- Platform-Specific Known Issues
- Mechanic-Grade Diagnostic Values
- Hidden / Shadow Codes Worth Checking
- Scan Tool Commands That Help
- Wiring & Ground Locations
- Real Owner Repair Stories
- OEM Part Supersession History
- Diagnostic Flowchart
- Other Known Issues on This Vehicle
- Used vs. New Parts: Buying Guide for This Vehicle
- Real Owner Stories
- 2004 Toyota Camry 2.4L 2AZ-FE
- 2002-2006 Toyota Camry 2.4L I4
- 2002-2004 Toyota Camry 2.4L
- Related OBD-II Codes
- Frequently Asked Questions
- 🎟️ Get 5% Off