

P0135 on 1993-1997 Ford Ranger 2.3L: O2 Sensor Heater Circuit Fixes
For a 1993-1997 Ford Ranger 2.3L, code P0135 almost always means the upstream oxygen sensor (the one before the catalytic converter) has failed. The internal heater element is a common failure point. Replacing the sensor is the most frequent fix, costing around $25-$60 for an aftermarket part. Before replacing, always check the 15A fuse for the heater circuit first.
- P0135 points to the heater circuit in the upstream O2 sensor (before the catalytic converter).
- The most likely cause is a failed O2 sensor; it's a common wear-and-tear part.
- Before replacing the sensor, check the corresponding fuse in the under-hood fuse box (likely 15A Fuse #20 on a '97).
- If you also have a P0141 code, the problem is likely a shared power source (fuse) or, rarely, the PCM.
- A new sensor should have a heater resistance between 3 and 30 ohms; test the new part before installation.
What's Unique About the 1993-1997 Ford Ranger
On this generation of Ford Ranger with the 2.3L Lima engine, the P0135 code is typically straightforward, pointing to a failed sensor. However, owners have documented cases where replacing the sensor doesn't fix the problem. If you also see a P0141 code (for the downstream sensor), the issue could be a shared power supply fuse or, in rarer cases, a failing PCM driver for the heater circuits. A detailed forum thread on TheRangerStation.com shows a user with a '97 2.3L exhausting all other possibilities (fuses, wiring, new sensors) before a replacement PCM finally solved simultaneous P0135 and P0141 codes. Always check the fuse before assuming the PCM is bad.
🎬 Watch: How to fix P0135 and P0141 codes in minutesSymptoms You May Notice
- Check Engine Light is on
- Slightly decreased fuel mileage
- Failure to pass an emissions test
- Vehicle may run in 'open loop' mode longer after a cold start, potentially causing a slightly rough or unstable idle initially.
- Replacing the downstream (Sensor 2) O2 sensor instead of the upstream (Sensor 1) sensor.
- Replacing the PCM before thoroughly testing the sensor heater resistance, the fuse, and the integrity of the wiring harness (power and ground).
- Assuming the new O2 sensor is good without testing its heater resistance out of the box.
Most Likely Causes
- Failed Upstream O2 Sensor 🔴 High Probability The internal heater element in oxygen sensors has a finite lifespan and is a common failure item due to constant, extreme heat cycles in the exhaust.
How to confirm: Disconnect the sensor and measure the resistance between the two heater circuit pins (often two wires of the same color). A reading of 'OL' (open loop) or infinite resistance means the heater is broken. A good heater should have a resistance of approximately 3-30 ohms, with many owners reporting values between 4-8 ohms on a good sensor.
Typical fix: Replace the upstream (Bank 1, Sensor 1) oxygen sensor. An O2 sensor socket is highly recommended for removal. 🎬 See this guide on testing oxygen sensor heater circuits
Est. part cost: $25-$60 - Blown Fuse 🟡 Medium Probability A short circuit in the O2 sensor heater element or its wiring can cause the shared fuse to blow as a protective measure. This is especially suspect if you have codes for both O2 sensor heaters (P0135 and P0141).
How to confirm: Check the fuse for the O2 heater circuit in the under-hood fuse box (Power Distribution Box). On 1997 models, this is often the 15A Fuse #20. On other years it may be a different fuse number, such as Fuse #3 on some V6 models which share a similar electrical design. A visual inspection or a continuity test with a multimeter will confirm if the fuse is blown.
Typical fix: Replace the blown fuse. If it blows again immediately, a short circuit exists in the wiring or one of the O2 sensors.
Est. part cost: $1-$5 - Damaged Wiring or Connector ⚪ Low Probability The wiring harness is exposed to significant heat from the exhaust manifold and road debris under the vehicle. This can lead to melted or brittle wire insulation, corrosion in the connector pins, or physical breaks over time.
How to confirm: Visually inspect the entire wiring harness leading to the upstream O2 sensor for any signs of melting, chafing, or breaks. Unplug the connector and check inside for corrosion, moisture, or backed-out pins.
Typical fix: Repair the damaged section of the wiring harness or clean/replace the connector.
Est. part cost: $10-$50
Rare But Worth Checking
- Faulty Powertrain Control Module (PCM): This is very rare, but has been documented by owners as the final solution when codes P0135 and P0141 appear together and persist after replacing sensors, the fuse, and verifying the wiring. The driver circuit within the PCM that provides the ground for the heater can fail, preventing the circuit from operating correctly.
Diagnosis Steps
- Retrieve the code P0135 with an OBD-II scanner.
- Check the fuse for the O2 sensor heater circuit in the power distribution box under the hood. For a '97 Ranger, this is typically the 15A Fuse #20.
- If the fuse is good, locate the upstream O2 sensor (before the catalytic converter) in the exhaust manifold.
- Visually inspect the sensor's wiring and connector for any obvious damage, such as melting, chafing, or corrosion.
- Disconnect the sensor. With the key in the 'On' position (engine off), use a multimeter to check for 12V power on the heater circuit power wire in the harness-side connector (often a Light Blue/Orange wire).
- Check for a good ground signal from the PCM on the other heater circuit wire. The PCM provides a switched ground, so this may not be a simple continuity-to-ground test.
- If power and ground signals are present at the harness, the issue is likely the sensor itself. Measure the resistance of the heater element across the two corresponding pins on the sensor side of the connector. A reading between 3-30 ohms is expected; an infinite reading (OL) confirms a failed heater element.
- If 12V power is missing at the connector, trace the wiring back to the fuse box to find the break or short.
- If all wiring and the sensor test good, and the code persists (especially if P0141 is also present), the PCM may be at fault, though this is the least likely cause.
Parts You'll Likely Need
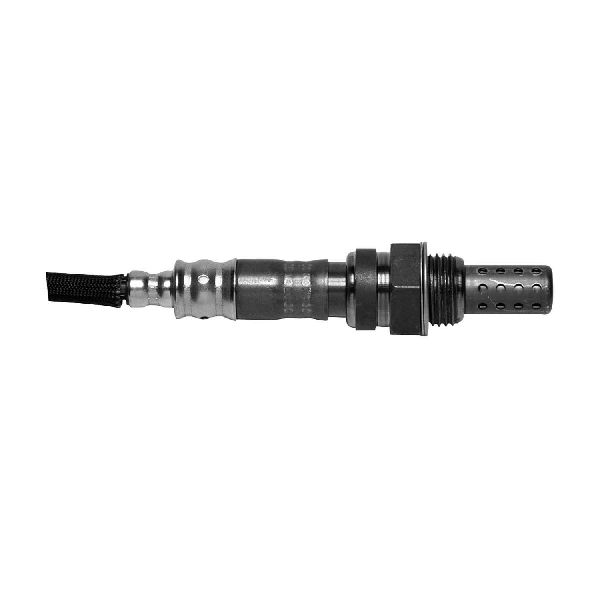
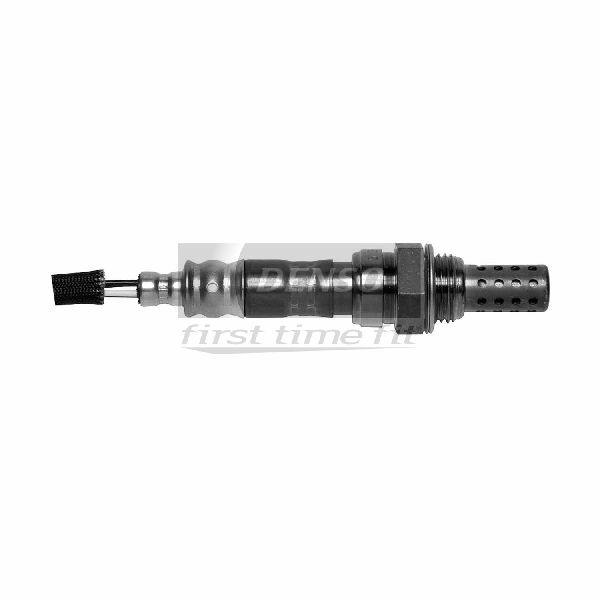
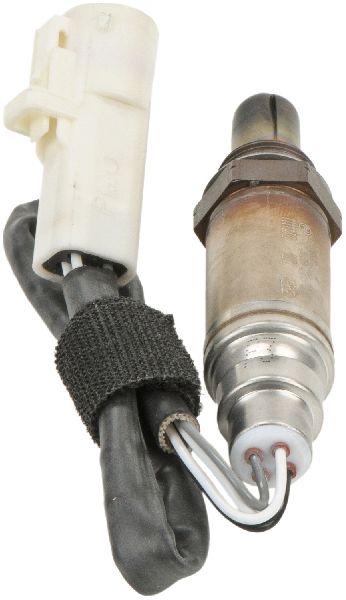
- Upstream Oxygen Sensor (Bank 1, Sensor 1)
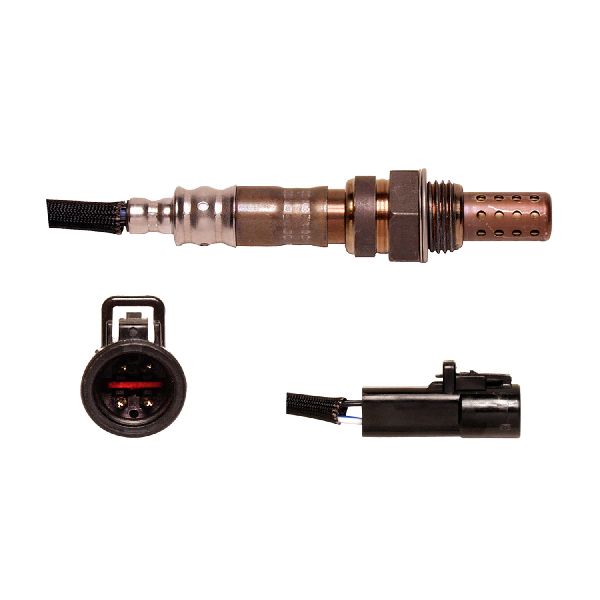
(OEM #F57Z-9G444-C (and other interchanges like F0TZ-9F472-C))— This is the most frequent point of failure for a P0135 code, as the internal heater element burns out over time.
Trusted brands: Motorcraft, Bosch, Denso, NGK/NTK
OEM price range: $60-$100
Aftermarket price range: $25-$60
Related Codes That Often Appear With This One
- P0141 — P0141 is the heater circuit code for the downstream sensor (Bank 1, Sensor 2). If both P0135 and P0141 appear together, it strongly suggests a problem with the shared power supply (fuse) or, rarely, a failing PCM.
Platform-Specific Known Issues
- In a well-documented thread on TheRangerStation.com, a 1997 Ranger owner with persistent P0135 and P0141 codes confirmed the fix was a replacement PCM after verifying fuses, wiring, and trying multiple new O2 sensors.
- The wiring for the O2 sensors runs close to the hot exhaust components and is susceptible to melting or becoming brittle and cracking over the vehicle's long life.
Mechanic-Grade Diagnostic Values
- O2 Sensor Heater Element Resistance — expected: 3-27 Ω (Ohms) on a good sensor.. Failure: A reading of 'OL' (Open Loop/infinite resistance) or a value outside the 3-27 Ω range indicates a failed heater element.
- O2 Sensor Heater Power Wire Voltage (KOEO) — expected: 11-12 Volts DC. Failure: No voltage or significantly low voltage points to a wiring issue, blown fuse, or problem with the power supply circuit, not the sensor itself.
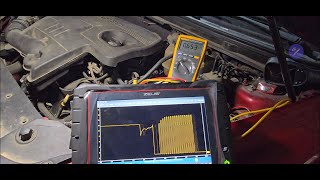
- PCM Ground Wire Bias Voltage — expected: Approximately 4.4 Volts with the sensor disconnected.. Failure: A reading of 0V or 12V could indicate a short or open 🎬 Watch: Professional walkthrough for testing an O2 heater circuit in the wiring to the PCM.
- Voltage Drop Across Heater Circuit — expected: Near zero, e.g., 0.03 VDC.. Failure: A significant voltage drop indicates high resistance in the wiring or connectors.
Wiring & Ground Locations
- Upstream O2 Sensor Heater Power Wire — In the 4-wire harness connector for the upstream O2 sensor.. This wire, often Light Blue/Orange (LB/O), supplies 12V power to the heater element. A Key-On-Engine-Off (KOEO) voltage test should show battery voltage here. Lack of power points to a blown fuse or a break in the power wire.
- Upstream O2 Sensor Heater Ground Wire — In the 4-wire harness connector for the upstream O2 sensor. On 1995+ models with a 104-pin PCM, this is often a White/Black (WH/BK) wire going to Pin 95 of the PCM.. The PCM provides a controlled ground to operate the heater. A fault in this wire or the PCM's internal driver will prevent the heater from working and set code P0135.
- G101 (Ground) — On early 2.3L models, this is located at the lower LH rear of the engine, near the starter motor. On other models, it can be on the radiator support.. This is a primary engine ground. A poor connection here can cause a variety of electrical issues, including erratic sensor behavior, as the PCM and sensors may not have a stable ground reference.
- G200 (Ground) — Located at the LH rear corner of the engine compartment, near the Powertrain Control Module (PCM).. This ground is critical for the PCM itself. Corrosion or a loose connection here can directly impact PCM function and lead to false codes, including P0135.
Real Owner Repair Stories
- Reddit user post in r/MechanicAdvice (1997 Ford Ranger 2.3L, 5-speed manual, 150k miles) — Simultaneous P0135 and P0141 codes, CEL would appear after 6-8 miles of driving.
❌ Tried (didn't work) Replacing both O2 sensors (multiple times)., Confirming 12V power and switched grounds at each sensor., Verifying heater resistance (4-8 ohms) on new sensors., Checking all fuses., Performing voltage drop tests., Checking engine grounds., Running secondary power wires to the rear O2 sensor.
✅ What actually fixed it Replacing the Powertrain Control Module (PCM). After 18 test drives failed to resolve the issue, a replacement PCM finally allowed the readiness monitors to clear and the truck to pass smog.
When the Usual Fixes Don't Work
- While the vast majority of P0135 codes are a simple sensor failure, there are multiple documented cases for this specific vehicle where the root cause was much harder to find. In one instance, a user on Reddit performed exhaustive diagnostics, replacing sensors, checking fuses, and verifying every wire, only to find the heater ground driver inside the PCM had failed, causing both P0135 and P0141 codes to persist. This proves that in rare cases where everything else checks out, the PCM can be the culprit.
OEM Part Supersession History
F0TZ-9F472-C→F57Z-9G444-C— Part number update and potential design revision over the model years.
Heads up: While many parts interchange, using the specific part number for your year is recommended. The core sensor function is the same, but connector keys or wire lengths could vary slightly. F57Z-9G444-C is a widely cited replacement for the 1995-1997 range.
Model Year Variations Within This Range
- 1995-1997: Starting in 1995, Ford switched from a 60-pin PCM to a 104-pin PCM. This changed the specific pinout for the O2 sensor heater ground control. For these later models, the upstream heater ground is typically on Pin 95 (WH/BK wire).
- 1993-1994: These models use a 60-pin PCM. The wiring colors and pin locations for the O2 sensor heater circuit will differ from the 1995+ models. For a 1994, the HEGO (Heated Exhaust Gas Oxygen) sensor ground is listed at Pin 29 (GRY/LT BLU wire). Always verify with a year-specific diagram.
- 1997: The fuse for the O2 heater circuit in the Power Distribution Box is well-documented as 15A Fuse #20 for the 1997 model year. While likely similar for other years, this specific location is confirmed for '97.
Diagnostic Flowchart
Other Known Issues on This Vehicle
Issues unrelated to this code that are worth knowing about as an owner of this generation:
- Timing Belt Maintenance 🔴 High — The 2.3L Lima is a non-interference engine, meaning a broken belt typically won't cause valve/piston damage. However, the belt is a maintenance item that requires replacement, often recommended around 100k-120k miles. Failure will leave the vehicle stranded.
- Idle Air Control (IAC) Valve Failure 🟠 Medium — A very common issue causing rough idle, high idle, or stalling. The valve gets stuck due to carbon buildup. Cleaning it can be a temporary fix, but replacement is often necessary.
- Concentric Slave Cylinder Leak (Manual Transmission) 🔴 High — The clutch slave cylinder is located inside the transmission bellhousing, making replacement labor-intensive. They are known to fail and leak, causing a soft or spongy clutch pedal and difficulty shifting. Owners often recommend replacing it with a high-quality Motorcraft part whenever the clutch is serviced.
- Blend Door Failure (HVAC) 🟡 Low — The plastic blend door in the HVAC system is known to break, resulting in a loss of control over air temperature (e.g., stuck on heat or cold).
- Dome Light/Door Ajar Switch Sticking 🟡 Low — A very common annoyance where the door jamb switch sticks, causing the interior dome light and 'door ajar' chime to stay on. Often fixed by cleaning and lubricating the switch.
Used vs. New Parts: Buying Guide for This Vehicle
When a used part is the smart pick: For this repair, a used part only makes sense for a replacement Powertrain Control Module (PCM), as it is a rare failure and a new unit can be prohibitively expensive or unavailable. Used wiring harness connectors are also a viable option if the original is damaged.
Donor-vehicle mileage cap: roughly under 150000 miles for the part to have meaningful remaining life.
What to inspect on the donor part:
- For a PCM: Match the part number EXACTLY. Ensure the donor vehicle has the same engine, transmission, and emissions configuration. Check for any signs of water damage or corrosion on the case and pins.
- For a connector: Inspect for brittle plastic, corrosion on the pins, or any signs of melting. Ensure there is a few inches of wiring pigtail to allow for a proper splice.
OEM-only on this vehicle (don't cheap out):
- Powertrain Control Module (PCM) - While a used OEM part is acceptable, avoid unverified aftermarket 'rebuilt' PCMs from unknown sellers, as they can be unreliable.
Aftermarket brands forum-validated for this vehicle:
- NTK/NGK
- Denso
- Bosch (ensure it is the correct part number for the application, as universal types can cause issues)
Brands owners have reported issues with on this vehicle:
- Unnamed, 'white-box' generic sensors from online marketplaces. Owners frequently report these fail quickly or are dead-on-arrival.
Real Owner Stories
Aggregated from forums and TSBs cited above. Mileages and costs reflect what owners reported in those sources.
1997 Ford Ranger 2.3L — 150000 miles
Symptoms: Throws P0135 & P0141 simultaneously, usually after driving 6-13 miles. CEL on.
What fixed it: Replaced the PCM.
Source hint: r/MechanicAdvice owner report
1997 Ford Ranger V6 — ~125000 miles
Symptoms: Vehicle had three O2 heater codes (P0135, P0141, P0155) simultaneously.
What fixed it: Replaced a single blown 15A fuse that powered all heater circuits.
Source hint: Ranger-Forums.com - 'O2 Codes Help'
1997 Ford Ranger 2.3L 2wd — ~100000 miles
Symptoms: Experienced both P0135 and P0141 codes after having exhaust work performed.
What fixed it: Checked for unplugged connectors or damaged wiring near the exhaust.
Source hint: Ford-Trucks.com - 'Help! P0135 & P0141 on 97 2.3L Ranger 2wd'
Related OBD-II Codes
Frequently Asked Questions
Which fuse should I check for the O2 sensor heater on my 1997 Ranger 2.3L?
What resistance reading should I see when testing the upstream O2 sensor heater on this engine?
If I have both P0135 and P0141 codes on my Ranger, what is the most likely common cause?
Are there specific wire colors I should look for when testing the O2 sensor harness?
Does the Mazda B2300 share this same P0135 diagnostic process?
Can a bad PCM really cause P0135 on a 1997 Ranger?
Helpful Videos
We Have This Part in Stock


The information in this article is provided for general reference and educational purposes only. Vehicle specifications, procedures, and part compatibility can vary by production date, trim level, and region. Always consult your vehicle's factory service manual and verify part numbers before purchasing or performing repairs. Safety-critical components such as airbags, seat belts, and braking systems should be installed by a qualified professional.
- Ford Ranger:
- 🎬 Helpful Videos
- 🛍️ Shop This Part
- What's Unique About the 1993-1997 Ford Ranger
- Symptoms You May Notice
- Most Likely Causes
- Rare But Worth Checking
- Diagnosis Steps
- Parts You'll Likely Need
- Related Codes That Often Appear With This One
- Platform-Specific Known Issues
- Mechanic-Grade Diagnostic Values
- Wiring & Ground Locations
- Real Owner Repair Stories
- When the Usual Fixes Don't Work
- OEM Part Supersession History
- Model Year Variations Within This Range
- Diagnostic Flowchart
- Other Known Issues on This Vehicle
- Used vs. New Parts: Buying Guide for This Vehicle
- Real Owner Stories
- 1997 Ford Ranger 2.3L — 150000 miles
- 1997 Ford Ranger V6 — ~125000 miles
- 1997 Ford Ranger 2.3L 2wd — ~100000 miles
- Related OBD-II Codes
- Frequently Asked Questions
- 🎟️ Get 5% Off