

P0134 on 2002-2007 Suzuki Aerio: O2 Sensor No Activity Causes and Fixes
On a 2002-2007 Suzuki Aerio, code P0134 almost always points to a failed upstream oxygen sensor (Bank 1, Sensor 1). This sensor is a critical component for managing fuel mixture and is a common wear item. Replacing it is the most frequent fix, as the internal heater element is a known failure point.
- P0134 on a Suzuki Aerio means the front (upstream) oxygen sensor is not working.
- The most common fix, by a large margin, is to replace the upstream oxygen sensor (Bank 1, Sensor 1).
- Check the O2 sensor heater fuse (likely 10A) and wiring for damage before replacing the sensor.
- Ignoring the code can lead to poor fuel economy, failed emissions tests, and eventual damage to the catalytic converter.
What's Unique About the 2002-2007 Suzuki Aerio
The Suzuki Aerio, produced over a single generation with a 2.0L J20A (2002-2003) and 2.3L J23A (2004-2007) engine, has a straightforward exhaust and emissions setup. Unlike V-type engines, its inline-4 has only one exhaust bank, simplifying diagnosis. P0134 directly points to the one and only upstream O2 sensor. Owner experiences and mechanic reports confirm that on this aging platform, the sensor itself is the most common point of failure, often due to normal wear and tear after many years and miles of service. The internal heater element is particularly prone to failing, which prevents the sensor from reaching its required operating temperature to send a signal.
Symptoms You May Notice
- Check Engine Light is on.
- Decreased fuel economy.
- Rough or unstable idle.
- Engine hesitation, misfiring, or stalling.
- Increased emissions, possibly with a noticeable smell of sulfur (rotten eggs) or black smoke from the exhaust.
- Failure to pass an emissions test.
- Replacing the downstream (Bank 1, Sensor 2) oxygen sensor. This sensor monitors the catalytic converter and will not fix a P0134 code.
- Replacing fuel system components like injectors or the fuel pump without first verifying the O2 sensor's operation.
Most Likely Causes
- Failed Upstream Oxygen Sensor (Bank 1, Sensor 1) 🔴 High Probability Oxygen sensors are wear-and-tear items with a finite lifespan, typically 60,000 to 90,000 miles. On a vehicle of this age, sensor failure is very common. The internal heating element, which is crucial for the sensor to start working quickly, is a frequent point of failure. Without a working heater, the sensor cannot reach its operating temperature of over 600°C and will not produce a signal, triggering the P0134 code. 🎬 Watch: How to fix the P0134 inactive circuit code
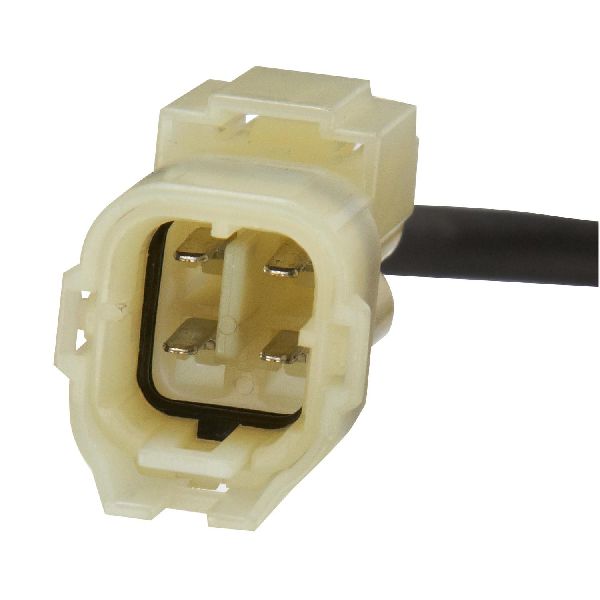
How to confirm: Use a scan tool to monitor live data for the 'B1S1' O2 sensor. If the voltage is stuck at a fixed number (e.g., ~0.45V) and does not fluctuate rapidly between ~0.1V and 0.9V when the engine is warm, the sensor is not active. You can also test the resistance of the heater circuit between the two same-colored wires on the sensor connector; an open circuit (infinite resistance) confirms the heater has failed. 🎬 See this easy DIY guide for testing your O2 sensor
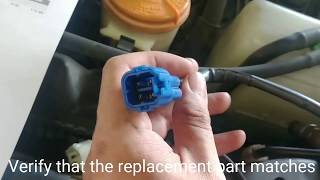
Typical fix: Replace the upstream oxygen sensor. This sensor is located on the exhaust manifold. A 22mm oxygen sensor socket is typically required. 🎬 Watch: Step-by-step guide to replacing an upstream oxygen sensor
Est. part cost: $40-$130 - Wiring or Connector Issue 🟡 Medium Probability Wiring in the engine bay is exposed to extreme heat and vibration, which can cause wires to become brittle, chafe, or break over time. The connector can also become corroded or filled with debris, especially after recent maintenance in the area.
How to confirm: Visually inspect the wiring harness leading to the oxygen sensor for any signs of melting, chafing, or breaks. Unplug the connector and check for corrosion or damage to the pins. Use a multimeter to check for continuity on the signal and heater circuit wires from the sensor connector to the ECM connector.
Typical fix: Repair the damaged section of wiring or clean/replace the connector.
Est. part cost: $5-$50 - Blown Fuse for O2 Sensor Heater ⚪ Low Probability The O2 sensor's internal heater has its own fused circuit. If this fuse blows, the sensor cannot reach operating temperature and will not show activity. This can happen due to a short in the wiring or the sensor's heater element failing.
How to confirm: Consult your owner's manual or a fuse diagram for the location of the O2 sensor or heater circuit fuse. On a 2002 Aerio, a wiring diagram shows a 'Heater fuse 10a' in the junction/fuse box behind the left side of the dash that services the O2 sensors. For a 2005 Aerio, a similar 10A heater fuse is listed. Visually inspect the fuse to see if it has blown.
Typical fix: Replace the blown fuse. If the new fuse blows immediately, it indicates a short circuit in the wiring or the sensor itself that must be traced and repaired.
Est. part cost: $1-$5
Rare But Worth Checking
- Exhaust Leak: An exhaust leak upstream of or near the O2 sensor can introduce outside air, causing the sensor to provide inaccurate readings that the ECU may interpret as 'no activity'. Check the exhaust manifold and gasket for any signs of black soot or audible leaks, especially when the engine is cold.
- Major Vacuum Leak: A significant vacuum leak, for instance from a brake booster hose, can lean out the air-fuel mixture to a point where the O2 sensor readings are outside the expected range, potentially being misinterpreted by the ECU as a sensor fault.
- Faulty Engine Control Module (ECM): This is extremely rare. Before condemning the ECM, all other possibilities, including the sensor, wiring, and fuses, must be exhaustively ruled out.
Diagnosis Steps
- Connect an OBD-II scanner to confirm that P0134 is the only code present. If other codes exist, address them first, especially codes related to the heater circuit.
- Use the scanner's live data function to observe the voltage of 'O2S B1S1' (Bank 1, Sensor 1). With the engine warm and at idle, the voltage should fluctuate rapidly between ~0.1V and 0.9V. If it is flat or stuck (e.g., at 0.45V), the sensor is inactive.
- Perform a thorough visual inspection of the upstream O2 sensor, its connector, and all visible wiring. Look for any signs of damage, melting on the exhaust, or corrosion.
- Check the fuse for the O2 sensor heater circuit, often labeled 'HEATER' or 'O2 HTR' in the fuse box. For the Aerio, this is likely a 10A fuse. Replace if blown.
- If the fuse and wiring appear intact, test the sensor's heater circuit. Disconnect the sensor and use a multimeter set to Ohms to measure resistance between the two heater wires (usually the same color). A reading of open loop (OL) means the internal heater is broken and the sensor must be replaced. A good sensor will typically have a resistance between 5 and 15 ohms.
- If the heater circuit is good, check for power and ground at the vehicle-side connector with the key on. You should have battery voltage on one wire and a ground provided by the ECM on another.
- If all wiring and fuse checks pass, the oxygen sensor itself has failed and should be replaced.
- After replacement, clear the codes and perform a test drive to ensure the repair was successful.
Parts You'll Likely Need
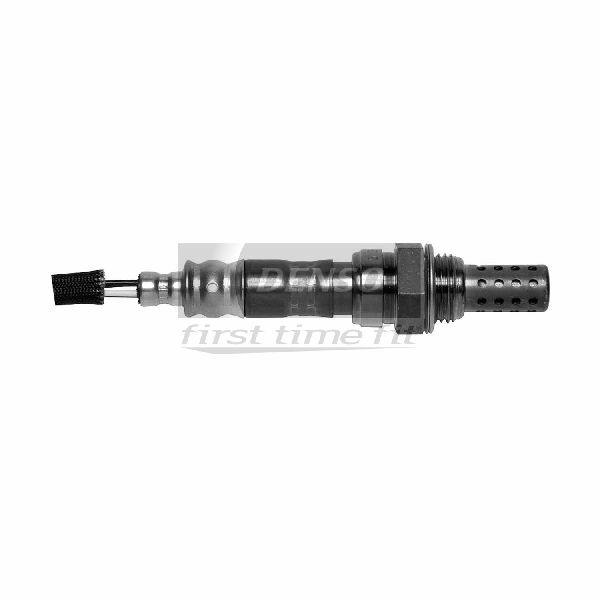
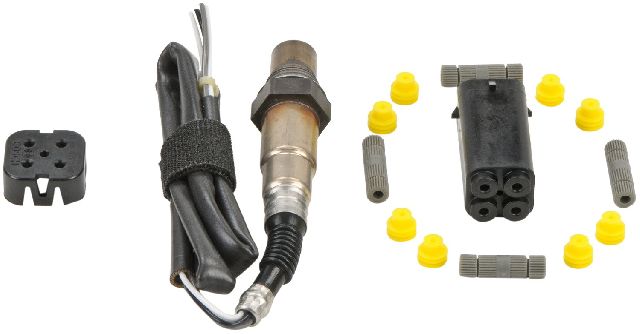
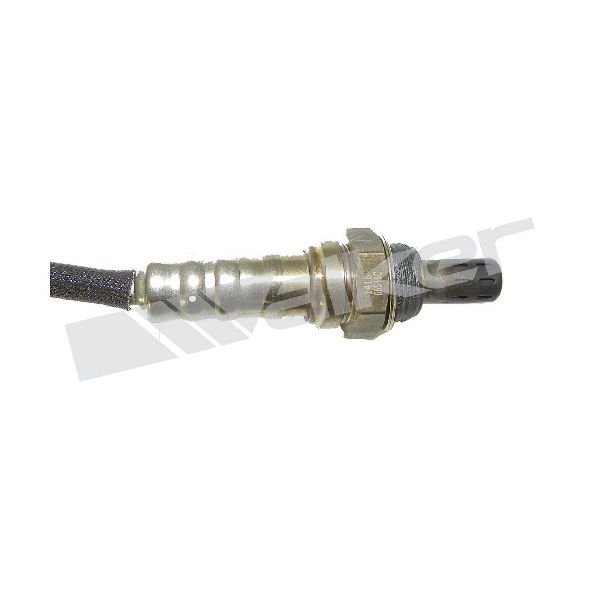
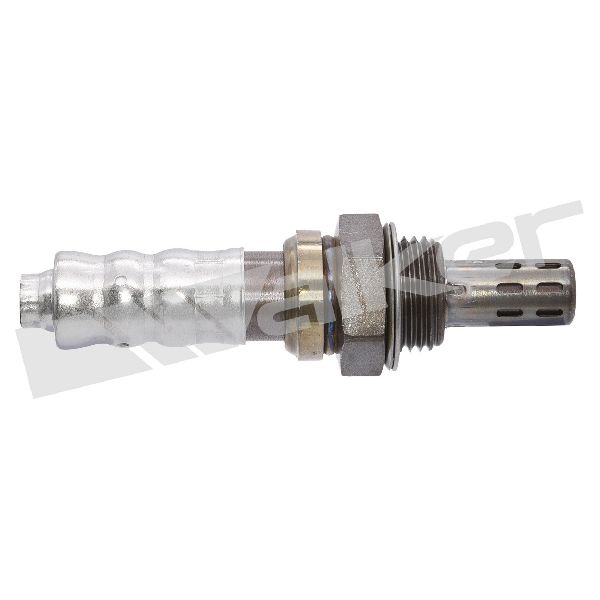
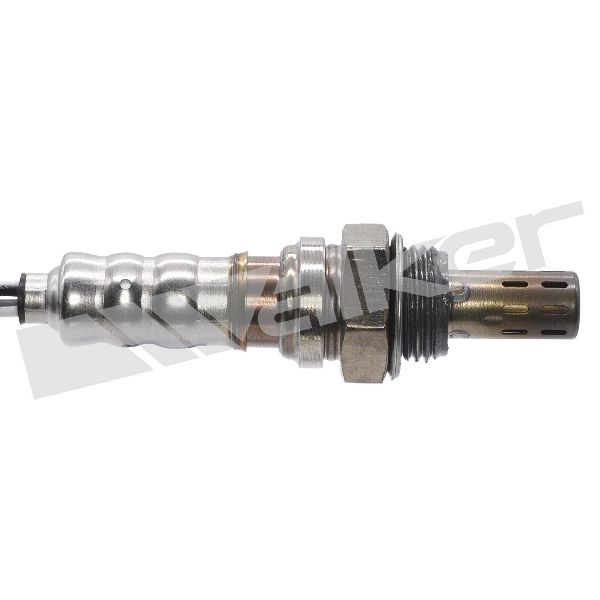
- Upstream Oxygen Sensor
(OEM #18213-68H00 (cross-reference, verify by VIN))— This is the primary component identified by the P0134 code and is a common wear item that fails with age, causing a lack of signal activity.
Trusted brands: Denso, Bosch, NGK/NTK, Walker Products
OEM price range: $90-$150
Aftermarket price range: $40-$90
Related Codes That Often Appear With This One
- P0420 (Catalyst System Efficiency Below Threshold) —
Platform-Specific Known Issues
- Recent Maintenance Coincidence: A Reddit user with a 2002 Aerio reported the P0134 code appeared shortly after replacing the radiator. While likely a coincidence due to the sensor's age, it highlights the possibility of accidentally damaging the nearby O2 sensor wiring during unrelated repairs in the engine bay. A visual inspection of the harness path is always wise after major work.
Mechanic-Grade Diagnostic Values
- Upstream O2 Sensor Heater Resistance — expected: 5 to 10 Ohms at 20°C (68°F). Some sources suggest a wider possible range of 2 to 15 Ohms depending on the specific sensor manufacturer.. Failure: A reading of infinity or Open Loop (OL) indicates a broken heater element. A reading of zero ohms indicates a short circuit. Both conditions require sensor replacement.
- Heated Oxygen Sensor Signal Voltage at ECM — expected: Fluctuating between 0V and 1V at idle on a warm engine.. Failure: A steady, non-fluctuating voltage (e.g., stuck at 0.45V) indicates no activity.
- Long Term Fuel Trim (LTFT) via Scan Tool — expected: Within +/- 5% after a new sensor is installed and the vehicle has been driven.. Failure: A P0134 fault will cause the LTFT to be highly positive or negative as the ECM tries to compensate for the lack of sensor input. A return to a low percentage after repair confirms the fix was successful.
Hidden / Shadow Codes Worth Checking
- Mode $06: This vehicle platform does not use proprietary 'shadow codes'. However, advanced diagnostics can be performed using OBD-II Mode $06. This mode displays the results of the ECM's self-tests for non-continuously monitored systems, including the oxygen sensor and its heater. A test result that is close to its failure threshold can indicate a marginal sensor, even before a DTC like P0134 is set. (see via A professional scan tool with Mode $06 capability is required. The relevant data for the O2 sensor is typically found under Test ID (TID) $01 through $04, though the specific ID can vary.)
Wiring & Ground Locations
- G3, G4, G5 — Located on the intake manifold.. These are primary engine ground points. A corroded or loose ground at these locations can affect the ECM and its sensor readings, potentially causing erratic behavior that could be misinterpreted as a sensor failure.
- G2 — Located at the left side of the engine compartment, near the washer fluid reservoir.. This is another critical engine bay ground point. Verifying it is clean and tight is a wise step in any electrical diagnosis for this code.
- ECM Connector E23/C37 — The ECM is located behind the glove box.. For advanced diagnosis, you can test the O2 sensor circuit directly at the ECM pins. A pinout diagram for a similar Suzuki ECU shows the A/F (O2) sensor heater ground at pin 31 (BLK/YEL), heater output at pin 32 (PNK/BLU), and signal wires at pins 34/37. This allows for a definitive test of the wiring harness continuity from the sensor to the computer.
Real Owner Repair Stories
- Suzuki forum user 'Lana' (Suzuki Swift (similar platform/engine logic)) — P0134 code appeared after the car sat for 6 months.
❌ Tried (didn't work) Clearing the code (it returned).
✅ What actually fixed it The user identified a leak in the brake booster pipe. After plugging the vacuum port on the intake manifold as a test, the issue was resolved, confirming a massive vacuum leak was the root cause. - AliExpress product review/guide (2008 Suzuki SX4 (142,000 miles, platform mate with similar engine controls)) — Solid check engine light with P0134, misfires, rough starts, hesitation.
❌ Tried (didn't work) Checking for vacuum leaks., Cleaning the MAF sensor., Replacing the PCV valve., Replacing a fuel injector.
✅ What actually fixed it The user found corrosion on the O2 sensor connector pins. Replacing the upstream O2 sensor with an aftermarket unit (cross-referenced to Denso 234-4129 and Bosch 13717) fixed the problem. The fix was confirmed by observing correct voltage oscillation on a scan tool and seeing long-term fuel trims normalize within a few days.
"I Checked Everything" — The Actual Cause
- A large vacuum leak was the true cause. A user on a Suzuki forum chased a P0134 code and eventually found it was caused by a leaking brake booster pipe. A standard smoke test of the intake manifold might not reveal a leak from the booster diaphragm itself, making it a tricky diagnosis. The fix was to repair the vacuum leak source, not the O2 sensor.
OEM Part Supersession History
Varies by year (e.g., 18213-68H00)→Varies— Standard part evolution and supplier changes.
Heads up: The most critical detail is ensuring compatibility between the 2.0L J20A (2002-2003) and 2.3L J23A (2004-2007) engines, as part numbers may differ. For aftermarket, direct-fit sensors from Denso (e.g., 234-4129) or Bosch (e.g., 13717) are reported to work correctly, while universal sensors requiring splicing should be avoided.
Model Year Variations Within This Range
- 2002-2003 vs 2004-2007: The engine changed from the 2.0L J20A to the 2.3L J23A in 2004. While the P0134 diagnostic logic is identical, the physical oxygen sensor part number may be different between these two engine types. Always verify the correct part number for your specific year and engine before purchasing.
Diagnostic Flowchart
Used vs. New Parts: Buying Guide for This Vehicle
When a used part is the smart pick: Almost never for the oxygen sensor itself. It is a wear item with a finite lifespan, similar to a spark plug or filter. Buying a used sensor is buying a part that is already part-way through its service life and may fail soon. A used part only makes sense for related components, like a replacement exhaust manifold if the original is cracked.
Donor-vehicle mileage cap: roughly under 40000 miles for the part to have meaningful remaining life.
What to inspect on the donor part:
- For the sensor: N/A, do not buy used.
- For a related part like an exhaust manifold: Check for cracks (especially around the flange and O2 sensor bung), warped mounting surfaces, and heavily stripped threads.
Aftermarket brands forum-validated for this vehicle:
- Denso (often the Original Equipment supplier)
- NGK / NTK
- Bosch (ensure it is a direct-fit 'OE style' connector, not universal)
Brands owners have reported issues with on this vehicle:
- Unnamed 'white box' or generic brands from online marketplaces without extensive positive reviews for this specific application. While they may work initially, they often have a shorter lifespan or less precise signaling, which can affect fuel economy.
Related OBD-II Codes
Frequently Asked Questions
Where is the Bank 1 Sensor 1 oxygen sensor located on my 2002-2007 Suzuki Aerio?
What special tool do I need to replace the upstream O2 sensor on my Aerio?
I just replaced my radiator and now my Check Engine Light is on with code P0134. Is this related?
What should the O2 sensor voltage look like on a scan tool if it's working correctly?
Where is the fuse for the O2 sensor heater on my Aerio?
Can ignoring a P0134 code cause other, more expensive problems?
Are there any recommended aftermarket brands for a replacement O2 sensor?
Helpful Videos

We Have This Part in Stock

The information in this article is provided for general reference and educational purposes only. Vehicle specifications, procedures, and part compatibility can vary by production date, trim level, and region. Always consult your vehicle's factory service manual and verify part numbers before purchasing or performing repairs. Safety-critical components such as airbags, seat belts, and braking systems should be installed by a qualified professional.
- Suzuki Aerio:
- 🎬 Helpful Videos
- 🛍️ Shop This Part
- What's Unique About the 2002-2007 Suzuki Aerio
- Symptoms You May Notice
- Most Likely Causes
- Rare But Worth Checking
- Diagnosis Steps
- Parts You'll Likely Need
- Related Codes That Often Appear With This One
- Platform-Specific Known Issues
- Mechanic-Grade Diagnostic Values
- Hidden / Shadow Codes Worth Checking
- Wiring & Ground Locations
- Real Owner Repair Stories
- "I Checked Everything" — The Actual Cause
- OEM Part Supersession History
- Model Year Variations Within This Range
- Diagnostic Flowchart
- Used vs. New Parts: Buying Guide for This Vehicle
- Related OBD-II Codes
- Frequently Asked Questions
- 🎟️ Get 5% Off