

P0134 on 2009-2013 Mazda 3: O2 Sensor No Activity Causes and Fixes
On a 2009-2013 Mazda 3, code P0134 almost always means the front oxygen sensor (Bank 1, Sensor 1) has failed due to age or contamination. Replacing this sensor with a high-quality OEM-equivalent part (like Denso or NTK) is the most common fix. Cheap aftermarket sensors are known to fail quickly. Parts cost around $60-$120 for a quality aftermarket replacement, and DIY difficulty is rated at 2/5.
- P0134 on a 2009-2013 Mazda 3 points directly to a problem with the front oxygen sensor (Bank 1, Sensor 1).
- The most probable cause is that the sensor itself has failed and needs to be replaced.
- Symptoms include a lit Check Engine Light, poor gas mileage, and potentially a rough idle.
- Before replacing the sensor, perform a quick visual inspection of the wiring and connector for obvious damage.
- Use a quality replacement sensor from a reputable brand like Denso or NTK to ensure a long-lasting repair.
What's Unique About the 2009-2013 Mazda 3

The 2009-2013 Mazda 3 (second generation, platform code 'BL') uses a conventional and reliable emissions control system. There are no widespread, unique design flaws that make this platform inherently prone to P0134. The issue is typically standard wear and tear on the front oxygen sensor. However, owner forums are filled with reports of cheap, no-name aftermarket sensors from sites like Amazon failing within weeks or months, causing the P0134 code to return. It is strongly recommended to use high-quality OEM or OEM-supplier brands like Denso or NTK for a lasting repair.
Generation note: The 2009-2013 year range primarily covers the second generation (BL) of the Mazda 3, which was sold from the 2010 to 2013 model years. The 2009 model year was the last year of the first generation (BK). The diagnosis and repair for P0134 are nearly identical for both generations and apply to both the 2.0L and 2.5L MZR engines. The first generation shares its platform with the Ford Focus, which can also experience similar issues.
Symptoms You May Notice
- Check Engine Light (CEL) is on
- Decreased fuel economy
- Rough or unstable idle
- Engine hesitation or loss of power during acceleration
- Failure to pass an emissions test
- Engine running in 'open loop' status, visible on some scan tools
- Replacing the downstream (post-catalyst) oxygen sensor. This code specifically points to Sensor 1, which is upstream of the catalytic converter.
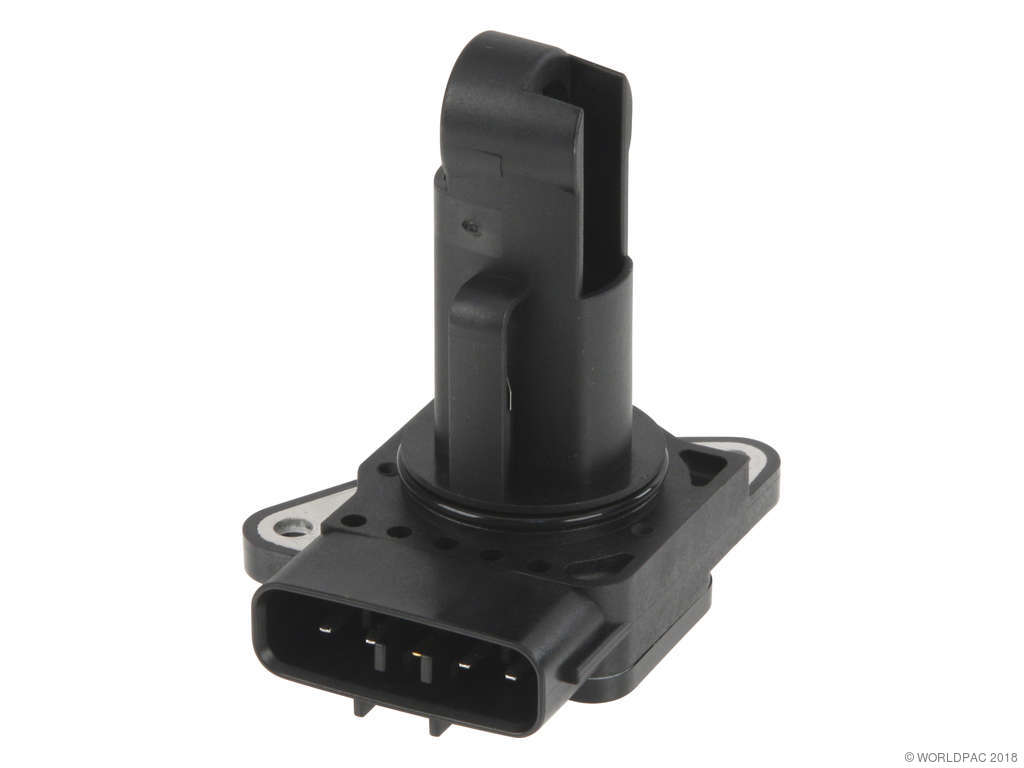
- Cleaning the Mass Airflow (MAF) sensor. While a dirty MAF can cause other performance issues and is sometimes suggested, it will not directly cause a P0134 'no activity' code. A technician on a forum noted they have 'never seen cleaning a MAF sensor fix an oxygen sensor circuit issue'.
- Assuming a new sensor is good. Defective-out-of-the-box sensors, especially from low-quality brands, are a common cause for the code returning immediately after a repair.
Most Likely Causes

- Failed Upstream Oxygen Sensor (Bank 1, Sensor 1) 🔴 High Probability Oxygen sensors are wear-and-tear items that have a finite lifespan, typically failing from age, heat cycles, and contamination from exhaust gases. This is the most common cause by a large margin, especially on vehicles over 100,000 miles.
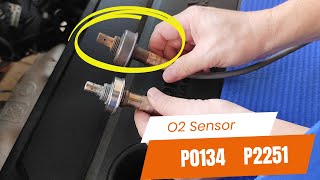
How to confirm: Use an OBD-II scanner with live data capability to monitor the Bank 1 Sensor 1 voltage (O2S11). A healthy sensor will show a rapidly fluctuating voltage. A flat, unchanging, or zero voltage reading confirms the sensor is inactive. 🎬 Watch: How to diagnose and fix P0134 and P2251 codes.
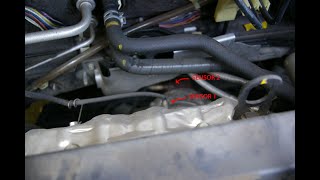
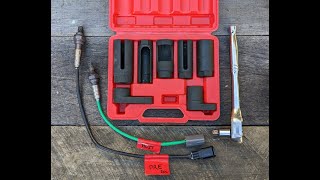
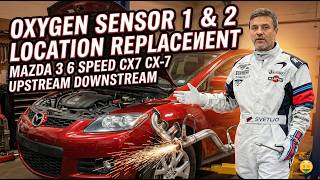
Typical fix: Replace the Bank 1, Sensor 1 oxygen sensor. It is located in the exhaust manifold, accessible from the top of the engine bay. 🎬 See this walkthrough for replacing second-gen Mazda 3 oxygen sensors. Use of a 7/8" or 22mm offset oxygen sensor socket is required.
Est. part cost: $60-$180 - Damaged Wiring or Connector 🟡 Medium Probability The wiring harness for the O2 sensor is routed near the hot exhaust manifold. Over time, the plastic loom and wire insulation can become brittle, melt, or fray, leading to a short or open circuit.
How to confirm: Visually inspect the entire length of the sensor's wiring harness from the sensor itself to the main engine harness connector. Check for melted plastic, frayed wires, or corrosion inside the connector plug. Pay close attention to the retaining clips that are meant to keep the harness away from the manifold, as they can break.
Typical fix: Repair the damaged section of the wire or replace the connector pigtail. If damage is extensive, a new sensor with an integrated harness is the best solution.
Est. part cost: $10-$30 for a pigtail - Blown Heater Circuit Fuse ⚪ Low Probability The oxygen sensor has an internal heater to get it to operating temperature quickly. This heater is on a fused circuit. A short circuit within a failed sensor or its wiring can blow this fuse, which will prevent the sensor from becoming active.
How to confirm: Consult the owner's manual or a fuse diagram for your vehicle to locate the fuse for the O2 sensor heater circuit (often labeled 'HEGO' or similar). Pull the fuse and visually inspect it to see if it is blown.
Typical fix: Replace the blown fuse. If the fuse blows again immediately, it indicates a persistent short circuit in the sensor or wiring that must be diagnosed and repaired before installing another fuse.
Est. part cost: $1-$5
Rare But Worth Checking
- Exhaust Leak: A significant exhaust leak between the cylinder head and the O2 sensor can introduce extra oxygen into the exhaust stream. This can cause the sensor to provide strange readings that the PCM might interpret as inactivity. You will usually hear a loud ticking or puffing noise from the engine bay, especially when the engine is cold.
- Faulty Powertrain Control Module (PCM): This is extremely rare. The PCM is the car's main computer, and a failure of the internal driver circuit for the O2 sensor can cause this code. All other possibilities, especially the sensor and wiring, must be exhaustively ruled out before condemning the PCM.
Diagnosis Steps

- Connect an OBD-II scanner and confirm that P0134 is the primary code. Note any other codes present, such as P2251 or P0031, which reinforce a sensor/circuit failure. 🎬 Watch: Step-by-step upstream sensor replacement for P0134 and P2251.
- Using the scanner's live data function, observe the voltage for 'O2S11' (Oxygen Sensor Bank 1 Sensor 1). It should fluctuate rapidly between approximately 0.1V and 0.9V on a warm engine. If the voltage is stuck, flat, or shows no reading, the sensor is not active.
- Turn off the engine and let the exhaust cool. Locate the sensor. It is screwed into the exhaust manifold at the front or top of the engine.
- Pro Tip: If you plan to replace the sensor, spray the base of it with a penetrating catalyst like PB Blaster the day before to make removal easier.
- Inspect the sensor's wiring harness and connector for any signs of melting, chafing, or corrosion. Ensure it is properly secured away from the hot manifold.
- If the wiring looks good, the next step is to test the sensor's internal heater circuit. Unplug the sensor and use a multimeter set to ohms to measure the resistance between the two heater pins (often the two same-colored wires). An open circuit (infinite resistance) means the heater is broken and the sensor must be replaced.
- Check the fuse for the O2 sensor heater circuit in the vehicle's fuse box.
- If wiring, fuses, and the sensor itself are confirmed to be good, check for exhaust leaks between the engine and the sensor.
- If all other tests pass, the issue may be with the PCM, which requires professional diagnosis.
Parts You'll Likely Need

- Upstream Oxygen Sensor / Air-Fuel Ratio Sensor (Bank 1 Sensor 1)
(OEM #L3CE-18-8G1 (For 2.3L engine, verify by VIN))— This is the component that has failed in the vast majority of cases for this code. It is a standard wear item.
Trusted brands: Denso (e.g., p/n 234-5015 for 1st gen/early 2nd gen), NTK
OEM price range: $150-$220
Aftermarket price range: $60-$120 - Oxygen Sensor Socket — A special tool is required to remove and install the sensor without damaging its wire. A 7/8" (22mm) offset socket is needed.
Trusted brands: Lisle, OEMTOOLS, Powerbuilt
OEM price range: N/A
Aftermarket price range: $10-$25
Related Codes That Often Appear With This One
- P2251 — This code means 'O2 Sensor Negative Current Control Circuit/Open'. It often appears with P0134 because a failure in the sensor or its wiring can affect both the signal and its ground reference circuit simultaneously.
- P0031 — This code indicates a problem with the sensor's internal heater circuit ('HO2S Heater Control Circuit Low'). A failed sensor often has a failed heater element, so these codes frequently appear together.
- P0131 — This code means 'O2 Sensor Circuit Low Voltage'. It can accompany P0134 as a complete lack of activity is the ultimate form of low voltage, indicating a dead sensor or open circuit.
Platform-Specific Known Issues
- High Failure Rate of Inexpensive Aftermarket Sensors: There are numerous owner accounts on forums like Reddit detailing experiences where a P0134 code returned shortly after replacing the original sensor with a cheap, off-brand part from Amazon or eBay. In one case, a user went through two such sensors in a matter of months before seeking advice. For a lasting repair, it is critical to use a reputable brand such as Denso or NTK, which are often the original equipment manufacturers.
Mechanic-Grade Diagnostic Values
- A/F Sensor Current (Bank 1 Sensor 1) on Live Data Scanner — expected: On a fully warm engine at a steady RPM (e.g., 2000-3000 RPM), the reading should be stable around 0.0 mA. When the throttle is blipped, the value should fluctuate significantly.. Failure: A flat-line reading that does not change with RPM, or a reading that is stuck high or low, indicates an inactive sensor.
- O2 Sensor Heater Element Resistance — expected: A specific ohm value can be looked up, but generally, a low resistance reading (e.g., 3-15 ohms) indicates a good heater. The test is performed across the two same-colored wires on the sensor's connector.. Failure: An open circuit (infinite resistance or 'OL' on a multimeter) means the internal heater element is broken and the sensor must be replaced.
- PCM Voltage Check at Connector — expected: At the PCM connector for a 2010 model, Pin 48 (O2 Sensor Signal) should show a fluctuating voltage between 0.1-4.9V with the engine running. Pin 47 (Heater Control) should show a switched 12V.. Failure: No voltage or a fixed voltage at Pin 48 points to a wiring open/short or a dead sensor. No voltage at Pin 47 indicates a problem with the heater circuit power supply or PCM driver.
- PCM Fault Trigger Condition — expected: A healthy sensor produces voltage outside the 391-491 mV range.. Failure: The PCM will set code P0134 if it determines the sensor voltage has not gone outside the 391-491 mV (0.391-0.491V) range for more than one minute after warmup.
Hidden / Shadow Codes Worth Checking
- Mode 6, Test ID $01: Professional scan tools can access Mode 6 data, which contains non-continuous monitor test results. For oxygen sensors, this can include test results for sensor response rate and heater circuit performance that may provide more granular detail than the generic P-code. (see via A professional-grade scan tool with Mode 6 capabilities, such as the Mazda IDS or equivalent, is required. The technician would look for test IDs related to the HO2S Bank 1 Sensor 1.)
Scan Tool Commands That Help
- Mazda IDS (or equivalent professional scanner): Data Logger / Live Data: O2S11 — This is the primary function used to observe the sensor's real-time activity (or lack thereof). For Mazda A/F sensors, the reading may be in milliamps (mA) rather than volts.
- Mazda IDS (or equivalent professional scanner): Clear KAM (Keep Alive Memory) — After replacing the O2 sensor, clearing the KAM ensures the PCM erases all learned fuel trim adaptations from the faulty sensor. This is more thorough than just clearing DTCs and forces the system to relearn with the new sensor immediately. A common alternative is to disconnect the battery and touch the terminals together for 30 seconds.
Wiring & Ground Locations

- PCM Connector Pin 48 — On the main Engine Control Unit (ECU/PCM), which is typically located in the engine bay near the battery or firewall.. This is the specific pin for the Bank 1 Sensor 1 signal input. A continuity test between this pin and the sensor connector pin can definitively rule out a broken signal wire.
- PCM Connector Pin 47 — On the main Engine Control Unit (ECU/PCM).. This is the pin that sends the 12V control signal to the sensor's heater circuit. Testing for 12V here (with key on) confirms the PCM is commanding the heater to turn on.
- Engine/Chassis Grounds — Key grounding points are located on the transmission housing, on the passenger side motor mount, and from the main harness to the driver's side fender/strut tower area.. The O2 sensor circuit relies on a clean ground reference. A corroded or loose ground at any of these major points can introduce electrical noise or voltage offsets, causing the PCM to misinterpret the sensor's signal as inactive.
Real Owner Repair Stories
- OzBargain Forums user 'tunzafun001' (2007 Mazda 3) — Initial codes P0131 and P2251. After replacing the sensor, new codes P0030 and P0134 appeared instantly.
❌ Tried (didn't work) Replacing the original O2 sensor with a new one purchased from eBay.
✅ What actually fixed it The diagnosis concluded that the new eBay sensor was defective out of the box, specifically with a faulty heater circuit, even though it measured 3 ohms. The user observed a flat-line 1.01v on their scan tool. The final fix required using a quality, non-defective sensor. - Reddit user r/AskMechanics (2007 Mazda 3) — P0134 code returned instantly after replacing the upstream O2 sensor.
❌ Tried (didn't work) Replacing the Bank 1 Sensor 1 O2 sensor.
✅ What actually fixed it The user confirmed the new sensor was not solving the issue. The community advised the next step was to investigate a wiring problem, specifically checking for a bad ground connection or damage to the harness connector, as this is a common cause for the code to persist after sensor replacement.
OEM Part Supersession History
L3CE-18-8G1→L3CE-18-8G1— No supersession found. This part number remains current for the specified application.
Heads up: This part number is specifically for the 2.3L Turbo engine (Mazdaspeed3). It is not compatible with the 2.0L or 2.5L naturally aspirated engines, which use different sensors.
Model Year Variations Within This Range
- 2009-2013: The primary variation is the engine fitted to the car, which dictates the correct upstream O2 sensor part number. The 2.0L, 2.5L, and 2.3L Turbo (Mazdaspeed3) engines all use different sensors. For example, a Denso 234-9085 may fit a 2009 2.0L, while an NGK 24395 is listed for a 2010-2013 2.5L. Always verify the part number by VIN or by using a trusted parts catalog for the specific engine.
Diagnostic Flowchart
Used vs. New Parts: Buying Guide for This Vehicle
When a used part is the smart pick: For this repair, a used part is almost never a smart choice. The primary cause of P0134 is a failed oxygen sensor, which is a wear-and-tear item with a finite lifespan. A used sensor from a donor vehicle has unknown remaining life and may fail shortly after installation.
Donor-vehicle mileage cap: roughly under 30000 miles for the part to have meaningful remaining life.
What to inspect on the donor part:
- If buying used is unavoidable, source from the lowest-mileage donor possible.
- Inspect the wiring for any signs of fraying, melting, or brittleness.
- Ensure the connector is free of corrosion, oil, or broken locking tabs.
- Avoid sensors with heavy carbon buildup or physical damage to the sensor tip.
OEM-only on this vehicle (don't cheap out):
- While not strictly 'OEM-only', using an OEM-supplier brand for the oxygen sensor is critical for this vehicle.
Aftermarket brands forum-validated for this vehicle:
- Denso
- NTK (a brand of NGK)
Brands owners have reported issues with on this vehicle:
- Generic, unbranded sensors from online marketplaces like eBay or Amazon are frequently reported to be defective out-of-the-box or fail within a few months, causing the P0134 code to return.
Real Owner Stories
Aggregated from forums and TSBs cited above. Mileages and costs reflect what owners reported in those sources.
2010 Mazda 3 2.0L
Symptoms: Check Engine Light (CEL) with code P0134.
What fixed it: The user did not report a final fix, but noted that replacing the O2 sensor with cheap Amazon parts did not solve the issue long-term, suggesting a deeper issue or the need for a quality part.
Source hint: Reddit r/MechanicAdvice
2011 Mazda 3 — 118000 miles
Symptoms: Started running a little rough, then got a CEL for P0134.
What fixed it: Initially, replacing the sensor with a quality NTK sensor resolved the rough ride and the CEL. However, the problem returned after 1.5 months and 6000 miles.
Source hint: Reddit r/MechanicAdvice
2010 Mazda 3 2-liter engine non SKYACTIV
Symptoms: Check engine light on with codes P2251 and P0134.
What fixed it: The owner ordered a new oxygen sensor to resolve the codes.
Source hint: YouTube comment on '416 DIY'
Related OBD-II Codes
Frequently Asked Questions
Where is the Bank 1, Sensor 1 oxygen sensor located on my 2010 Mazda 3?
I see cheap oxygen sensors on Amazon. Are they okay to use for my Mazda 3?
What special tools are needed to replace the upstream O2 sensor on a 2009-2013 Mazda 3?
How can I be sure the O2 sensor is actually bad on my Mazda 3 before I buy a new one?
I replaced the O2 sensor on my Mazda 3, but the P0134 code came back. What else should I check?
Is the P0134 code a common issue on related Mazda or Ford vehicles?
Helpful Videos
We Have This Part in Stock


The information in this article is provided for general reference and educational purposes only. Vehicle specifications, procedures, and part compatibility can vary by production date, trim level, and region. Always consult your vehicle's factory service manual and verify part numbers before purchasing or performing repairs. Safety-critical components such as airbags, seat belts, and braking systems should be installed by a qualified professional.
- Mazda 3:
- 🎬 Helpful Videos
- 🛍️ Shop This Part
- What's Unique About the 2009-2013 Mazda 3
- Symptoms You May Notice
- Most Likely Causes
- Rare But Worth Checking
- Diagnosis Steps
- Parts You'll Likely Need
- Related Codes That Often Appear With This One
- Platform-Specific Known Issues
- Mechanic-Grade Diagnostic Values
- Hidden / Shadow Codes Worth Checking
- Scan Tool Commands That Help
- Wiring & Ground Locations
- Real Owner Repair Stories
- OEM Part Supersession History
- Model Year Variations Within This Range
- Diagnostic Flowchart
- Used vs. New Parts: Buying Guide for This Vehicle
- Real Owner Stories
- 2010 Mazda 3 2.0L
- 2011 Mazda 3 — 118000 miles
- 2010 Mazda 3 2-liter engine non SKYACTIV
- Related OBD-II Codes
- Frequently Asked Questions
- 🎟️ Get 5% Off