

P0134 on 2010-2012 Audi S5 3.0T: Causes and Fixes for O2 Sensor No Activity
On a 2010-2012 Audi S5 3.0T, code P0134 almost always means the front (upstream) oxygen sensor on the passenger side has failed. The most common fix is to replace the sensor. Before replacing, it is critical to inspect for oil leaks from the valve cover gasket dripping onto the sensor's connector, as this is a frequent cause of failure on this engine. Expect to pay $70-$150 for a quality aftermarket part (like Bosch) or $180-$250 for an OEM sensor. DIY difficulty is 2/5.
- P0134 on your S5 points directly to the upstream oxygen sensor on the passenger side.
- The most likely fix is replacing the sensor itself, which is a common wear item.
- Before replacing the sensor, inspect its wiring connector for oil contamination from a potential valve cover or oil filter housing leak. Repairing the leak is crucial for a long-term fix.
- Always check the O2 sensor heater fuse before buying parts.
- Using a quality OEM-equivalent brand like Bosch for the replacement sensor is highly recommended for a lasting repair.
What's Unique About the 2010-2012 Audi S5
The 3.0L TFSI supercharged V6 is a robust engine, but like many V-engines, its components are tightly packed. For code P0134, the primary issue is typically the Bank 1 oxygen sensor failing due to age. However, a notable and well-documented issue on this platform is the potential for oil leaks from the valve cover gasket or the oil filter housing gasket. These leaks can drip oil directly onto the O2 sensor's wiring harness, causing the connector to become saturated, which can short out the sensor's internal heater and lead to this code. Many owners on forums have documented this exact scenario, making an inspection for oil leaks a critical first step.
Symptoms You May Notice
- Check Engine Light is on
- Reduced fuel economy
- Rough or uneven idling
- Engine hesitation or sluggish performance
- Failing an emissions test
- Smell of gasoline from the exhaust due to a rich fuel mixture
- Replacing the wrong oxygen sensor (e.g., the downstream sensor or the sensor on the driver's side/Bank 2).
- Replacing the oxygen sensor without fixing the underlying oil leak that caused it to fail, leading to a repeat failure.
Most Likely Causes
- Failed Bank 1, Sensor 1 Oxygen Sensor 🔴 High Probability Oxygen sensors are wear-and-tear items with a finite lifespan. The internal heating element, which is necessary for the sensor to function, is a common failure point that leads to the 'no activity' code. This failure is often accelerated by oil contamination from common engine oil leaks.
How to confirm: Use an OBD-II scanner's live data function to monitor the voltage for 'O2 Sensor Bank 1 Sensor 1'. A healthy sensor's voltage fluctuates rapidly between ~0.1V and ~0.9V. A failed sensor will show a flat, unchanging voltage (e.g., stuck at 0.45V). You can also test the internal heater by disconnecting the sensor and measuring resistance between the two heater pins (usually same-colored wires). A good sensor will show low resistance (typically 2.5-20 Ohms), while a failed one will show an open circuit (infinite resistance).
Typical fix: Replace the Bank 1, Sensor 1 (upstream, passenger side) oxygen sensor. An O2 sensor socket is required for removal and installation. Soaking the sensor threads with penetrating oil beforehand is highly recommended. Access can be tight; some DIYers remove the air intake box for better access from above.
Est. part cost: $70 - $250 - Damaged Wiring or Connector due to Oil Leak 🟡 Medium Probability The engine bay is a harsh environment. More specifically, oil leaks from the valve cover gasket or oil filter housing gasket are known to drip onto the O2 sensor connector, saturating it with oil and causing a short or poor connection. This is a widely reported issue on forums for the 3.0T engine.
How to confirm: Visually inspect the entire length of the wiring harness for the Bank 1 O2 sensor, from the sensor itself to the black connector on the passenger-side firewall. Look for signs of melted plastic, chafing, breaks, or a connector filled with engine oil. The presence of oil is a strong indicator this is the root cause.
Typical fix: If the connector is full of oil, it must be thoroughly cleaned with electrical contact cleaner. The source of the oil leak (e.g., valve cover gasket) must be repaired to prevent repeat failure of the new sensor. 🎬 See this step-by-step 3.0T valve cover gasket replacement guide If the sensor itself was saturated, it should be replaced as well.
Est. part cost: $10 - $50 for repair repair materials, plus gasket cost if needed - Blown Fuse for O2 Sensor Heater ⚪ Low Probability A short in the sensor or its wiring (often from the aforementioned oil contamination) can cause the associated fuse to blow. This will prevent the sensor's heater from working, leading to a 'no activity' code. On many B8 platform vehicles, a single fuse powers the heaters for both upstream O2 sensors.
How to confirm: Locate the fuse box in the plenum chamber (under the windshield cowl) and identify the fuse for the oxygen sensor heaters (often labeled 'Lambda sensor'). Visually inspect the fuse and test for continuity with a multimeter. A forum user with a B8 platform car reported this was a 15A fuse.
Typical fix: Replace the blown fuse. If the fuse blows again immediately, it indicates a persistent short circuit in the O2 sensor wiring (Bank 1 or Bank 2) or one of the sensors that must be found and fixed.
Est. part cost: <$5
Rare But Worth Checking
- Exhaust Leak: A crack in the exhaust manifold, a leaking gasket upstream of the O2 sensor, or a failing downpipe flex pipe can introduce fresh air. This can cause the sensor to read a constant lean condition, which the ECU might interpret as 'no activity' if the signal is flat. This is less common than sensor failure but worth checking, especially if you hear a ticking or hissing sound from the exhaust.
- Faulty Engine Control Module (ECM): This is extremely rare. The ECM's internal driver for the O2 sensor circuit can fail, but all other possibilities should be exhaustively ruled out before considering ECM replacement, as it is expensive and requires programming.
Diagnosis Steps
- Read fault codes with an OBD-II scanner to confirm P0134 is present and check for any other codes, especially P0135 or P1196.
- Check the fuse for the oxygen sensor heater circuit, typically a 15A fuse located in the engine bay fuse box (plenum chamber).
- CRITICAL: Visually inspect the Bank 1 (passenger side) valve cover for signs of an oil leak. Follow the path down to the upstream O2 sensor's wiring and connector (black connector on the firewall) for any signs of oil saturation, damage, or melting.
- With the scanner, view live data for 'O2 Sensor Voltage Bank 1 Sensor 1' with the engine warm and at idle. The voltage should fluctuate rapidly between approx. 0.1V and 0.9V. If it is flat or unchanging (e.g. 0.45V), this confirms the 'no activity' fault.
- If wiring and fuse are good, test the sensor's heater circuit. Disconnect the sensor and measure resistance across the two heater pins. Infinite resistance means the heater is broken and the sensor must be replaced.
- Before replacing the sensor, check for any exhaust leaks between the cylinder head and the sensor, listening for any ticking sounds.
- If a new sensor and verified good wiring/fuse do not resolve the code, the final and rarest possibility is a fault within the Engine Control Module (ECM).
Parts You'll Likely Need
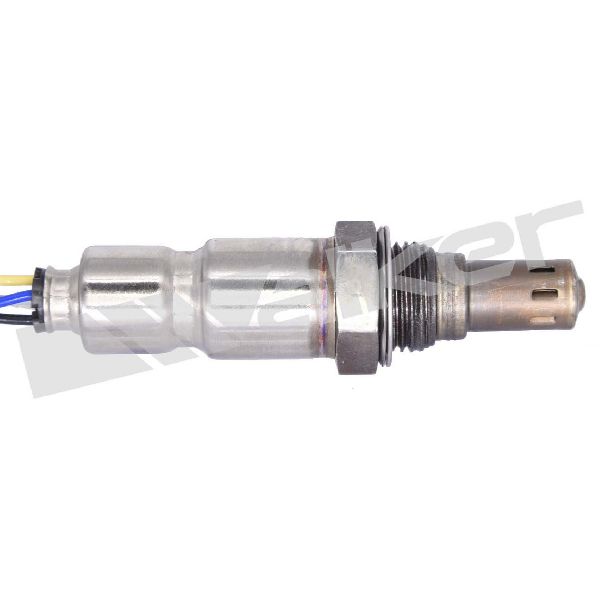
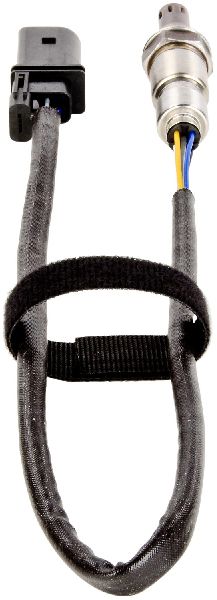
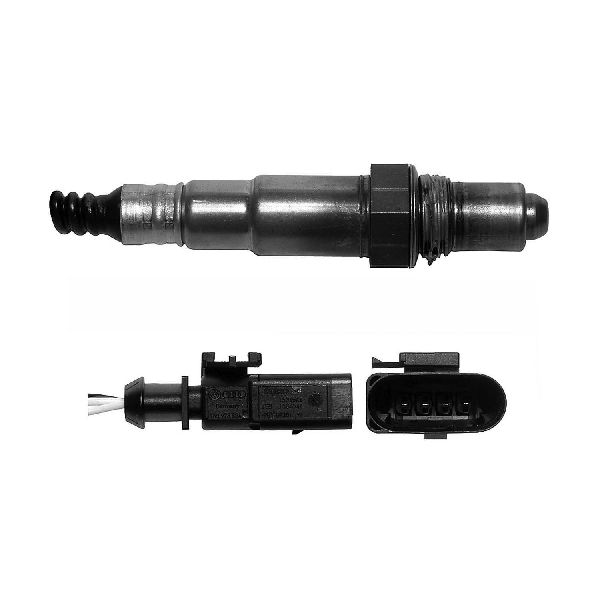
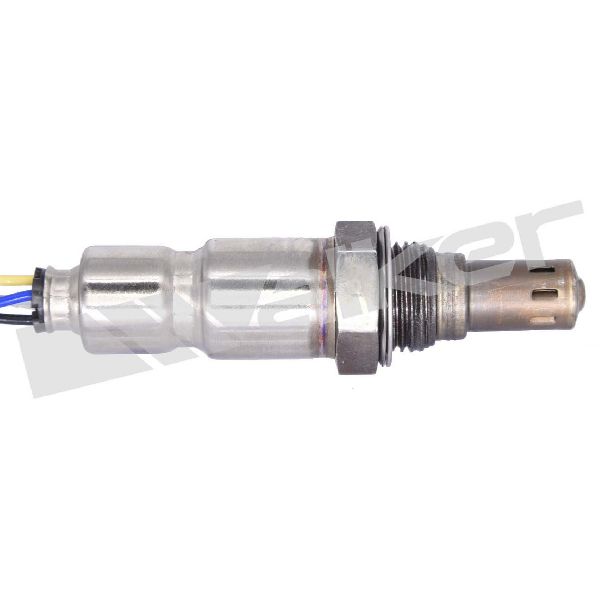
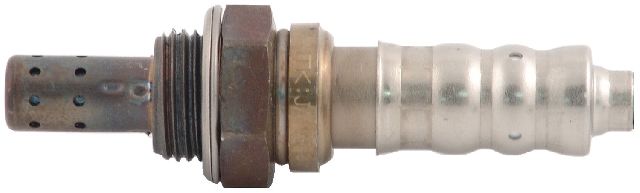
- Upstream Oxygen Sensor (Bank 1)
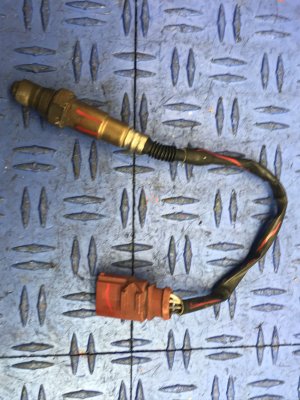
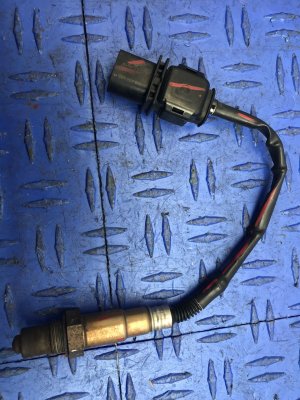
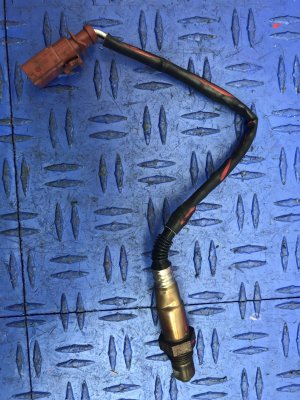
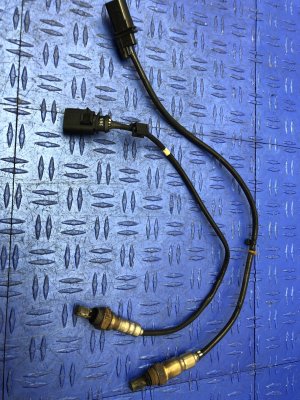
(OEM #06E906265S)— This is the component that fails in the vast majority of P0134 cases. The internal heating element wears out or is shorted by leaking oil, preventing the sensor from sending a signal.
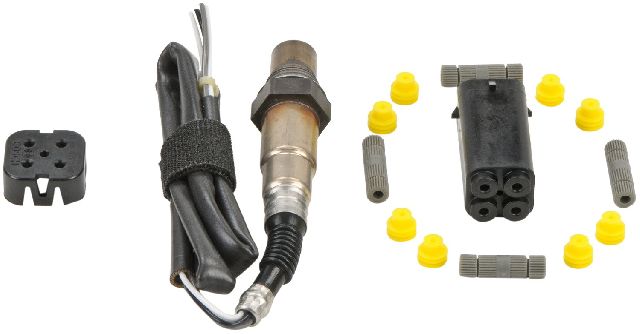
Trusted brands: Bosch (OEM supplier, part #17351 or #18089 are often cited for this application), NTK, Denso
OEM price range: $180-$250
Aftermarket price range: $70-$150
Related Codes That Often Appear With This One
- P0135 — This code specifically indicates a fault in the heater circuit for Bank 1, Sensor 1. Since a failed heater is the most common reason for the sensor to show 'no activity', P0135 and P0134 are often caused by the same single failed sensor.
- P1196 — This is an Audi-specific code for 'O2 Sensor Heater Circuit Bank 1 Sensor 1 Electrical Malfunction'. It is functionally the same as P0135 and points directly to a problem with the same sensor's heater. Audi has a TSB that references this code pattern.
- P1197 — This is the equivalent heater circuit fault code for Bank 2 (driver's side). If the fuse that powers both upstream sensor heaters blows, you may see P1196 and P1197 logged together.
Technical Service Bulletins (TSBs) & Recalls
- NHTSA TSB #01139020337671: While not directly for P0134, this TSB is a 'Repair Authorization' for related heater circuit codes P1196 and P1197 on the 3.0T engine, confirming that heater circuit failures are a manufacturer-recognized issue pattern.
Platform-Specific Known Issues
- A leaking valve cover gasket or oil filter housing gasket can drip oil onto the Bank 1 O2 sensor connector, causing it to fail. This should be inspected and repaired along with the sensor replacement to prevent a repeat failure.
- The fuse for the O2 sensor heaters is located in the plenum chamber fuse box, which is under the plastic cowl below the windshield wipers. This location can sometimes be overlooked.
Mechanic-Grade Diagnostic Values
- O2 Sensor Heater Element Resistance (cold) — expected: 2.5 - 20 Ohms. More specifically, 2.5-10 Ohms is a common range cited for a good cold sensor.. Failure: Infinite resistance (Open Line / OL) or near-zero Ohms (short circuit).
- Harness-Side Connector Heater Power (Key On, Engine Off) — expected: 12V+ (Battery Voltage).. Failure: 0V or significantly low voltage, indicating a blown fuse, bad relay, or wiring issue upstream.
- VCDS Live Data: O2 Heater Resistance (Dynamic) — expected: Resistance will rise as the sensor heats up. A cold reading might be ~15 Ohms, while a hot reading could be over 40 Ohms.. Failure: An unchanging, extremely high (e.g., >1 kOhm), or out-of-spec reading as reported by the ECU.
Scan Tool Commands That Help
- VCDS (VAG-COM): Basic Settings - "Automatic test sequence" (e.g., IDE00553) — To force the vehicle to run through its internal emissions system tests after a repair, such as replacing an O2 sensor. This helps set the readiness monitors without extensive driving. The procedure typically requires holding the brake and accelerator pedals while the ECU runs the engine through various RPMs.
- VCDS (VAG-COM): Readiness (Function 15) — To check the status of the 8 onboard emissions system monitors. After clearing codes, they will show 'Failed or Incomplete'. This function is used to verify if the 'Automatic test sequence' or a drive cycle has successfully completed, setting the monitors to 'Passed'.
- VCDS (VAG-COM): Measuring Value Blocks (MVB) for O2 Sensors — To view live data, including the ECU's calculated heater resistance (e.g., in MVB 040 or 042) and sensor voltage. This allows for real-time diagnosis without disconnecting the sensor.
Wiring & Ground Locations
- Ground Connection (in plenum chamber, right) — In the plenum chamber (the area under the plastic cowl at the base of the windshield), on the right (passenger) side.. This is a primary ground point in the area where the O2 sensor heater fuse and relay are located. A corroded or loose ground here can cause intermittent power issues to the heater circuit, mimicking a failed sensor or fuse.
- Ground Connection (in engine compartment, left) — On the left (driver's) side of the engine compartment, often on the frame rail or strut tower.. This serves as a main engine ground. While less direct, a poor main engine ground can cause a variety of electrical issues, including creating voltage offsets that may affect sensor readings.
- O2 Sensor Connector (Bank 1, Sensor 1) — A black, multi-pin connector typically mounted to a bracket on the passenger-side firewall, near the back of the engine.. This is the specific connector for the sensor in question. It is the primary point of inspection for oil contamination from a leaking valve cover gasket, which is a very common cause of P0134 on this engine.
Real Owner Repair Stories
- AudiWorld Forums user 'jcrampton' (Audi A6 (C5 platform, but diagnosis is relevant to 3.0T)) — Check Engine Light with codes P1196, P1197 (both heater circuits) and P0134 (B1S1 no activity).
❌ Tried (didn't work) Replaced both pre-cat O2 sensors with universal-fit Bosch sensors., Checked fuses in the driver-side panel., Replaced a blown maxi fuse.
✅ What actually fixed it The forum concluded the persistent codes were likely caused by the universal-fit sensors. The recommended fix was to use direct-fit OEM or equivalent (Bosch direct-fit, not universal) sensors, as the wiring and internal resistance can differ on universal parts, causing issues with the sensitive Audi ECU.
OEM Part Supersession History
06E906265F→06E906265S— Standard part revision and improvement by the manufacturer.
Heads up: 06E906265S is the correct and current part number for this application. Using older stock or other variants may lead to compatibility issues. Always verify fitment with a VIN.
Diagnostic Flowchart
Other Known Issues on This Vehicle
Issues unrelated to this code that are worth knowing about as an owner of this generation:
- Water Pump & Thermostat Failure 🔴 High — Very common, especially on 2010-2012 models with original plastic components. Often fails between 60k-100k miles. Can cause overheating and significant engine damage if ignored. (Ref: TSB 2040491/4 (or 01 16 68) exists for a related coolant pump mechanical malfunction (P1B1C) on some 3.0T models, involving a software update and potential thermostat replacement.)
- PCV Valve / Oil Separator Failure 🟠 Medium — Common failure item, typically between 60k-80k miles. The diaphragm tears, causing a loud whistle, high crankcase vacuum, and potential for subsequent oil seal leaks (like the rear main seal). (Ref: An updated PCV with a lower pressure regulating valve was released to help with oil consumption concerns.)
- Intake Valve Carbon Buildup 🟠 Medium — Inevitable on all direct-injection engines. Symptoms like misfires and reduced power typically appear after 60k-80k miles. Requires manual cleaning (e.g., walnut blasting) as fuel additives are ineffective. (Ref: A TSB exists for cleaning clogged secondary air injection ports, which is a related carbon issue, but not for the intake valves themselves.)
- Timing Chain Tensioner Wear 🔴 High — Less common than other issues but extremely costly. A brief rattle on startup is the primary symptom. The plastic guides can become brittle and tensioners can fail, requiring engine-out service to repair.
- Leaking Upper Timing Chain Covers 🟡 Low — A common oil leak source. The gaskets for the covers at the rear of the engine can leak oil. It's often recommended to replace the covers themselves along with the gaskets.
Used vs. New Parts: Buying Guide for This Vehicle
When a used part is the smart pick: For this specific repair, using used parts is generally not recommended. However, if the wiring harness connector on the vehicle side is damaged (e.g., melted or broken clips), a used connector pigtail from a junkyard can be a cost-effective repair versus replacing a larger harness section.
Donor-vehicle mileage cap: roughly under 80000 miles for the part to have meaningful remaining life.
What to inspect on the donor part:
- For a connector pigtail, ensure the plastic is not brittle, the locking tab is intact, and there are no signs of oil saturation or corrosion on the pins.
- Verify the donor vehicle was not involved in a fire or flood.
OEM-only on this vehicle (don't cheap out):
- Oxygen Sensor: While OEM-supplier brands are excellent, avoid 'universal' or unbranded sensors. The ECU is sensitive to the specific resistance and response time of the correct sensor. Using a cheap or incorrect sensor often results in the code returning.
Aftermarket brands forum-validated for this vehicle:
- Bosch (often the OEM supplier; direct-fit models like 17351 or 18089 are frequently cited)
- NTK
- Denso
Brands owners have reported issues with on this vehicle:
- Universal-fit oxygen sensors that require splicing wires.
- Unbranded, no-name sensors from online marketplaces.
Real Owner Stories
Aggregated from forums and TSBs cited above. Mileages and costs reflect what owners reported in those sources.
2010-2012 Audi S4 (B8) 3.0T
Symptoms: The owner observed heater faults for both banks simultaneously.
What fixed it: The issue was resolved by replacing a single blown 15A fuse located in the plenum chamber fuse box that powered both sensors.
Source hint: Audizine Forum User (Audi S4 3.0T)
Related OBD-II Codes
Frequently Asked Questions
Does NHTSA TSB #01139020337671 apply to my 3.0T Audi S5 if I have heater circuit issues?
Where is the oxygen sensor heater fuse located on the B8 S5 platform?
Can a valve cover gasket leak cause the P0134 code on my S5 Cabriolet?
What should the voltage readings look like for Bank 1 Sensor 1 on a healthy 3.0L TFSI engine?
Is it necessary to replace the O2 sensor if the connector is just oily?
Helpful Videos
![How To Replace The Valve Cover Gaskets | 2011-2016 Audi Q7 3.0L Supercharged | DY [Part Numbers]](https://img.youtube.com/vi/gcn7silwdM4/mqdefault.jpg)
Used OEM Parts in Stock


New Aftermarket Parts Available

The information in this article is provided for general reference and educational purposes only. Vehicle specifications, procedures, and part compatibility can vary by production date, trim level, and region. Always consult your vehicle's factory service manual and verify part numbers before purchasing or performing repairs. Safety-critical components such as airbags, seat belts, and braking systems should be installed by a qualified professional.
- Audi S5:
- 🎬 Helpful Videos
- 🛍️ Shop This Part
- What's Unique About the 2010-2012 Audi S5
- Symptoms You May Notice
- Most Likely Causes
- Rare But Worth Checking
- Diagnosis Steps
- Parts You'll Likely Need
- Related Codes That Often Appear With This One
- Technical Service Bulletins (TSBs) & Recalls
- Platform-Specific Known Issues
- Mechanic-Grade Diagnostic Values
- Scan Tool Commands That Help
- Wiring & Ground Locations
- Real Owner Repair Stories
- OEM Part Supersession History
- Diagnostic Flowchart
- Other Known Issues on This Vehicle
- Used vs. New Parts: Buying Guide for This Vehicle
- Real Owner Stories
- 2010-2012 Audi S4 (B8) 3.0T
- Related OBD-II Codes
- Frequently Asked Questions
- 🎟️ Get 5% Off