

P0107 on 2007-2017 Mitsubishi Lancer: MAP Sensor Circuit Low Causes and Fixes
For a 2007-2017 Mitsubishi Lancer, code P0107 almost always points to a faulty Manifold Absolute Pressure (MAP) sensor. An aftermarket sensor costs around $40-$90, while an OEM part is significantly more. Replacement is DIY-friendly, typically taking less than 30 minutes.
- P0107 on a 2007-2017 Lancer means the MAP sensor's voltage signal is too low, almost always due to a failed sensor.
- This is a very common, well-documented issue for this car and its platform mates (Dodge Caliber, Jeep Patriot).
- Symptoms include rough idle, poor acceleration, stalling, and bad gas mileage.
- Before replacing the sensor, confirm the connector is secure and check for 5V reference and ground at the harness.
- Replacing the MAP sensor (OEM Part #1865A052) is a simple, beginner-friendly DIY fix that usually takes less than 30 minutes.
What's Unique About the 2007-2017 Mitsubishi Lancer
The 2007-2017 Mitsubishi Lancer generation and its platform mates using the 'World Engine' (4B11, 4B12) have a well-documented, high rate of MAP sensor failure that triggers the P0107 code. Unlike in many other vehicles where P0107 might first suggest a vacuum leak, on the Lancer, the sensor itself is the prime suspect. Forum discussions are filled with owners who resolved the code simply by replacing the sensor. The sensor's accessibility on the intake manifold across all engine variants (2.0L, 2.4L, and 2.0L Turbo) makes it a very common and straightforward DIY repair.
Generation note: The 2007-2017 model year range covers the ninth generation of the Mitsubishi Lancer (often called 'Lancer X'), including the base models, Ralliart, and Evolution X. While engines differ (4B11, 4B12, 4B11T), the cause and fix for P0107 are consistent across the platform, relating to the MAP sensor and its wiring. This issue is also shared by other Mitsubishi, Dodge, and Jeep vehicles using the same 'World Engine' family.
Symptoms You May Notice
- Check Engine Light is on.
- Rough or erratic idle.
- Engine hesitation or stumbling during acceleration.
- Poor fuel economy.
- Engine stalling, especially at stops.
- Noticeable loss of power or sluggish performance.
- Black smoke from the exhaust under a rich condition.
- Difficulty starting the engine.
- Replacing the Mass Airflow (MAF) sensor. While some symptoms overlap, P0107 specifically points to the MAP sensor circuit, not the MAF. However, some users have reported intermittent starting issues with both P0107 and IAT codes (P0113), which were resolved by cleaning or reseating the MAF sensor connector, suggesting a possible wiring harness issue affecting both circuits.
Most Likely Causes
- Faulty Manifold Absolute Pressure (MAP) Sensor 🔴 High Probability This is a widely reported failure item on this Lancer platform and its platform mates. The internal electronics of the sensor degrade over time, leading to incorrect voltage outputs that fall below the 0.2V threshold.
How to confirm: With a scan tool, observe the MAP sensor voltage with the Key On, Engine Off (KOEO). It should read near your local barometric pressure (e.g., ~101 kPa at sea level). With the engine running at idle, the voltage should be stable (typically 1.0-1.5V). A static low voltage (under 0.5V) points to a bad sensor.
Typical fix: Replace the MAP sensor. It is located on the intake manifold, secured by one or two bolts.
Est. part cost: $40-$90 - Wiring or Connector Issue 🟡 Medium Probability The wiring harness in the engine bay is exposed to heat and vibration, which can lead to chafed wires, loose pins in the connector, or corrosion over time. Water intrusion after a rainstorm or car wash has also been reported as a trigger for intermittent issues.
How to confirm: Visually inspect the MAP sensor connector and wiring for any signs of damage. With the key on, unplug the sensor and use a multimeter to check for a 5-volt reference (between 4.9V and 5.1V per service manual), a good ground, and the signal wire at the connector. Wiggle the harness to see if the connection is intermittent; some owners report that simply disconnecting and reconnecting the sensor temporarily resolves the issue, indicating a poor connection.
Typical fix: Repair the damaged section of the wiring harness or replace the connector pigtail.
Est. part cost: $10-$30 - Vacuum Leak ⚪ Low Probability While less common than a sensor failure for this specific code, vacuum hoses can become brittle and crack over time. A significant leak would be needed to drop manifold pressure enough to trigger P0107.
How to confirm: Visually inspect all vacuum hoses connected to the intake manifold for cracks, disconnections, or brittleness. A user on an EvolutionM forum noted that checking the Fuel Pressure Regulator (FPR) vacuum line is a good starting point. A smoke test is the most effective way to find a leak that isn't obvious.
Typical fix: Replace the cracked or disconnected vacuum hose.
Est. part cost: $5-$25
Rare But Worth Checking
- Faulty Engine Control Module (ECM): This is extremely rare. The ECM should only be considered after all other possibilities, including the sensor, wiring, and vacuum system, have been thoroughly tested and ruled out.
- Improperly Scaled Aftermarket MAP Sensor: If you have an aftermarket MAP sensor (e.g., an Omni 4-bar for a tuned vehicle), an incorrect scaling configuration in the ECU tune will cause a P0107 code. This is a software calibration issue, not a hardware failure. A forum thread on EvolutionM discusses this exact scenario.
Diagnosis Steps
- Read the codes with an OBD-II scanner to confirm P0107 and check for any other related codes.
- Visually inspect the MAP sensor, which is located on the intake manifold. Check its electrical connector for corrosion, damage, or a loose fit. Some owners report that simply reseating the connector can temporarily fix the problem.
- Inspect the wiring harness leading to the sensor for any signs of chafing, melting, or breaks, especially near hot or vibrating components.
- Inspect all vacuum lines connected to the intake manifold for obvious cracks, splits, or disconnections, paying attention to the FPR vacuum line.
- Use a scan tool to monitor live data. With the Key On, Engine Off (KOEO), the MAP sensor reading should be close to the barometric pressure (approx. 101 kPa at sea level). At idle, it should show a stable voltage between 1.0V and 1.5V.
- If the live data reading is stuck low (e.g., below 0.5V), disconnect the sensor. Use a multimeter to test the harness connector for a 5V reference (Pin 3), a good ground (Pin 2), and check the signal wire (Pin 1).
- If the 5V reference and ground are present and stable, the MAP sensor is almost certainly faulty.
- If power or ground is missing, the problem is in the wiring between the sensor and the ECM. Trace and repair the faulty wire.
- If all tests pass but the problem persists, consider the rare possibility of a faulty ECM.
Parts You'll Likely Need
- Manifold Absolute Pressure (MAP) Sensor
(OEM #1865A052)— This is the most common cause of a P0107 code on this vehicle due to a high rate of internal failure.
Trusted brands: Denso, Standard Motor Products, Delphi, Mitsubishi Genuine
OEM price range: $220-$270
Aftermarket price range: $40-$90
Related Codes That Often Appear With This One
- P0106 — P0106 indicates a 'Range/Performance' issue with the MAP sensor. A failing sensor can send signals that are not just low (P0107) but also erratic or out of the expected performance range, causing both codes to appear.
- P0171 — This code for 'System Too Lean' can sometimes accompany P0107. If the MAP sensor is providing a false low-pressure reading, the ECM may not deliver enough fuel, leading to a lean condition. An EvolutionM forum thread from 2011 details a user experiencing both codes, with the community pointing towards a failed MAP sensor as the likely culprit.
Platform-Specific Known Issues
- Intermittent Failure After Water Exposure: A user on EvolutionM.net reported getting P0107 and P0113 (IAT Sensor) codes after a rainstorm, causing a no-start condition. The issue was temporarily resolved by disconnecting and reconnecting the MAF sensor, suggesting a poor connection or water intrusion in the harness that affects multiple sensors. This highlights the importance of checking connector integrity, especially after washing the car or driving in heavy rain.
- Bad Connection vs. Bad Sensor: In a forum thread discussing a P0107 code after installing an aftermarket MAP sensor, one user resolved their issue simply by disconnecting and reconnecting the sensor's electrical plug. Another user confirmed the problem was a defective new sensor. This shows that before replacing the part, it's crucial to ensure the connector is fully seated and making good contact.
Mechanic-Grade Diagnostic Values
- MAP Sensor Supply Voltage at Harness Connector — expected: 4.9 - 5.1 volts. Failure: Voltage below 4.9V or above 5.1V indicates a problem with the ECM or wiring.
- MAP Sensor Output Voltage (KOEO) at ECM Connector — expected: At sea level: 3.8 - 4.2 volts. At 600m (1,969 ft): 3.5 - 3.9 volts. At 1,200m (3,937 ft): 3.3 - 3.7 volts.. Failure: Voltage below these ranges, especially under 0.2V for 2 seconds, confirms the fault condition.
- MAP Sensor Live Data (KOEO) via Scan Tool — expected: At sea level: ~101 kPa (29.8 in. Hg). At 600m (1,969 ft): ~95 kPa (28.1 in. Hg). At 1,200m (3,937 ft): ~88 kPa (26.0 in. Hg).. Failure: A reading of 5 kPa (1.5 in.Hg) or lower for 2 seconds will trigger the code.
- MAP Sensor Fail-Safe Value — expected: When P0107 is active, the ECU defaults to a fixed intake manifold pressure value of 101 kPa.. Failure: This is not a failure indicator, but the backup strategy used by the ECU. It results in poor performance and fuel economy.
Scan Tool Commands That Help
- Mitsubishi M.U.T.-III: Data List Item 8: Manifold Absolute Pressure Sensor — This is the primary function used in the official Mitsubishi diagnostic procedure to read the live pressure data from the MAP sensor and compare it against expected values for the current altitude.
- Mitsubishi M.U.T.-III: Erase DTC — After a repair (like replacing the sensor or fixing a loose connection), this function is used to clear the P0107 code. The car should then be driven to see if the code returns, confirming if the fix was successful.
Wiring & Ground Locations
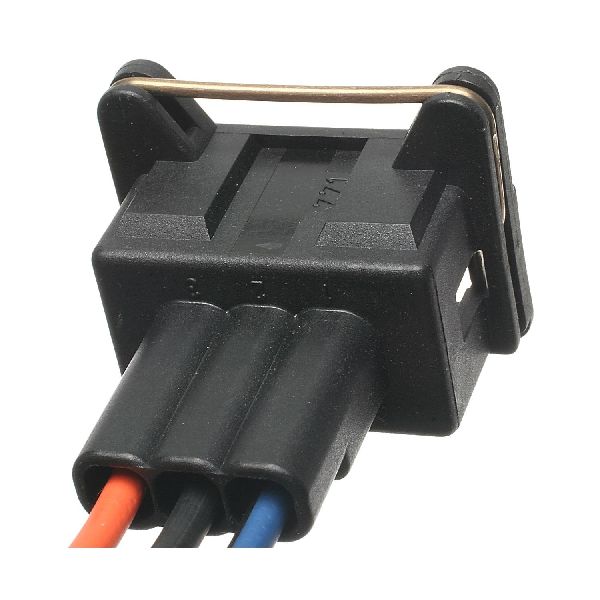
- MAP Sensor Connector (B-117) — On the MAP sensor, which is mounted to the intake manifold.. This is the primary connection point. Pin 1 is the Signal wire to ECM pin 45. Pin 2 is the Ground wire to ECM pin 46. Pin 3 is the 5V Reference from ECM pin 44.
- ECM Connector (B-108) — At the Engine Control Module (ECM).. This is the termination point for the MAP sensor harness. Testing for voltage and continuity at pins 44 (5V Ref), 45 (Signal), and 46 (Ground) can isolate a wiring fault from a sensor fault.
- Ground Point G1 — At the right front corner of the engine compartment.. A diagram for the 2008 Lancer shows this as a major grounding point for several engine components. While the MAP sensor grounds directly through the ECM, a poor main ground for the ECM itself could cause erratic sensor readings.
- Ground Point G2 — On the left front of the engine compartment.. This is another key engine bay ground point. Verifying that main engine and body grounds are clean and tight is a crucial step when diagnosing any electronic sensor circuit fault.
Real Owner Repair Stories
- EvolutionM Forum User (Mitsubishi Lancer Evo X) — Car went into limp mode and shut down, throwing code P0107.
❌ Tried (didn't work) Restarting the car multiple times (code eventually cleared temporarily).
✅ What actually fixed it The user found the Fuel Pressure Regulator (FPR) vacuum line had popped off the intake manifold. Reconnecting the hose resolved the issue and the code did not return after a hard test drive.
OEM Part Supersession History
1865A052→1865A052 (current)— This part number has remained consistent for the specified vehicle range.
Heads up: The OEM part 1865A052 is a 3-bar sensor for the turbocharged Evolution X models. Using this on a naturally aspirated Lancer may cause issues if the ECU is not tuned for it. Conversely, using a standard 1-bar sensor on a tuned, turbocharged car will cause incorrect readings and performance problems.
Model Year Variations Within This Range
- 2007-2017: While the P0107 fault is common across the generation, the specific ECM pin numbers for the MAP sensor circuit can vary slightly between early and later models, or between Manual (M/T) and Automatic/CVT (A/T) transmissions. For example, some service documents reference ECM pins 96, 97, and 101 for the MAP circuit, while others reference pins 44, 45, and 46. Always use a service manual specific to the vehicle's exact year and transmission for wiring diagnosis.
Diagnostic Flowchart
Other Known Issues on This Vehicle
Issues unrelated to this code that are worth knowing about as an owner of this generation:
- CVT Transmission Failure/Hesitation 🔴 High — Commonly reported between 80,000-120,000 km (50k-75k miles), especially on 2009-2010 models. Can be catastrophic, requiring full replacement. Regular fluid changes are critical. (Ref: A recall was issued for 2015-2016 models in North America for a hesitation problem.)
- ASC System Service Required Warning 🟠 Medium — A common electronic fault, often triggered by a failing ABS wheel speed sensor, a faulty brake pedal switch, or even a dying 12V battery. Some 2010 models had a known issue with the ASC module itself. (Ref: A recall was issued in the US for the ABS pump system which can trigger this warning.)
- Clear Coat / Paint Peeling 🟡 Low — Widespread issue, particularly on darker colors like red and blue, where the clear coat delaminates and peels due to UV exposure. It is considered a cosmetic flaw but can lead to surface rust if not addressed.
- Front Crossmember Corrosion 🔴 High — Affects vehicles in regions with road salt use, leading to severe rust on the front subframe that can cause control arms to detach. (Ref: NHTSA Campaign Number: 16V246000)
- Accessory Drive Belt Tensioner Failure 🟠 Medium — The flange on the automatic tensioner can crack, causing the drive belt to detach, leading to a loss of power steering and alternator function. (Ref: NHTSA Campaign Number: 15V645000)
Used vs. New Parts: Buying Guide for This Vehicle
When a used part is the smart pick: A used OEM MAP sensor from a low-mileage donor vehicle can be a cost-effective alternative to a new OEM part, especially given the high price of the genuine Mitsubishi sensor. However, it is generally not recommended due to the high failure rate of this specific component; you may be buying a part that is close to failing.
Donor-vehicle mileage cap: roughly under 50000 miles for the part to have meaningful remaining life.
What to inspect on the donor part:
- Check for any physical damage, cracks, or corrosion on the sensor body and connector pins.
- Ensure the O-ring is present and in good condition to prevent vacuum leaks.
- If possible, ask for the donor vehicle's mileage and history.
OEM-only on this vehicle (don't cheap out):
- For tuned or turbocharged (Evolution, Ralliart) vehicles, using the correct OEM MAP sensor (e.g., the 3-bar 1865A052) is critical for accurate boost readings and engine safety.
Aftermarket brands forum-validated for this vehicle:
- Denso
- Delphi
- Standard Motor Products (SMP)
Brands owners have reported issues with on this vehicle:
- Unbranded, exceptionally cheap sensors found on marketplaces have a high rate of being dead-on-arrival or failing prematurely, often causing the P0107 code to return shortly after installation.
Real Owner Stories
Aggregated from forums and TSBs cited above. Mileages and costs reflect what owners reported in those sources.
2011 Mitsubishi Lancer
Symptoms: The owner experienced both P0107 and P0171 error codes simultaneously.
What fixed it: The community suggested MAP sensor failure as the primary cause for these specific codes on the Lancer engine tech forum.
Source hint: EvolutionM - P0107 + P0171 error codes (2011)
2017 Mitsubishi Lancer
Symptoms: P0107 and P0113 (IAT Sensor) codes appeared after a rainstorm, resulting in a no-start condition.
What fixed it: The issue was temporarily resolved by disconnecting and reconnecting the sensor, suggesting water intrusion or a poor connection in the harness.
Source hint: EvolutionM.net report cited in 'Intermittent Failure After Water Exposure'
2020 Mitsubishi Lancer (EvolutionM user)
Symptoms: Low voltage readings at the MAP sensor even after the sensor was replaced.
What fixed it: The owner was advised to check the wiring harness and grounds after a multimeter confirmed the low voltage persisted with a new sensor.
Source hint: EvolutionM - Map Sensor low Voltage (2020)
2013 Mitsubishi Lancer
Symptoms: P0107 code appeared specifically after installing an Omni 4 bar aftermarket MAP sensor.
What fixed it: One user resolved the issue by simply reseating the electrical plug, while another found the new aftermarket sensor itself was defective.
Source hint: EvolutionM - p0107 code with omni 4 bar (2013)
Related OBD-II Codes
Frequently Asked Questions
I just installed an aftermarket MAP sensor on my Lancer and I'm still getting P0107. Is the sensor bad?
My Lancer won't start after a heavy rainstorm and shows P0107. Could this be related to the weather?
Where is the MAP sensor located on the 2007-2017 Lancer engine?
Is there a specific vacuum line I should check on my Lancer for this code?
My Jeep Patriot has the same engine as the Lancer and shows P0107 along with the Traction Control light. Is this the same issue?
What voltage should I see from the Lancer MAP sensor at idle?
Helpful Videos

We Have This Part in Stock


The information in this article is provided for general reference and educational purposes only. Vehicle specifications, procedures, and part compatibility can vary by production date, trim level, and region. Always consult your vehicle's factory service manual and verify part numbers before purchasing or performing repairs. Safety-critical components such as airbags, seat belts, and braking systems should be installed by a qualified professional.
- Mitsubishi Lancer:
- 🎬 Helpful Videos
- 🛍️ Shop This Part
- What's Unique About the 2007-2017 Mitsubishi Lancer
- Symptoms You May Notice
- Most Likely Causes
- Rare But Worth Checking
- Diagnosis Steps
- Parts You'll Likely Need
- Related Codes That Often Appear With This One
- Platform-Specific Known Issues
- Mechanic-Grade Diagnostic Values
- Scan Tool Commands That Help
- Wiring & Ground Locations
- Real Owner Repair Stories
- OEM Part Supersession History
- Model Year Variations Within This Range
- Diagnostic Flowchart
- Other Known Issues on This Vehicle
- Used vs. New Parts: Buying Guide for This Vehicle
- Real Owner Stories
- 2011 Mitsubishi Lancer
- 2017 Mitsubishi Lancer
- 2020 Mitsubishi Lancer (EvolutionM user)
- 2013 Mitsubishi Lancer
- Related OBD-II Codes
- Frequently Asked Questions
- 🎟️ Get 5% Off