

P0106 on 2013-2016 Chevrolet Malibu 2.5L: Loose Intake Manifold and MAP Sensor Fixes
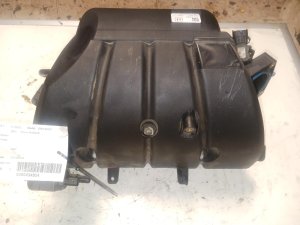
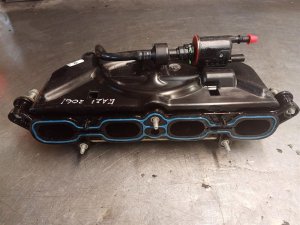
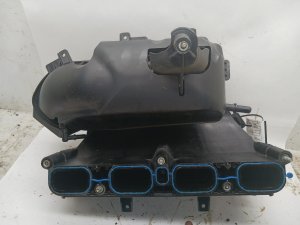
On a 2013-2016 Malibu with the 2.5L engine, code P0106 is almost always caused by loose intake manifold bolts creating a vacuum leak. Before buying any parts, check if the manifold is loose and tighten the bolts to 12 Nm (108 in-lbs). This is often a free fix that resolves the code.
- For a 2013-2016 Malibu 2.5L with code P0106, your first step should always be to check if the intake manifold is loose. This is a free check that can save you from buying parts you don't need.
- This code is almost always paired with P0171 (System Too Lean), which strongly points to a vacuum leak as the root cause.
- The fix is often as simple as tightening the three 10mm bolts on the front of the intake manifold to 12 Nm (108 in-lbs).
- Only consider replacing the MAP sensor if the intake manifold is confirmed to be tight and free of any leaks.
What's Unique About the 2013-2016 Chevrolet Malibu

For the 8th generation Malibu (2013-2015 and 2016 Limited) with the 2.5L LCV engine, this code has a very specific and common cause that is often misdiagnosed. The bolts securing the plastic intake manifold to the cylinder head are known to loosen over time due to engine vibration and heat cycles. This creates a significant vacuum leak that the ECM interprets as a MAP sensor problem, triggering P0106. GM issued Technical Service Bulletin PIP5529B which directly addresses this issue across multiple vehicles using the LCV engine. Many owners and technicians have fixed this code simply by re-torquing these bolts, avoiding the unnecessary cost of a new sensor.
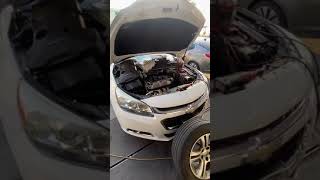
🎬 Watch: How to fix P0106 by tightening the intake manifold.Generation note: The 2013-2016 year range covers the end of the 8th generation (2013-2015) and the carryover 2016 'Limited' model, which used the 2.5L LCV engine. The all-new 9th generation Malibu was also introduced in 2016 with different engines (1.5L/2.0L Turbo). This guide specifically addresses the P0106 code for the 2.5L LCV engine found in the 8th generation and 2016 Limited models, where loose intake manifold bolts are the primary cause.
Symptoms You May Notice
- Check Engine Light is on
- Rough or unstable idle
- Vehicle may stall when coming to a stop or at low speeds
- Poor acceleration or hesitation
- Reduced fuel economy
- A hissing sound from the engine bay may be audible due to the vacuum leak.
- Replacing the MAP sensor without first checking if the intake manifold is loose. This is the most common mistake and will not fix the problem if a vacuum leak is the root cause.
Most Likely Causes

- Loose Intake Manifold Bolts 🔴 High Probability The plastic intake manifold and its bolts are subject to thermal expansion and contraction, which can cause the bolts to back out over time, creating a vacuum leak at the gasket. This is a well-documented issue covered by GM Technical Service Bulletin PIP5529B.
How to confirm: With the engine off, physically grab the intake manifold and try to wiggle it. If there is any movement, the bolts are loose. A smoke test will definitively show smoke billowing from the gasket area if a leak is present.
Typical fix: Tighten the intake manifold mounting bolts to the correct specification of 12 Nm (108 in-lbs). For a more permanent repair, remove one bolt at a time, apply medium-strength (blue) threadlocker, and then torque. TSB PIP5529B notes that replacing the intake manifold gasket is typically not necessary for this repair.
Est. part cost: $0-$10 (for threadlocker) - Faulty Manifold Absolute Pressure (MAP) Sensor 🟡 Medium Probability
How to confirm: If the intake manifold is tight, test the sensor. With a scan tool, check that the MAP reading matches the BARO reading with the key on, engine off. With a multimeter, back-probe the signal wire; voltage should change smoothly as vacuum is applied with a hand pump.
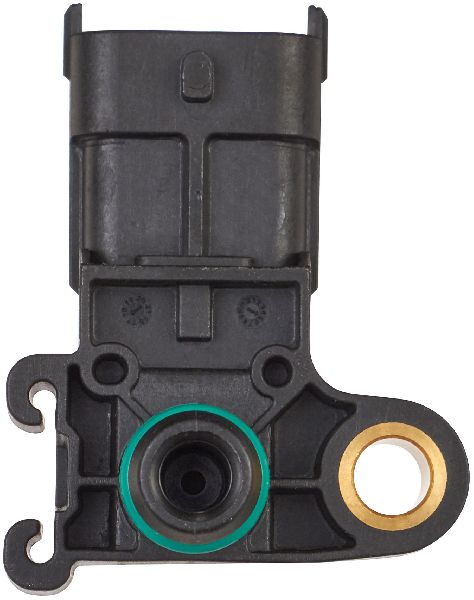
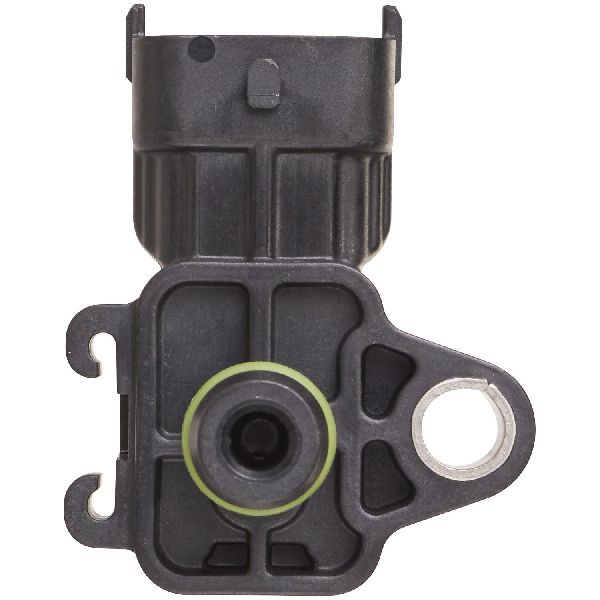
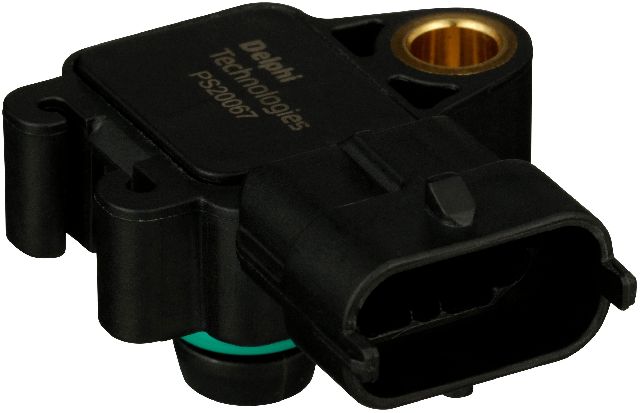
Typical fix: Replace the MAP sensor. It is located on the back of the intake manifold, near the throttle body, and is typically held in by a single Torx bolt.
Est. part cost: $30-$80 - Other Vacuum Leaks (Hoses, etc.) ⚪ Low Probability Hoses like the PCV tube can become brittle and crack with age, creating a vacuum leak.
How to confirm: Visually inspect all vacuum hoses connected to the intake manifold, the PCV system hoses, and the air intake duct for cracks, disconnections, or damage. A smoke test is the most effective way to find hidden leaks.
Typical fix: Replace the cracked or disconnected hose.
Est. part cost: $10-$50
Rare But Worth Checking
- Damaged Wiring or Connector: While less common than a loose manifold, a broken or corroded wire in the MAP sensor harness can cause an intermittent signal and trigger P0106. This may require careful inspection of the harness near the sensor.
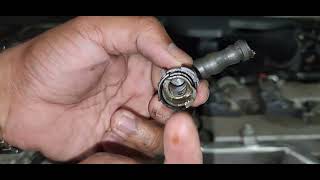
- Cracked PCV Tube: A specific point of failure can be the plastic PCV tube (GM Part No. 12627132) that connects to the intake manifold. It can become brittle and crack, causing a vacuum leak that may not be immediately obvious. 🎬 See how to identify and replace a cracked PCV tube.
- Clogged Catalytic Converter: In rare cases, a severely restricted exhaust can cause abnormal pressure in the intake manifold, leading to a P0106 code. This is usually accompanied by other symptoms like a significant loss of power and potentially other exhaust-related codes.
Diagnosis Steps

- Read all fault codes with an OBD-II scanner. Note if P0171, P0068, or P1101 are present with P0106, as this strongly suggests a vacuum leak.
- With the engine OFF, physically grab the plastic intake manifold and attempt to move it. If it wiggles or feels loose, this is the primary suspect.
- If loose, use a 10mm socket to tighten the intake manifold mounting bolts to 12 Nm (108 in-lbs). It is highly recommended to apply blue threadlocker to the bolt threads to prevent them from loosening again.
- Clear codes and perform a test drive to see if the code returns.
- If the manifold is tight, perform a thorough visual inspection of all vacuum lines, especially the PCV tube (Part No. 12627132), and the air intake tube between the air filter and throttle body for any cracks or loose connections.
- If no visual faults are found, a smoke test is the next step to definitively identify any hidden vacuum leaks.
- If no vacuum leaks are found, test the MAP sensor. It is located on the rear of the intake manifold.
- Using a scan tool with the Key On, Engine Off, verify the MAP sensor reading in kPa matches the Barometric Pressure (BARO) reading.
- Inspect the MAP sensor connector and wiring for any damage, corrosion, or loose pins.
- If all else fails, replace the MAP sensor.
Parts You'll Likely Need

- Intake Manifold Bolts — These are not replaced but are the component that needs to be tightened. This is the most common fix and requires no new parts, though threadlocker is recommended.
OEM price range: $0
Aftermarket price range: $0 - Manifold Absolute Pressure (MAP) Sensor
(OEM #12644228 (superseded by 12711681))— This is the second most likely cause if the intake manifold is confirmed to be tight and free of leaks.
Trusted brands: ACDelco, Bosch, Standard Motor Products
OEM price range: $60-$100
Aftermarket price range: $30-$75 - Intake Manifold Gasket
(OEM #12655276)— While the TSB states replacement is often not needed when just re-torquing bolts, if the manifold is removed for any reason or the gasket is visibly damaged, it should be replaced to ensure a proper seal.
Trusted brands: ACDelco, Fel-Pro, Mahle
OEM price range: $35-$50
Aftermarket price range: $15-$30
Related Codes That Often Appear With This One
- P0171 - System Too Lean — This is the most common code to appear with P0106. The vacuum leak from the loose intake manifold allows unmetered air into the engine, creating a lean air-fuel mixture that triggers P0171.
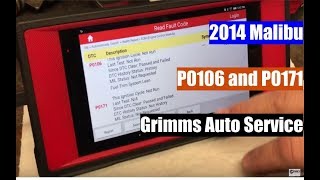
- P0068 - MAP/MAF - Throttle Position Correlation — This code indicates a conflict between the airflow sensors. The irrational signal from the MAP sensor due to the vacuum leak directly causes this correlation error. TSB PIP5529B groups these codes together. 🎬 Watch a diagnostic walkthrough for P0106 and P0171 lean codes.
- P1101 - Intake Air Flow System Performance — Similar to P0068, this code is set when the unmetered air from the vacuum leak creates a discrepancy between what the Mass Airflow (MAF) sensor measures and the engine's actual airflow.
Technical Service Bulletins (TSBs) & Recalls

- PIP5529B: Addresses stall, hesitation, and multiple codes (including P0106, P0171, P0068) caused by loose intake manifold bolts on 2.5L LCV, LKW, and LTG engines. The recommended fix is to re-torque the bolts, using threadlocker. It explicitly states replacing the gasket is not typically necessary. This bulletin provides diagnostics and repair to assist in resolving a malfunction indicator lamp illumination due to any combination of diagnostic trouble codes including P0068, P0101, P0106, P0171, P0131, P0137, P0324, P0326, P0331, and P0506.
- Bulletin #PIP5529A: An earlier version of the manufacturer service bulletin that also provides diagnostics and repair to resolve check engine light illumination for the same combination of codes, including P0106 and P0171.
Platform-Specific Known Issues
- A widespread issue of intake manifold bolts backing out over time is documented for the 2.5L LCV engine, leading to vacuum leaks that trigger P0106 and P0171. This is confirmed by GM TSB PIP5529B.
Mechanic-Grade Diagnostic Values
- MAP Sensor 5V Reference Wire — expected: ~5.0 Volts DC (Key On, Engine Off). Failure: Voltage significantly lower than 5.0V, or 0V, indicates a wiring or ECM issue.
- MAP Sensor Ground Wire — expected: Less than 100 millivolts (0.1V) when tested against battery negative.. Failure: Higher voltage indicates a poor ground connection, which can skew sensor readings.
- MAP Sensor Signal Wire (Key On, Engine Off) — expected: ~4.5 - 4.7 Volts DC (at sea level). Should match BARO reading on scan tool.. Failure: Voltage that is stuck low, stuck at 5V, or does not correlate with barometric pressure.
- MAP Sensor Signal Wire (Engine Idling) — expected: 1.0 - 1.5 Volts DC (at normal operating temperature, in park/neutral).. Failure: Voltage is significantly higher (indicating low vacuum) or erratic.
- MAP Sensor Signal (Manual Vacuum Test) — expected: With a hand vacuum pump connected to the sensor, voltage should drop smoothly from ~4.7V (0 in. Hg) to ~1.2V (20 in. Hg).. Failure: Voltage does not change, changes erratically, or does not drop with vacuum applied.
Hidden / Shadow Codes Worth Checking
- P0171, P0068, P1101, etc.: There are no specific 'shadow codes,' but TSB PIP5529B indicates that P0106 is frequently set along with a cluster of other codes (P0171, P0068, P0101, P0131, P0506). The presence of these codes together is a strong indicator that the root cause is the common loose intake manifold issue, not multiple separate faults. (see via Standard OBD-II scanner. The key is interpreting the combination of codes, not just P0106 in isolation.)
Scan Tool Commands That Help
- GDS2 / Professional Scan Tool: Live Data Graphing: MAP vs. BARO — With Key On, Engine Off (KOEO), the MAP and BARO values should be nearly identical. Graphing them allows for easy comparison. A significant difference points to a faulty MAP sensor or circuit issue before the engine is even started.
- GDS2 / Professional Scan Tool: Freeze Frame / Failure Records — When P0106 is set, the ECM stores a snapshot of all sensor data at the moment of the fault. Reviewing this data can show if the MAP reading was irrationally high or low compared to RPM, throttle position, and MAF readings, helping to confirm the nature of the performance error.
Wiring & Ground Locations
- MAP Sensor Connector — On the MAP sensor, located on the rear of the intake manifold near the throttle body.. This is the primary point for electrical testing. The typical pinout is Pin A: Ground, Pin B: Signal, Pin C: 5V Reference. Verifying power, ground, and signal at this connector is a key diagnostic step.
- G101 / G102 — On or near the lower left side of the engine block or left front of the engine compartment.. These are primary engine and ECM ground points. A corroded or loose ground here can cause erratic behavior in multiple sensors, including the MAP sensor, leading to incorrect readings and fault codes.
- G121 — On the engine, near the rear of the A/C compressor.. This is another critical engine ground point. A poor connection here can cause a floating ground and voltage offsets that interfere with low-voltage sensor signals like the one from the MAP sensor.
Real Owner Repair Stories
- YouTube user 'Mr. Mechanic' (2013-2015 Chevrolet Malibu) — Check Engine Light with code P0106, potentially with other codes.
❌ Tried (didn't work) The user advises against immediately buying or replacing the MAP sensor.
✅ What actually fixed it The intake manifold was physically loose. The user showed one of the three main bolts being extremely loose. Tightening the intake manifold bolts to spec resolved the code and the problem. - Go-Parts.com analysis of YouTube video (Chevrolet Malibu with 2.5L LCV engine) — Check Engine Light with multiple codes, including P0171 (System Too Lean), which is grouped with P0106 in TSB PIP5529B.
❌ Tried (didn't work) Initial diagnosis focused on O2 sensors or fuel system components.
✅ What actually fixed it The mechanic discovered the intake manifold bolts were extremely loose, requiring several full turns to tighten. Torquing the bolts to spec resolved the codes, confirming the TSB's diagnosis.
"I Checked Everything" — The Actual Cause
- A smoke test for vacuum leaks may come back clean even if the intake manifold bolts are the root cause. The bolts can be loose enough to allow the manifold to vibrate against the cylinder head (which can trigger knock sensor codes like P0326/P0331) and cause intermittent, irrational MAP readings, but not loose enough to show a constant, large leak during a smoke test at idle. The fix is mechanically re-torquing the bolts per TSB PIP5529B, not just chasing a visible smoke leak.
When the Usual Fixes Don't Work
- While the loose intake manifold is the overwhelming cause for P0106 on this specific platform, it is not the only cause. If a technician confirms the intake manifold is physically tight (via the 'wiggle test' and a torque wrench) and a smoke test is negative, they must not stop there. The code is then likely caused by the 'textbook' reasons that are less common on this car: a genuinely failed MAP sensor, a wiring/connector issue, or a different vacuum leak (e.g., a cracked PCV tube). The common issue can cause 'tunnel vision,' where technicians replace a MAP sensor, find it doesn't work, tighten the manifold, and stop, even if the manifold wasn't the issue on that particular car.
OEM Part Supersession History
12644228→12711681— Standard part evolution, likely for improved reliability or manufacturing.
Heads up: The new part number (12711681) also replaces several other MAP sensor part numbers, including 12594942, 12694725, and 12701247, making it a widely used multi-purpose pressure sensor for GM.
Model Year Variations Within This Range
- 2016-2017 (9th Generation): While the 2016 'Limited' is a carryover 8th gen, the all-new 2016 9th generation Malibu uses different engines (1.5L/2.0L Turbo). On these models, TSB 17-NA-181 points to a potential cause for P0106 being the engine wiring harness chafing against a coolant hose clamp, causing a short in the MAP sensor circuit. This is a different primary failure pattern than the loose manifold on the 8th gen 2.5L.
Diagnostic Flowchart
Other Known Issues on This Vehicle
Issues unrelated to this code that are worth knowing about as an owner of this generation:
- Excessive Oil Consumption 🟠 Medium — Relatively common, with GM considering up to 1 quart per 2,000 miles as 'normal'. Some owners report higher rates. Monitoring oil level between changes is crucial.
- PCV System Failures 🟠 Medium — The PCV tube can become brittle and crack, and the orifice can clog, leading to oil leaks and performance issues. This is a common failure point on many GM 4-cylinder engines of this era. (Ref: TSB 19-NA-021 (for related 2.4L engine, but similar principle))
- Faulty Fuel Gauge Level Sensor 🟡 Low — A notable number of owners report the fuel gauge reading incorrectly or showing empty when full. This often requires replacing the fuel level sending unit inside the fuel tank.
- Electric Power Steering Problems 🔴 High — Complaints include sudden loss of power steering assist, which can be a safety hazard. The fix can be expensive, sometimes requiring replacement of the entire steering column or the assist motor on the rack.
- No Start Due to Passlock Anti-Theft System 🟠 Medium — The vehicle's anti-theft system (Passlock) can fail, preventing the car from starting even with the correct key. This is often an issue within the steering column ignition components.
Used vs. New Parts: Buying Guide for This Vehicle
When a used part is the smart pick: For this repair, buying new parts is generally recommended due to the low cost of sensors and the critical nature of seals. However, if the plastic intake manifold itself is found to be cracked (a rare failure), a used manifold from a low-mileage donor vehicle is a viable and cost-effective option.
Donor-vehicle mileage cap: roughly under 75000 miles for the part to have meaningful remaining life.
What to inspect on the donor part:
- Inspect for any hairline cracks, especially around bolt holes and seams.
- Ensure all threaded inserts for bolts are intact and not stripped.
- Check that the gasket mating surfaces are flat and free of deep gouges.
- Verify no signs of melting or heat deformation.
OEM-only on this vehicle (don't cheap out):
- None for this specific repair. Aftermarket sensors and gaskets are widely available and generally reliable.
Aftermarket brands forum-validated for this vehicle:
- MAP Sensor: ACDelco, Bosch, Standard Motor Products (SMP), NTK/NGK.
- Intake Gasket: Fel-Pro, Mahle, Victor Reinz.
Brands owners have reported issues with on this vehicle:
- Unbranded, no-name electronic sensors from online marketplaces should be avoided, as their calibration and longevity can be questionable and lead to repeat diagnostics.
Real Owner Stories
Aggregated from forums and TSBs cited above. Mileages and costs reflect what owners reported in those sources.
2013 Chevrolet Malibu 2.5L
Symptoms: Owner experienced a P0106 code and attempted to resolve it by cleaning the throttle body and checking for loose manifold bolts.
What fixed it: Accessing and tightening the intake manifold bolts and cleaning the throttle body.
Source hint: YouTube - '2013 malibu p0106 manifold absolute pressure performance'
2013-2016 Chevrolet Malibu Limited 2.5L EcoTec
Symptoms: Vacuum leak triggering lean codes or MAP sensor codes.
What fixed it: Replacing a cracked Intake PCV Tube (Part No. 12627132).
Source hint: YouTube - '2013 - 2016 Chevrolet Malibu Limited 2.5 EcoTec Cracked Intake PCV Tube 12627132'
2013-2016 Chevrolet Malibu 2.5L
Symptoms: P0106 and P0171 codes present; owners often replaced the MAP sensor unnecessarily only for the light to return.
What fixed it: Tightening loose intake manifold bolts using the 'wiggle test' to confirm movement.
Source hint: chevymalibuforum.com - Multiple threads on P0106/P0171
Related OBD-II Codes
Frequently Asked Questions
Does GM TSB PIP5529B apply to my 2013-2016 Chevrolet Malibu with the 2.5L engine?
I have a P0106 and P0171 on my Malibu; do I need to replace the intake manifold gasket?
How can I tell if my Malibu's intake manifold bolts are loose without tools?
Where is the MAP sensor located on the 2.5L LCV engine?
Is there a specific PCV part I should check for leaks on my 2013-2016 Malibu?
What is the correct torque specification for the intake manifold bolts on the 2.5L engine?
Helpful Videos

Used OEM Parts in Stock

New Aftermarket Parts Available


The information in this article is provided for general reference and educational purposes only. Vehicle specifications, procedures, and part compatibility can vary by production date, trim level, and region. Always consult your vehicle's factory service manual and verify part numbers before purchasing or performing repairs. Safety-critical components such as airbags, seat belts, and braking systems should be installed by a qualified professional.
- Chevrolet Malibu:
- 🎬 Helpful Videos
- 🛍️ Shop This Part
- What's Unique About the 2013-2016 Chevrolet Malibu
- Symptoms You May Notice
- Most Likely Causes
- Rare But Worth Checking
- Diagnosis Steps
- Parts You'll Likely Need
- Related Codes That Often Appear With This One
- Technical Service Bulletins (TSBs) & Recalls
- Platform-Specific Known Issues
- Mechanic-Grade Diagnostic Values
- Hidden / Shadow Codes Worth Checking
- Scan Tool Commands That Help
- Wiring & Ground Locations
- Real Owner Repair Stories
- "I Checked Everything" — The Actual Cause
- When the Usual Fixes Don't Work
- OEM Part Supersession History
- Model Year Variations Within This Range
- Diagnostic Flowchart
- Other Known Issues on This Vehicle
- Used vs. New Parts: Buying Guide for This Vehicle
- Real Owner Stories
- 2013 Chevrolet Malibu 2.5L
- 2013-2016 Chevrolet Malibu Limited 2.5L EcoTec
- 2013-2016 Chevrolet Malibu 2.5L
- Related OBD-II Codes
- Frequently Asked Questions
- 🎟️ Get 5% Off